It was five degrees when I took this picture. I haven’t felt this cold in years. My boyfriend and I were trying to go to the Shedd Aquarium but unknowingly came on the day of the week when admission is regularly discounted. There were probably about 300 people in line waiting OUTSIDE to get in. No thank you. We cut our losses and snapped this photo instead :P.
So I’ve been freezing my butt off all week, having a great time seeing family and old friends, and thought I’d pop my head in on the blog to wish you all a Happy New Year! No New Year’s projects or resolutions to share, but just here to send you my love for an amazing start to your 2014, hopefully with family and loved ones by your side :).
I do have a fun and exciting new post coming up this Friday. See you all then!
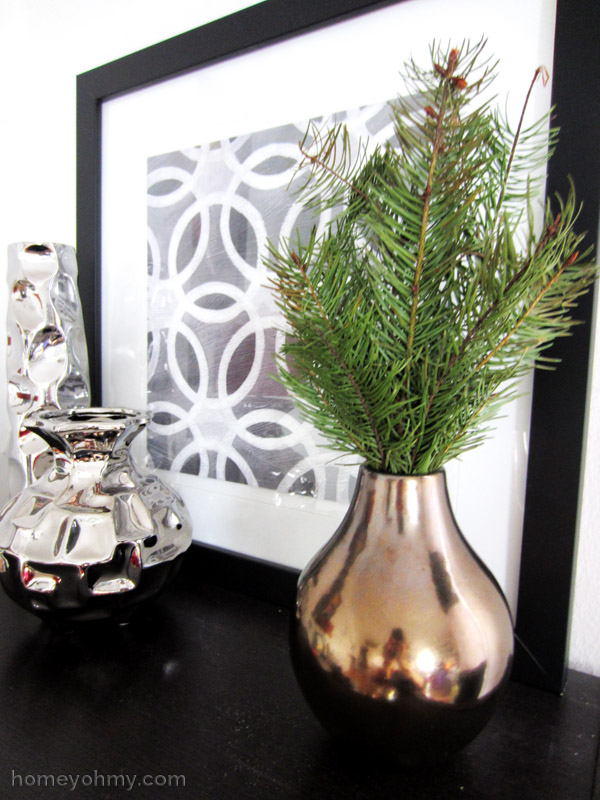
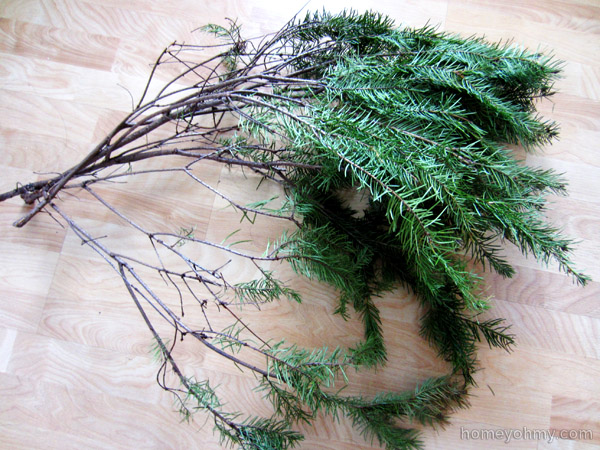
This probably won’t be the last time I tell a story that starts like this. I was walking by the trash outside on the sidewalk and something caught my eye. To clarify, it wasn’t my intention to look around in the trash, but I just happened to catch a glimpse of this green treasure.
Someone had tossed out these branches from their Christmas tree. Shame set in as I stood from a distance, my legs locked, unable to look away from the branches, thinking about what if someone was watching me at that moment and wondering why I was staring at the trash. I acted fast and swiped the branches, making my getaway quick before I’d have one too many witnesses.
I’m here to report that my mission was successful and I regret nothing at all.
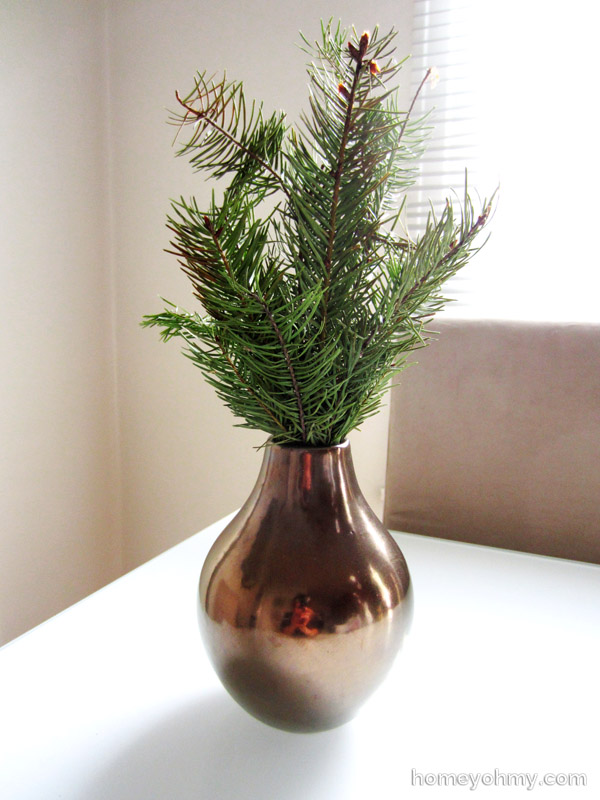
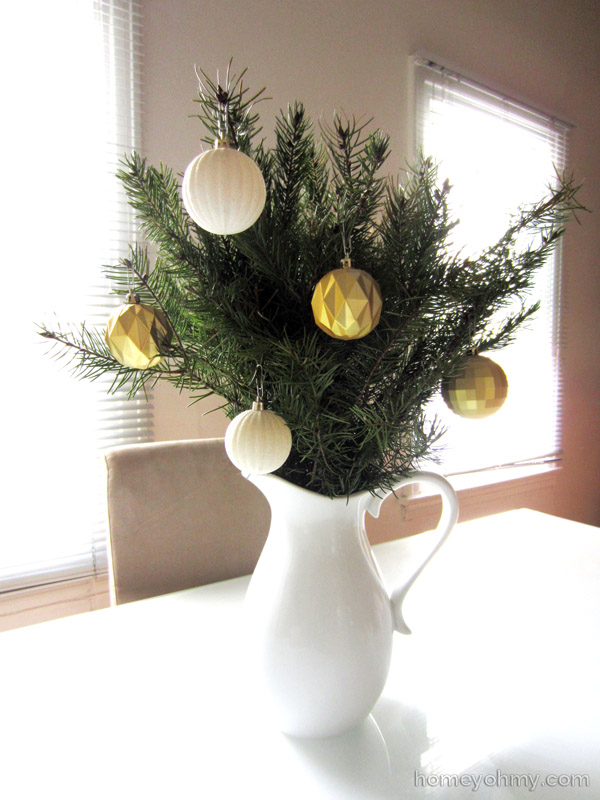
This bronze vase had been sitting empty since I got it and it was the first thing I thought of when I brought the branches home. I cut off the smaller pieces and made this adorable mini arrangement. That still left a lot more to be done with, so I took the rest and stuck them into a white pitcher.
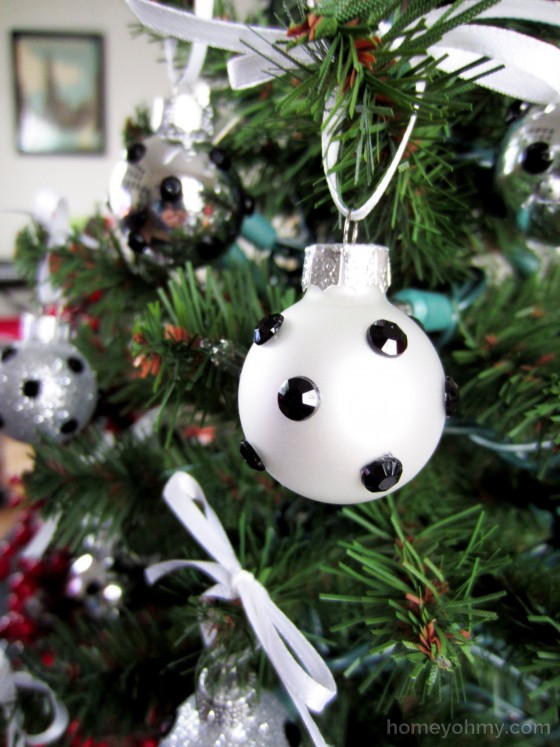
They were screaming for some ornaments, so I hung up these gold and white ones from the dollar store that I never ended up using this year… until now! I’m perfectly okay with ornaments after Christmas. In fact, I will probably be keeping my Christmas decorations out through January because I’m not ready to let go of them. This holiday season just went by too fast!
Are you keeping your Christmas decorations up or have you already started putting them away? At what point is it considered keeping them out too long? I’m hoping you can agree that at least January is ok :P.
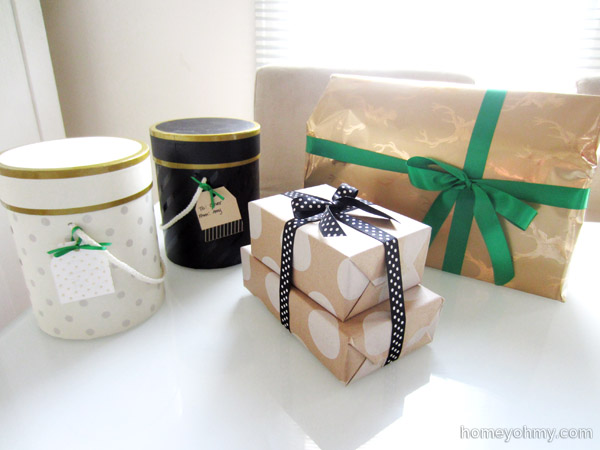
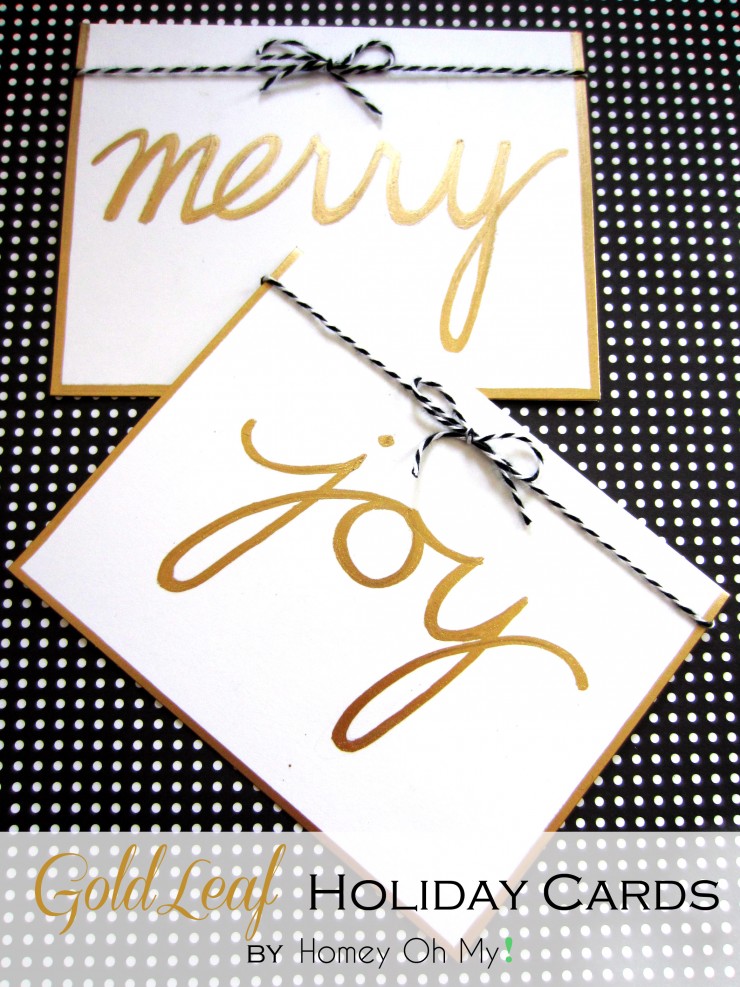
Wrapping gifts is probably the funnest part of gift giving for me, so I thought I’d share how I wrapped some gifts for Christmas. I wanted to wait until after I gave these gifts before putting them up on here, so we’re in the clear now ;). At best, I hope it serves as some inspiration for your own, last minute gift wrapping.
You can see I kept my wrapping very simple this year. Maybe it’s because I generally love keeping things simple, and maybe it’s because I didn’t have a lot of time. Which one was it? A little bit of both, but regardless I’m really loving the way all the wrapping turned out.
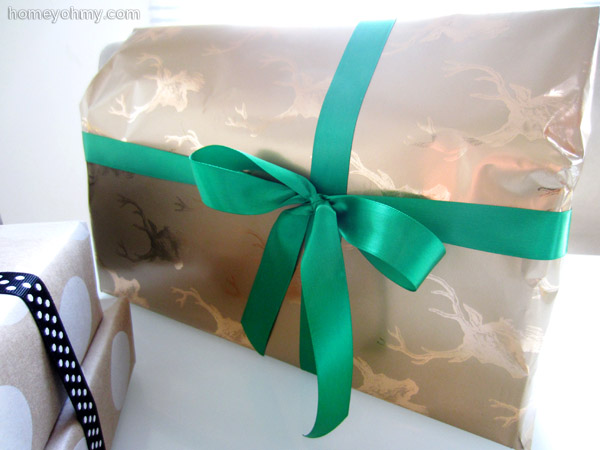
Ok, all except for this one. I love the gold deer wrapping paper, but the oddly shaped object turned out to make for a really awkward and slightly sloppy wrapping job. I struggled with this one and don’t even remember how I did it. Still, I love the combination of the gold with the green ribbon and will be wrapping some remaining gifts for family members this way. Those gifts are in boxes, which will be much easier to wrap, thankfully.
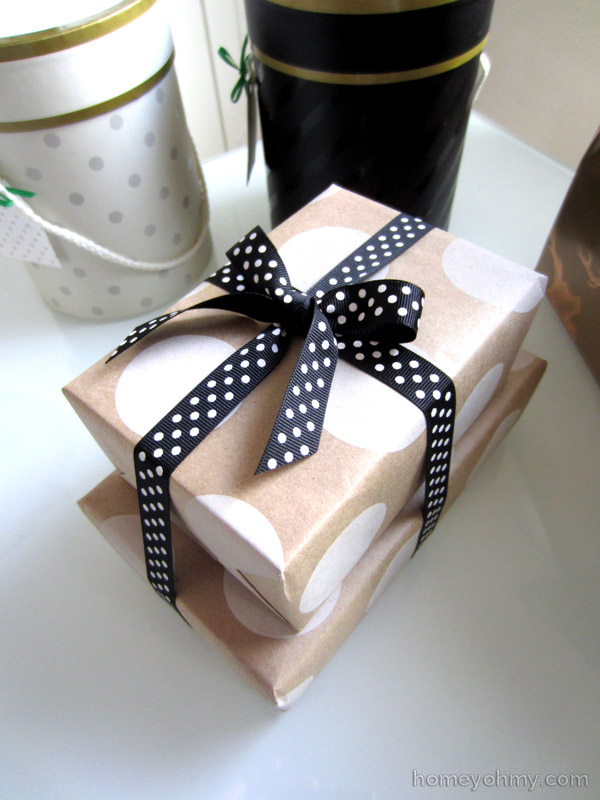
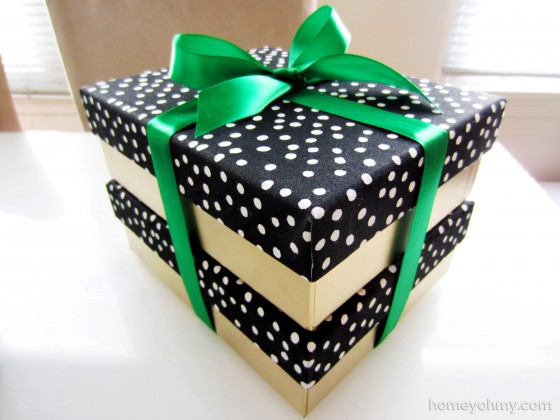
This I love. It’s my favorite and I have a feeling it might be your favorite, too. The polka dot craft wrapping paper first made an appearance on my Thanksgiving table and I’m SO glad I got it, especially since I wasn’t even thinking about using it for wrapping at that time. The polka dot ribbon was a must and I love how it looks with the larger polka dots on the wrapping paper.
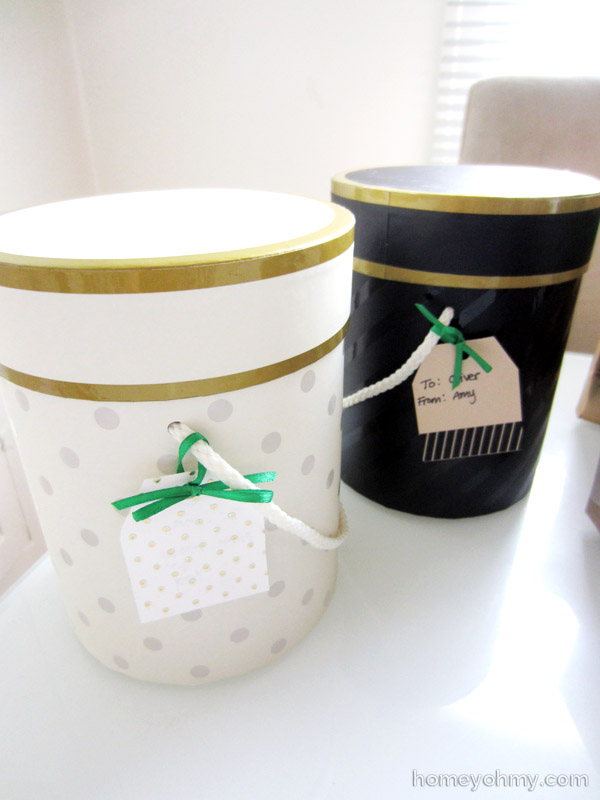
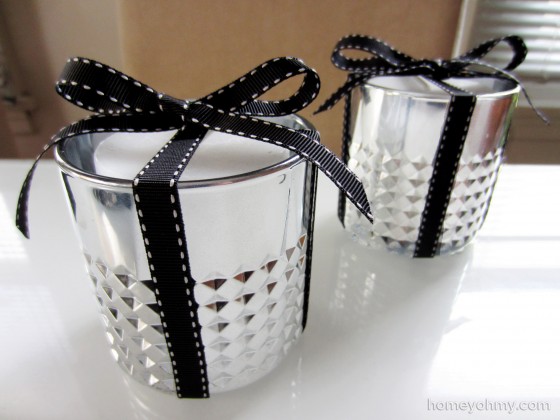
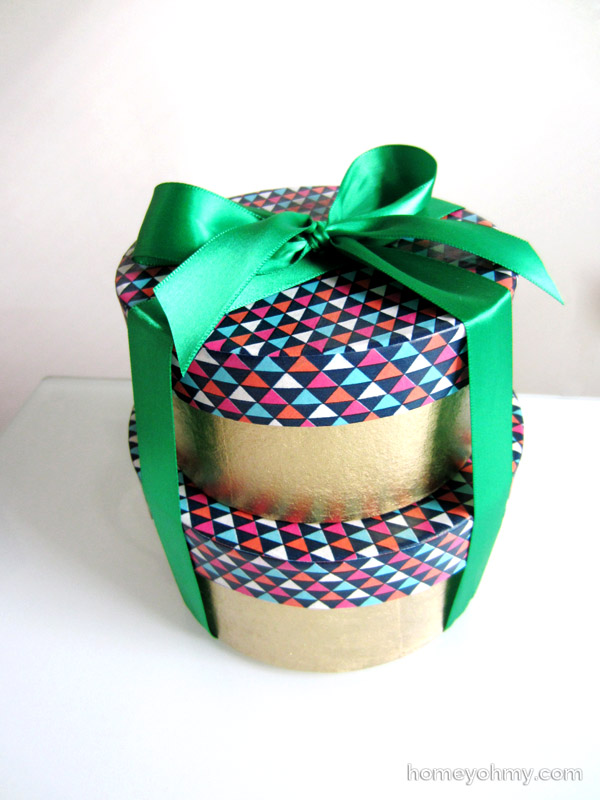
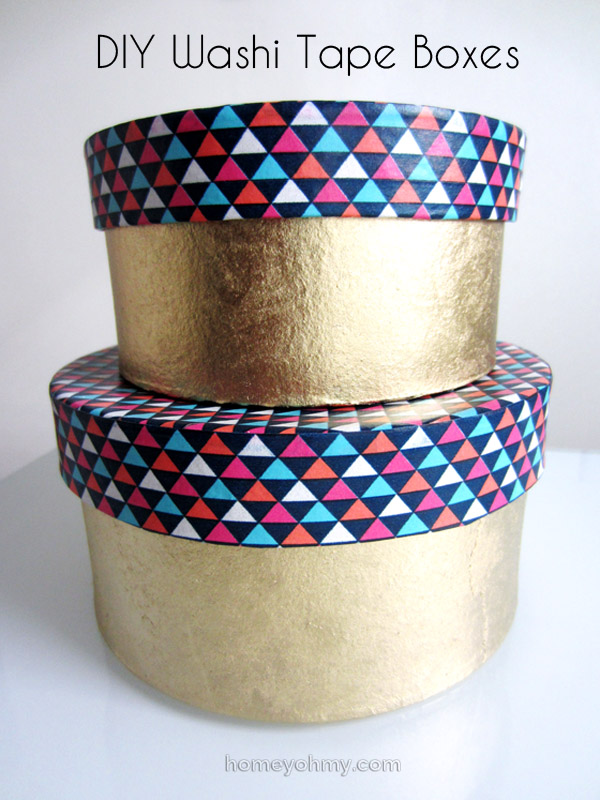
I came across these cylindrical boxes at Target and couldn’t leave without them. They are so cute and chic, and most of all, re-usable. Me and decorative boxes, guys. I love them. I cut out the gift tags from some card stock I had and tied them on with green ribbon. I didn’t do anything to the gold polka dot tags, but for the other ones I applied a strip of black and white washi tape at the bottom.
I got a few of these boxes for my friends, the white ones for the girls and the black ones for the guys. Want to see what I put inside?
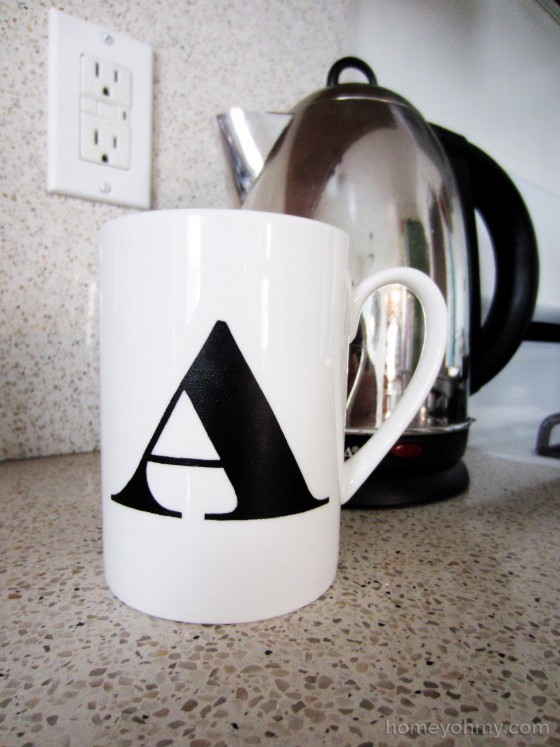
For the girls, I monogrammed cups using the same method here but used silkscreen stencils this time around. I filled each cup with shredded tissue paper and gold foil (a wonderful dollar store find, by the way) and on top of it put a bottle of nail polish tied with the same polka dot ribbon from before.
For the boys…
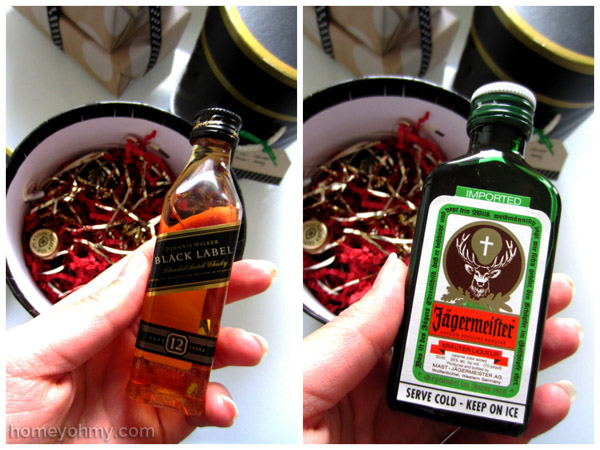
I filled their boxes with an assortment of mini “spirits”. Aren’t they adorable?? I know y’all love that Jager.
Hope you guys enjoyed this. I really enjoyed wrapping and gifting it all :).
How is Christmas already less than a week away?? When does this happen???
Though I’m excited for the festivities ahead, I’m also sad that this holiday season will soon be over. I thought I’d put together a list of all my Christmas DIYs not only as some last minute inspiration for your viewing convenience, but also just to have one, last, collective look on how I’ve decorated for this holiday. I’m slowing down to enjoy the days passed through looking back on the projects I’ve put up on this blog. I hope you enjoy it as well!
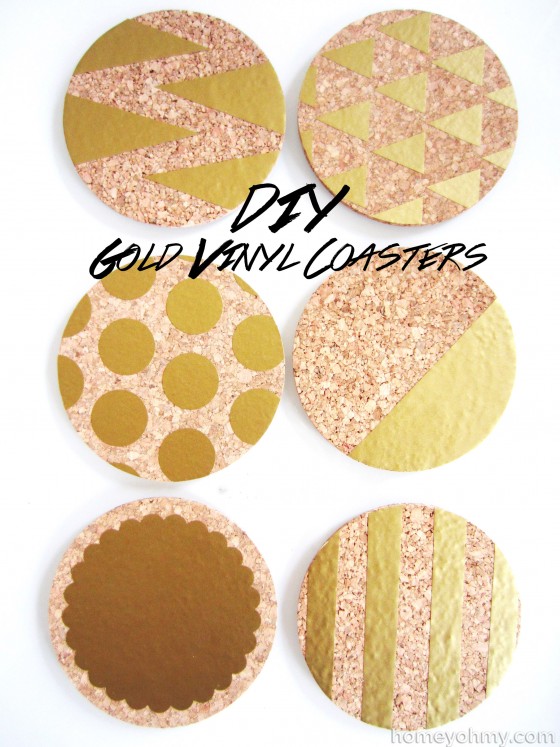
I love boxes. Really. They’re one of the best ways you can decorate your space while adding the functionality of storage. And if not for your own use, they’re so practical for re-usable gift wrapping that I think anyone would enjoy receiving.
The idea behind these boxes is very similar to the fabric lid boxes I previously did. I spray painted the boxes gold and decorated the lids, this time with Washi tape.
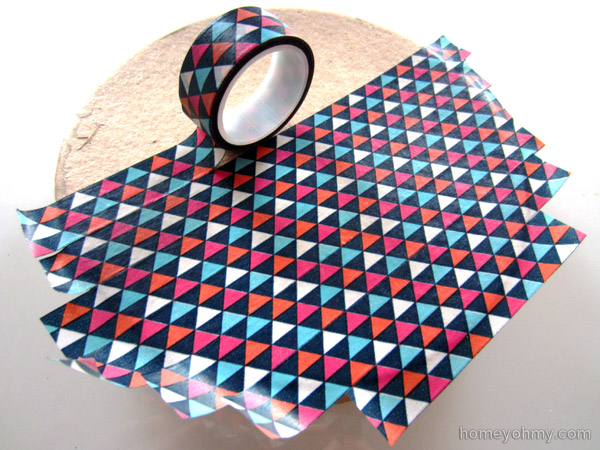
How cute is this Washi tape??? You can get it here (affiliate link). I covered the lids with the Washi tape and lined up each row so that the tape pattern stayed consistent. Then I cut off most of the excess, leaving just a little bit to tape down over the edge.
I had to apply two rows of Washi tape around the sides of the lids and wrap the excess tape over the bottom edge.
It turned out so much better than I expected! I thought the tape edges would look obvious but I think the pattern especially helps hide where they are. They’re barely noticeable.
Didn’t I tell ya decorated boxes make great gift wrapping? I’m so in love with the geometric design on the Washi tape. What do you think of it?
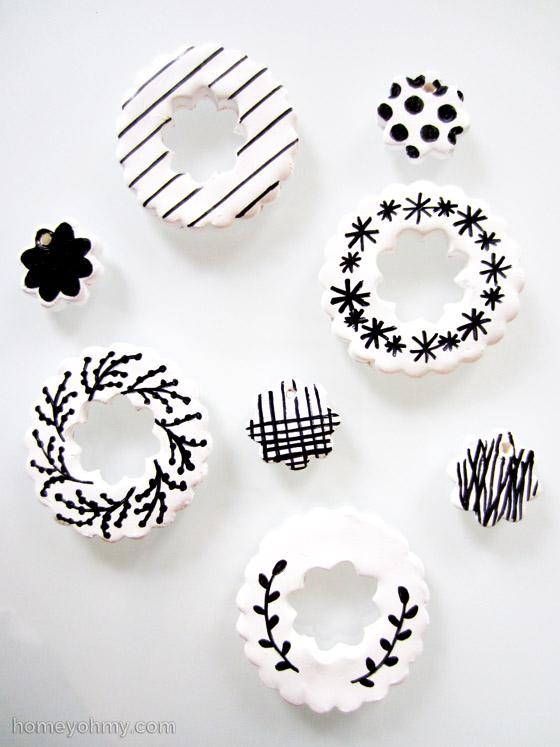
I’m really loving projects where I get to come up with multiple designs, especially if I’m free-handing them. I originally planned on using stencils for these clay ornaments, but I couldn’t resist the fun in spontaneous doodling. I hardly consider myself a drawer though. I’m fine with drawing patterns or shapes on small scales, but not with drawing actual things that people would be able to identify like “Oh yea, that’s a cat!”
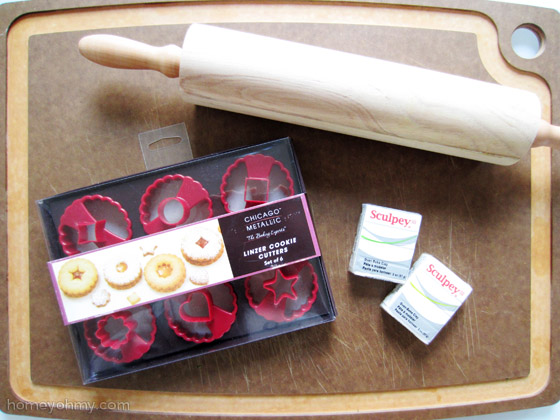
Besides the sharpie I used to draw the designs, here are the other materials.
I like how the first thing I did with my new set of cookie cutters is not make cookies. That will be a must in the near future though.
I mashed both packs of Sculpey clay together, rolled it into a ball, then flattened it out with a rolling pin. I wasn’t concerned at all about getting the clay perfectly even in thickness all around, so I just went at it as I pleased.
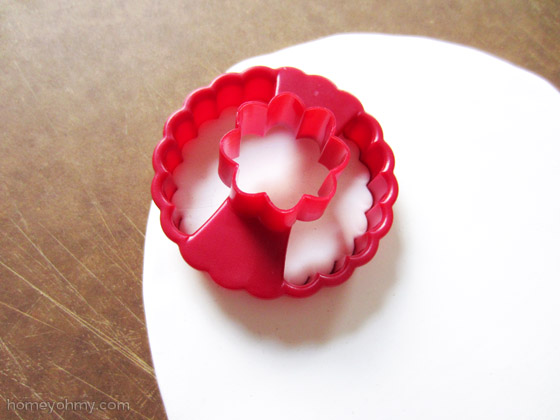
I cut out four ornaments with this scalloped circle cutter. I flipped the cutter over to cut out the hole in the center and while I hadn’t planned on saving those donut holes, they were just too cute not to include in the ornament making fun. All I needed to do with those was cut out a hole in each one for hanging, which I roughly did with a toothpick.
I baked them all in the oven at 275 degrees for about 30-40 minutes. I can’t remember exactly how long, but the key is to keep your eye on them and make sure they don’t burn!
Sharpie, ribbon, string, boom.
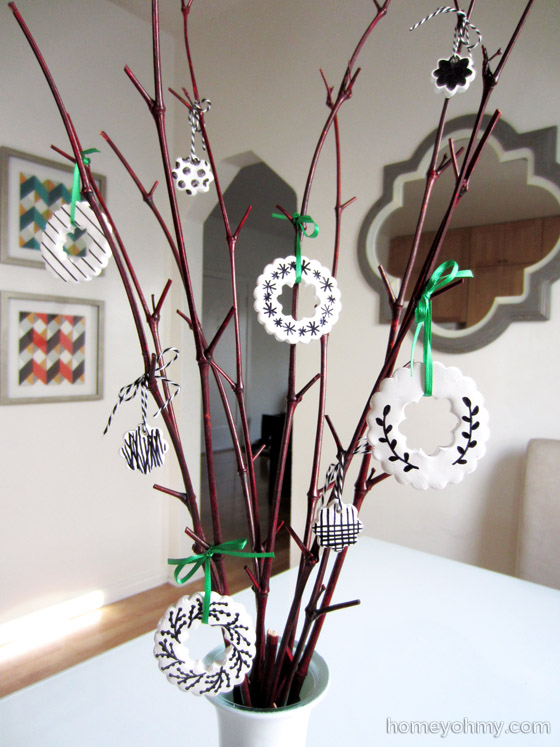
So a little oversight… I didn’t think at all about how big I needed to make the holes on the little ones and the green ribbon I used on the big ones wouldn’t fit through. I went with black and white string for them but now I’m wondering… would it be better if I just used the string on all of them? I do like the pop of green though.
Alright friends, it’s time to play my favorite game. Which one is your favorite??? I think mine is the one on the bottom with the berry branches-esque design. That one surprised me! It was one of those occasions where I had no idea where I was going with it until about halfway and then I was like yes, this is turning out better than expected.
Thank you for visiting me today and have a fantastic weekend!