12/10 DIY

DIY Striped Mercury Glass Vase

DIY Striped Mercury Glass Vase

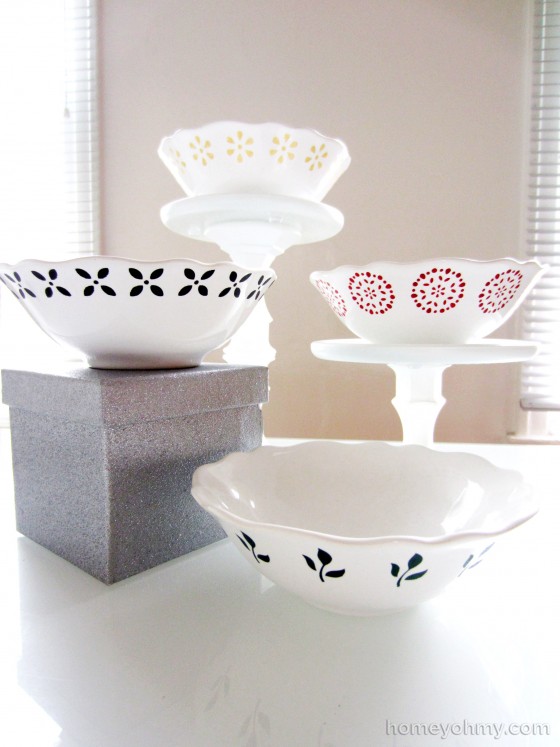
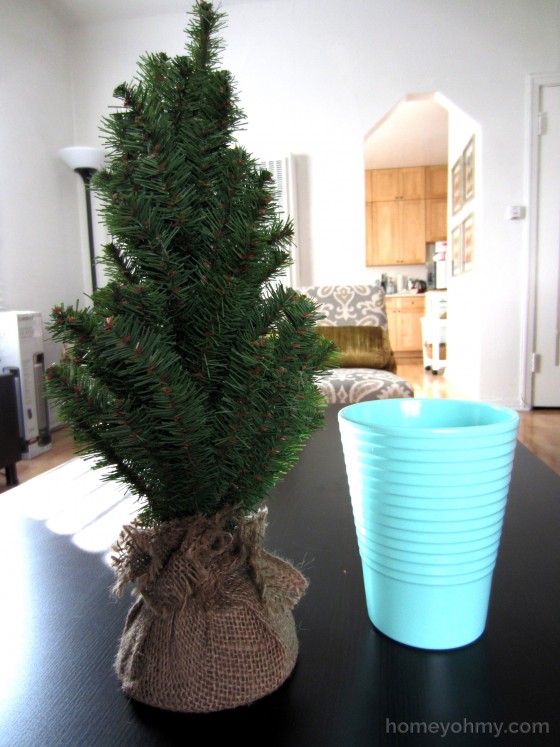
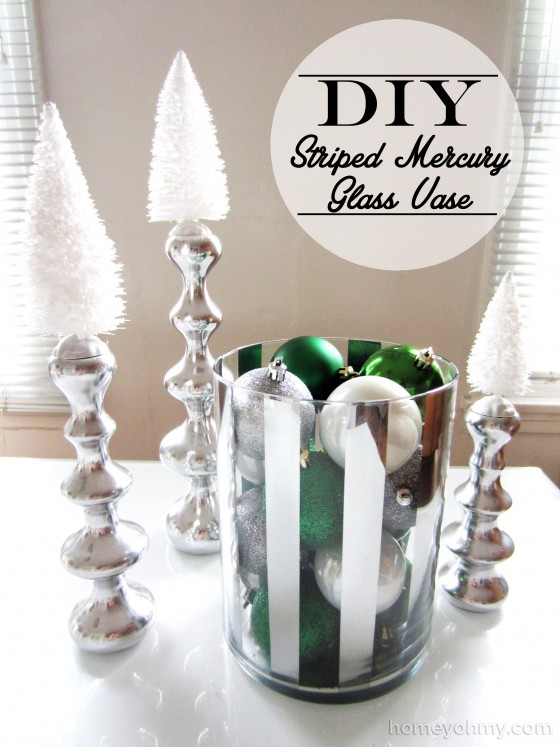
I’ve seen vases filled with ornaments everywhere and wanted to join in on the pizzazz.  The display is so festive while still being simple, which I love keeping things simple :).  To go with my silver Christmas decor, I decorated the vase with Looking Glass Spray Paint.  (Before we get into it, can I just talk about how much I love the mini white bottle brush trees displayed in the photo above??  I perched them on top of candle stick holders, which they themselves look like abstract silver trees, no?  Love it all.)

Krylon looking glass spray paint

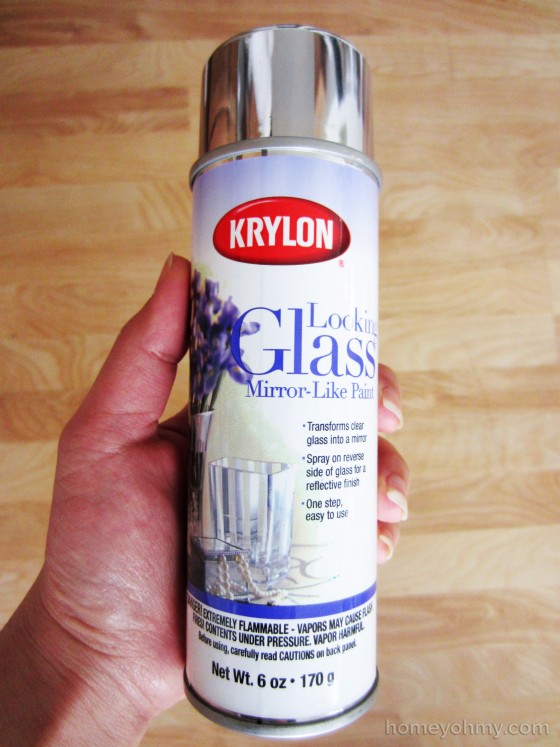
You can get the spray paint here (affiliate link).  I introduced this paint in my mercury glass votives DIY and I’ve really wanted to use it again since.  While in that project I painted the outside of the glass, this time I wanted to try painting the inside of the glass, which is what the intended technique for this spray paint is (if you want the reflective side to show on the outside).

For the prep:

Tape and aluminum foil
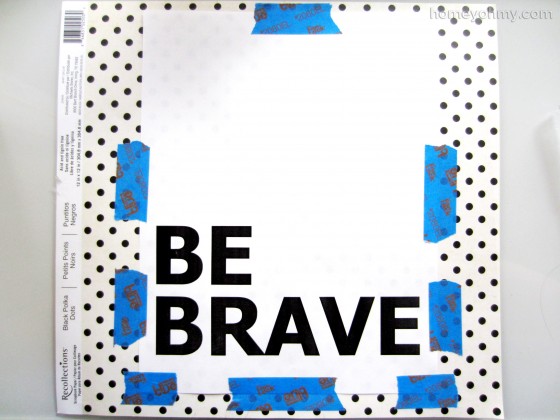
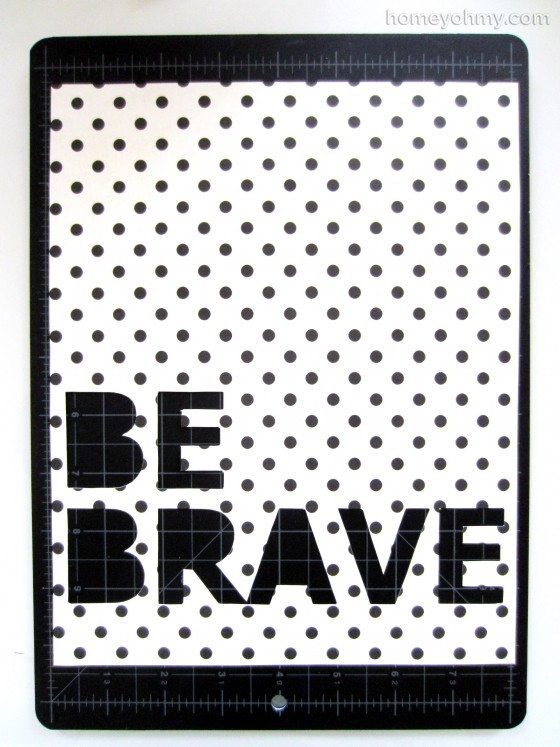
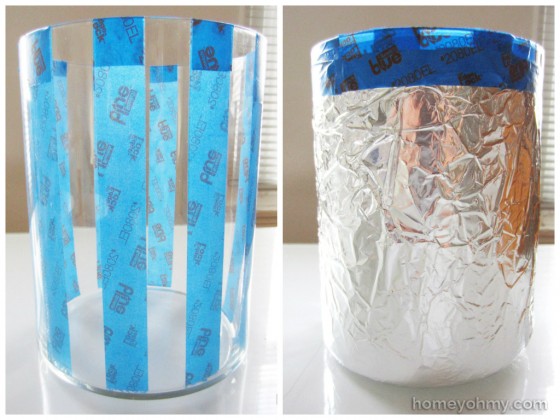
I chose to do vertical stripes because one, I love stripes, and two, I feel like I don’t see them  as often as I do horizontal ones, so why not give it a try?  What made this difficult was that I had to apply the tape on the inside of the vase since, remember, I’m spraying the paint on the inside surface.  I made it easier on myself though by not being too nit-picky about getting the stripes perfectly straight or placing them at even widths and spaces.   I just eyeballed their placements, and I say that if it looks good to your eyeball, then it’s good enough!  To protect the outside of the vase, I wrapped around and taped some aluminum foil.

*Quick tip for the Looking Glass Spray Paint:  This stuff runs very easily, so it’s extra important to apply in thin layers.  The directions recommend spraying at least 5 light coats, but I think I ended up doing about 10. 

I started spraying at the inside bottom of the vase and then quickly stroked upwards past the top edge of the vase. Doing this on every section of the inner surface once is one layer.

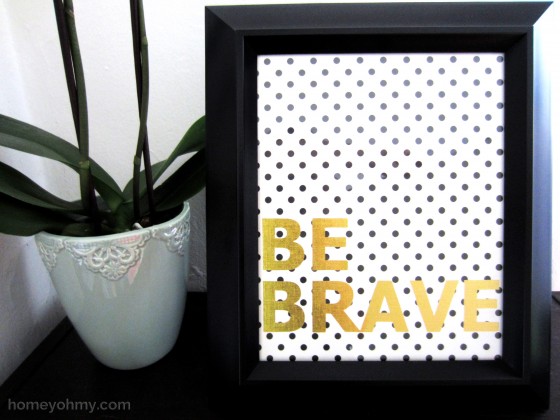
Removing the tape after painting is the best part.

Mercury Glass Stripes

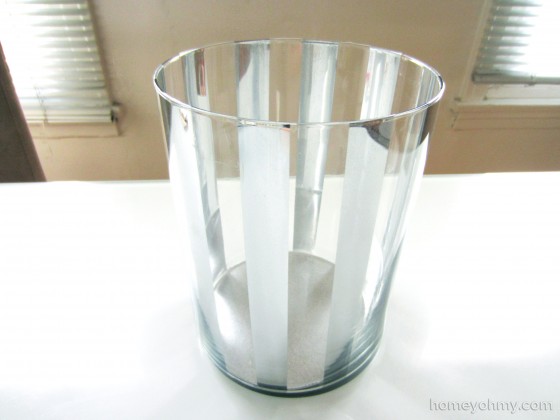
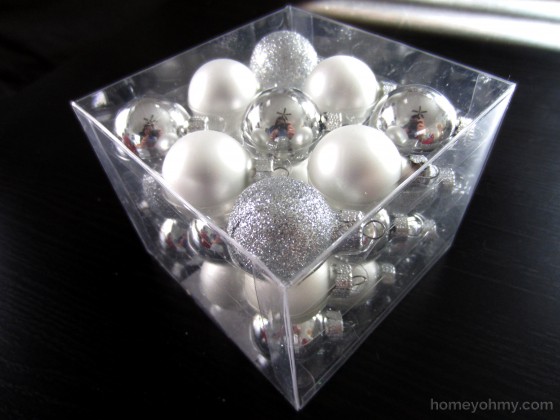
Second best part is filling it up with ornaments.

Striped Mercury Glass Vase with Ornaments

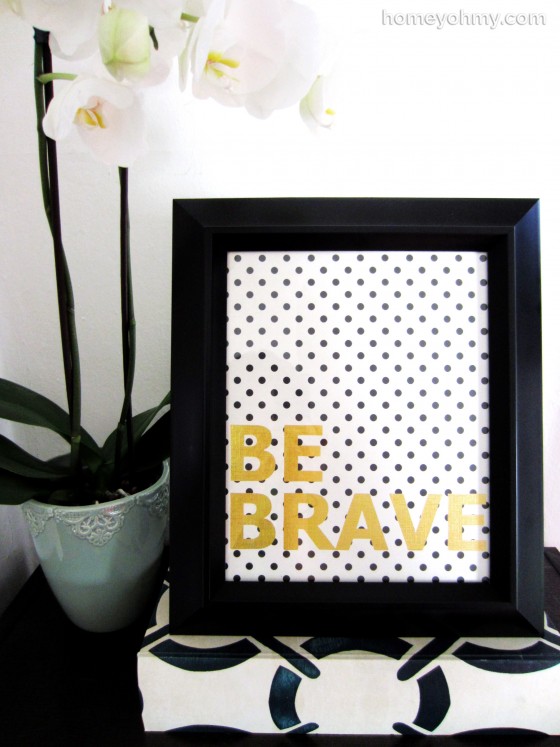
I got these ornaments at the Dollar Tree and in this case, “you get what you pay for” applies.  For at least the ones that I got, their imperfections would be very apparent if hung on a Christmas tree, but they are absolutely appropriate for stacking in a vase.  And c’mon, I spent a total of $2 on all of them.  Totally worth it.

How do you like my choice of silver and green ornaments?  I’m curious to know what color scheme of ornaments you’re decorating with this season!


Like what you see? Stay connected with me:

FacebookGoogle +InstagramPinterestRSSTwitter

12/06 DIY

DIY Painted Bowls

DIY Painted Bowls

I’ll be honest- I don’t need any more bowls.  And while I do think these would make a great gift, I didn’t have any plans on gifting them.  I simply saw the bowls at IKEA, loved their shape, and my “want” overpowered my “need” (does this happen often to you, too?)  That, combined with my curiosity to try out some Martha Stewart stencils, birthed this DIY project.

Martha Stewart stencils
I think the photos on the packaging are so enticing.  Many times I’ve perused the packs of stencils at Michaels and gotten lost in daydreams of all the things I’d decorate with them.  This time, it’s bowls.  Some very cute ones.

Stencil appliedAdhesive stencils are the way to go.  All I did was stick on the stencil, dab on acrylic paint with a dauber, remove the stencil, and repeat around the bowl.

Bowl with green leaves design

I used the Martha Stewart satin acrylic paints in green, red, black, and gold colors.  The only color I was dissatisfied with was the gold one, which is a shame because that’s the one I was looking forward to most.  It looks more yellow than I’d like and wasn’t very opaque.  The other colors were fine though and I’m happy with how they turned out.  These paints can be dishwasher safe by following one of two different settings methods, which you can refer to in my DIY monogrammed cup post.

DIY painted bowls display

I’m not going to be keeping these bowls out in this magnificently mind-blowing display, but I figured it would be a good looking way to show each bowl :).  With anything that I make in multiple designs or colors, I like to play favorites.  The black one calls out to me the most and I like how I unintentionally applied the design closer to the rim of the bowl.  That one just might need to become my designated cereal bowl.

Of course I want to know… which design are you liking the most??  It’s always fun to hear what you guys think!

Like what you see? Stay connected with me:

FacebookGoogle +InstagramPinterestRSSTwitter

12/03 DIY

DIY Rhinestone Polka Dot Ornaments

Mini Christmas tree with DIY Rhinestone Polka Dot Ornaments

Alright, guys.  I’m doing something different with Christmas decorating.  I’m decorating with silver.  I know, I feel like I’m turning my back on gold, but silver just felt so right for this season.  I will admit, this project was originally going to be done with gold ornaments, but once I decided that I was going to put my mini faux tree in a mint colored pot, I liked the idea of silver better.

Mini Christmas tree and mint pot

The mint colored pot was actually a purchase from a while ago that I never found the right plant for.  I’m glad that was the case, because the moment I saw the mini tree at JoAnn’s, I knew my mint pot would be perfect for it (don’t you love when that happens?)

I got the mini silver ornaments from Michaels.  They came in an assortment of chrome, matte and glitter finishes.

Silver mini ornaments

I originally tried to draw the polka dots with a black Sharpie, but that was an instant fail.  The Sharpie didn’t “stick” to the ornament so it was difficult to get opaque coverage.  So then I thought I’d use acrylic paint with a dotting technqiue, which was an equally gargantuan fail.  Trying to get the circles to be uniform in size without globbing on the paint was just not possible, and the paint was making more of a mess than I could validate.  Third time’s a charm- I went with black rhinestones and I’m ecstatic about how they worked out.

Rhinestone placement

The adhesive rhinestones were much more expensive, so I went with non-adhesive ones and used tweezers to dip them in Tacky glue and apply them to the ornaments.  I only needed a small smudge of glue on each rhinestone.  I did the same with the star on top of the tree but painted it white first since it’s made of cardboard.  That was also purchased at Michaels.

As you can imagine, applying each rhinestone one by one is time consuming.  But guys… it was so worth it.  I’m head over heels in love with my ornaments and mini tree.

DIY Rhinestone Polka Dot Ornaments

I hung up the ornaments with white ribbon that I tied into bows.  Polka dots and bows, y’all…  how freaking CUTE.

Would you like to see the tree lit up?

Mini Christmas tree lit up

Is it weird to feel emotional over a Christmas tree?  Don’t answer that haha!  Maybe it’s because of all the time I put into it, but I seriously have never loved a tree so much.  One of these years I will get a big, gorgeous Christmas tree, but I will always have love for my miniature tree friends.  Sorry this is getting weird, guys.

What do you think of my tree??  Are you going miniature or big with your Christmas tree?  Real or faux?

Thank you so much for visiting me today!

Like what you see? Stay connected with me:

FacebookGoogle +InstagramPinterestRSSTwitter

12/02 DIY

Gold Leaf Holiday Cards- Guest Post at Persia Lou!

Today’s post is a bit different!  It’s my first guest post ever and I’m so excited that it’s on a blog that I love.  Not only do I admire Alexis and all her work, but she has been one of the nicest, most down to earth bloggers that I connected with very early on in my blogging journey.  I’m so honored that she asked me to contribute to her Handmade Holiday Series.

Visit Persia Lou to see the guest post, or continue reading here to see how I made these gold leaf cards.

Gold Leaf Holiday Cards
My main goal with these cards was to make the design simple.  Especially with how hectic this season gets, it’s ideal for me to keep holiday DIY projects easy, although really… I like to keep all my projects easy.  So for anyone looking to make quick and simple handmade cards, I’ve got your back with this one.

What you’ll need is a pencil, gold leaf pen (I used the one by Krylon), string or ribbon, and a pack of blank white cards. Now before you get started, it is critical to get used to the gold leaf pen and practice on a scrap piece of paper if this is your first time using one.  You not only want to get used to the shape of the pen tip, but also become familiar with how to control the flow of the gold leaf so that you achieve steady and consistent coverage.

The first step is to apply the gold leaf pen on the front side edges of the card to create a border.

Gold leaf edge applicationThe edges of the card should help physically guide your pen and make it easy to create straight lines.

After letting the edges dry for a little bit, lightly write out in pencil whatever it is that you want on the card.

Joy in pencilNext, trace over the pencil with your gold leaf pen. Take your time and don’t feel like you have to trace over everything in one go. I used short strokes, stopping at the corners of the letters or in places that made sense to take a break at.

Joy in gold leafGive this some time to dry!   I made a mistake in my first attempt at this card by moving on to the next step immediately and ended up smudging the gold leaf.  Learn from my fail.

Finally, wrap string or ribbon around the top of the front flap of the card and tie it into a bow.

Joy card with bowYou can add glue or any adhesive under the knot of the bow to secure it in place.

Merry and Joy Holiday Cards

That’s it!  Quick and simple, right?

Something you’ll see over and over again on my blog is my profound love for gold.  I especially love combining it with black and white, like I did with the string for these cards.  The string makes the gold more casual but is still consistent with keeping the design chic.  It’s everything I love!  Do you love this color combo as well?

If you haven’t already, go and link up your holiday projects or browse the projects that were already shared at the Handmade Holiday Link Party!  There’s lots of great inspiration and there will be even more through Dec. 22nd.  Check it all out here!


Like what you see? Stay connected with me:

FacebookGoogle +InstagramPinterestRSSTwitter

11/25 DIY

DIY Typography Wall Art- Be Brave

With typography art, my criteria is that it should be simple and something that I will probably never get tired of looking at.  Although the latter can’t always be accurately predicted, I try to stay true to messages or themes that are close to my heart.  I’ll explain more on that at the end of this post, but for now let me show you what I came up with.

DIY Typography Wall Art- Be Brave

Straight to the point, just how I like it :).

I started out by typing the words “Be Brave” in a Word document and played around with fonts and sizes.  I went with a bottom-left alignment and adjusted the margins accordingly.  To make this project easier, I chose an 8×10 frame so that it would closely match the size of a regular sheet of paper.

After printing out the Word document, I used painters tape to attach it to a sheet of polka dotted paper.

Be Brave taped

I added extra tape around the words for more stability since that’s where I would be cutting.  Using an X-acto knife, I first cut out any holes in the letters (in this case, the holes in the B’s, R, and A) and saved those for later.  These are floating pieces that will need to be added back in at the end.

*A little tip for cutting with an X-acto knife-  Especially if your blade is fresh, you don’t need to apply much pressure to cut through both sheets of paper.  I have a tendency to press too hard with my knife and it can end up warping the blade, making it more difficult to cut in straight lines.  Practice first on a scrap piece of paper to become familiar with how much pressure you need to apply and try to keep it consistent. 

After cutting out all the letters, I used scissors to cut the polka dotted paper along the edges of the paper taped on top.  Removing the paper on top, I was left with this cut-out.

Be Brave cut out

Since a sheet of paper is 8.5×11″ and my frame is 8×10″, I had to cut a little more off of the edges so that it would fit in the frame.  After adjusting the cut-out to the proper size, I traced the edges onto some gold paper, cut out the gold paper, and then glued the polka dot cut-out on top of it with a glue stick.  The glue stick only needed to be applied on the edges and not on the entire back side of the polka dot cut-out.

With the glue stick again, I glued on the floating pieces I saved from earlier back into the B, R, and A letters (on top of the gold paper that is now peaking through the letters).  While the glue is still wet, it makes it easy to slide the pieces around after you stick them on, so you can take the time to accurately adjust their placements.  I used my finger nail to make the tiny adjustments.  Once that’s dry, all that’s left is to put the art in the frame.

Be Brave Wall Art

Black, white, gold, AND polka dots??  Instant love for me right there.  The gold paper has a linen texture ,which you can kind of see in the letters that are shadowed a bit.  It’s not showing as well in the photos as I would have liked, but trust me- it’s pretty!  I’m so pleased with it.

DIY Be Brave Wall Art

So why the “Be Brave” choice of words?

I’ve talked a lot with a good friend of mine about what it takes to share your creativity.  We agreed that expressing your ideas and vision is like baring your soul.  Your creativity is one of the most precious and personal things you own, and to expose it to the subjective views of strangers can be just plain scary.  Still now, I’ll sometimes feel a bit of that fear before I click the “Publish” button on a new blog post.

I spent a long time being afraid of starting this blog.  I want to say years.  While there’s a long list of reasons why, the heart of it all was that I simply didn’t think I could do it.  As I read over that now, as the creator of this blog that has become one the most amazing endeavors of my life that I cannot live without, I’m wishing I could travel back in time to tell the old me that there was nothing to be afraid of.

Looking at this artwork, I’m reminded of how I got here and what I need to do to keep going.  As short as the words are, they swell me up with confidence and inspiration.  I smile not only because I’ve accomplished these words, but also because of the powerful things some paper and an X-acto knife can make me feel ;).

To my friends, fellow bloggers, loyal readers, and new visitors, all of you who I cherish so deeply, thank you for helping me see that I have something of value to share.  In the spirit of this upcoming Thanksgiving holiday, I want you to know how grateful I am for your support and positive vibes.  You all have made me more brave.


Like what you see? Stay connected with me:

FacebookGoogle +InstagramPinterestRSSTwitter

11/21 Seasonal/Holiday

Thanksgiving Table

Thanksgiving Table

This year will be my first time hosting a Thanksgiving dinner and it’s only right that I decorate for it!  I’m still going home to my mom’s on Thanksgiving day (mom’s food is the best food), but my friends and I organized a potluck dinner this weekend to celebrate thanks together.  Hence the “Friends-giving” sign you see on my table :).

I set up my dining table to be buffet-style with the decorations pushed to the back so that friends can place the dishes they bring at the front.

Table runner

I laid down some burlap with this polka dot kraft wrapping paper on top to serve as a runner.  I got the wrapping paper at Marshalls without knowing if I’d have a use for it and am so glad I did!  Can’t say no to polka dots.

Chalkboard

This chalkboard used to be a picture frame.  I got it at Marshalls (are you noticing a trend here?) to put some artwork in it, but the second I brought it home I dropped it on the floor and shattered the glass :(.  I kept the frame and it bothered me terribly, so I turned it into a chalkboard.  All I did was cut out a piece of poster board, apply a few layers of chalkboard paint, and place it in the frame that I spray painted gold.  And not going to lie… but that arrangement of marigolds is mostly there to help keep the chalkboard standing straight.  Resourceful, indeed!

Pumpkin stands

I made these display stands with dollar store candle holders!  You can find the tutorial at The Thinking Closet.  I love how Lauren used Looking Glass spray paint, which is what I was initially going to use as well, but I went with white spray paint instead since I think it fits better with the decor.

If you were wondering about that mini white pumpkin, it is the lone survivor from my gold dipped pumpkin vase centerpiece.  Still going strong!

Medallions

The paper medallions ended up being my favorite part.  I made them with card stock, which is a sturdier alternative to tissue paper.  That wall between the two windows in my kitchen has remained bare since the day I moved in and I haven’t been able to figure out what to put there.  For now, I like the idea of changing it out regularly with decorations (foreshadowing??????).

As for the centerpiece and candle holders on the table, I’ve already written posts about those so check them out if you’d like!

I hope you’re all inspired to add your own special touches to Thanksgiving this year!  Stay thankful, my friends (said in the voice of the most interesting man in the world.  I really hope y’all know what I’m talking about haha!)

Like what you see? Stay connected with me:

FacebookGoogle +InstagramPinterestRSSTwitter