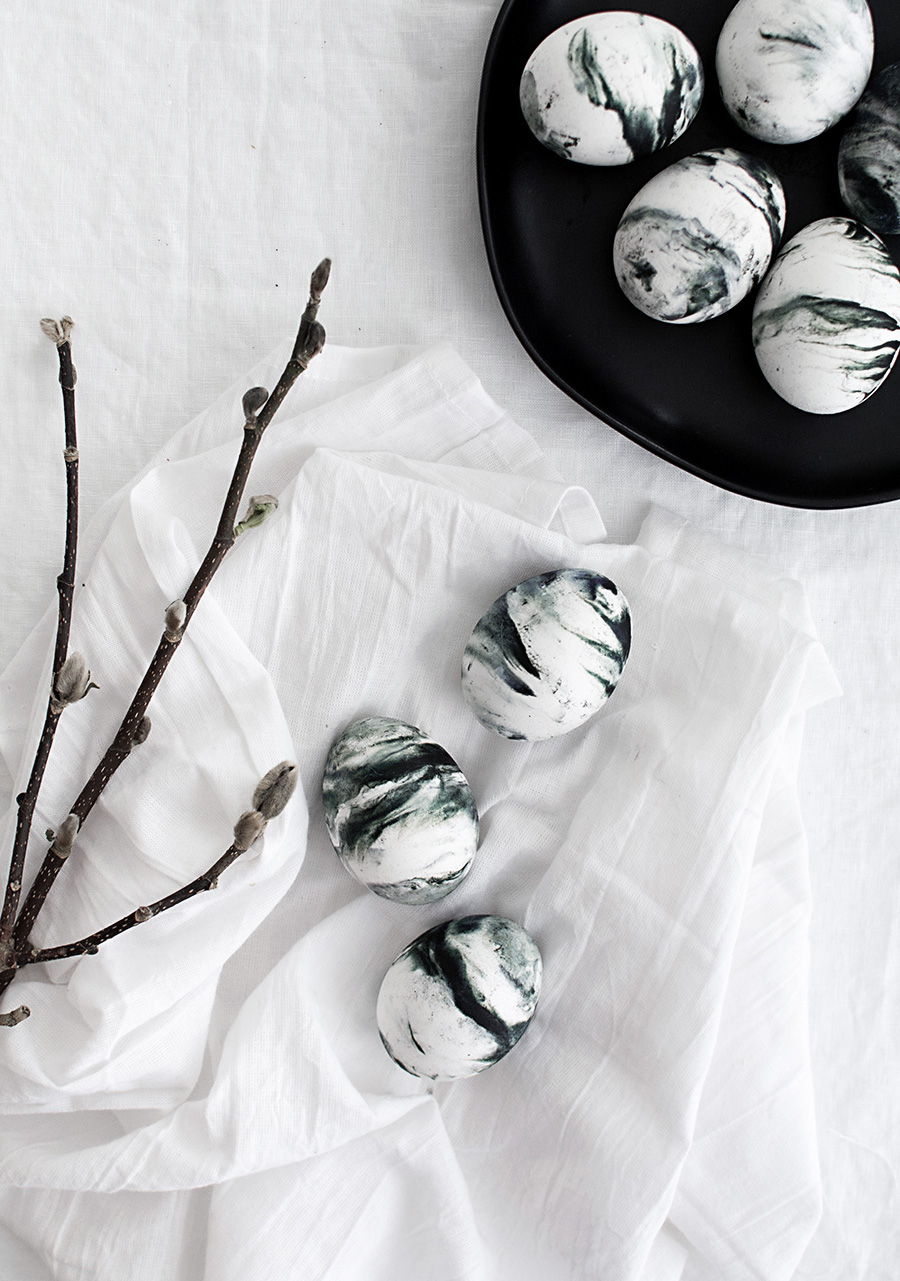
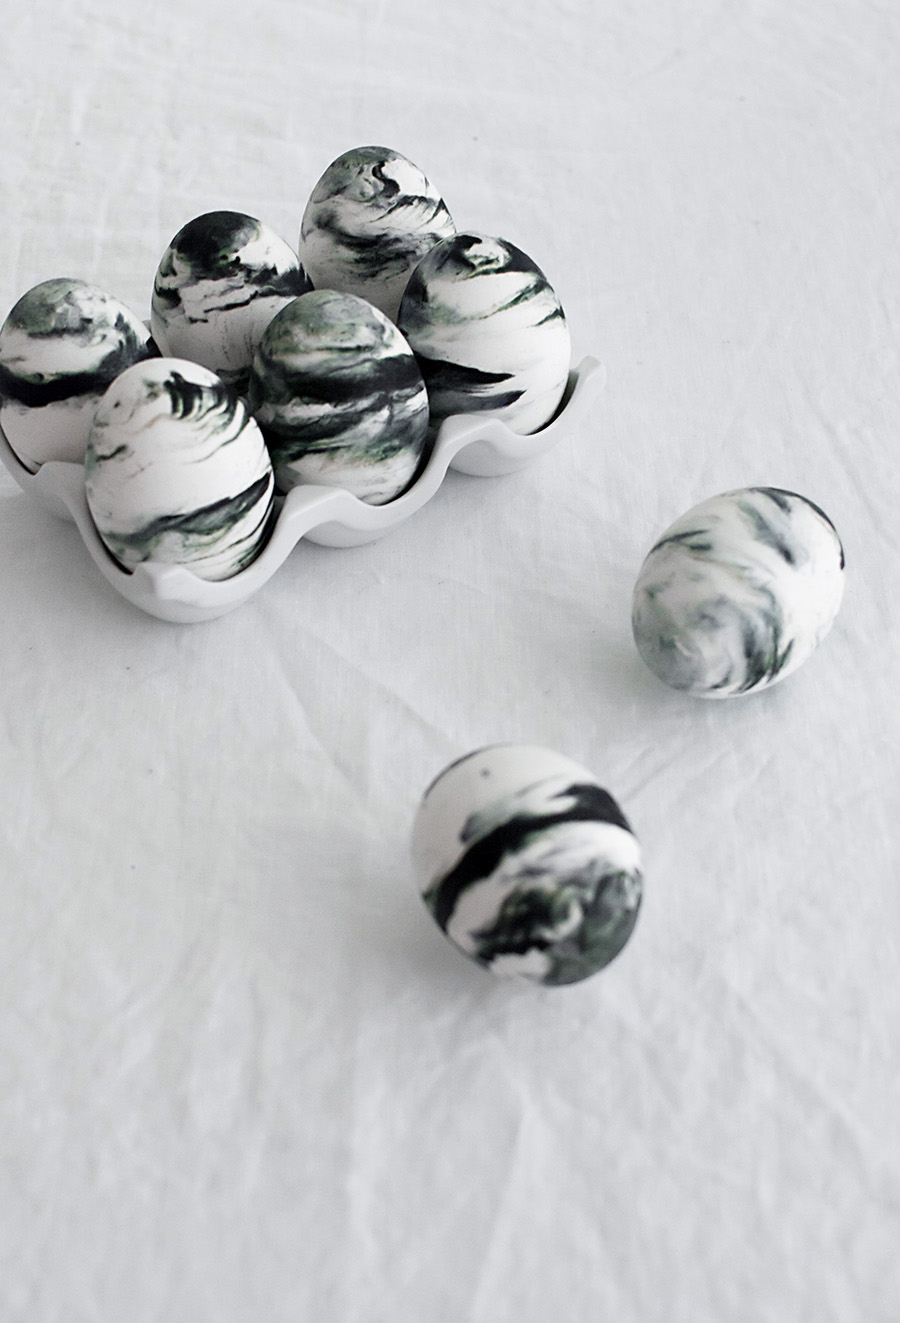
It only took me two dozen eggs to figure out this year’s Easter egg DIY, a big improvement from last year’s three dozen eggs, but the fact still remains that this time of year means lots of egg salad around here (I will never do anything to an egg that makes it inedible!)
I’ve wanted to try this technique of marbling ever since I first learned about marbling paper using shaving cream and paint. To keep this food safe however, we’re using Cool Whip and food dye instead. It’s very simple and pretty fun to see what kind of random marbled patterns come out.
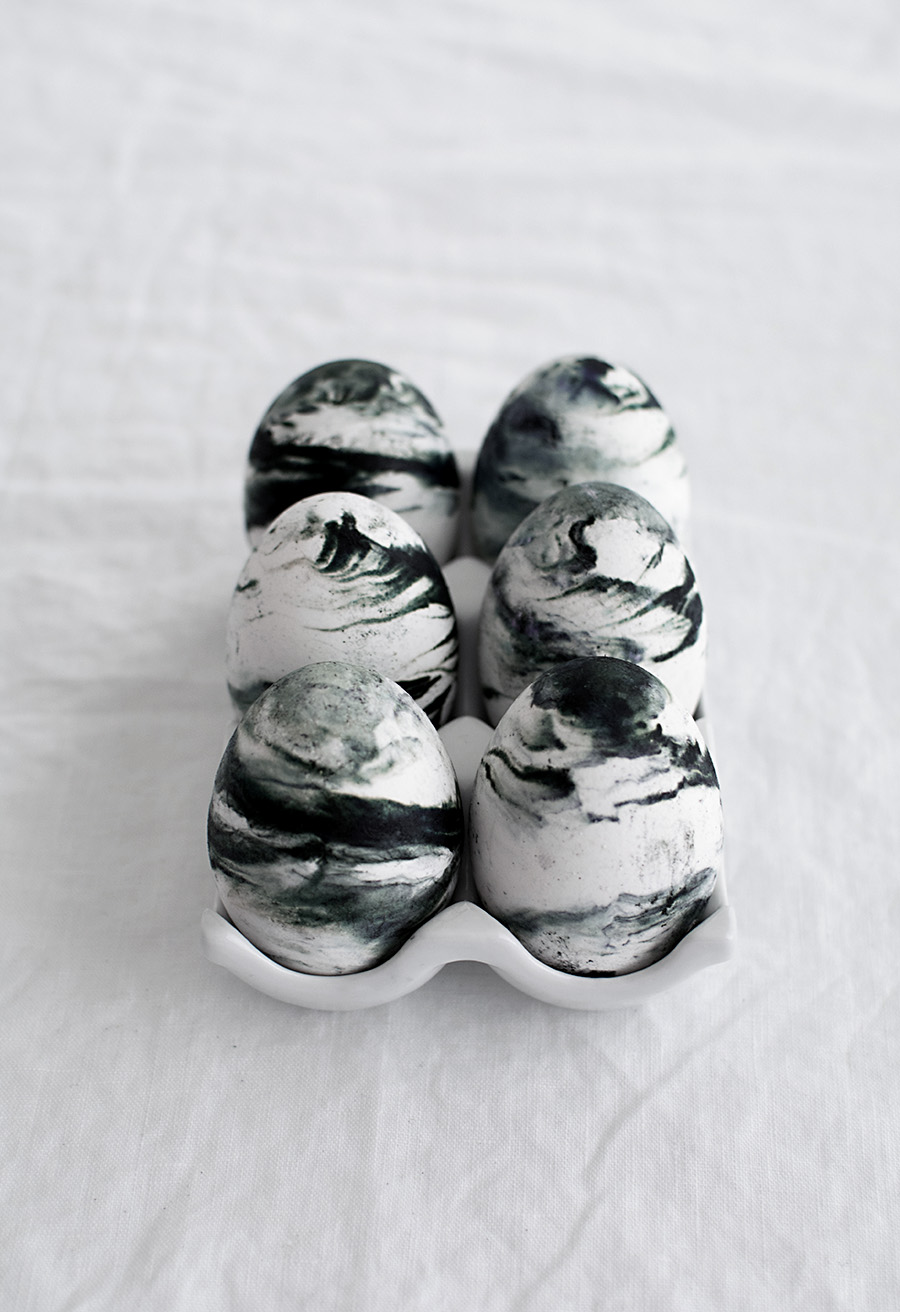
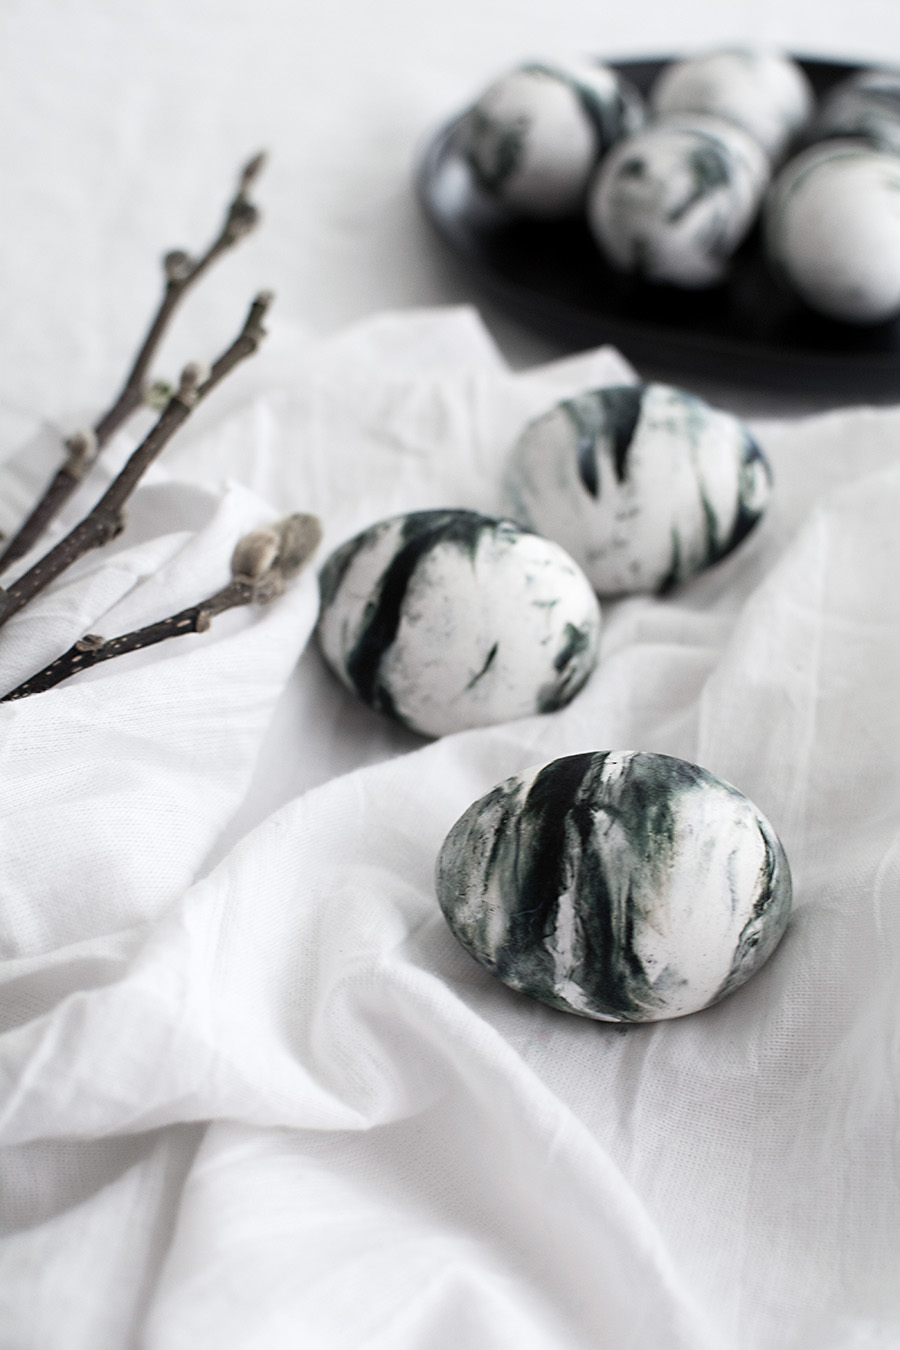
The tricky thing about this DIY is the black food dye, which black dyes in general pose issues because the undertones tend to show through. The black food dye I used has purple and green undertones, and by playing around with some techniques I ended up with this deep emerald tint which I LOVE even more than the original intended pure black and has me thinking about how to incorporate more of it into my life. Sprinkled in some important tips in the following steps to obtain the color that I did, which you don’t have to follow if you use pretty much any other color of food dye. I’ll detail and remind you how this all works shortly.
Materials:
Hard-boiled eggs
vinegar
Cool Whip
food dye (use a gel like this one)
tray wrapped in aluminum foil
wood stick or toothpick
gloves
paper towels
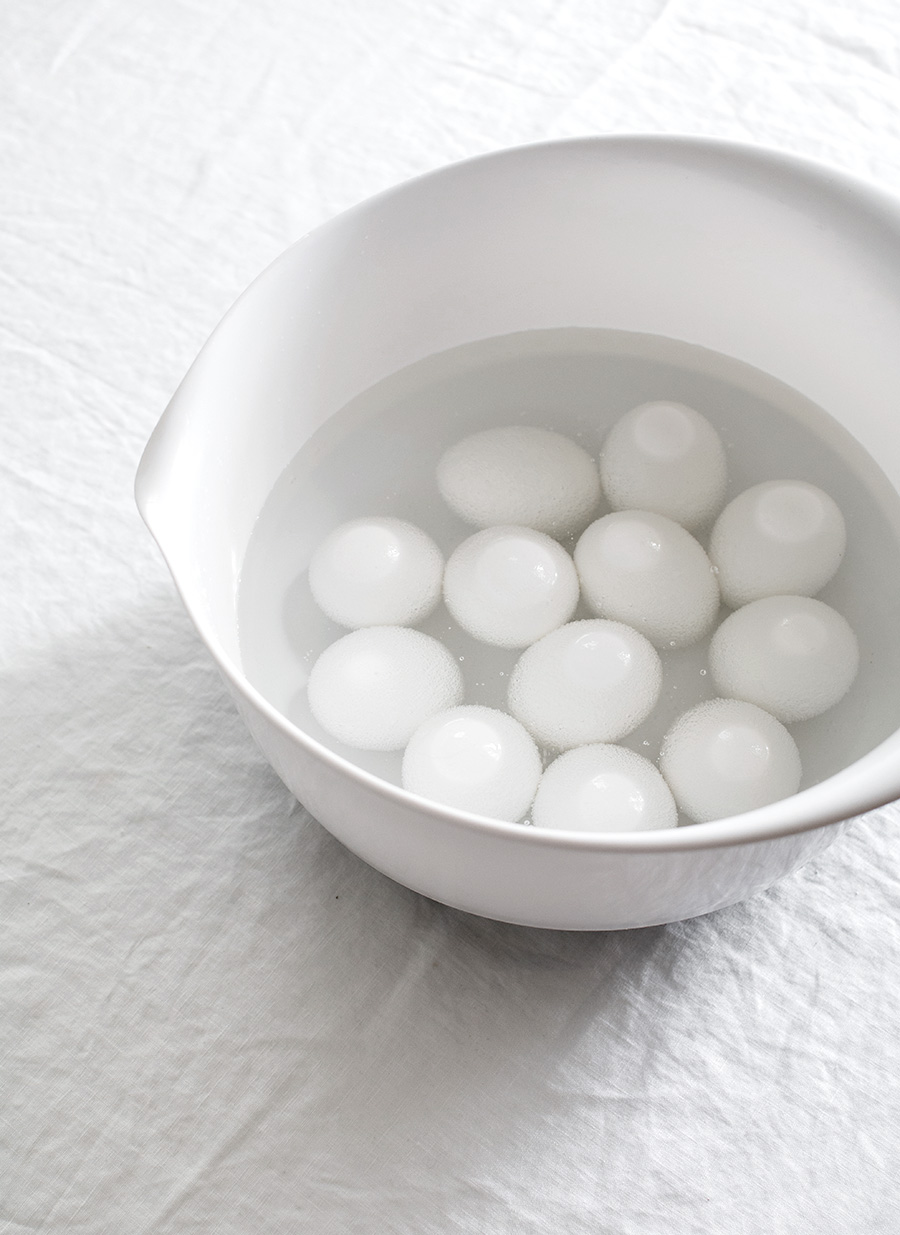
Soak the hard-boiled eggs in vinegar for about 5 minutes. This will help the dye set better on the eggs. Once taken out, wipe each one dry.
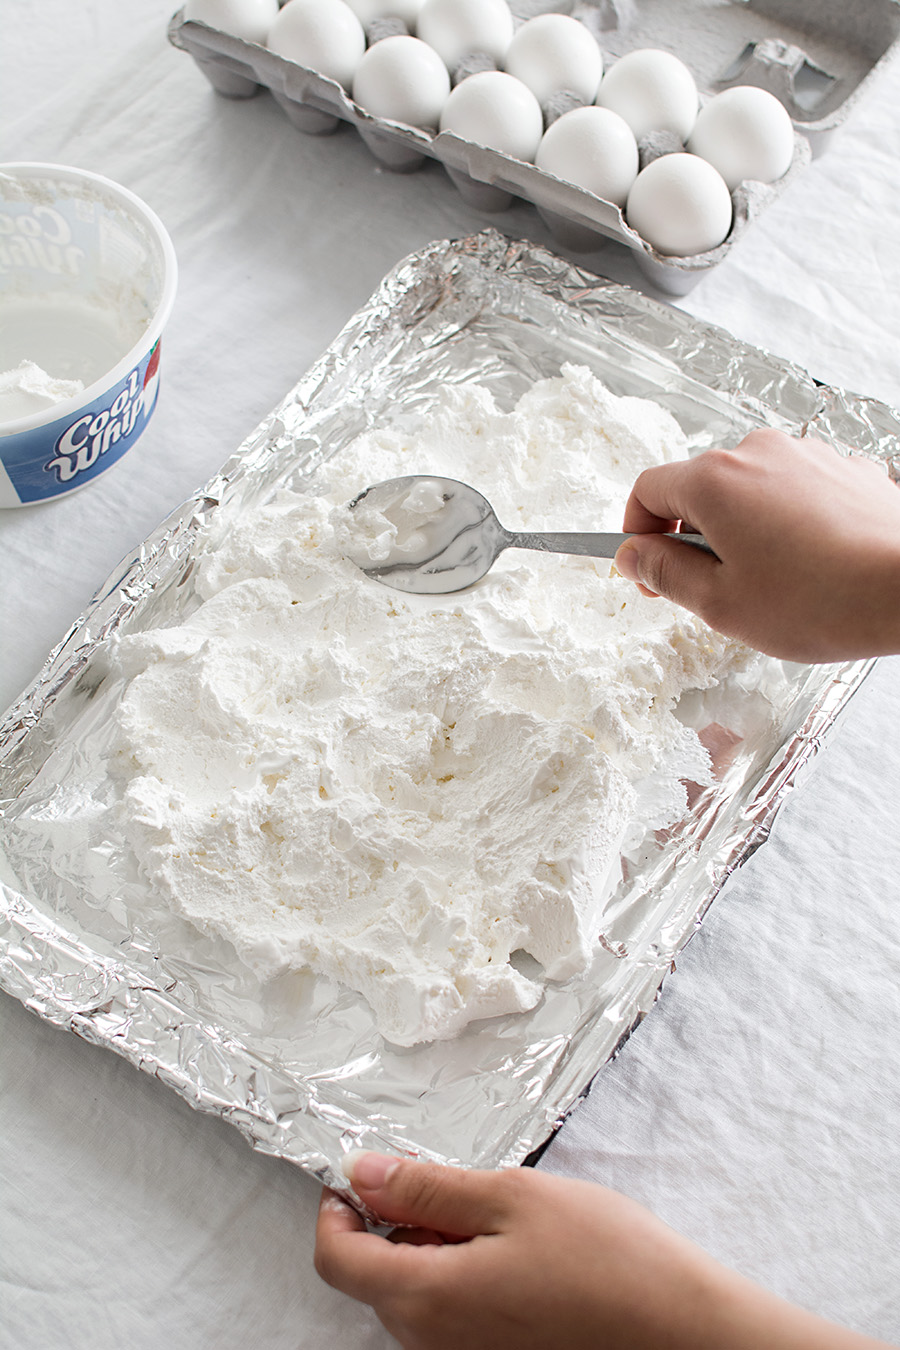
Spread a 1 inch layer of Cool Whip onto a tray. I used about 1.5 containers of Cool Whip.
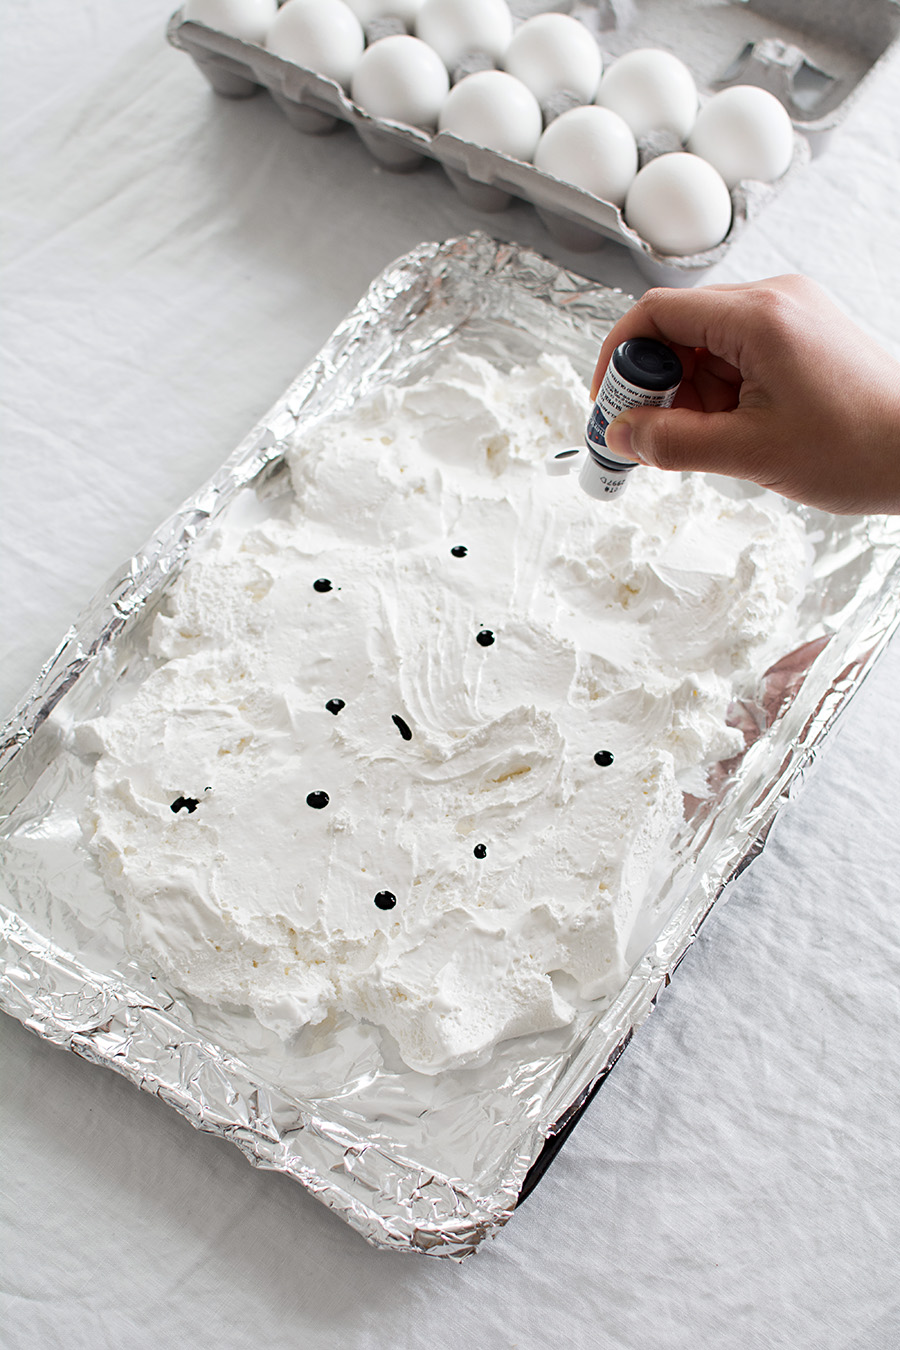
Squeeze a few drops of food dye onto the Cool Whip. NOTE: these images are from my first attempt, where I learned that I had used too much dye. The second time around I used about 5 drops total and liked the way the marbling turned out much better since it left white as the majority color on the eggs. If you don’t care about achieving this or are using multiple colors, go at it with how much you add and ignore this tip.
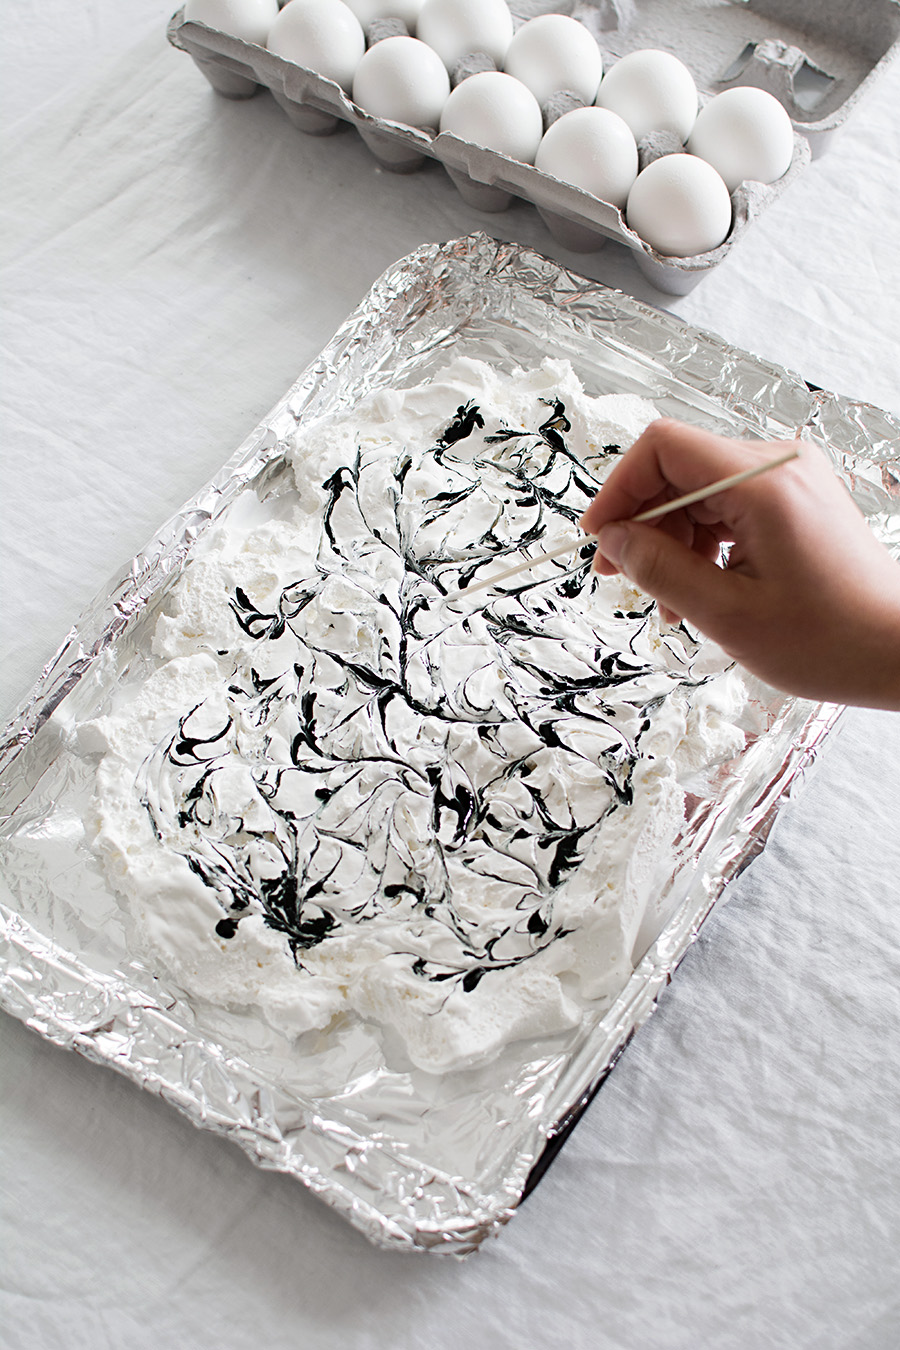
Use a thin wood stick or toothpick to marble the dye throughout the Cool Whip. Do not over-marble if you want to keep your lines and colors distinct. Again, this was way too much dye for my liking and I ended up using a lot less the second time around. The next step shows a little on why.
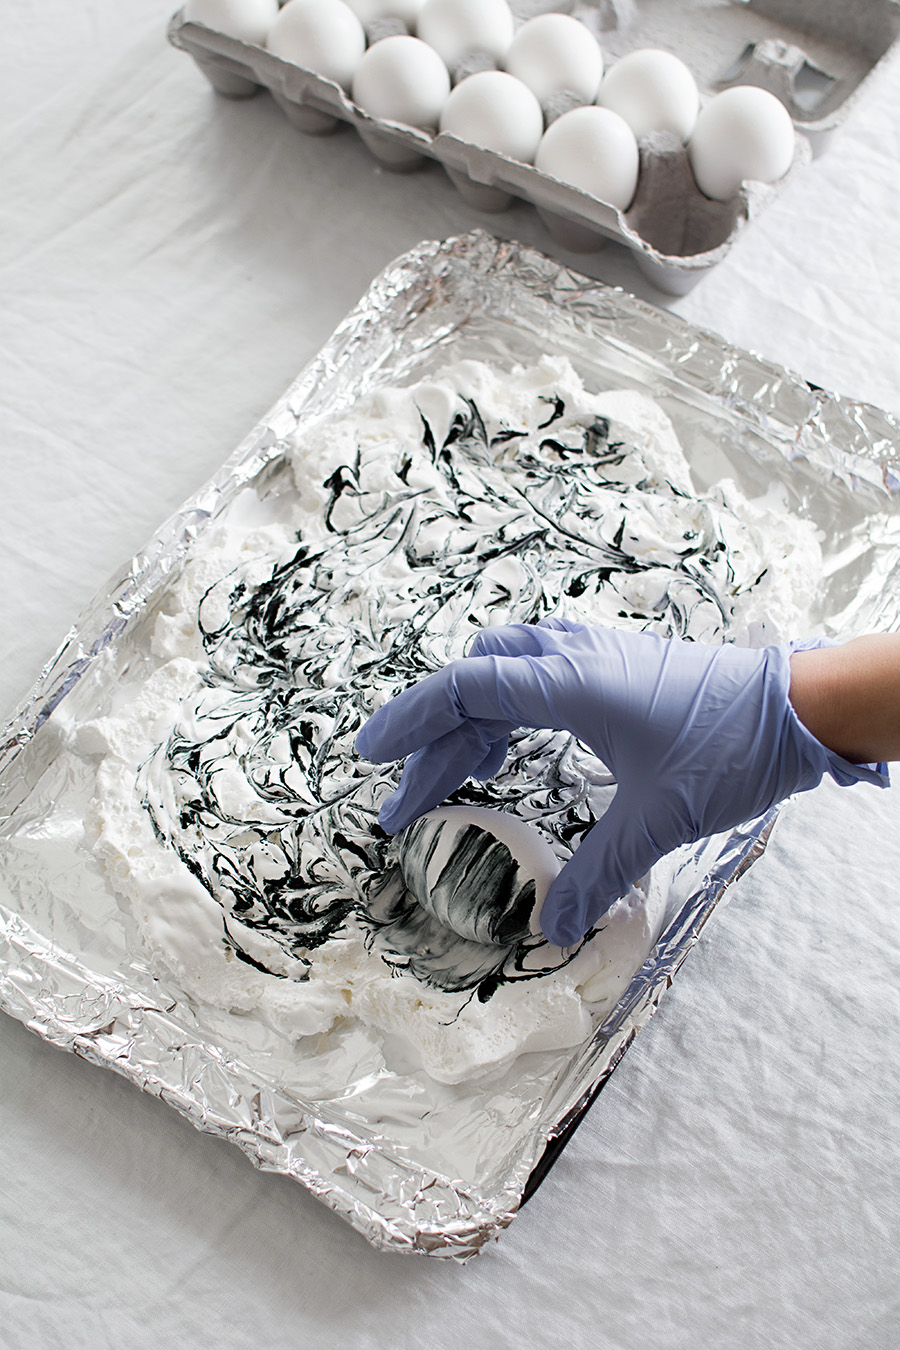
Place the egg on the Cool Whip and roll it across until all sides of the egg are covered (wear gloves to protect your fingers from getting dyed). As you do this, you’ll see that the lines of food dye flatten and smear onto the egg, becoming larger and therefore potentially a lot more muddy than you intended. Another reminder to use a lot less dye than shown in this photo if you want marbling similar to how my eggs turned out as seen in the rest of the photos.
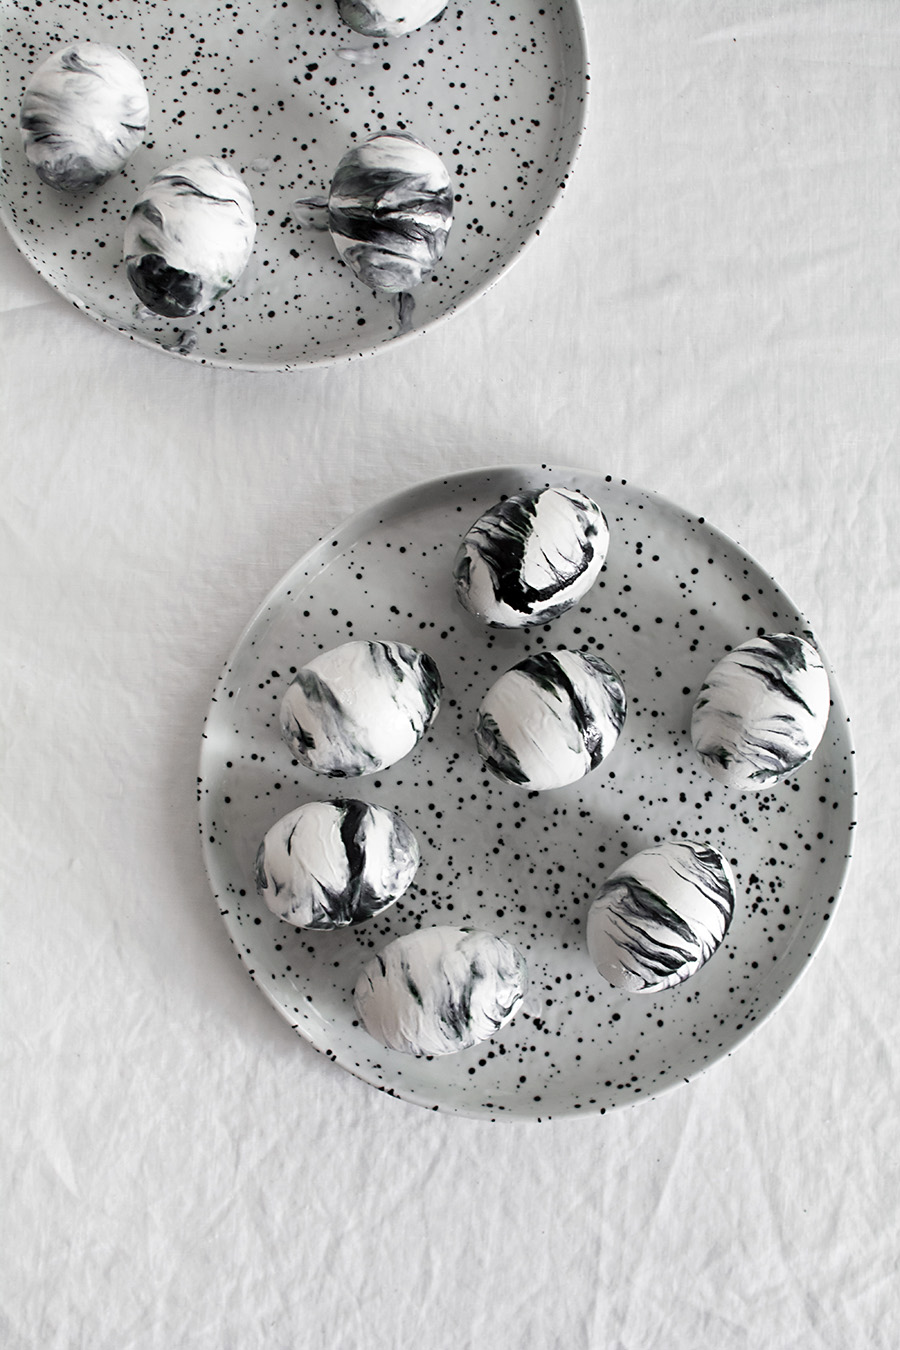
Lay each egg on a plate, still covered in the Cool Whip, and let the dye set for about 20-25 minutes. If you’re using colors other than black, you can rinse off the eggs after the setting time by lightly shaking each one in a large bowl of water without rubbing. This will make the color fainter than how it looked with the Cool Whip, the benefit being that the surface is now more colorfast and cleaner to handle. Follow the next steps if you’d rather maintain color vibrancy or are using black dye.
At the end of the setting period, wrap each egg in a paper towel and gently squeeze all over the surface to dry (do not rub). You’re pressing the dye pattern into the egg while absorbing the Cool Whip and excess dye into the paper towel. Keep doing this while continually moving the egg to clean portions of the paper towel until barely or no dye is coming off. Repeat until as much excess substance as possible is removed
Admittedly, the eggs will remain slightly sticky and the dye will lightly stain your fingers a bit during handling from here on out, but I found that if these eggs are rinsed in water then the black dye washes off and stains the eggs purple and light green. It’s not a bad look, it’s just not what I was going for!
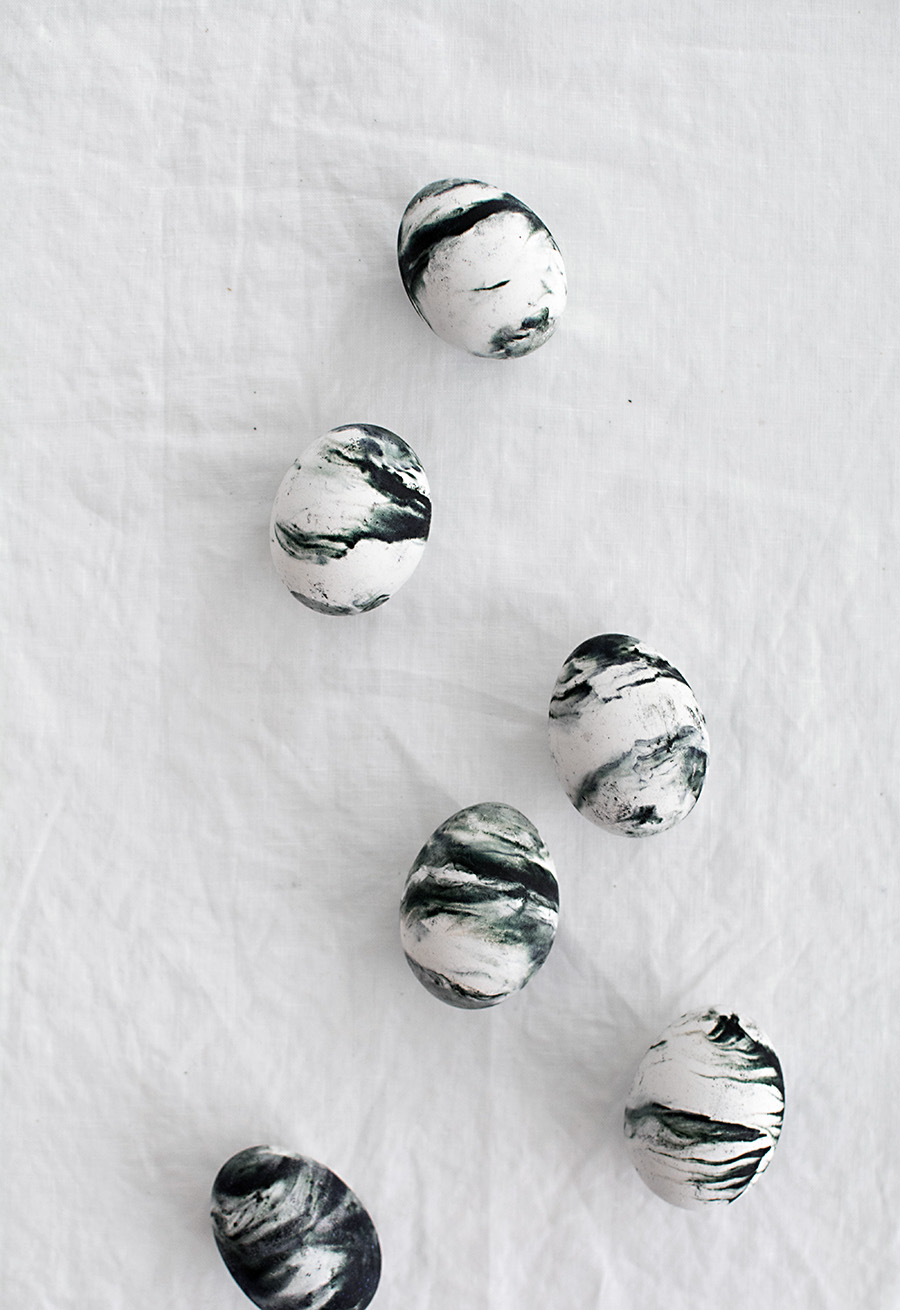

Again, you can use whatever colors you want and how many of them you want. The steps you can play around with are how much dye you use, the marbling pattern you make with your stick, and either rinsing the eggs or patting them dry at the end. Hope you might try this and share what you come up with!


Oh thank you so much!! I was hoping to find something crafty to do today!! These eggs are so pretty!
Do you have any tips to keep Daffodils and Tulips happy and standing tall once home from
TJ’s?
Have a wonderful week!
Hi Ann! For tulips, I once tried the penny trick and it seemed to work… I put several pennies in the water at the bottom of the vase and it made the tulips stand straight. Only thing is that the pennies have to be old enough- newer pennies don’t have enough copper in them!
This is an absolutely cool idea, those eggs look so stylish!
https://www.makeandmess.com/
I love this! What a great idea!!!
This is so cool!! I wish I saw it sooner for Easter. Thank you for sharing!