
This post is sponsored by Canon.
Around this time last year I was visiting Stockholm which was an amazing time to go because the city was filled with signs of Christmas. I had come across some beautiful paper and honeycomb ornaments at a shop and talked myself out of getting them because I was short on room in my luggage, and I’ve regretted it since. As I’ve started decorating our home for Christmas this year, the memory of those paper ornaments came top of mind and it became mandatory that I make my own version of them.
These 3D paper ornaments are simple to put together, very customizable, and shatterproof so they’ll last year after year as long as you store them well. Read on for the tutorial, and get the paper template downloads at the end provided in partnership with Canon!
Materials:
- card stock
- printer- Canon Pixma TS5320
- scissors
- string
- tape
- glue stick
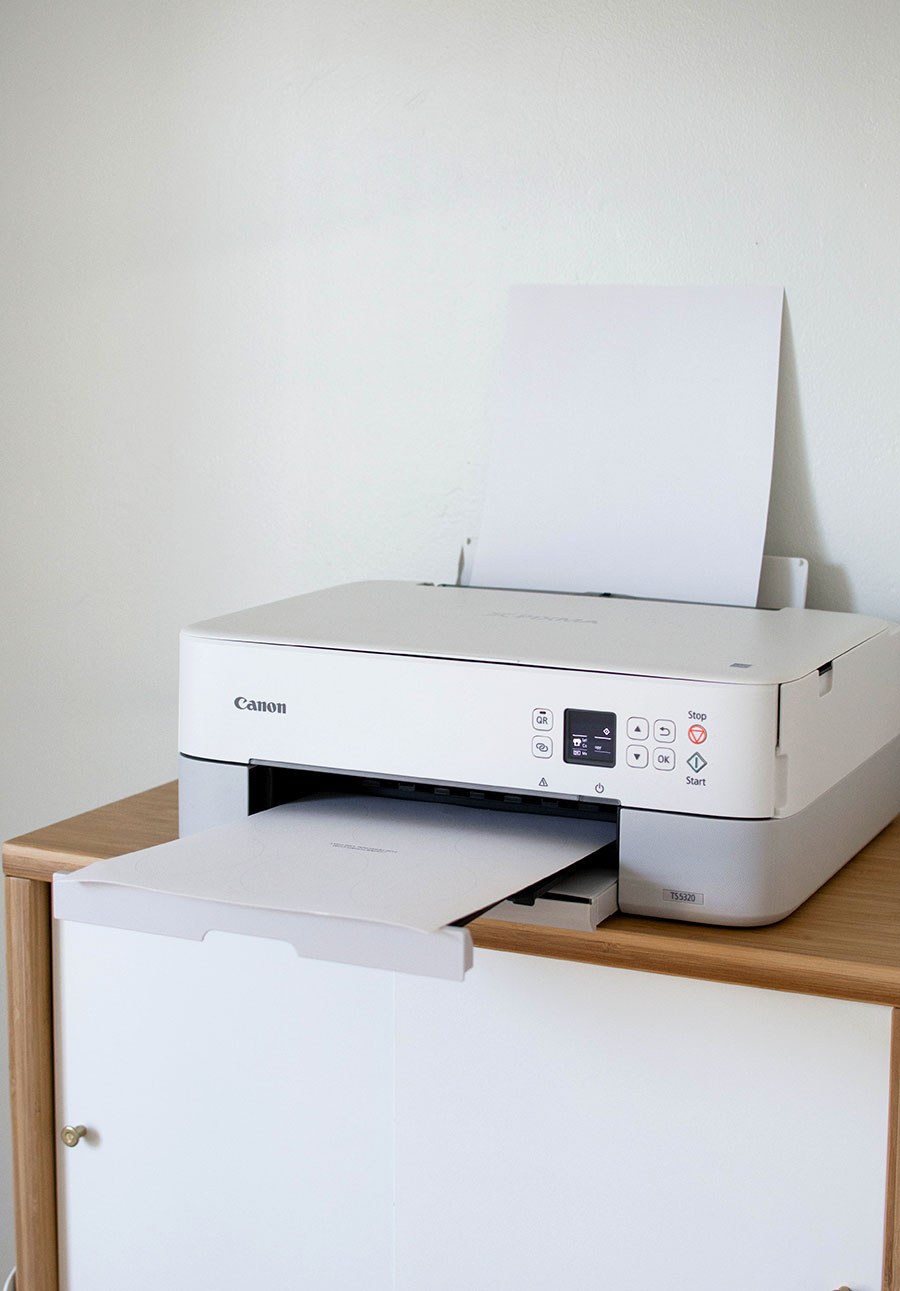
I printed the templates using the Canon Pixma TS5320. Having worked with Canon over the years, I’ve consistently been impressed by their multi-functional printers that also fit my style. I love the sleek and modern look of this printer that doesn’t take up a lot of space and that I don’t feel at all like I have to hide inside a cabinet. I also love that it has a rear tray (a must-have feature of mine for any printer), which makes it easier to feed through thicker papers like card stock for projects like this one.
Use whatever color or patterned paper you’d like- you can try mixing up colors and patterns within each ornament, too! Thicker papers like card stock will be sturdier and work better all around. If your paper is patterned on one side, make sure the template prints on the back side where the paper is blank to achieve cleaner results.
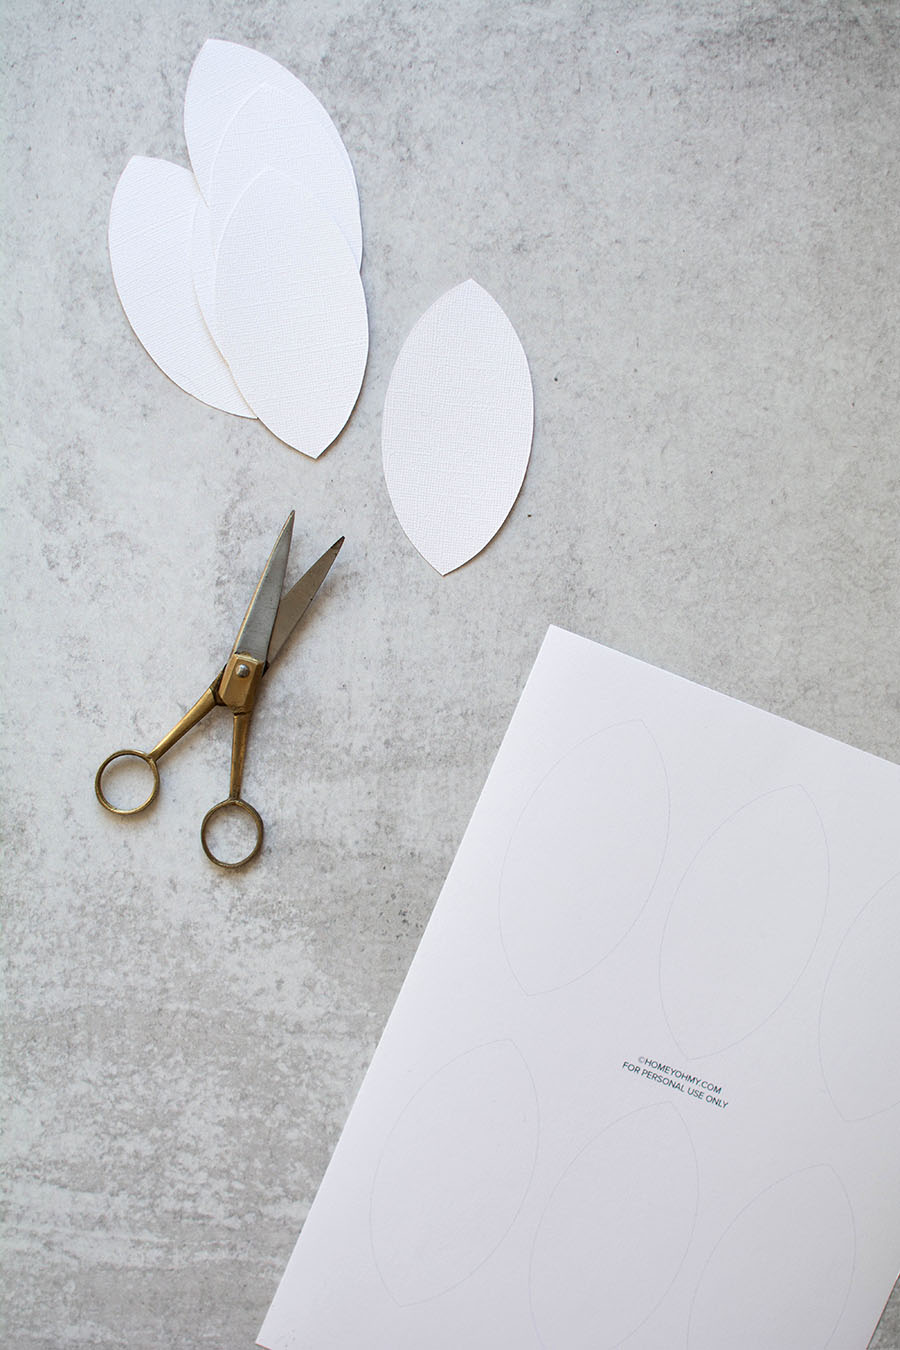
Cut out the shapes from your printed template and fold all of them in half except for one (you will need to cut out 9 pieces total per ornament, which is at least 2 printed template sheets).
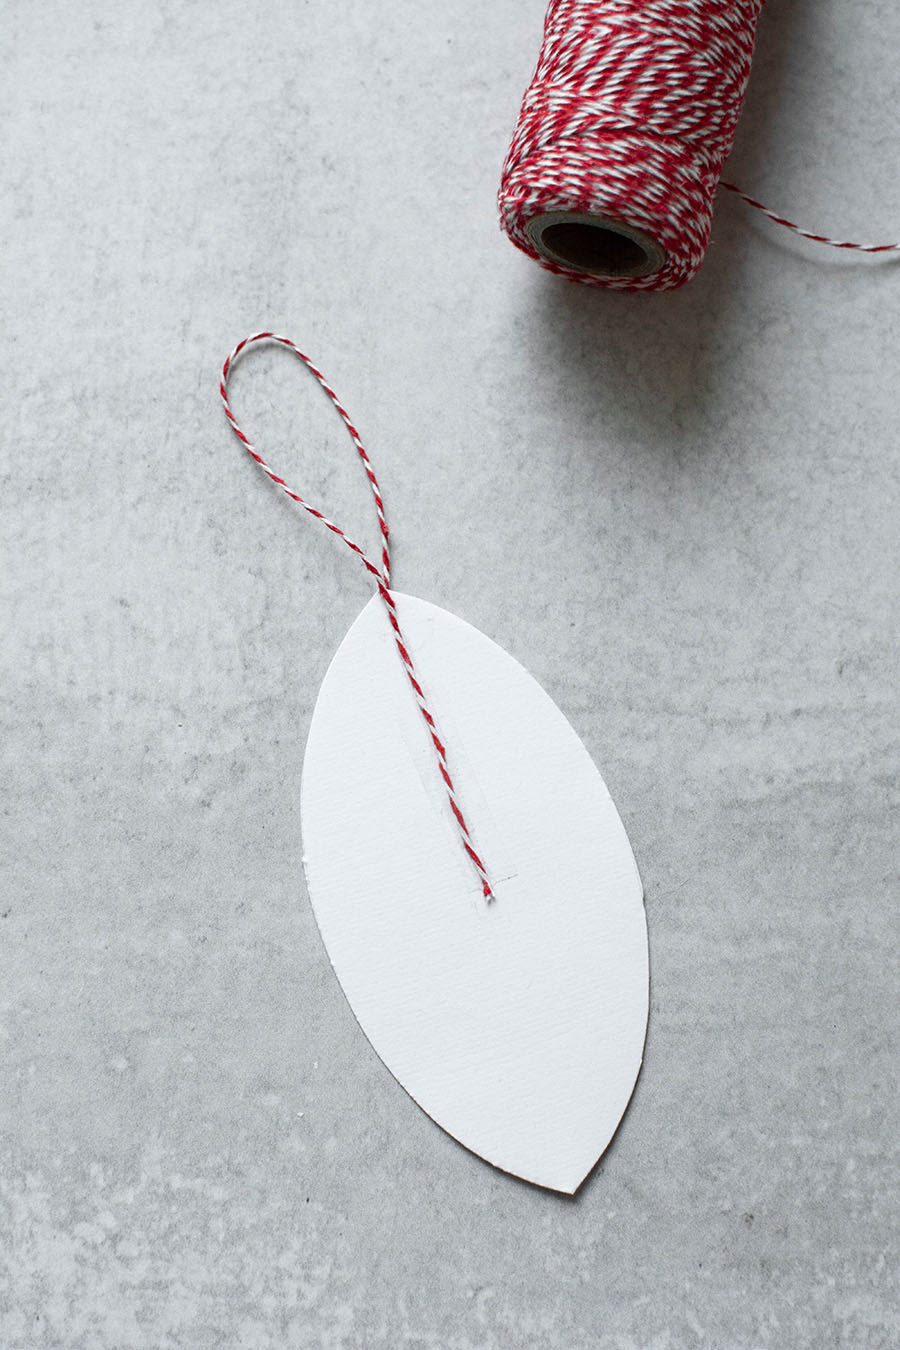
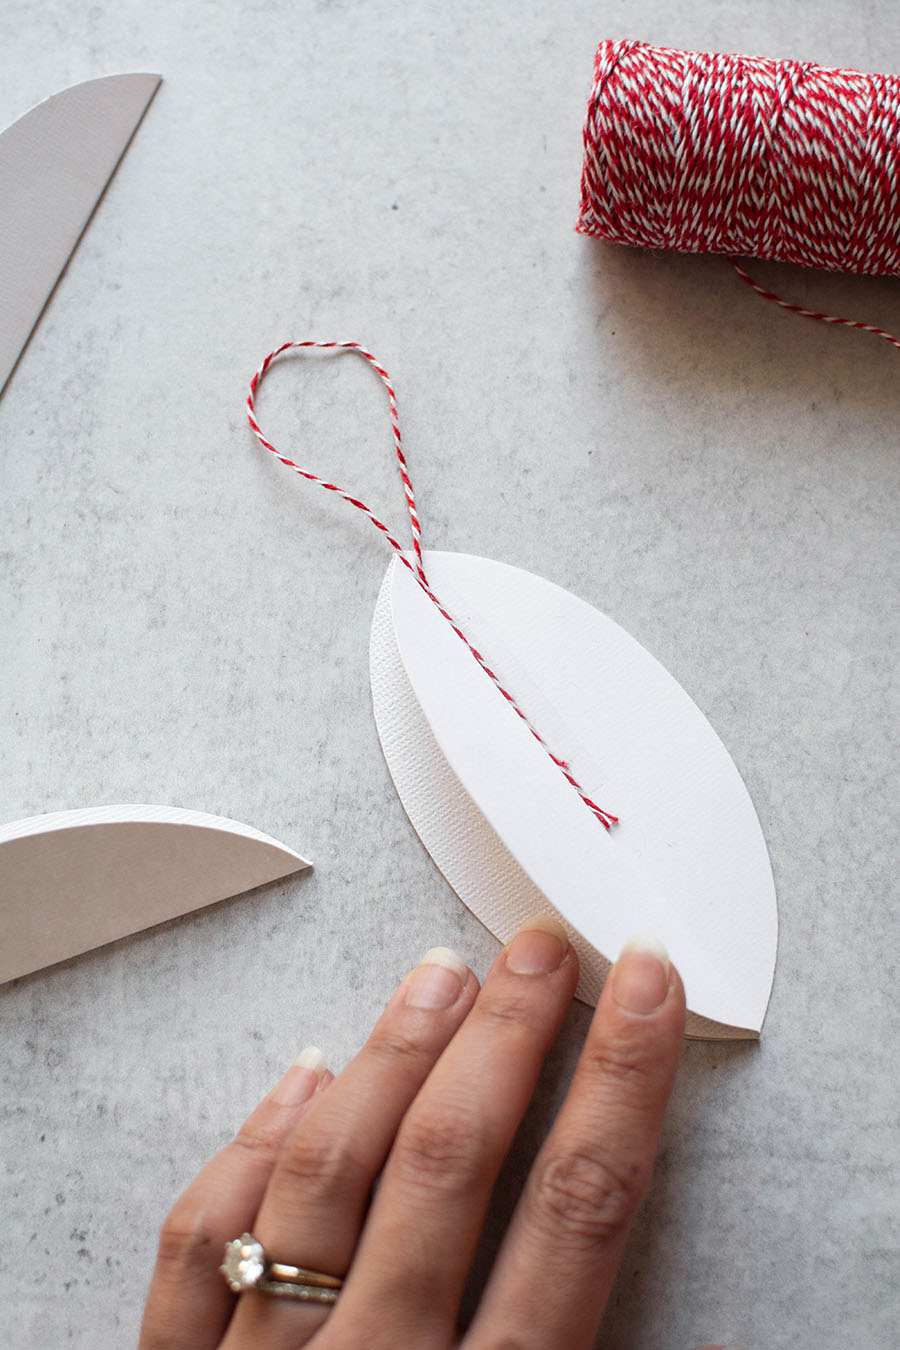
The one unfolded piece will be your base that you attach the rest of the pieces onto. Start by taping on a looped piece of string to the center of the base paper, each end of the string taped on each side of the paper. This will be what the ornament hangs from.
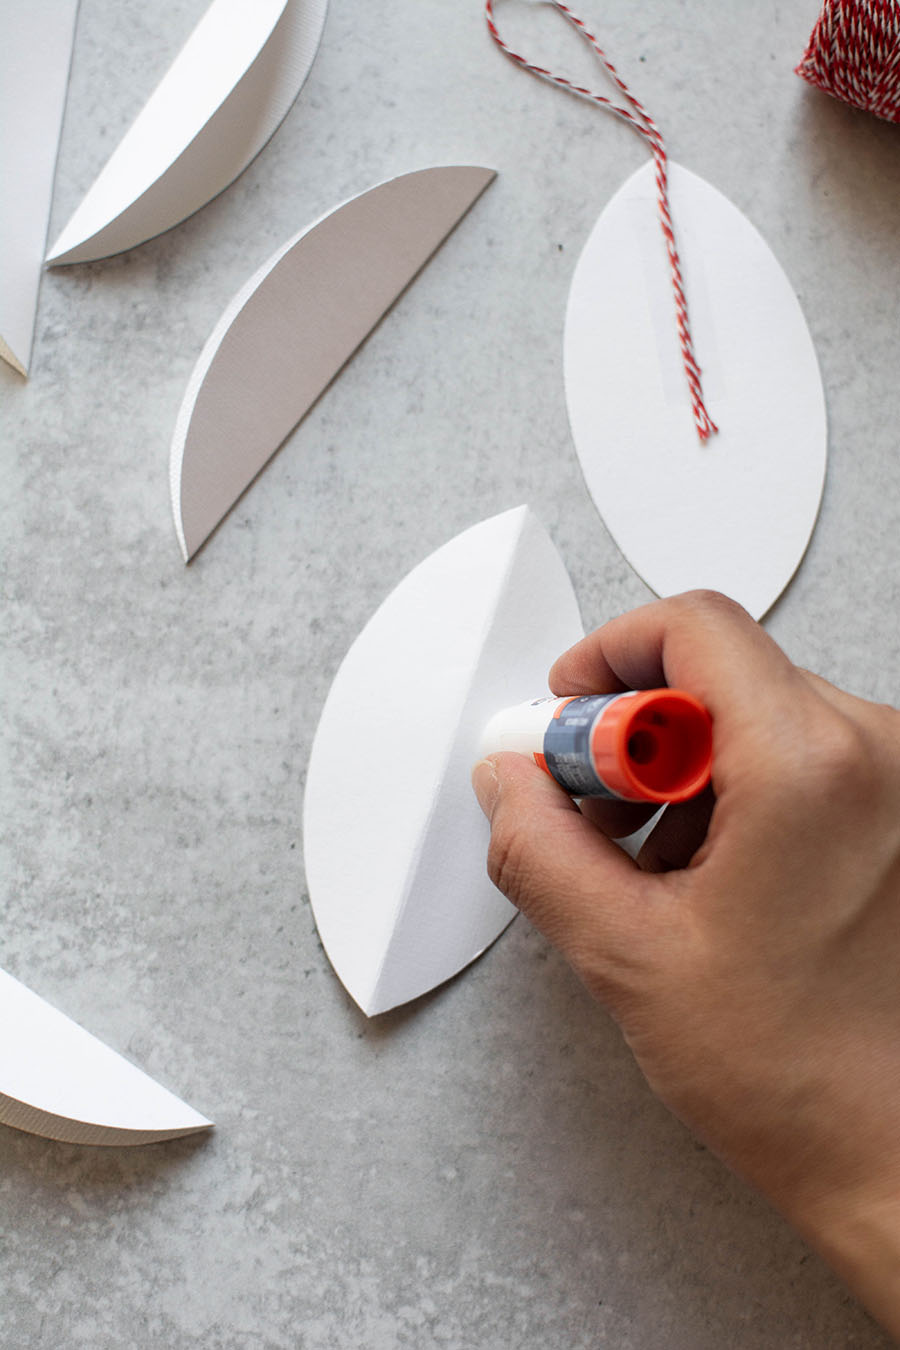
Use glue stick to attach one side of a folded piece to the base piece so that the edges align perfectly. Make sure to apply the glue thoroughly especially on the outer edge.
I chose to use glue stick because it remains repositionable before it dries, but that also means it takes a little longer to set completely so it’s important that you press down firmly and hold the paper in place for a bit before moving on to the next piece.

Attach one side of another folded piece to the free side of the previous folded piece. Think of it like you’re making an accordion. Press and hold the sides and edges to ensure the glue dries with the paper pieces correctly in place.
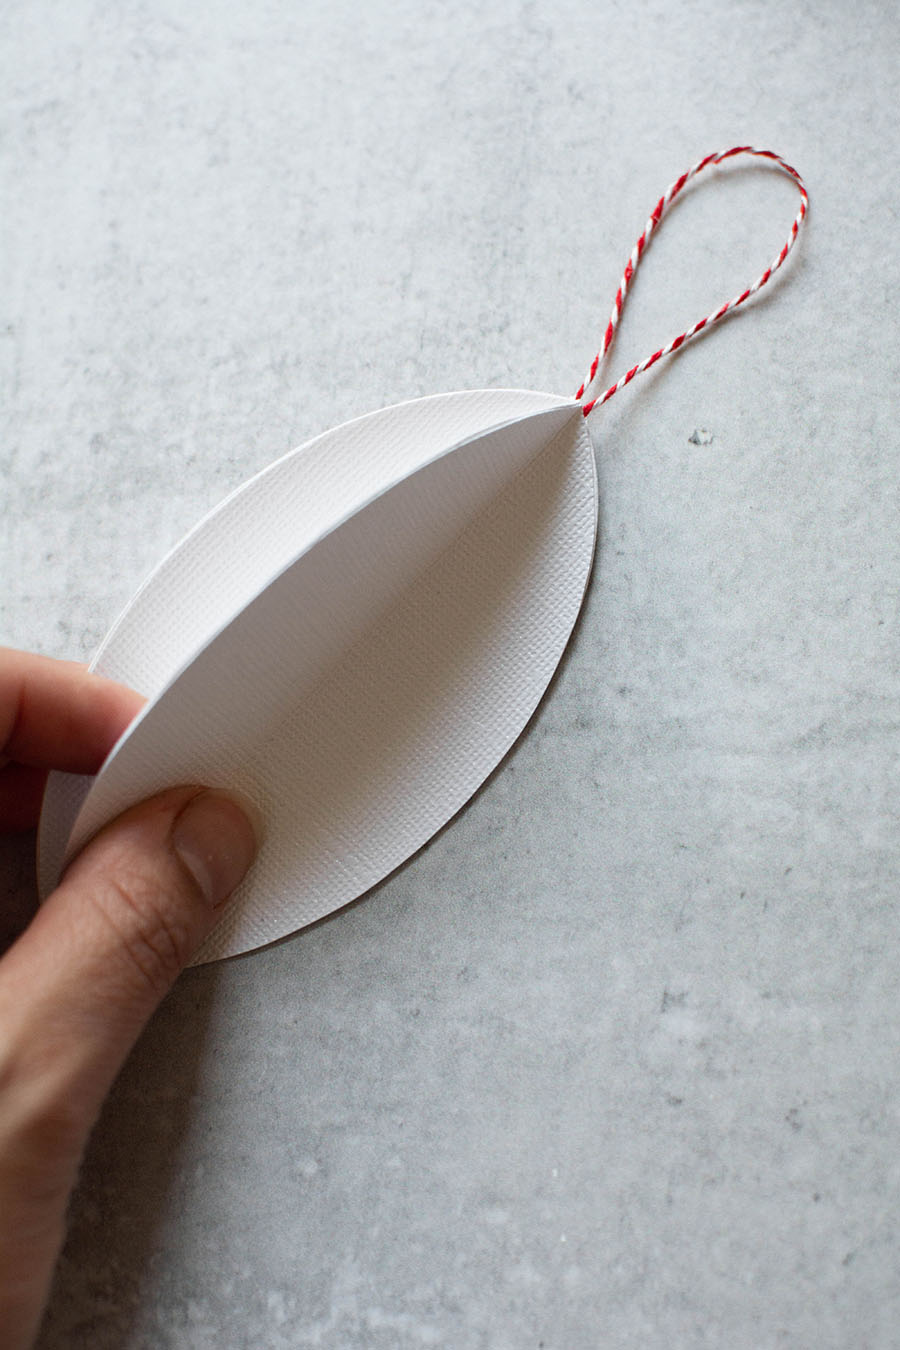
Repeat with a total of 4 pieces, attaching the free end of the last piece to the remaining free end of the base piece. Again, press down on all sides and edges so that everything remains attached as the glue dries.

This is an overhead view of what it should look like after completing one side. Flip over and repeat steps on the other side, that’s it!

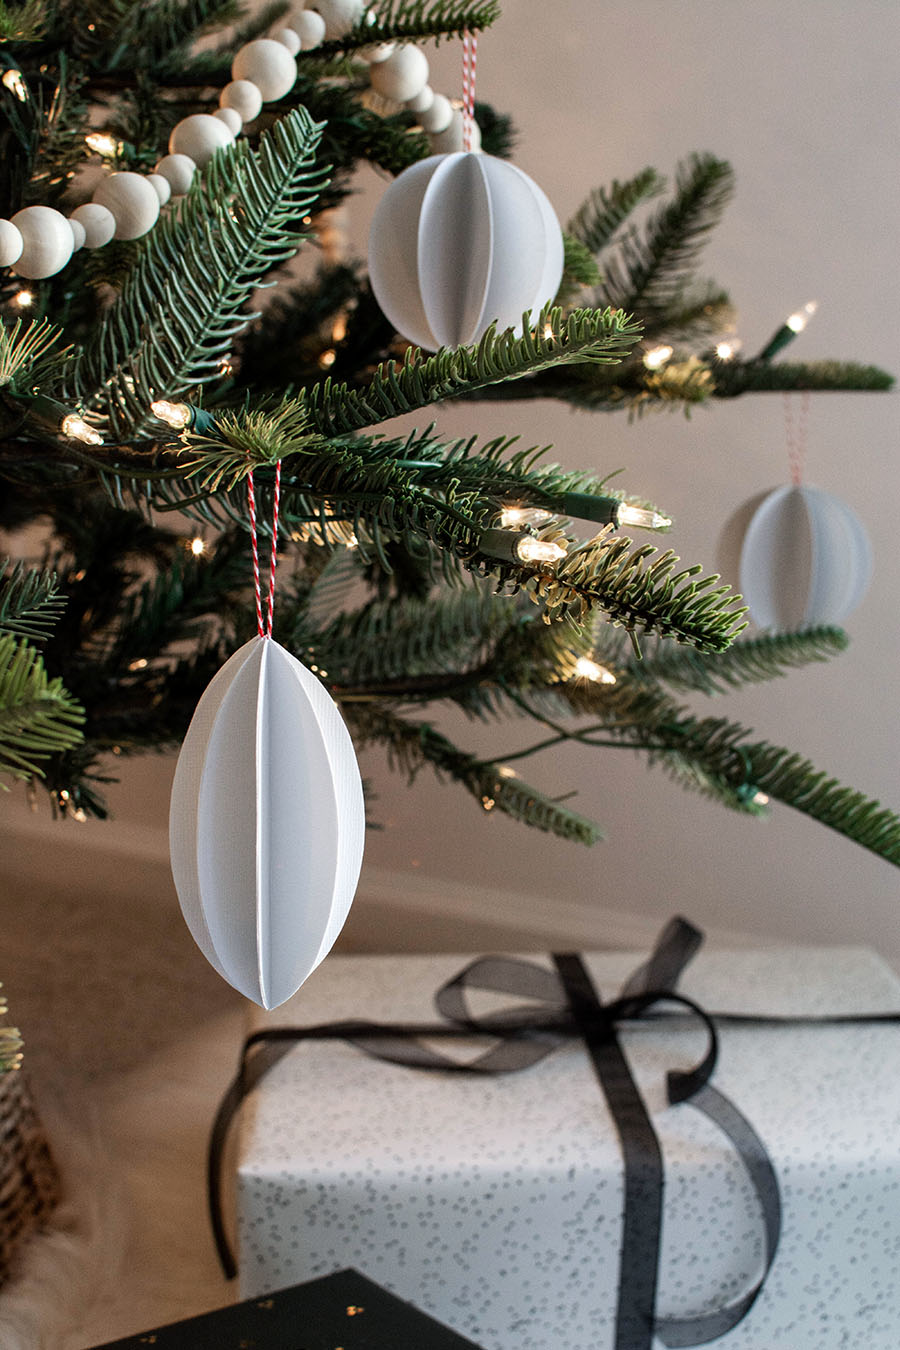


Aside from hanging them on your tree, you can hang them from garlands or wreaths, make a string garland with the ornaments themselves, or gift them as gift toppers- the double function of being part of the gift wrap and being a gift itself makes gift topper my favorite option!
Get the free template downloads below:
Round ornament template
Long ornament template
This is a sponsored conversation written by me on behalf of Canon. Thank you for supporting partners that help HOM continually bring you original content.


So cute! Thanks for the downloads.
Enjoy!!
Thanks! Great craft idea for my tween grandkids!
Great to hear. I’d love to see how they turn out!