03/03 DIY

DIY Gold Desk Dishes


DIY-Gold-Desk-Dishes
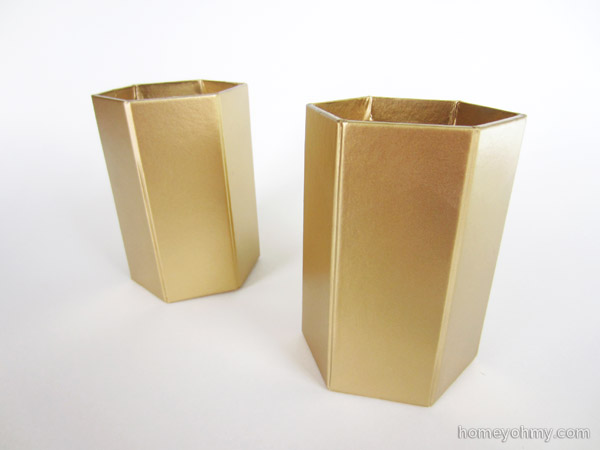
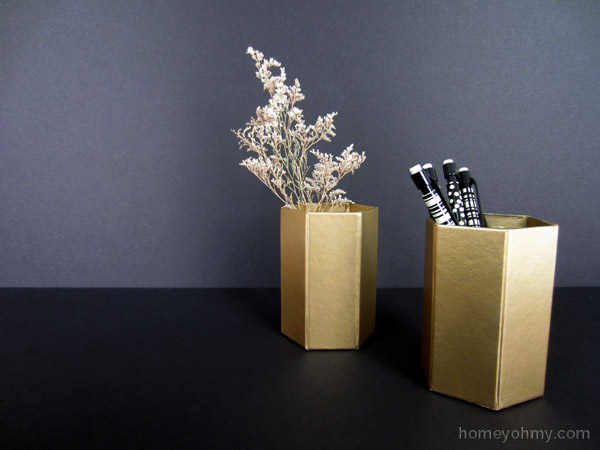
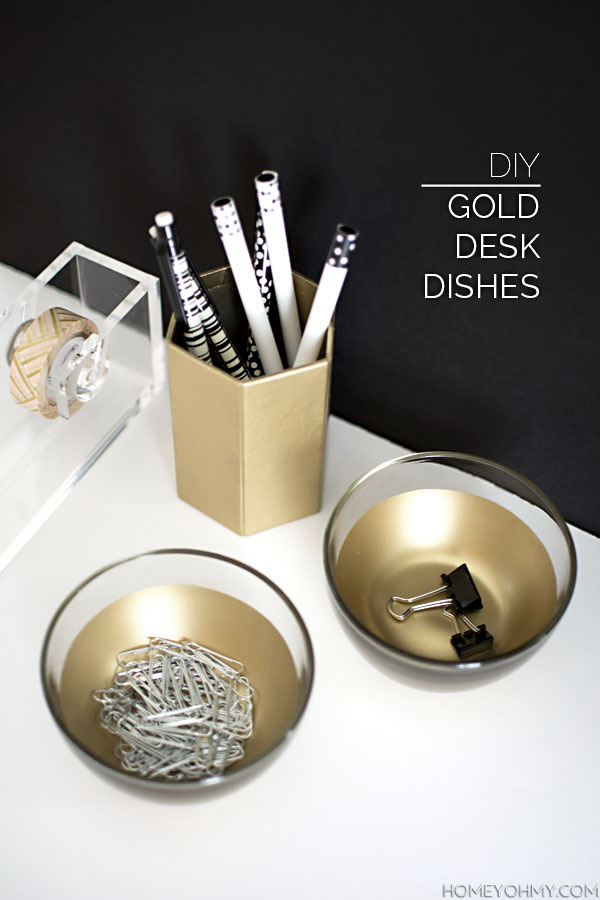
I had a really hard time coming up with a name for this DIY.  “Desk Accessories” or “Desk Organizers” didn’t feel specific enough, but I wonder if “Desk Dishes” is even regularly used in desk organizing terms…  You get the idea though, right? Everyone needs something to corral random knick knacks on top of their desk!

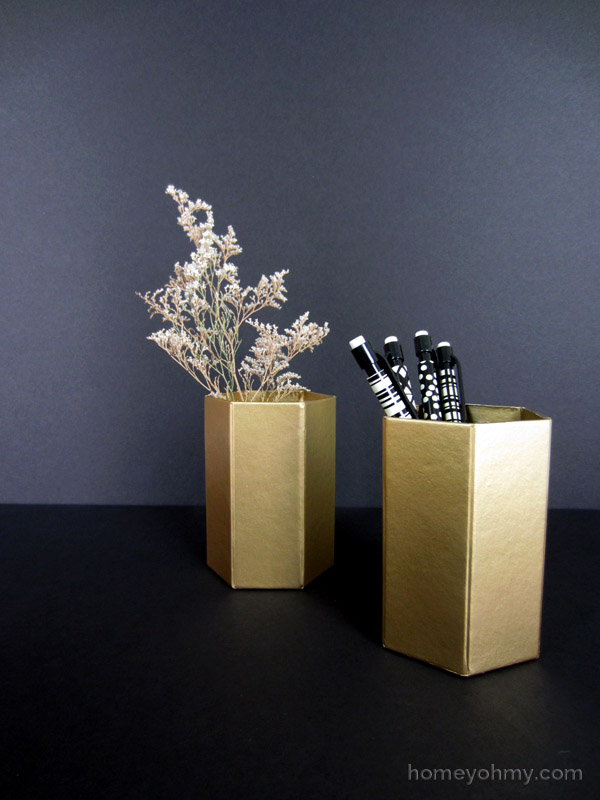
They’re actually made from glass sugar jars, which  added to my confusion on what to call them.

Taping the jars

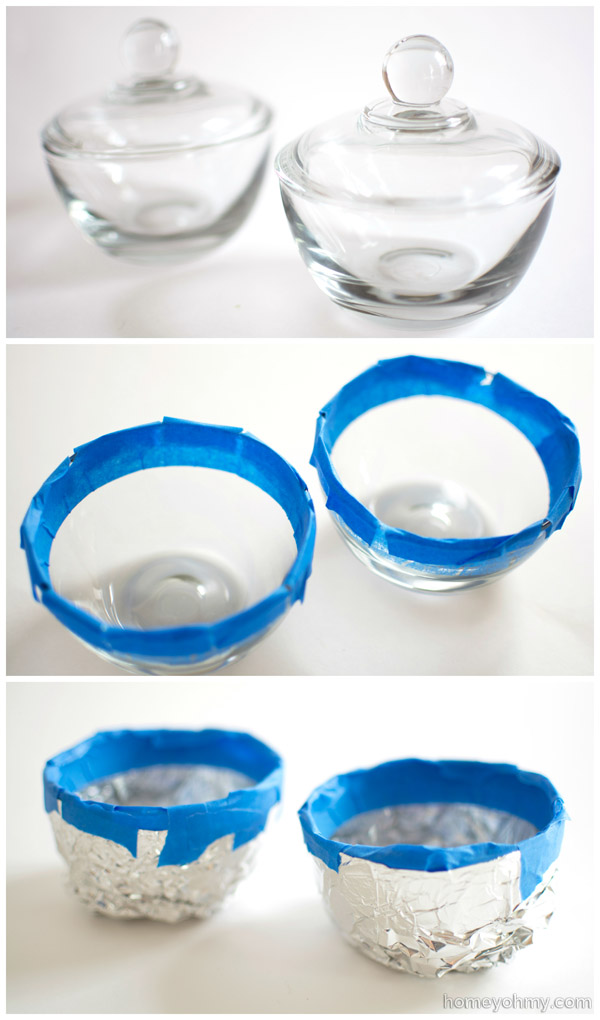
I applied painters tape on the inner rim of the jars, having to make vertical cuts along the part of the tape hanging over the edge so that it would fold over.  Then I taped aluminum foil to the outside surface since I only wanted the inside to be painted.  I sprayed two coats of Rust-Oleum Gold Spray Paint (affiliate link) and two coats of Clear Acrylic Coating (affiliate link) on the inside surface.  The acrylic coating is to protect the paint, especially since it will be coming in direct contact with whatever is placed in the dishes.

Dishes painted gold

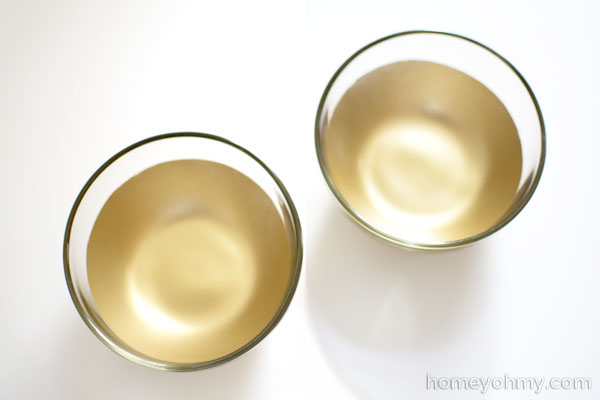
I love how painting the inside looks, as opposed to typically painting the outside.  This way it looks more like liquid gold was swirled around on the inside (ooh fancy!)  Since these are clear glass vessels, the gold shows through on the outside anyway, so either way is a win.

Gold Desk Dishes DIY
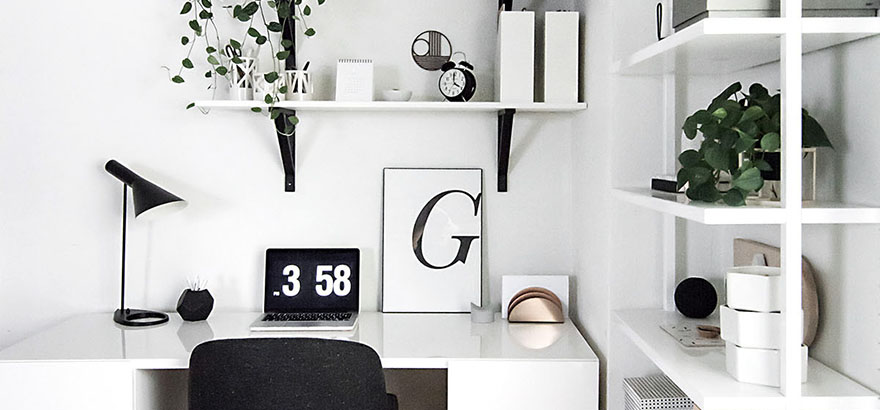
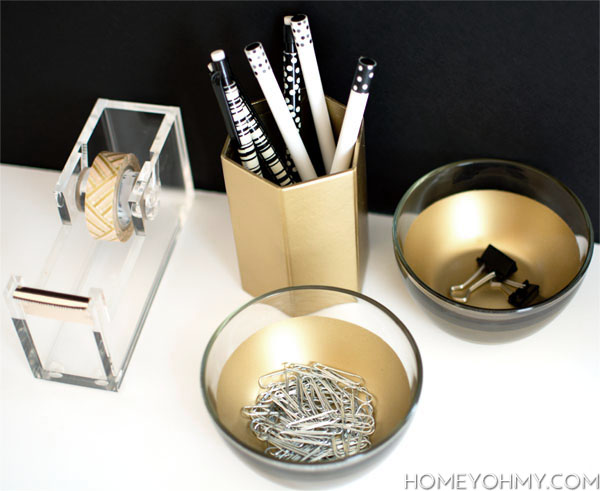
That acrylic tape dispenser is what inspired the design of this project.  Yea, true, I like to paint everything gold always, but I thought the glass and the gold of the dishes would look consistent with the acrylic and gold of the tape dispenser.  There’s also a matching stapler, which I shared on Instagram and man did you guys like it!  Still have a few more things I want to add and finalize with my desk, and for sure I’m keeping strong on the gold.

Curious to know… what would you call these gold dishes?  Holders?  Catch-alls?  Containers?

02/27 DIY

DIY Graphic Circle Wall Art

DIY Graphic Circle Wall Art

So this previously blank wall above my bookshelf has been bothering me for a long time.  Before that, there used to be a tall plant that helped cover up the space, but it’s no longer there since it outgrew the shelf, which is a yay for plant thriving and nay for blank wall.

I’m a huge fan of graphic black and white designs and was inspired to make one ever since I saw this pin on Pinterest, especially because of how easy it is!  I followed the same steps except I simply used black card stock for the circles.

Graphic Circle Wall Art How To

First I used a pencil to trace the inside and outside of the mat from my frame onto poster board and cut along the outside lines.  The inner edges of my mat measure 10.5 x 13.5″, so I used a 1.5″ circle punch and glued on a 7 x 9 circle grid to the poster board, using the inner pencil tracings as a guide.  I glued the circles on edge to edge so that they’d fit perfectly inside the mat.

DIY Graphic Wall Art
I love how the art looks with the white mat.  It creates such a nice contrast to the bold cluster of circles.

Graphic wall art above bookshelf

The art is hanging up in this corner of my living room and I’m sure you can imagine how glaring that space above the bookshelf would be without it hanging there.  I would have gone with a mirror if it weren’t for the mirrors on the right side.  There are actually twelve more of those square mirrors off to the right.  Yeah, another mirror would have been mirror overload.

I’m contemplating making a collection of black and white pieces maybe to hang up all together gallery style.  Probably not to hang here but on another blank wall that’s bothering me!  What do you think about black and white designs?


02/24 Seasonal/Holiday

Flower arranging- Ranunculus, Poppies, and Kumquats

Ranunculus kumquats and poppies

Say the title of this post 5 times fast.  What a mouthful!  These guys are currently trending in the floral design world, and when I saw them this past weekend at an Anthropologie pop-up farmer’s market, I jumped at the chance to design with them myself.  You may have caught a glimpse of them on my Instagram.

I always prefer arranging flowers myself.  It’s hard to say how I do it exactly because I just go with the flow and do what feels right (I’m truly sorry for how unhelpful that is).  In general though, I follow the formula of starting with fillers, followed by adding smaller intermediate blossoms, and then ending with the focal flowers.

Flower Arranging
In order after the filler, I added the kumquats, ranunculus (ranunculuses?  ranunculi?), and the poppy.  I took inspiration from the display at the pop-up market and arranged the flowers in a mason jar, then tied the black ribbon they came with around the rim of the jar.

Now… something beautiful happened a day after I arranged this.

Blooming poppy
A poppy bloomed!  Whaaat?!  You can see the casing still hanging off on the right.  How can that not make your heart soar???

I was actually wishing I had gotten another poppy, and clearly I didn’t know that the alien looking bulb that I added in step 6 was a poppy waiting to be born!

Ranunculus kumquats and poppies arrangement
You can see it sticking out on top to the right.  It unexpectedly added the final, finishing touch, and is absolutely necessary.

What do you think of these blooms?  I’m completely in love with them, if that wasn’t clear already!  And can someone shed light on the plural form of ranunculus?  I’ve seen it used all ways, and I’m thinking there’s no one, “right” way.


02/20 DIY

DIY Mirror Jewelry Wall Hangers


DIY Mirror Jewelry Wall Hangers

I was so excited to find these mirrors at the dollar store because hexagons are currently a huge trend in home decor.  Then I realized later they’re octagons.  Oops.  Still cool, though!

Originally I had only planned on arranging them on a wall, but after deciding that I wanted them to be near my vanity I thought I should make them functional and turn them into jewelry hangers.  It is SO. EASY.
Mirror Jewelry Wall Hangers DIY
All I did was glue on acrylic knobs (THESE are shaped like hexagons) to the mirrors using E6000 Craft Adhesive (affiliate link) and held them in place until the glue set a little bit.  I let them dry overnight before sticking on an adhesive hanger on the back.  Two would have been more stable and less wobbly after sticking on the wall, but one in the center sufficiently holds up each mirror.
DIY Mirror Hangers
The knobs were love at first sight.  I was sold on the copper accents and the acrylic keeps consistent with the look of the mirrors, especially being similar in geometric shape.
DIY Jewelry Hangers
This “vanity” is actually a built-in dresser with an awkward ledge attached on the left.  The blank wall behind this ledge always bothered me, and my default plan was to put up some art but I much prefer decorating with mirrors!  Plus, I’m always looking for new ways to store my jewelry. You can check out another DIY centered around my jewelry obsession here.


Anyone else love decorating with mirrors?  My apartment is officially saturated and I’ll be cooling off from them (for now).


02/17 DIY

Gold Pencil Cups

DIY Gold Pencil Cups
Continuing on with the gold desk accessories!  I think I’ve mentioned this a couple times before, but I’m re-decorating my desk area and I’m incorporating a lot of gold,  The one thing that’s helping me the most with this is gold spray paint, my holy grail craft weapon.

Spray paint is seriously addicting.  The way it can entirely transform objects encourages me to see in shapes instead of colors, because most often something can be done about the color much more easily than the shape.  Take for instance these pencil cups.

Target Chevron Pencil Cups

I found them in the wildly exciting Target dollar spot.  The chevron pattern is alright, but what caught my eye was the geometric shape.  For a dollar each, I thought it was absolutely worth trying to turn them gold, so I used my favorite gold spray paint (affiliate link) and applied three light coats on the outside and on the inner edges at the opening.

Pencil cups painted gold

I’ve found that gold spray paint picks up fingerprints very easily.  For decorative items that I won’t be touching much, I won’t spray on a protective coat, but since I expect to be moving these pencil cups around a lot, I sprayed two light layers of acrylic coating (affiliate link).

Gold pencil cups and caspia

I have an instinctual desire to turn any vessel into a vase.  These cups aren’t fit to hold water, but the dried caspia turned out to be a beautiful alternative!  I can see myself regularly switching out what I put in the cups and relocating them throughout my apartment.

What do you think?  Did you like the chevron pattern better or is gold more your fancy?

02/13 Inspiring Spaces

Decorating With Red

I come across so many inspiring photos of decorated spaces, and unless you’re following me 24/7 on Pinterest, you probably don’t see the majority of them.  So I’m doing something different today by sharing some interiors centered around decorating with one of my favorite colors.

Valentine’s Day being around the corner definitely influenced my desire to look at decorating with red, but I’ve also become very fond of the color ever since adopting my boyfriend’s red couch, which you might have seen a glimpse of here.  Having been forced to decorate around it, I’ve found that my favorite ways to work with red are pairing it with light blue or black and white.  I’m also finding that it can be a surprisingly versatile color!  What do you think?


Red and blue bohemian style
Dining room red chairs
Red rug and turquoise throw
Red desk
Soft reds in a Scandinavian style living room

I LOVE how this Scandinavian style living room incorporates softer shades of red in different textures and patterns.

Red door

Red stools

Office with red accents

Red accent wall

Red wall paper accent wall

Red pendant

And can I just say that I’m obsessed with The Hunted Interior??? Her style, her home, everything Kristin does speaks to me.  Her site is a must for anyone interested in a chic, DIY home.


Black and white kitchen with red accents

And finally, I just had to throw a heart in here.
Heart Backdrop
How epic would it be to work in front of a heart backdrop like that?  It would be like being in a perma blogger photoshoot.  It’s big, bold, and everything beautiful about red.


So how do you feel about decorating with red?  Which of these spaces inspires you?


Images: 1 | 2 | 3 | 4 | 5 | 6 | 7 | 8 | 9 | 10 | 11 | 12 | 13