I don’t mean to ever sound like I’m wishing 5/7ths of my life away, but MAN am I extra glad Friday is here. Had a pretty rough week because I got sick with this cold that everyone seems to have right now, so I’m more excited than usual to get some rest this weekend. While chain-blowing my noise and struggling to breathe, I managed to come across some fun and inspiring stuff I wanted to share with you guys before we all run off for the weekend!
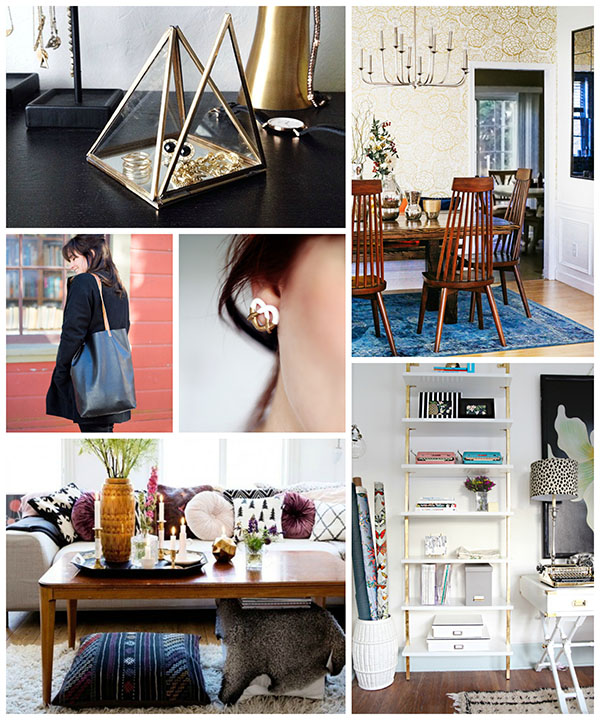
I shared my new pyramid mirror box on Instagram yesterday and everybody seemed to dig it. I’m really into it, too. You can find it here!
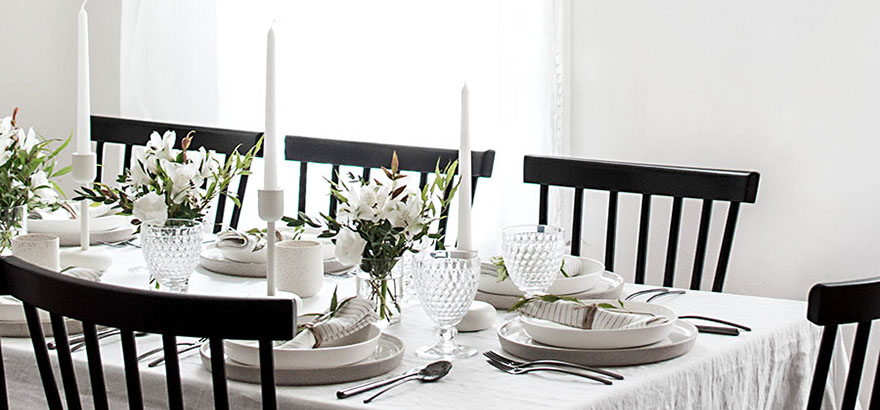
I seriously love that Hygge and West wall paper, even if it’s everywhere. I’m not the type to write something off just because it’s something “everyone” has. I know what I like and that’s it! This beautiful dining room makeover also has me sold on over-dyed rugs. Such a gorgeous blue.
Guys, I seriously need to learn how to sew already so I can make pretty things like this leather tote bag.
If you had simply asked me if I was interested in pretzel shaped earrings, I probably would’ve hesitated, but seeing these gold dipped ones that Fran made has me convinced on what I didn’t think was possible. They’re so chic and adorable all at once!!
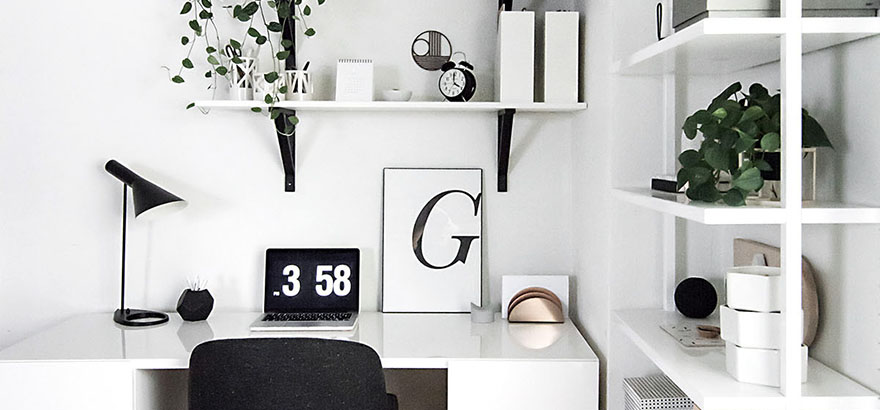
I’ve been eyeing these CB2 shelves and love how the gold foiling was added to them (of course). This entire home office is full of pretty details like this. I very much hate our current coffee table, but justified it at the time because it was dirt cheap and has awesome storage capacity. I’ve been feeling a little stuck on what I would get instead without compromising too much storage, so I’m feeling inspired by this post about not wasting space under your coffee table (mostly just this image and the golden poufs).
ALSO, if you’re going to be in LA on Feb 8th, you should definitely go to this workshop at West Elm LA hosted by my friend Jeran from Oleander and Palm. I’m SO sad I won’t be able to make it, so please go for me. It looks like it’s going to be a lot of fun, and some pretty terrific goodie bags are in store ;).
That’s all, folks. If anyone else is sick, then get well soon please because that really sucks and I’m right there with ya <3.
Have a fantastic weekend, friends! Hope you’re all up to some fun.
Remember when I said that one of my goals this year is to de-clutter because last year I was drowning in clutter? Then soon after I talked about how I’m in a bit of a creative funk and finding it hard to get the wheels rolling again after the holiday madness? I’m convinced the two are completely intertwined.
I started reading The Life-Changing Magic of Tidying Up to get a grip on my clutter issues, and it made one thing instantly clear again, a concept I find really easy to forget:
Tidy Space = Tidy Mind
This quote from the book puts it so perfectly:
“…when you put your house in order, you put your affairs and your past in order, too. As a result, you can see quite clearly what you need in life and what you don’t, and what you should and shouldn’t do.”
How badass is that?? Who wouldn’t want to achieve this?
So often I’ve been frustrated by the constant messes piling up around our apartment, but still I let it be just that- a distraction, a nagging troll that occupied my thoughts and convinced me that my efforts to de-clutter would just be replaced with more clutter, so why even try.
I needed a change in perspective, so I’m going to try a different approach outlined by this book that’s different from anything I’ve heard before. As simple as it is, it’s pretty bold. Want to know the secret?
Throw away everything.
Ok, so that’s a super simplified and dramatic version of it all, but I’ll go into more details on the main concepts, because I know there are more of us out there who feel me on this dilemma and have decided to take on this battle as a high priority.
1) Identify Your Goal
The book explains this as the most important first step and encourages specific visualization of the lifestyle you want to achieve should you successfully de-clutter.
Story time. A recent event was my rude awakening for why things needed to change. We had an unannounced guest. Guys… it nearly killed me, and is why I frequently kind of joke that I need at least one week notice from anyone that wants to come over. The mortification I felt over there being nowhere for him to sit because every surface was occupied by materials or scraps for one of the 47 projects I was working on at the time was unbearable. Some might think I’m overreacting, but to me this brings to light what my goal is: I want a lifestyle where people can come over and I won’t have to worry about them having to move trash in order to sit down. Simple! This is in addition to wanting to free up space so I can enjoy both working and relaxing in my home, and not feeling stressed about having to tidy all the time.
2) Discard
This refers to a one time tidying, major overhaul of discarding all items that do not bring you joy. We’re talking like 13 garbage bags to toss, donate, or sell. Can you imagine how good it would feel to be surrounded only by items you truly use and love? It requires examining every possession one by one, holding it in your hand, and asking yourself if it is either useful or makes your heart soar. If the answer is no, toss it, baby. The author stresses that this inner dialogue you have with yourself is so important, to not even listen to music or watch TV while you do it. It should be a serious, almost meditative practice, where you really pay attention to the energy of the item and what you want do with it.
I’ve never in my life taken the time to go through all my possessions and re-evaluate what I still enjoy and what I forgot even existed (I’m looking at you, leather shorts shoved up against the back of my dresser). I’d like to think a bonus that would come out of this activity is grooming a “buy less choose well” mentality, which is something I definitely want to commit to.
An important factor that the author stresses is to do this in a short amount of time. In my mind, I was thinking I could get this done in a weekend, but the timeline she gives as an example is six months. At first I was like whaaat but then I thought about my vase collection and how that itself will probably take a week of examining, so yea, six months sounds reasonable.
3) Organize by Category
The author recommends examining objects by category, not by location/room. This is a completely new concept to me, but makes a lot of sense. For example, she recommends starting with clothes by gathering every clothing item from every room into one pile, and maybe into subcategories if there are a ton of items. This is for two reasons, 1) to get an accurate visual for how much of the item you actually have and 2) to notice repeats and similar items that might be an easy place to start for deciding what to toss. I’ve actually started doing this with my jewelry and have tossed half of it already, one of which were earrings from Claire’s that I wore to PROM (WHY did I still have those?!?)
A funny thing the author mentions is warning not to downgrade old clothes into loungewear. I am so guilty of just making anything I wouldn’t wear in public another pair of pajamas. My pajama drawer doesn’t even close right now. It has got to go.
My plan is to hack away category by category each weekend and try to do it all within a 6 month period, and I agree, it sounds a bit daunting, but I really do think this is one of those the-hardest-part-is-starting situations. The idea is to make it such a big feat with drastic results in lifestyle changes that reverting back becomes an impossibility.
What do you think? Is this something you’d try or have tried before? Was this so totally boring? Are you guys interested in this kind of stuff?
I really recommend you check the book out if you’re trying to get serious about tidying and de-cluttering, and because I only did a so-so job of summarizing the main points. It’s a quick and eye-opening read, and has interesting anecdotes that address things like why you shouldn’t let your mother see what you’re throwing away. Hilarious, though that’s not my mom. She’s really, really good at throwing things away, a talent I unfortunately did not inherit from her.
It doesn’t get much more traditional Valentine’s Day than this! I’ll always love a classic red heart and the way it can stand alone and still be so bold. Combined with my other love for pom poms, I put together these mad cute Valentine’s Day treat bags you can hand out to friends, coworkers, or people you don’t know very well ;).
As small as an embellishment like this is, that little extra step can make the simplest gestures that much more special. So while we’re more than three weeks away from Valentine’s Day, there’s a good amount of time to be thinking about how to spread the love this holiday, starting with these pom pom heart treat bags that I’m sharing the tutorial for over at the PBteen blog. <—See you there!
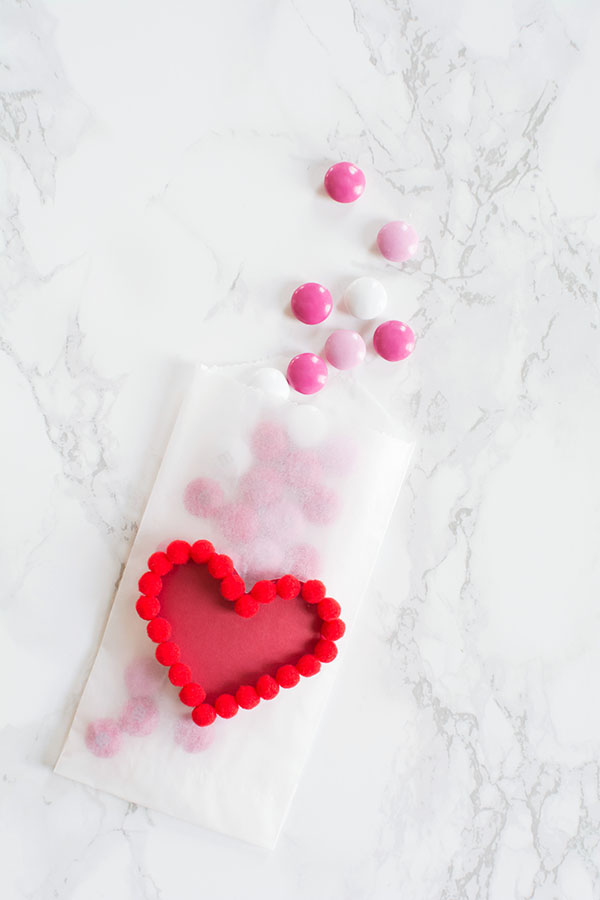
Serious question for you guys…. does anyone like the taste of conversation hearts? I imagine their consistency is the same as eating chalk. I consider them the candy corn of Valentine’s Day- nice to look at, but not to eat. I was thinking about this when I was deciding on which candy to get for this project, and while conversation hearts would have been cute, I’d rather eat M&M’s. We’ve already made it half way through a big bag. Edible props are better when they’re chocolate <3.
If you’re still here, go visit the PBteen blog for the DIY! And/or you can stay here and chat with me about how conversation hearts do not taste good, whatever you wanna do~
So I guess I’m making Washi tape creations on my desk wall whenever the holiday inspiration strikes. I’m really missing the tree I did for Christmas! Valentine’s Day is an odd one though, a holiday I don’t specifically decorate for, but I do love hearts, and I’m in a heart-y mood with that day coming up soon. Plus, it’s Washi tape, so it’s very little fuss and commitment, and the only other thing you need is a blank wall- in a cubicle, at a party, in the bathroom, anywhere is a good choice ;).
I made this geometric diamond-ish design in the above steps. Making the heart outline was the hardest part since that’s where I had to decide the heart proportions. For sure I had to unstick and re-stick the tape many times, but that’s why we Washi. I also used scissors to cut the tape at the corners of the heart so that the edges would be clean. Other than that, there’s not much else to it! I find this activity to be pretty relaxing, almost meditative. Threw on some tunes and I was done in less than 30 minutes.
I love these kinds of graphic, geometric shapes and liked the idea of using them for a different approach to V-Day. Boyfriend had me feeling like it was too different, though. He saw the heart and was like oh hey that’s cool. I had a feeling he didn’t know what it was so I told him it was a heart, after which he told me he thought it looked like a mouse. What an imagination!
Are you into decorating for Valentine’s Day or nah? It’s less about decor (unless it’s a party) and more about ways to give love, right? Well, I’ve got another fun idea coming for ya tomorrow with some more traditional V-Day vibes, and no, it doesn’t look like a mouse. See you back here then!
Hey… we’re already half-way through January. Time overall has yet again managed to fly by, but this week was a bit of a drag for me. I’ve been sensing and reading about a struggle in the blogging community lately with returning to the blog grind after the holidays, and I’m right there with everyone else. This week was a lot of staying up late, second-guessing, and brainstorming about ideas I didn’t have, and to put it frankly, it’s bumming me out! For as much time as I spent this week trying to plan for the blog, there isn’t much to show for it. I did enjoy staying up with Jimmy Fallon to keep me company, though. Love that guy.
That’s probably why half of today’s finds are related to this struggle. I haven’t at all figured out the best way to get out of these annoying ruts, but there’s some good advice and insight out there on this stuff that’s worth thinking about. That’s all at the end of this post, which I bet you’re going to want to skip to, but first let’s look at some other finds I’ve been inspired by this week.
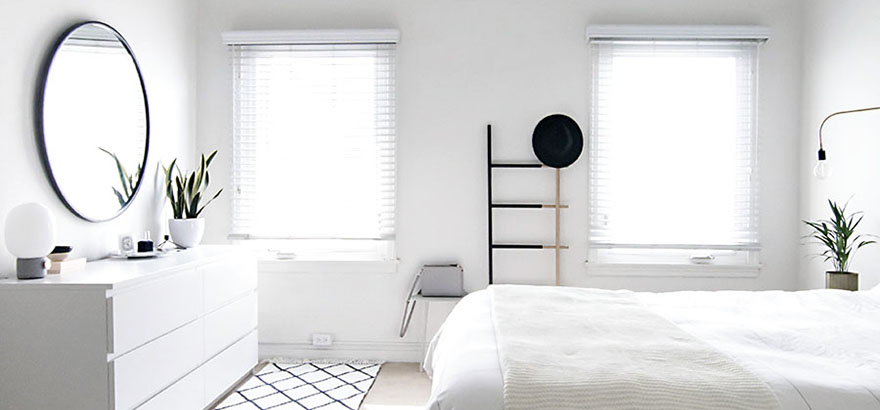
I just started understanding the need for a ladder in the home as I’ve noticed my throw collection grow. This copper ladder from BrittanyMakes is gorgeous, easy to make, and simple enough to fit in with different styles.
I’m going to go ahead and say this is the prettiest yoga mat strap there is. The ladies of The Merry Thought are too amazing at simple and beautiful crafts!
You guys are already following Dream Green DIY, right? Carrie shared a tour of her living room and it’s full of so many pretty details, like this custom industrial shelving.
Mandi from Vintage Revivals is so good at saying everything I want to say in the most perfect way possible. Her honesty and humor make her so relatable, and I wonder if you too can relate to this post about re-charging the creative battery.
This is probably the most helpful and inspiring post I’ve read about dealing with blogger burnout. Blogger or not, everyone can benefit from this.
Bonus find: This article is an excellent read about holding true to yourself and having the confidence to do so. Thing is, there’s an f-bomb in almost every sentence, which I found entertaining and at times pretty creative at how the author was able to do this and still make profound points. It’s inspiring if you can look past all the swearing, haha! You’ve been warned, so if vulgarity doesn’t bother you, read on right here.
Another bonus: Rachel at The Crafted Life chats about staying motivated and I was nodding my head “yes” to all of it. Join the conversation here!
Is anyone still here? I understand, there’s a lot of good stuff I just shared to check out. While you’re doing that, I’m going to blabber a little more.
This weekend is an exciting one. Boyfriend’s company holiday party (in January?) is in Newport Beach, so we got a hotel room and we’re going to make it a mini getaway. I’m so looking forward to it, if not just for rest, but simply for a good time with the best guy ever. Instead of stressing over all the work I should be doing, like I normally do, I’m going to enjoy the crap out of this weekend. I’ll maybe bring my camera, too. Haven’t done an “Around Town” post in a while because I am lazy keep forgetting to take photos. We’ll see!
I’ve been meaning to do another leather DIY after how much I loved my first encounter with the stuff, but even better about this one is that it was boyfriend requested! Just a simple and sleek leather keychain to help carry around keys. Happy to do it, sir. I was already feeling inspired by these key rings from The Everygirl, so it was meant to be.
I actually made three, but the first one was a complete disaster because I was rushing to beat sundown (blogger. problems.) so I’ll share a couple morsels of cautionary tips as I go on with the instructions. In general though, this is a fairly simple DIY and a great beginner project for anyone wanting to get into leather crafting.
Here are the rough measurements for the leather piece. I used a rotary cutter and ruler to cut off a one inch wide strip, then used a pencil to draw out the little trapezoid shaped cut-outs shown above. Those smaller pieces were cut with an X-ACTO knife, and was probably the most difficult part. Getting those corners cut clean takes patience, guys.
Mistake #1: I didn’t think at all at first about how long I wanted the loop to be so I just left it the length that it was, only to find out later that it was awkwardly long. The next time around I measured and cut the loop length to 6″ as marked above, but the actual leather in the photos of all the steps is longer, so just an FYI for anyone that was detailed enough to notice that it didn’t look like 6″. Anyone?
The trapezoid cut-outs are there to make a thinner loop for the key ring to go, which becomes more obvious when folding the short end over, then the long end over on top. This is how the leather strap will be constructed.
So this part is a little weird. I already had this leather awl and thought it would be enough to poke a hole big enough for the rivets, but it wasn’t. This is where I want to say that it’s best to use a leather punch for the holes after first marking where they should go, then to punch out a hole in each layer of the leather. Buuuuuut if you’re like me and want to avoid getting a leather punch, I improvised by poking the awl through all three layers of leather, then enlarging each hole by sticking an X-ACTO knife through in a cross formation. It isn’t neat and it’s a bit tricky, but it worked. Just need to be careful not to push the knife too far into the hole or else it will cut a slit that’s too big (Mistake #2 from my first time around).
The best part. Have you used rivets for anything? They’re amazing, and this rivet kit is spectacular. After slipping the key ring through and pushing the rivet backing through the holes, I hammered the rivet shut.
Mistake #3: Maybe it was the adrenaline from rushing, but for the first keychain I made, I bashed the life out of the rivet. This somehow misaligned the top and bottom and it shut diagonally and off-center, which wasn’t cute at all. Bashing is completely unnecessary. Light taps with the hammer are sufficient, and you can go progressively harder if needed, but not too hard.
Here’s the back side of the keychain. SO satisfying to see how good the rivet shut. I sincerely hope you’ll soon know what that joy feels like if you don’t already.
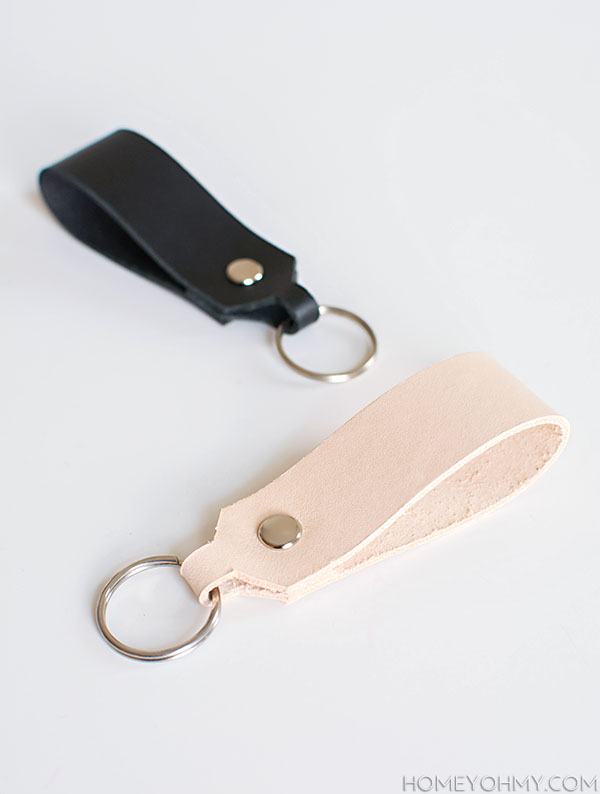
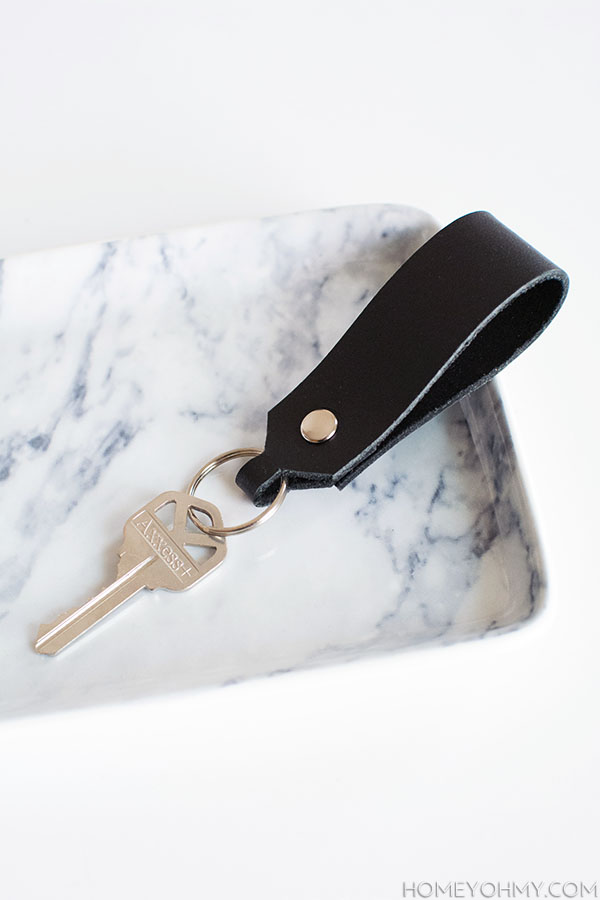
One for him.
One for me!
I’ve totally been in this kind of color mood lately, namely no color. Is it the winter? Neutrals are a favorite forever, but just even more so lately. Also, I guess tooling leather only comes in so many colors, ha! Boyfriend initially requested brown, but I couldn’t even find that. Poor him. Which of these two colors do you prefer?
 I don’t mean to ever sound like I’m wishing 5/7ths of my life away, but MAN am I extra glad Friday is here. Had a pretty rough week because I got sick with this cold that everyone seems to have right now, so I’m more excited than usual to get some rest this weekend. While chain-blowing my noise and struggling to breathe, I managed to come across some fun and inspiring stuff I wanted to share with you guys before we all run off for the weekend!
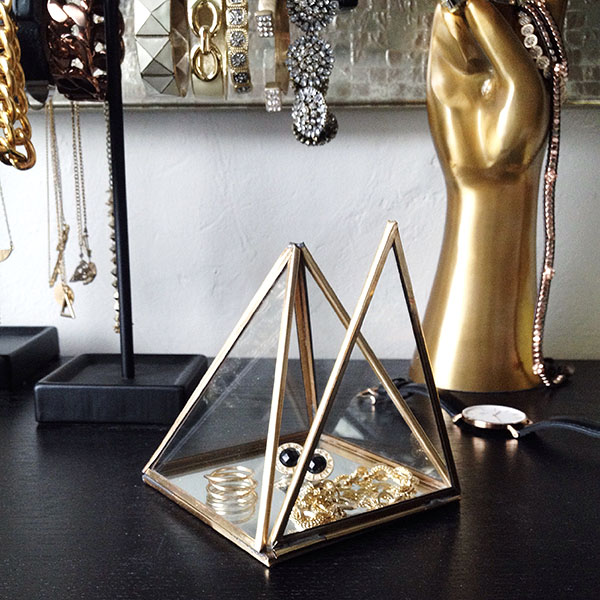 I shared my new pyramid mirror box on Instagram yesterday and everybody seemed to dig it. I’m really into it, too. You can find it here!
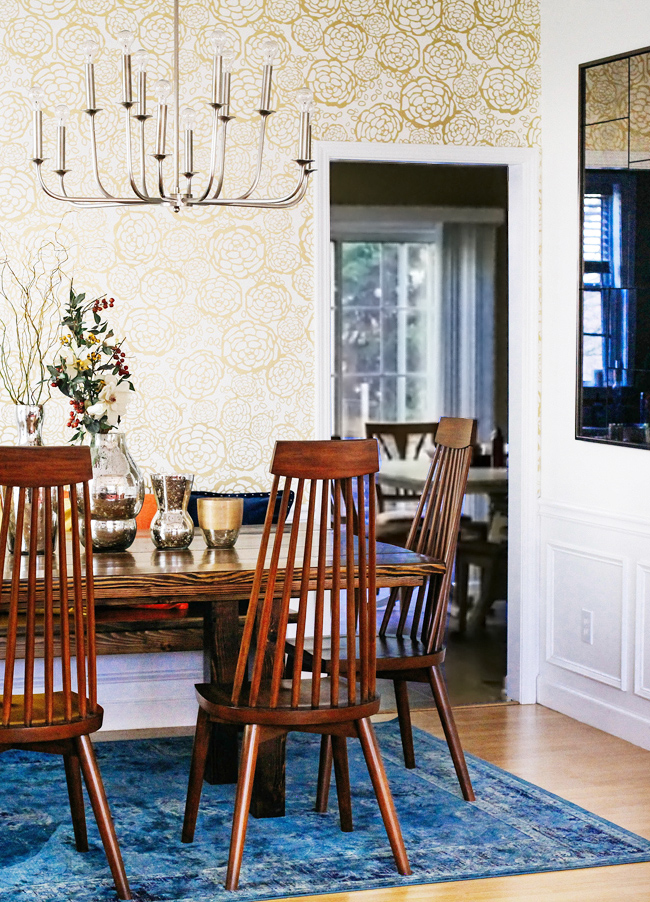 I seriously love that Hygge and West wall paper, even if it’s everywhere. I’m not the type to write something off just because it’s something “everyone” has. I know what I like and that’s it! This beautiful dining room makeover also has me sold on over-dyed rugs. Such a gorgeous blue.
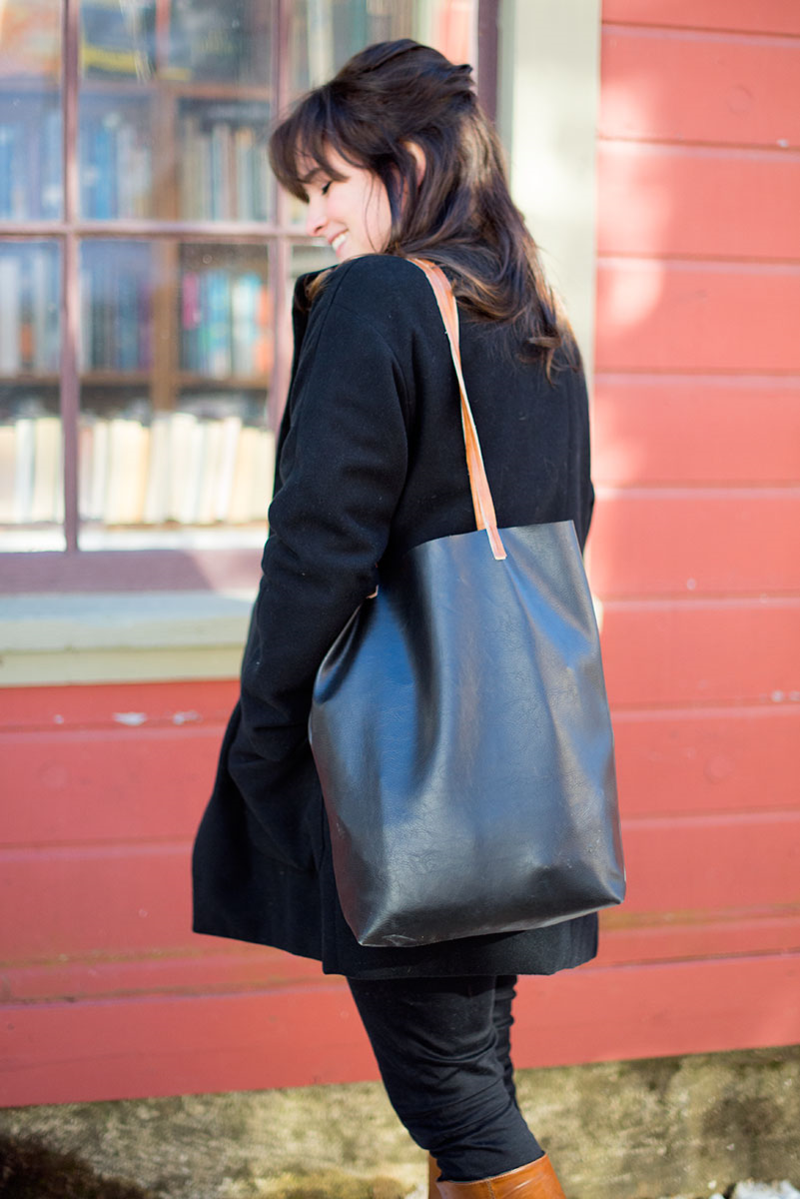 Guys, I seriously need to learn how to sew already so I can make pretty things like this leather tote bag.
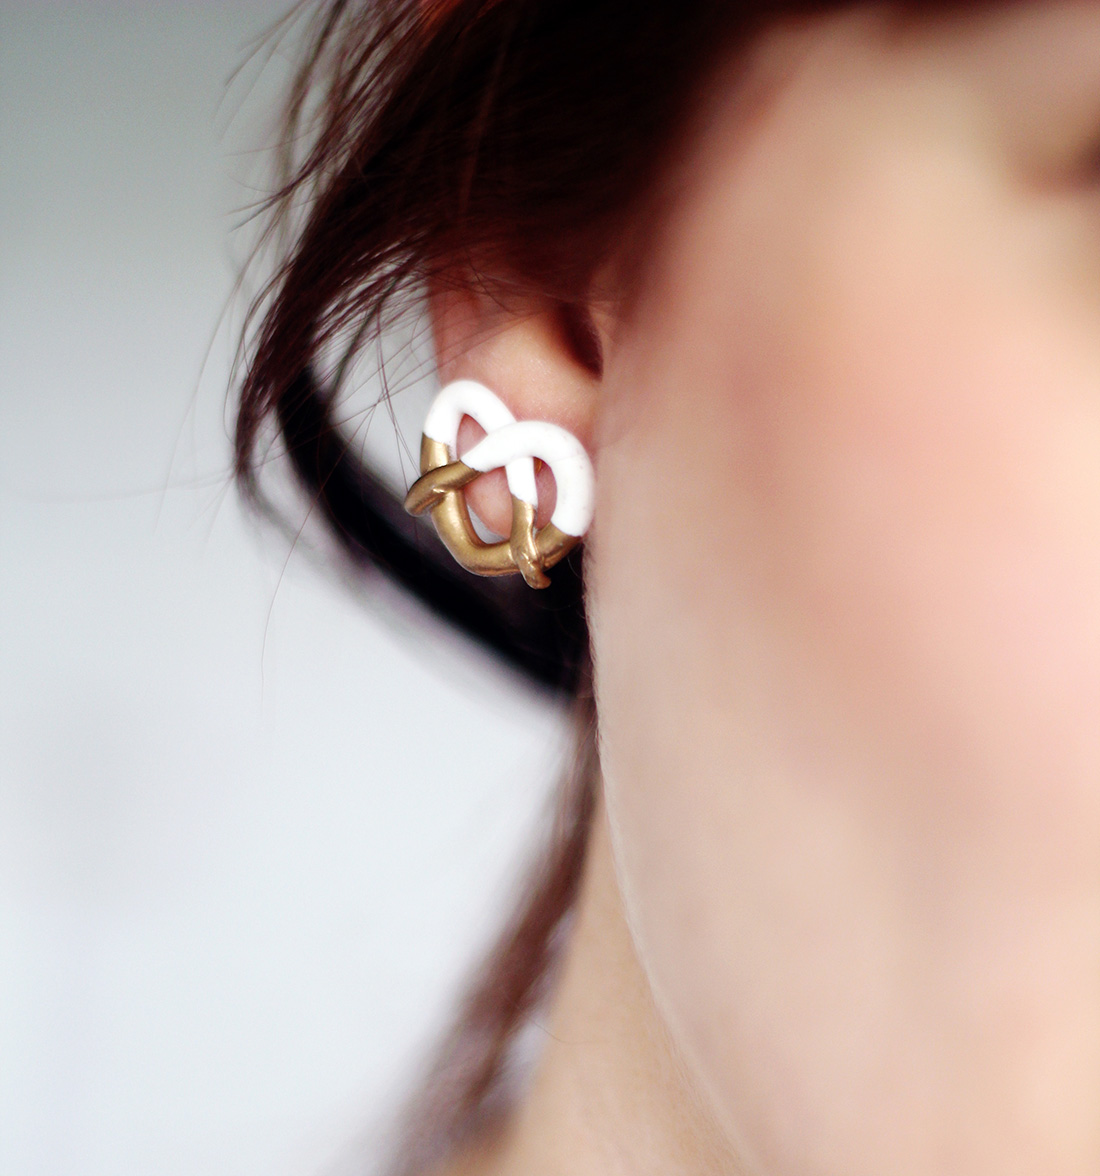 If you had simply asked me if I was interested in pretzel shaped earrings, I probably would’ve hesitated, but seeing these gold dipped ones that Fran made has me convinced on what I didn’t think was possible. They’re so chic and adorable all at once!!
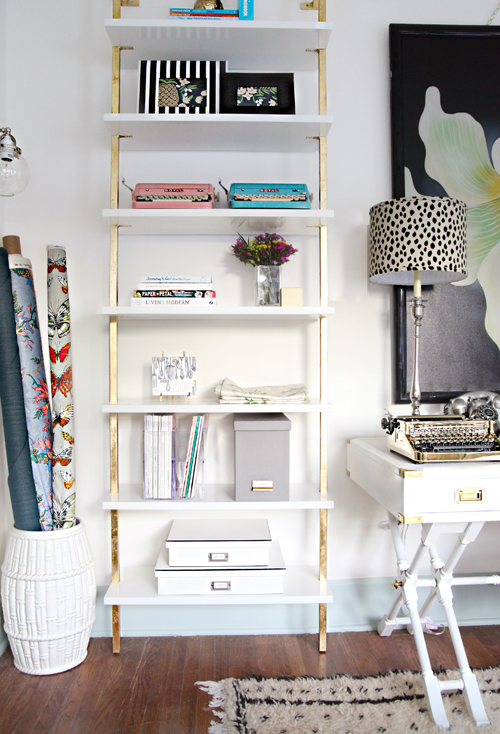 I’ve been eyeing these CB2 shelves and love how the gold foiling was added to them (of course). This entire home office is full of pretty details like this.
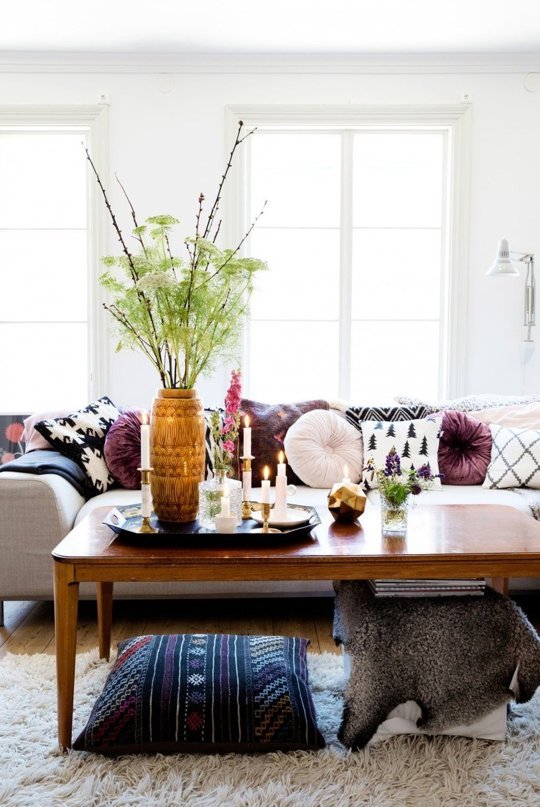 I very much hate our current coffee table, but justified it at the time because it was dirt cheap and has awesome storage capacity. I’ve been feeling a little stuck on what I would get instead without compromising too much storage, so I’m feeling inspired by this post about not wasting space under your coffee table (mostly just this image and the golden poufs).
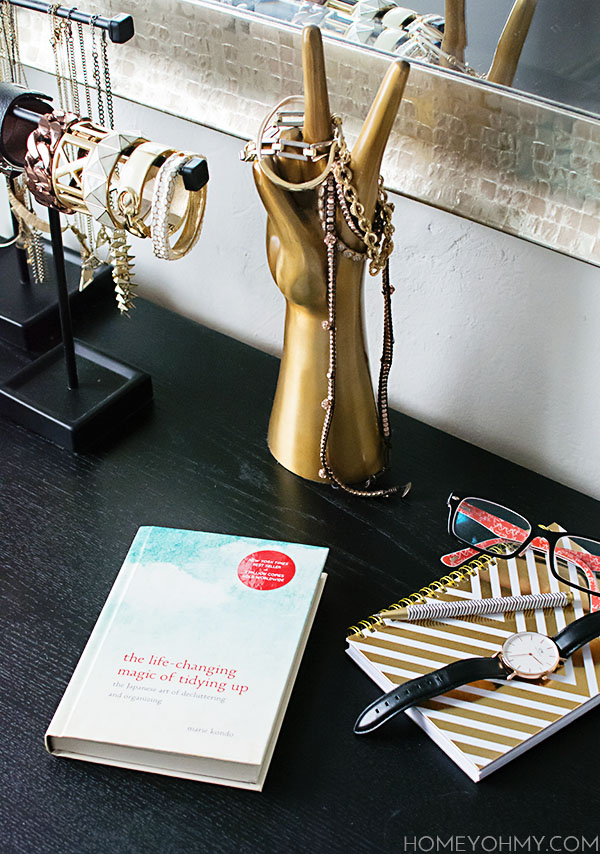 Remember when I said that
 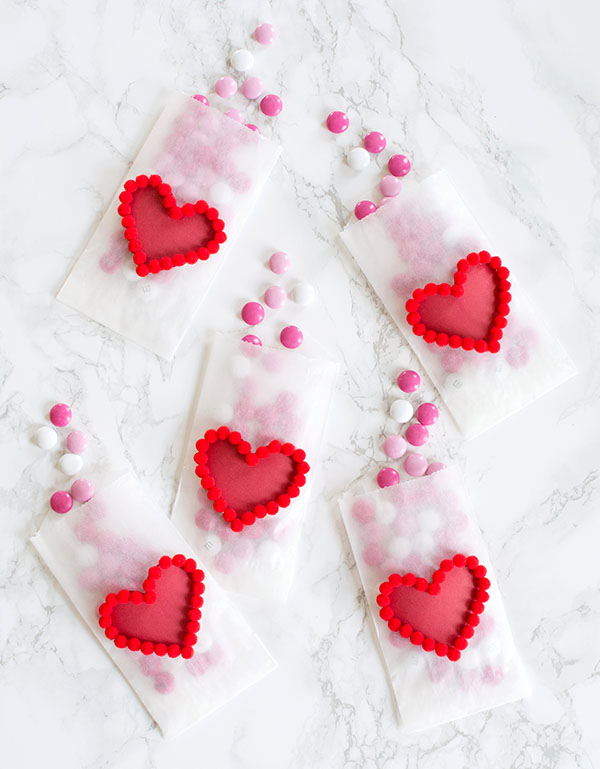 It doesn’t get much more traditional Valentine’s Day than this! I’ll always love a classic red heart and the way it can stand alone and still be so bold. Combined with my other love for pom poms, I put together these mad cute Valentine’s Day treat bags you can hand out to friends, coworkers, or people you don’t know very well ;).
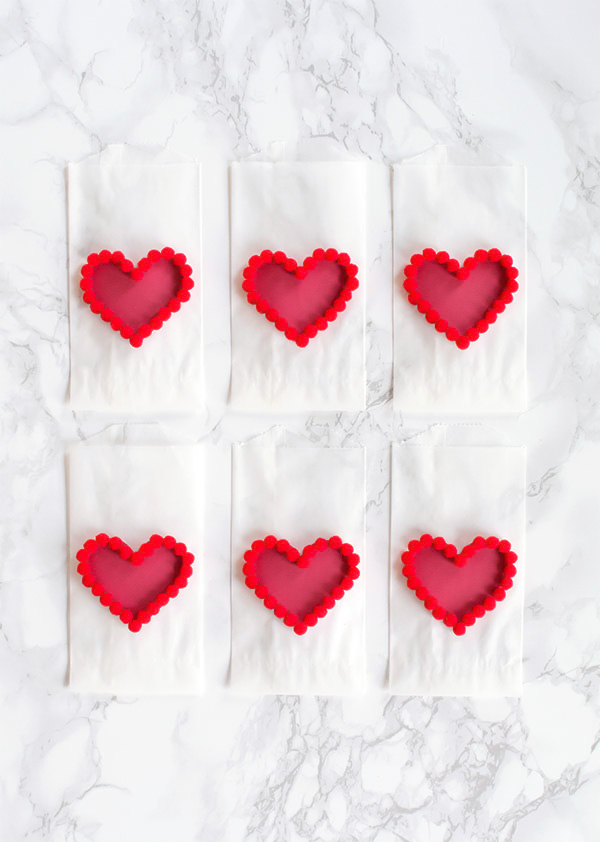
 Serious question for you guys…. does anyone like the taste of conversation hearts? I imagine their consistency is the same as eating chalk. I consider them the candy corn of Valentine’s Day- nice to look at, but not to eat. I was thinking about this when I was deciding on which candy to get for this project, and while conversation hearts would have been cute, I’d rather eat M&M’s. We’ve already made it half way through a big bag. Edible props are better when they’re chocolate <3.
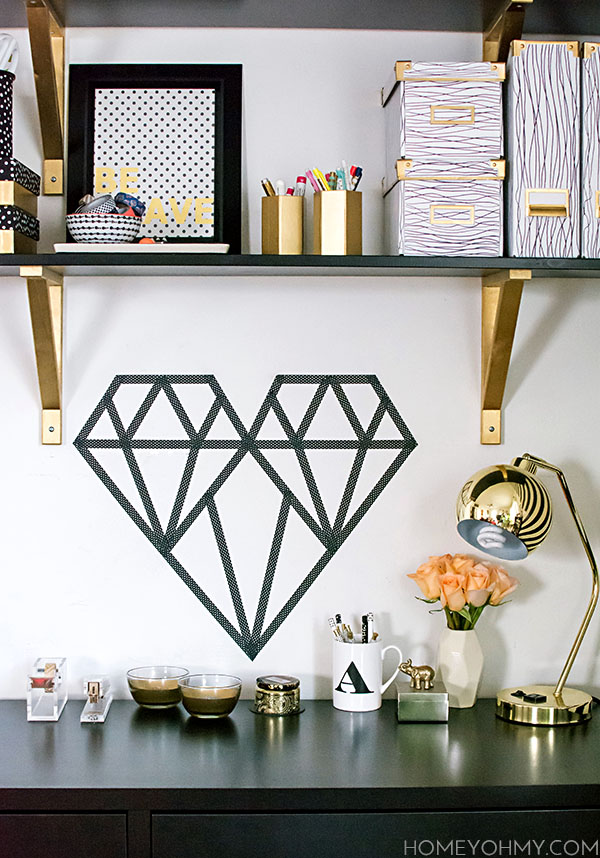 So I guess I’m making Washi tape creations on my desk wall whenever the holiday inspiration strikes. I’m really missing the
 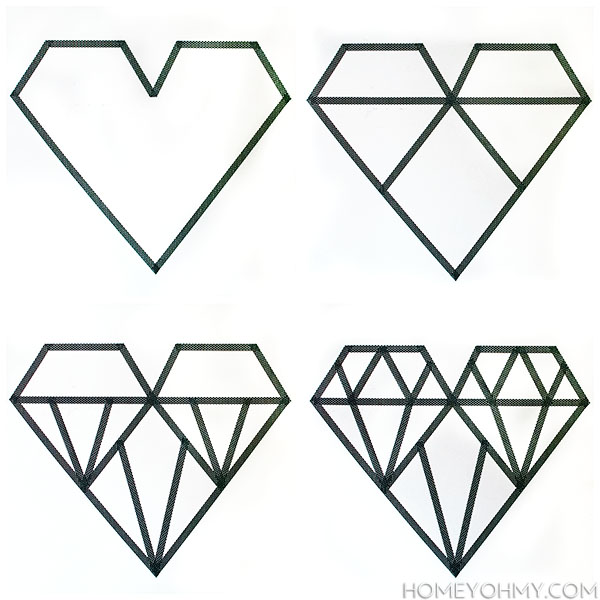 I made this geometric diamond-ish design in the above steps. Making the heart outline was the hardest part since that’s where I had to decide the heart proportions. For sure I had to unstick and re-stick the tape many times, but that’s why we Washi. I also used scissors to cut the tape at the corners of the heart so that the edges would be clean. Other than that, there’s not much else to it! I find this activity to be pretty relaxing, almost meditative. Threw on some tunes and I was done in less than 30 minutes.
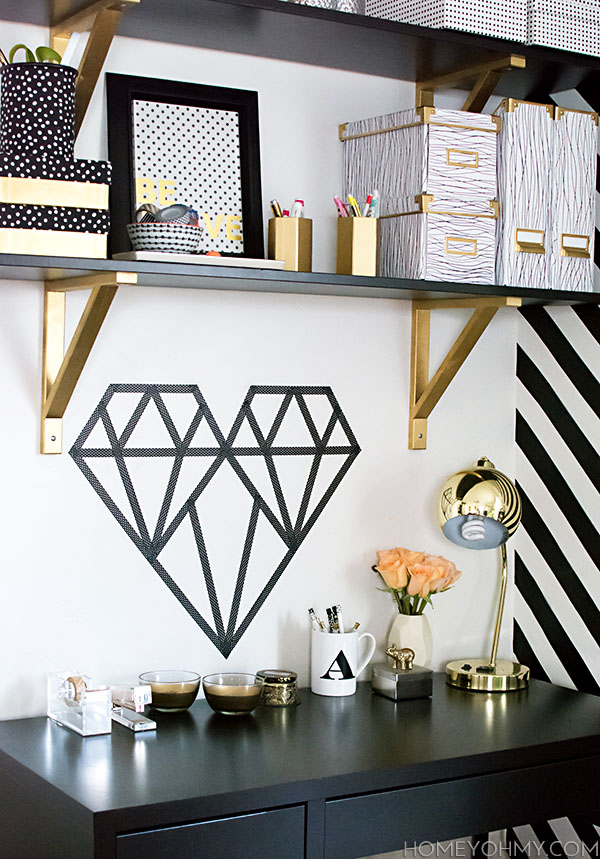 I love these kinds of graphic, geometric shapes and liked the idea of using them for a different approach to V-Day. Boyfriend had me feeling like it was too different, though. He saw the heart and was like oh hey that’s cool. I had a feeling he didn’t know what it was so I told him it was a heart, after which he told me he thought it looked like a mouse. What an imagination!
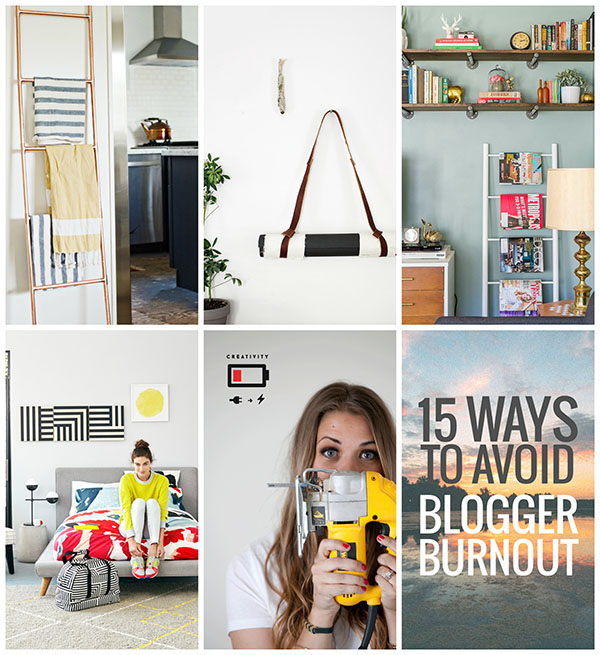 Hey… we’re already half-way through January. Time overall has yet again managed to fly by, but this week was a bit of a drag for me. I’ve been sensing and reading about a struggle in the blogging community lately with returning to the blog grind after the holidays, and I’m right there with everyone else. This week was a lot of staying up late, second-guessing, and brainstorming about ideas I didn’t have, and to put it frankly, it’s bumming me out! For as much time as I spent this week trying to plan for the blog, there isn’t much to show for it. I did enjoy staying up with Jimmy Fallon to keep me company, though. Love that guy.
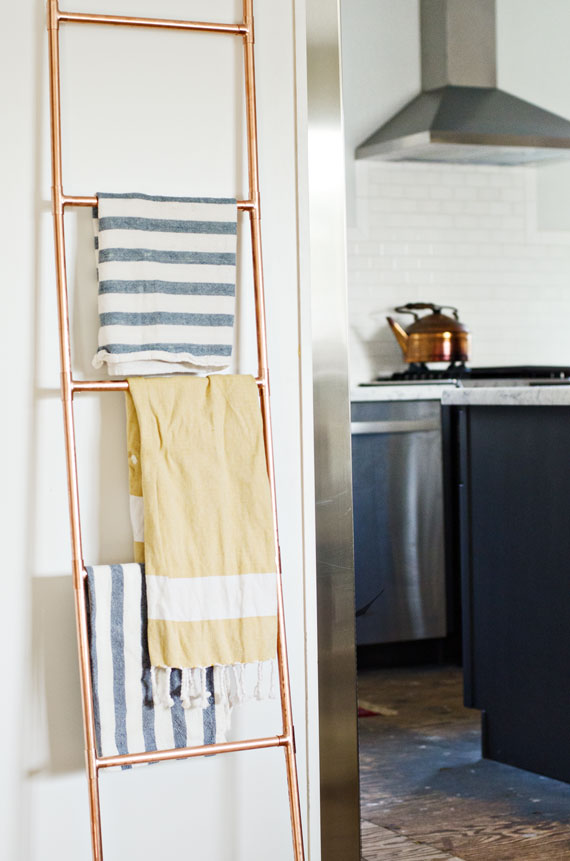 I just started understanding the need for a ladder in the home as I’ve noticed my throw collection grow. This
 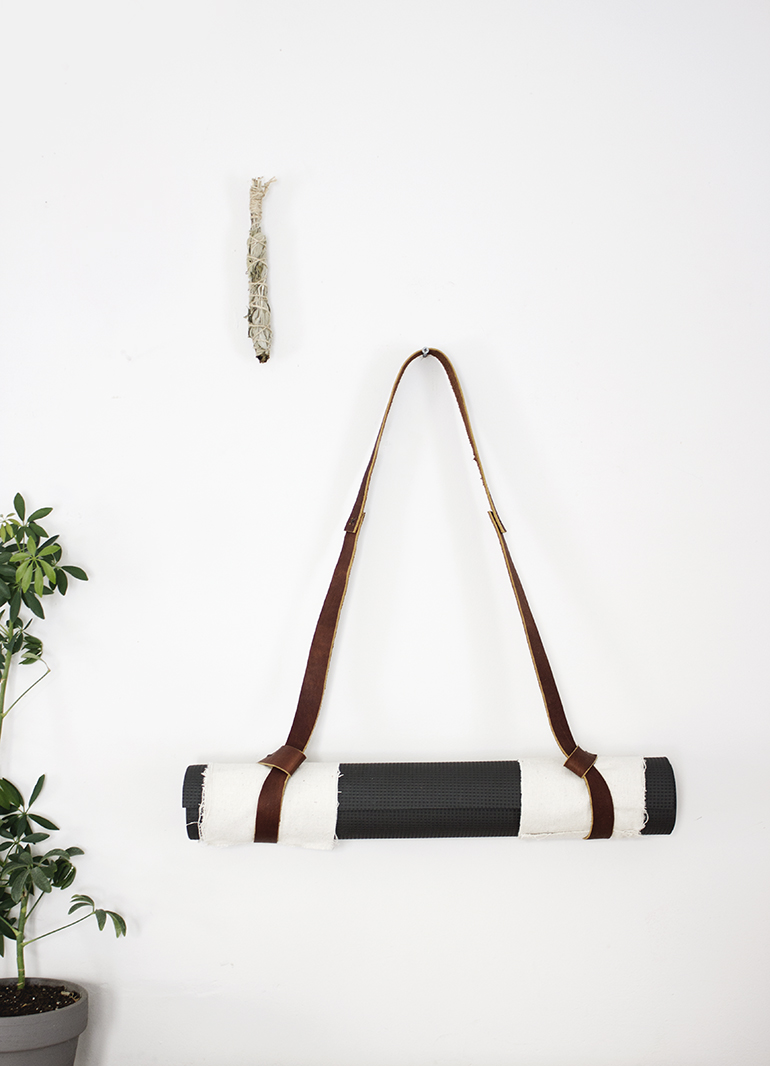 I’m going to go ahead and say this is the prettiest
 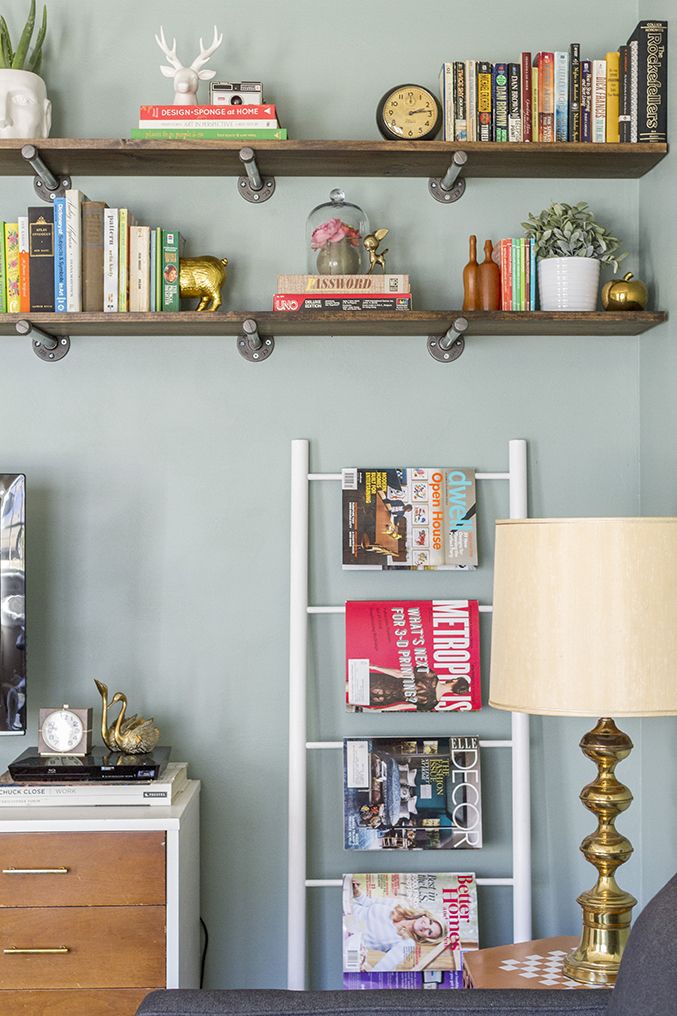 You guys are already following Dream Green DIY, right? Carrie shared a
  What. A perfect. Collaboration.
  Mandi from Vintage Revivals is so good at saying everything I want to say in the most perfect way possible. Her honesty and humor make her so relatable, and I wonder if you too can relate to
 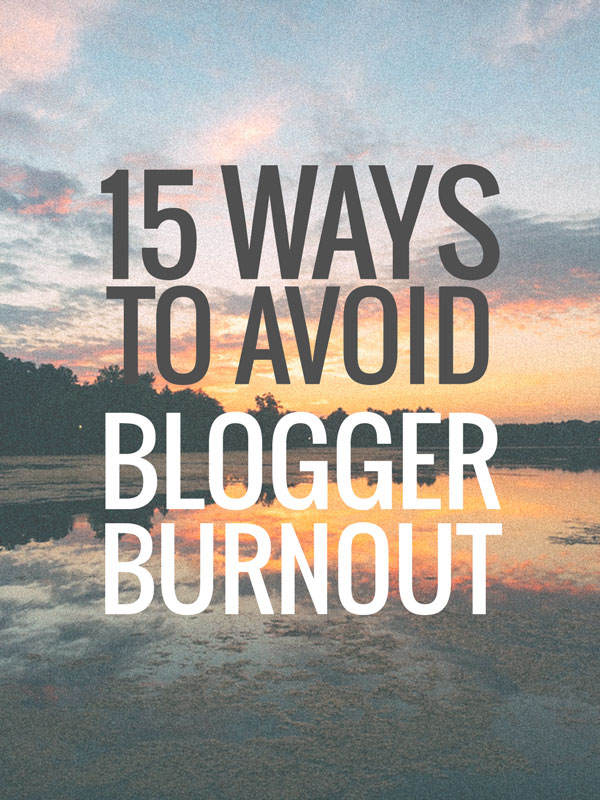 This is probably the most helpful and inspiring post I’ve read about
 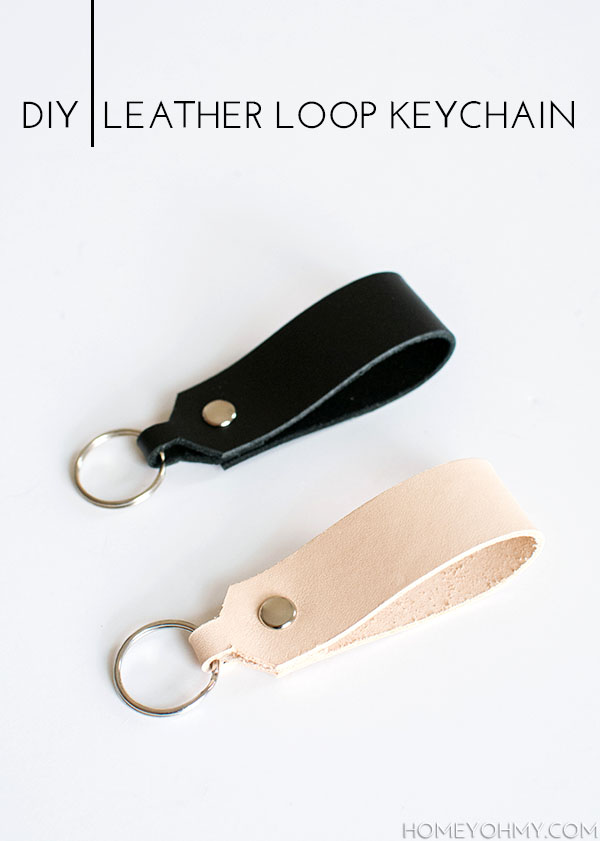 I’ve been meaning to do another leather DIY after how much I loved
 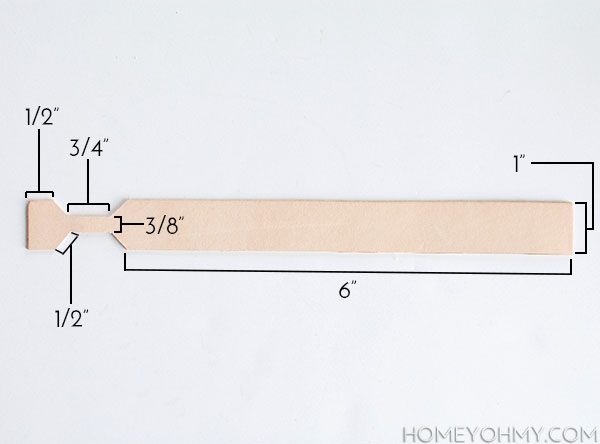 Here are the rough measurements for the leather piece. I used a
 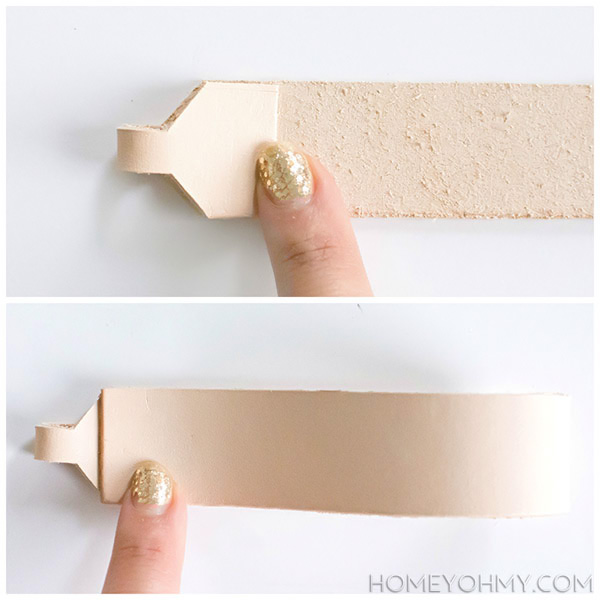 The trapezoid cut-outs are there to make a thinner loop for the key ring to go, which becomes more obvious when folding the short end over, then the long end over on top. This is how the leather strap will be constructed.
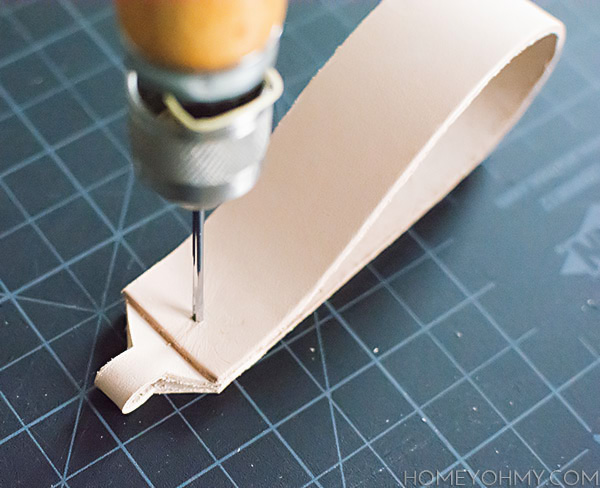 So this part is a little weird. I already had this leather awl and thought it would be enough to poke a hole big enough for the rivets, but it wasn’t. This is where I want to say that it’s best to use a
 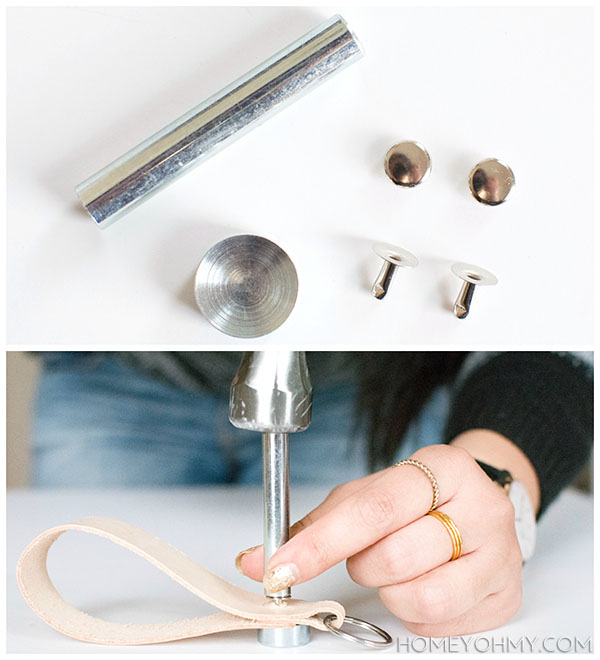 The best part. Have you used rivets for anything? They’re amazing, and this
 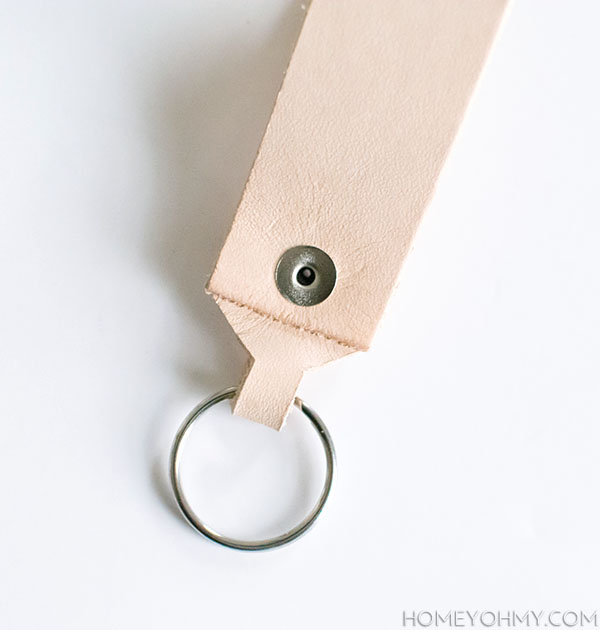 Here’s the back side of the keychain. SO satisfying to see how good the rivet shut. I sincerely hope you’ll soon know what that joy feels like if you don’t already.
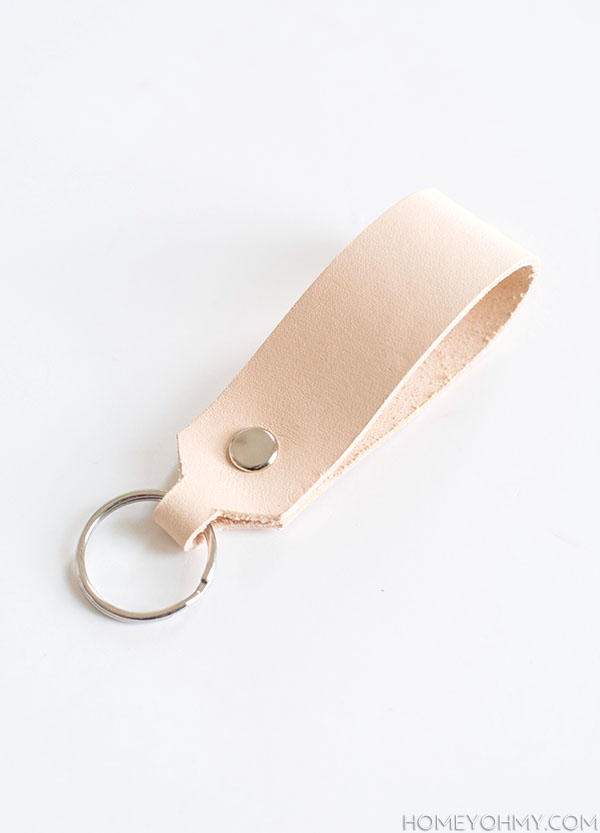
 One for him.
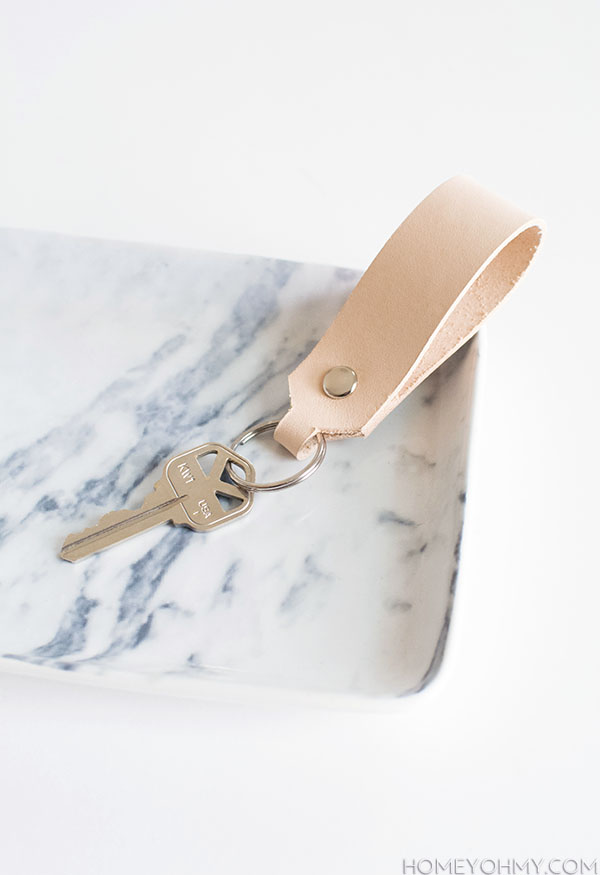 One for me!
 I’ve totally been in this kind of color mood lately, namely no color. Is it the winter? Neutrals are a favorite forever, but just even more so lately. Also, I guess tooling leather only comes in so many colors, ha! Boyfriend initially requested brown, but I couldn’t even find that. Poor him. Which of these two colors do you prefer?