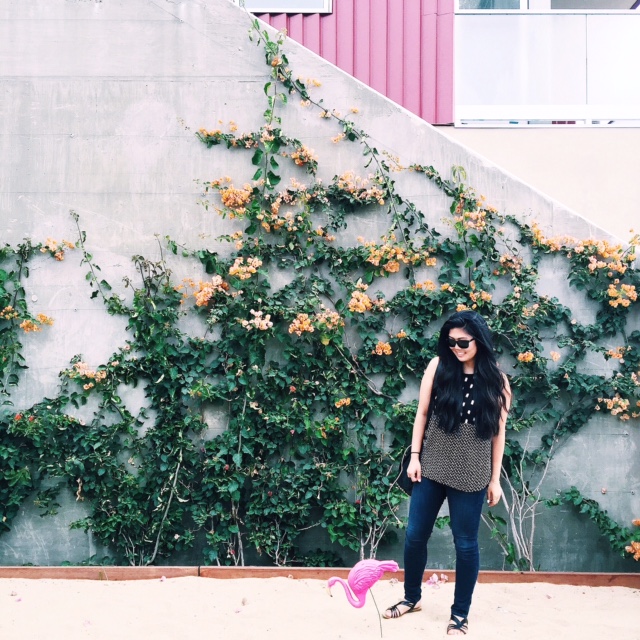
It’s backyard/patio/outdoor space envy season, guys. As boyfriend and I think more about what our ideal home would be like, having an outdoor space is near the top of the list for both of us. I’m really not too picky about it either- enough space for a couple chairs and a fire-pit (we’ll tell him it’s a grill) and I’m good, really. Just somewhere to kick back and hang out outside is such a luxury for summer, or pretty much year-round if we’re talking weather like LA (grateful), so no doubt we’d get good use out of it.
Some current favorite outdoor inspiration:
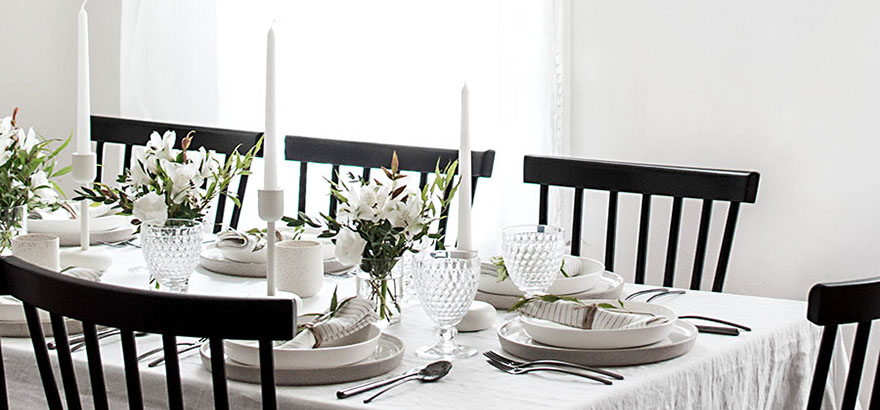
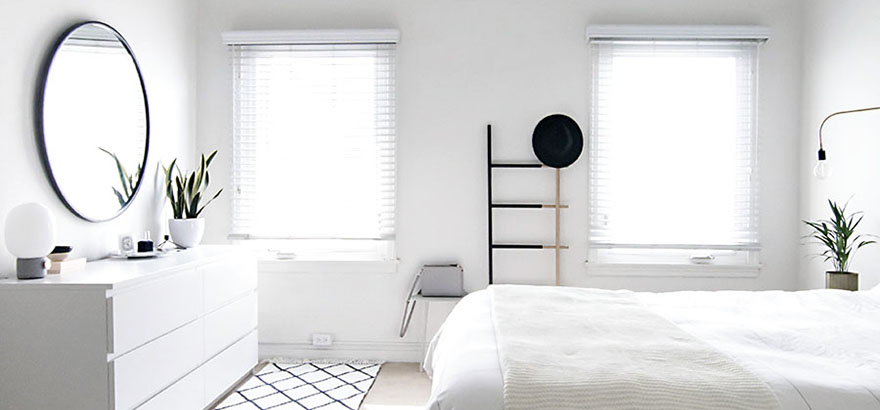
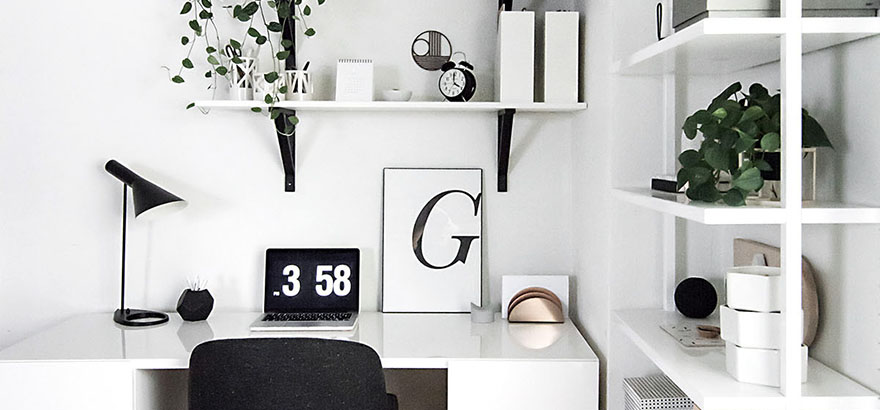
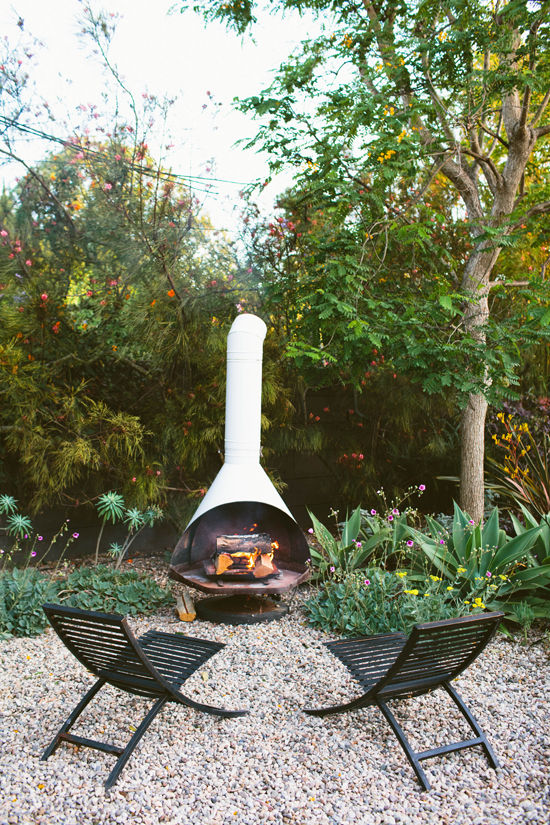
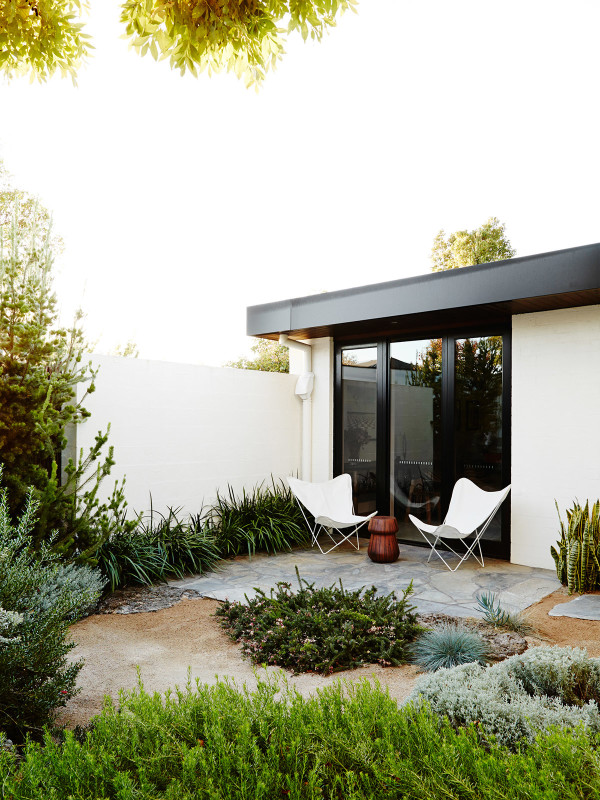
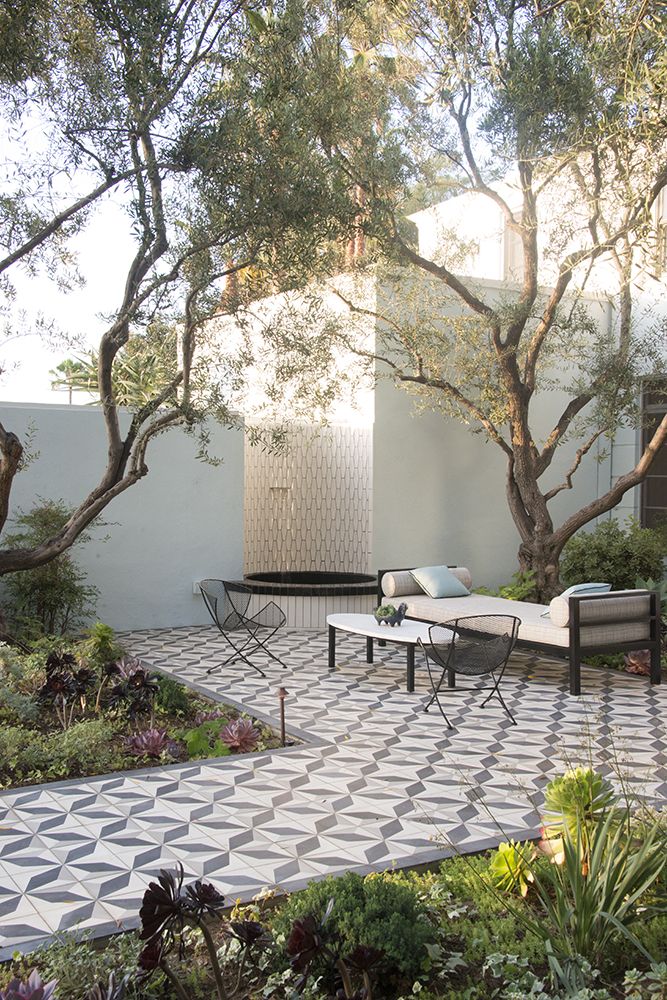
I swear I wasn’t intentionally searching for monochrome spaces. It’s just what happens these days as I realize more and more that it’s my favorite. I think I’m on to something.
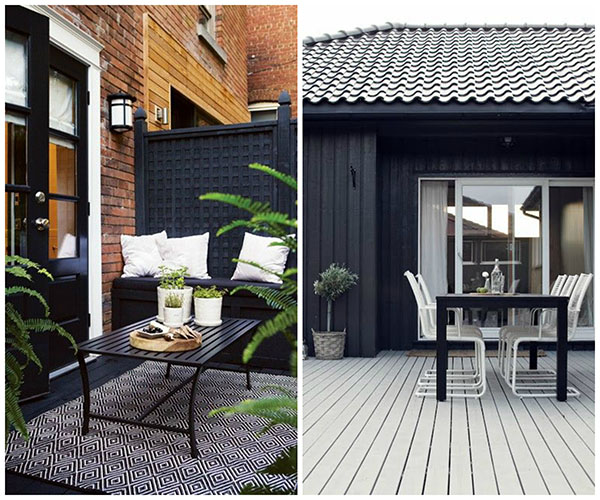
Does any real person’s backyard actually look like this? That tile is dreamy!I can also admit that I look forward most to putting up globe lights. I must. Or hammocks. A rooftop deck works too, I’ll take it. And those chairs!
Got a favorite among the bunch here? Feeling the same envy as me or do you already enjoy an outdoor space of your own (luckyyy)?
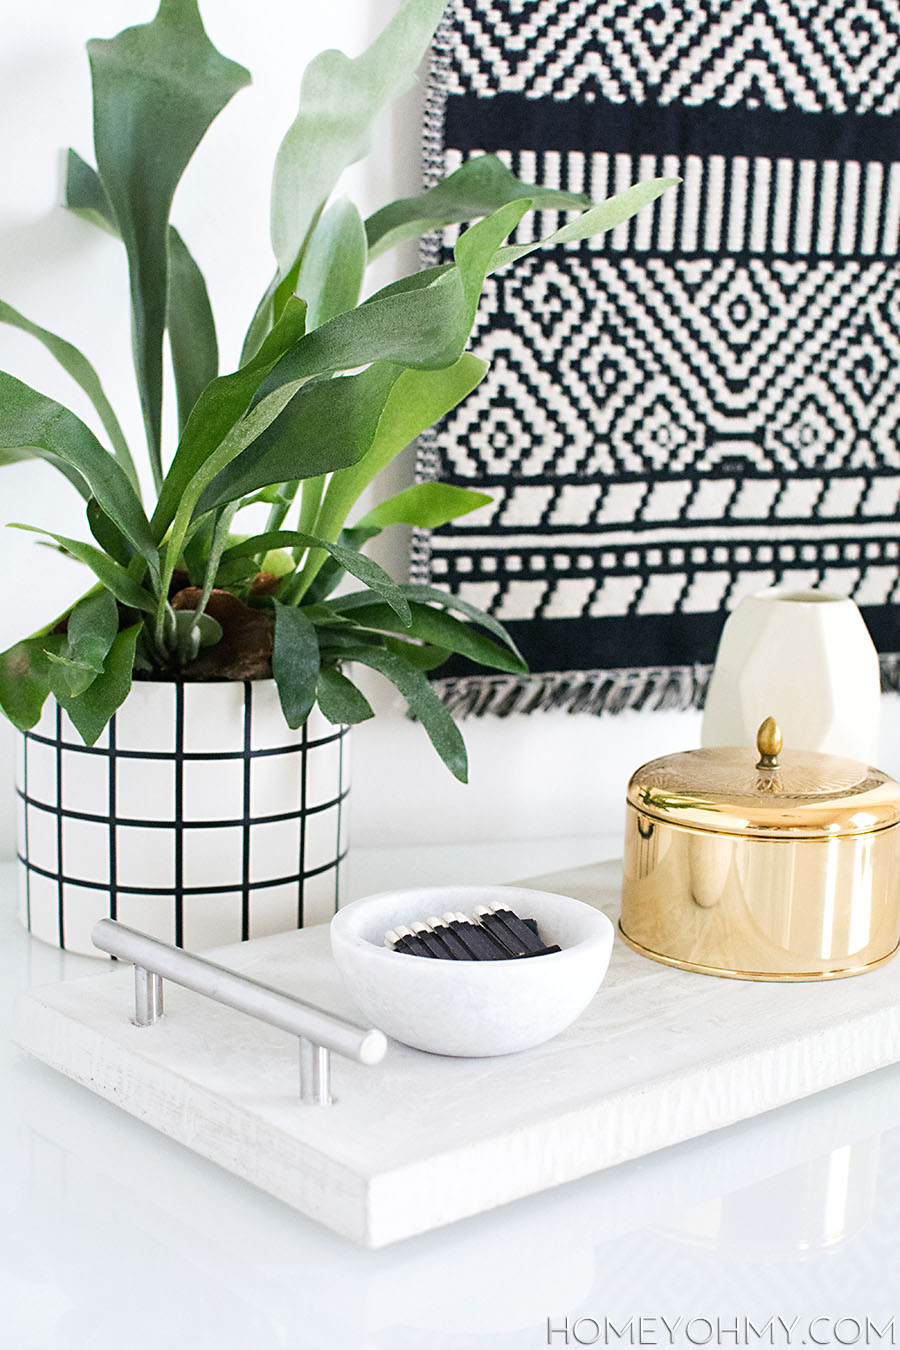
We had a little discussion on here not too long ago about reasons for DIYing, and this is one of those times where I did it for the challenge of it, but also it turned out pretty cute so this is a good situation right here heyyy. I’m joining in on the concrete challenge over at The Home Depot Blog with my basic DIY criteria: simple, chic, and easy.
Ok, a little, honest disclaimer on the easy… the concept and required skill set I think are easy, but the execution can be challenging. A lot of it has to do with how concrete has the potential to be really fussy, and taking three attempts at getting this right pointed out that there were more things that could go wrong than I initially anticipated. But when I got it right, maaaaan did I pump my fist so hard. I call it the maker’s high. It refills the DIY tank, for sure.
I styled the tray here as a decorative display, but styled it over at the Home Depot Blog as a serving tray. I love the minimal look and how it can really go anywhere, so while it could definitely be painted or embellished, I prefer the natural state of the concrete. If you’re up for the challenge, or are curious, or just want to show some love <3, take a peek at The Home Depot Blog for the tutorial! See you there!
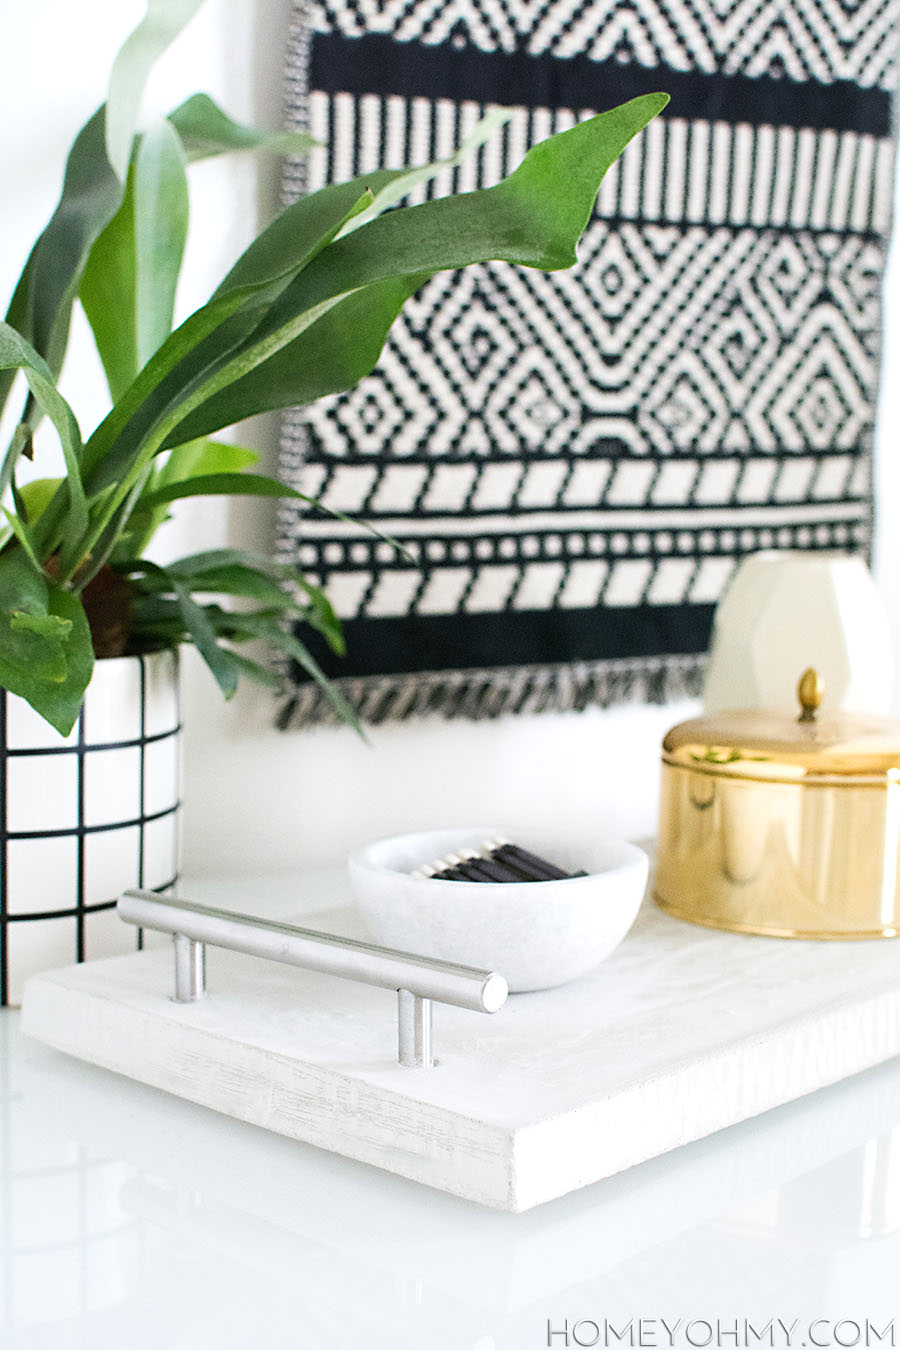
In case you were wondering about the props, the wall hanging is actually just this table runner, the gold thing is this candle, the white thing is a Nate Berkus vase no longer available, mini marble bowl is from Target, and the grid planter I did a DIY for right here!
I’m still on that grid pattern, guys. I’ve been spotting it everywhere, like when I was roaming around Instagram and saw a flat lay with a grid-patterned pouch in it. Since then I’ve been hunting for one, and you know how that goes… couldn’t find one I liked, yup, so now we gotta do this.
Before I potentially mislead you any further, I didn’t make the pouch itself. Learning to sew has yet again been pushed off. Eternally at this rate. So this is more of a tweak than a from scratch DIY. There are also probably cheaper pouches you can find, but this one I already had and was willing to risk ruining it (I didn’t, woohoo!)
Materials:
–white pouch
–frog tape
–1/4″ tape (optional)
–acrylic paint (whatever paint you use should indicate that it can be used on fabric, otherwise add fabric medium to it)
-flat head brush
This is my first time using Frog Tape, and I wasn’t wildly impressed, meaning I think regular painters tape would’ve worked fine as well. Granted, the fabric on this pouch is pretty textured so it’s a difficult surface for creating flawless lines on. Still, the lines turned out pretty good, not perfect, but pretty darn good.
I started by taping one strip of tape down the center of the pouch, then laid down strips of tape adjacent to it by using the 1/4″ tape in between to evenly space them all across the pouch. I noted this specific tape I used as “optional” because it’s expensive and I only had it from being left over from other projects, so if I didn’t have it, I would have cut down a strip of Washi tape to roughly 1/4″ in width instead.
With every strip of Frog Tape, I reinforced all edges by running my fingernail firmly over them.
More important than the tape is the painting technique. All it is is brushing on the paint perpendicular to the tape to reduce the potential of paint getting swiped up under the tape. I did it along one edge of the tape, then down the adjacent edge, making the paint overlap in the center of the stripe.
After removing the tape, the pouch looked like this, and I let the paint dry completely before continuing on to the next steps.The next part is just repeating all previous steps, but perpendicular to the now dry stripes. After peeling away the tape and savoring the satisfaction of revealing newborn clean lines, the pouch was good to go after drying.
I only painted the design on one side of the pouch because I’m lazy I think that’s cool. It didn’t help that the other side had the brand logo patch stitched on it and I didn’t want to mess with painting around it, so one side was just fine with me!
I plan on using this as an on-the-go makeup bag to hold whatever I need for the day and then throw it in my purse. Are you guys into beauty? I very much dig that stuff. If I talked about it around here now and then would you guys find that fun or no? Let me know!
This week I learned that having an excellent few hours of daytime partying on a Wednesday can make the whole week fly by. It’s possible other factors were in play, but at the very least, this was the highlight of my week FOR SURE. I took the shot above at The Fig House where I attended a blogger party and it was stupendous. All my favorite things were there: food, crafting, flowers, and good people. I loved it. And just look at those rugs!
There’s been an unusual amount of to-do’s outside of the blog lately so I’ve done a lot of unplugging this week, which is great, but those hours get logged by themselves and need to be made up for somehow, of course. So, it’s about to be a mostly working weekend for me, plus taking it easy and catching up on Z’s- only the best! Hope you’re heading off to a best weekend, too <3.
Signing off with this weeks favorite links:
Will you be in LA tomorrow, Saturday the 11th? I’m going to this pop-up shop and you should too!
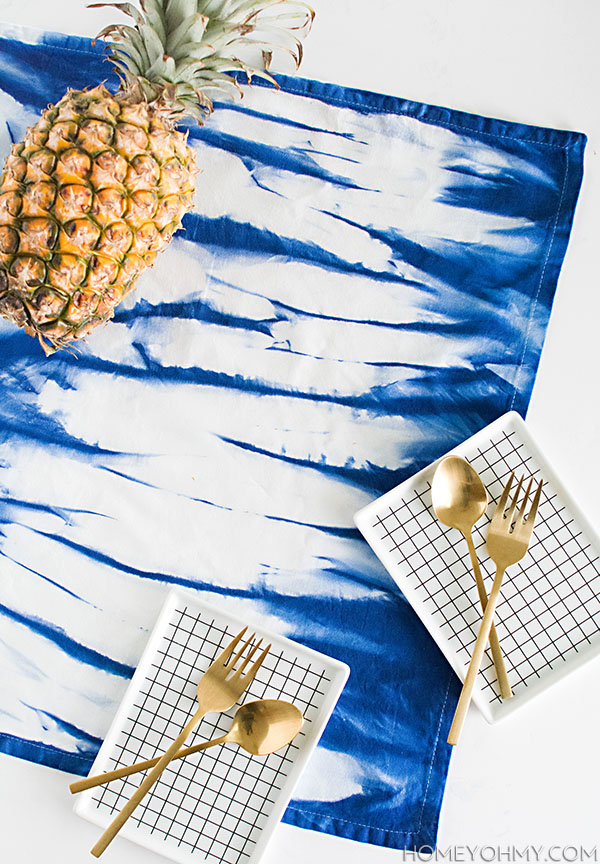
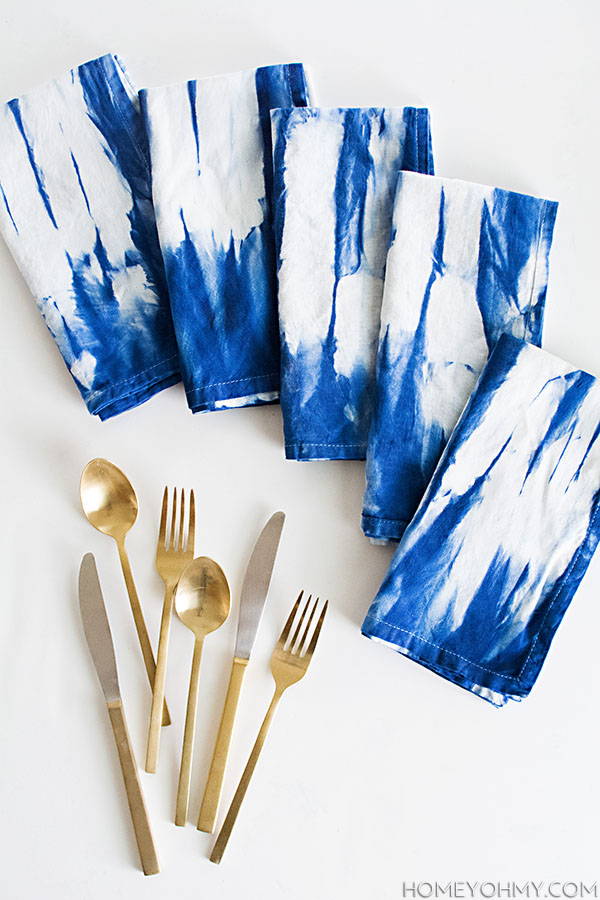
Alright guys, it’s Inkodye napkins part two. What happened was I initially did two versions of this DIY and only posted the second version, which you saw here. Later I shared a photo of the first version on Instagram basically saying why didn’t I share this one too I think it’s pretty and you guys agreed. Hard. I was so surprised by the positive response (thank you!!) and noted that I’ll have to post about how I did napkin version one.
I recommend doing all the prep indoors away from a window. It shouldn’t prematurely activate the dye, thus you can work at a comfortable pace instead of maniacally trying to beat the sun outside (this is a lesson I learned the hard way).
I vigorously shook the Inkodye and poured it into a five gallon bucket. The large size of the bucket felt like overkill at fist, but later I found it so helpful in terms of acting as a splash guard for later steps, so it was actually perfect. Yay.
Next I dipped in a napkin and swished it around to soak up some dye, then wrung out as much of the excess dye as possible. Each napkin needs to be evenly soaked without being over-saturated with dye. Also, you can see I’m wearing latex gloves. No. Do not. They ripped and I got dye on my hands, which turned them blue AGAIN (the first time I wore no gloves, why!) Stick to the heavy-duty rubber gloves, friends.
The shiny surface I worked on top of is a piece of cardboard covered in aluminum foil. I mentioned these materials as optional because it can really just be any protected, portable surface you have, but I think this is probably the easiest one to “make”. The foil is only needed if you want to reuse the cardboard for something else, which I did.
Ok, so it’s another simple folding technique to create the design on the napkins. I laid a napkin flat on the cardboard, then fashioned my hand into a karate chop position to scrunch the napkin upwards from the bottom left. I repeated the same motion but moving downward from the top right of the napkin, and then the napkin looked like this.
I did this with all the napkins on several pieces of cardboard, then carried them outside and left them in direct sunlight for about 20-30 minutes. The sun activates the Inkodye and turns the exposed areas blue because of magic.
I immediately threw the napkins in the laundry machine and ran them for two cycles with Inkowash detergent. They came out looking like this!
I thought I preferred the clean, straight lines from the other version I did, but I also love the wild and crazy random designs this folding technique makes. There’s also a lot more blue with this version, which really bumps up the contrast with the un-dyed white portions.
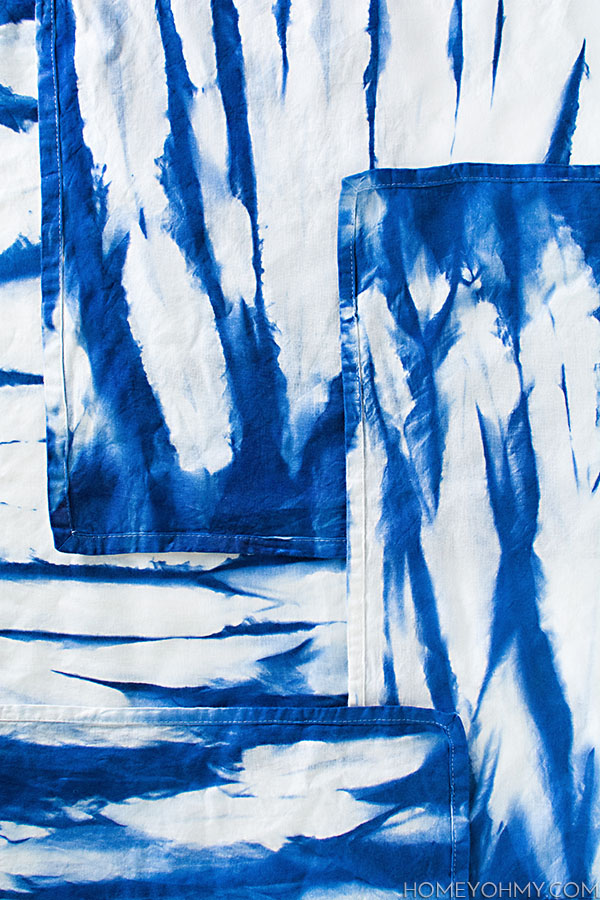
Gold flatware basically belongs with these napkins. I find this color combo irresistible, and also maybe it channels my Bruin pride.
So do you prefer this version or the other version of these napkins? I’m down for anything blue, really. It’s been THE color for me this year.
The best thing about a short week? A long weekend, of course! Just wanted to jump on here for a minute and wish you a happy holiday. The 4th of July not only feels like the heart of summer, but also a reminder that we’re half-way through the year. HALF. I’ve already started drawing up ideas for pumpkins, guys… and right behind that is going on a wrapping paper hunt for Christmas.
Having to plan ahead for blog content constantly keeps my head in the future, anticipating upcoming events, holidays, seasons, deadlines, all that yummy stuff, which makes being in the now, or looking back and remembering past joys and successes, one of my biggest challenges. I’m sure that’s a large part of why it feels like time has gone into ultra warp-speed, and why I’m recognizing more than ever that taking a minute to stop and look around is crucial for dominating life. SO, thank goodness for long weekends and holidays that force us to slow down, spend time with our loved ones, and take leisure seriously.
I’m planning on clocking in some time at the beach tomorrow, which I haven’t gone to yet this year, which is how to NOT take advantage of living on the west coast so we’re going to do something about that so long as some of this residual June gloom doesn’t get in the way. Also have a July 4th house party to go to, which has become a yearly tradition in our a circle of friends and is always a blast. It’s been a while since I’ve had a weekend like this, and I’m simply really, really excited for it.
Got any plans or 4th of July traditions?
Hope you guys have a happy, fun, and safe weekend. <3
 I swear I wasn’t intentionally searching for monochrome spaces. It’s just what happens these days as I realize more and more that it’s my favorite. I think I’m on to something.
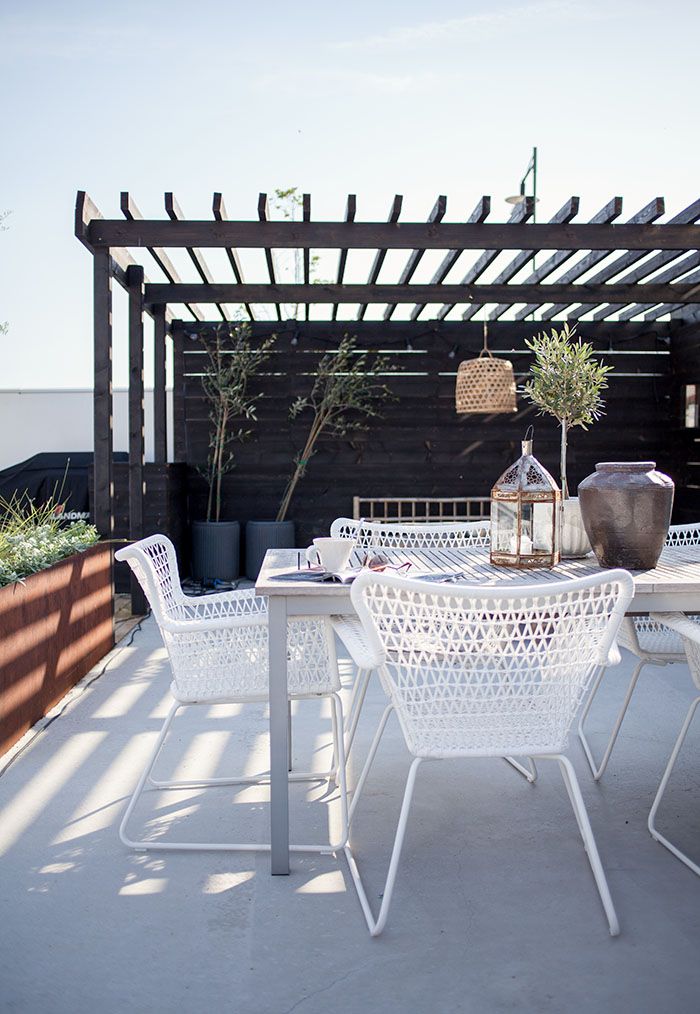
 Does any real person’s backyard actually look like this? That tile is dreamy!
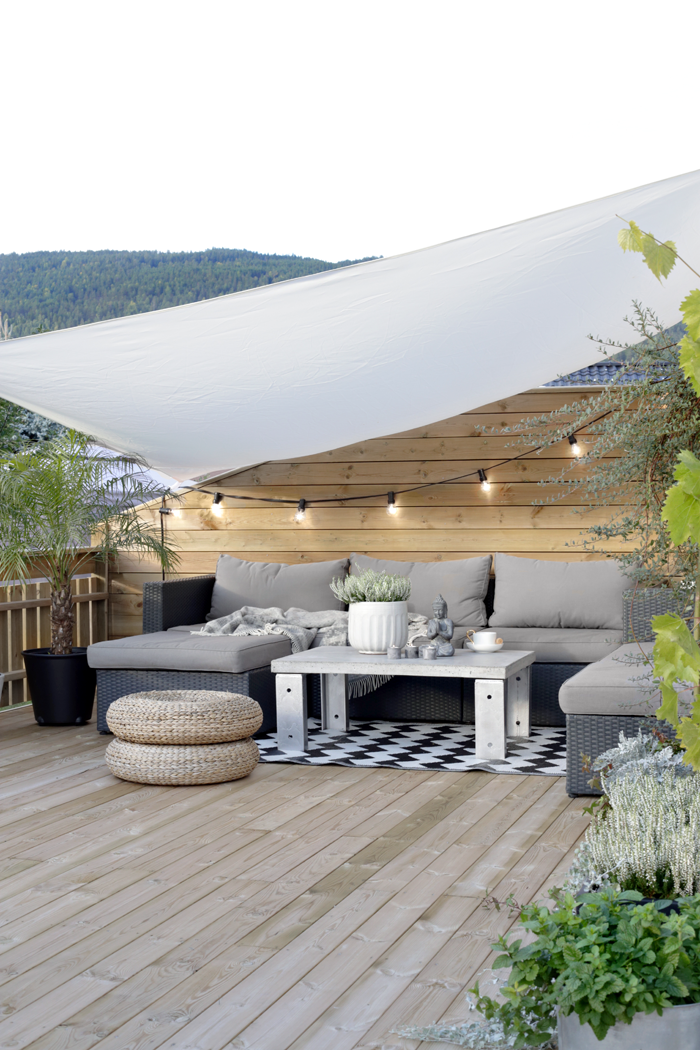 I can also admit that I look forward most to putting up globe lights. I must.
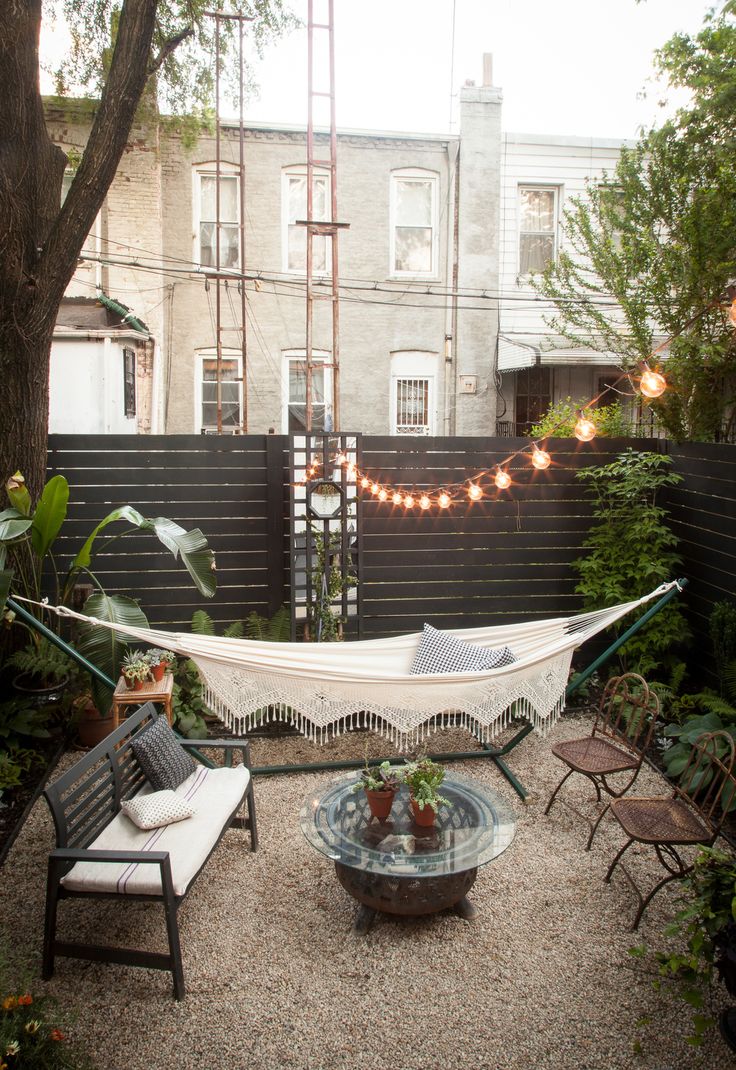 Or hammocks.
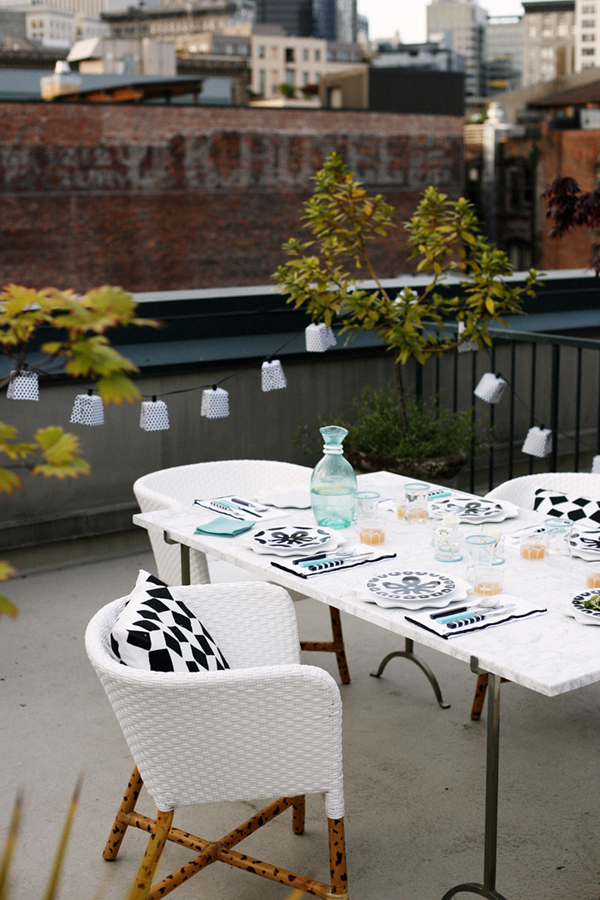 A rooftop deck works too, I’ll take it. And those chairs!
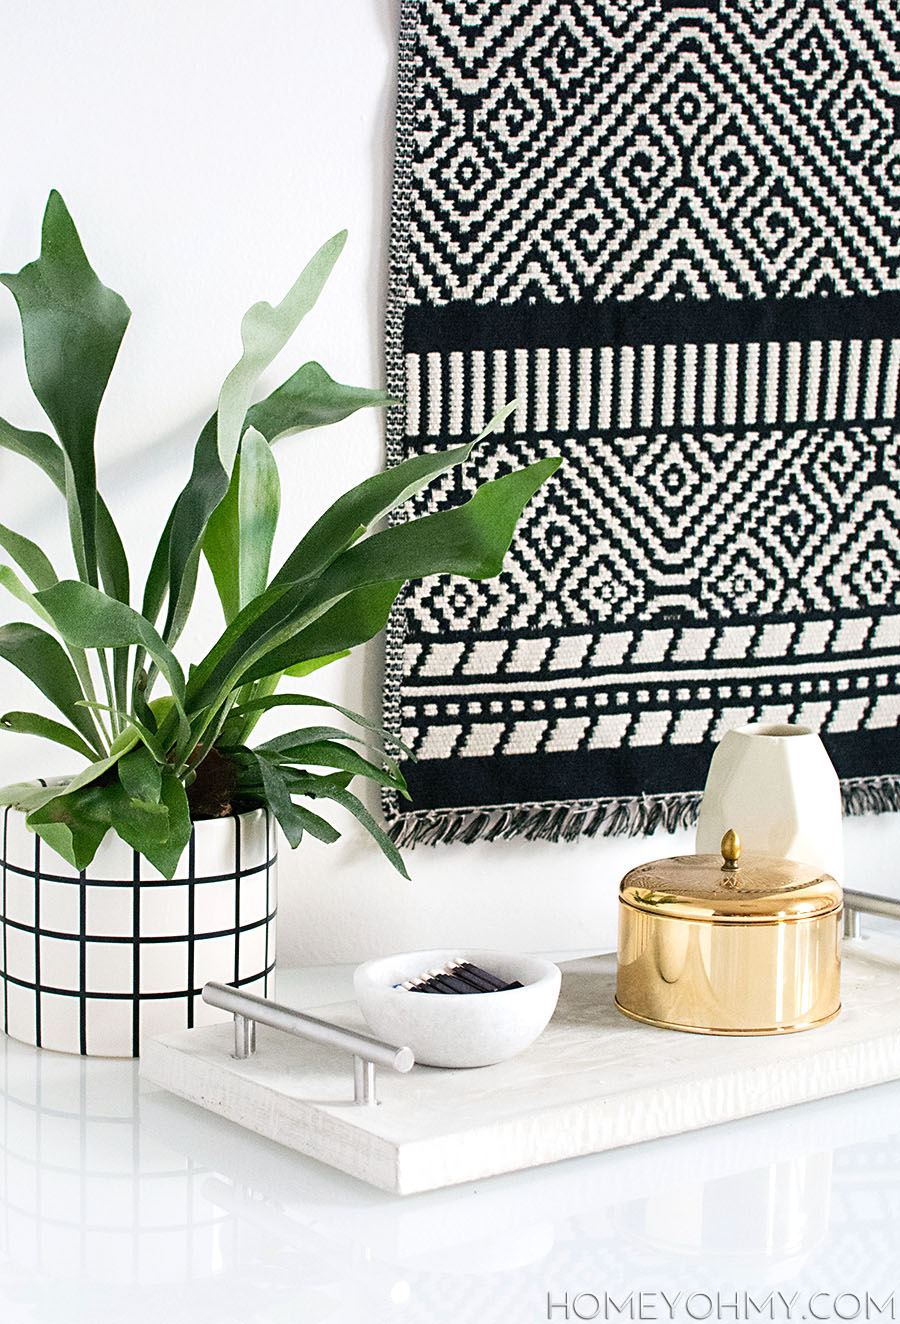 We had a little discussion on here not too long ago about reasons for DIYing, and this is one of those times where I did it for the challenge of it, but also it turned out pretty cute so this is a good situation right here heyyy. I’m joining in on the concrete challenge over at
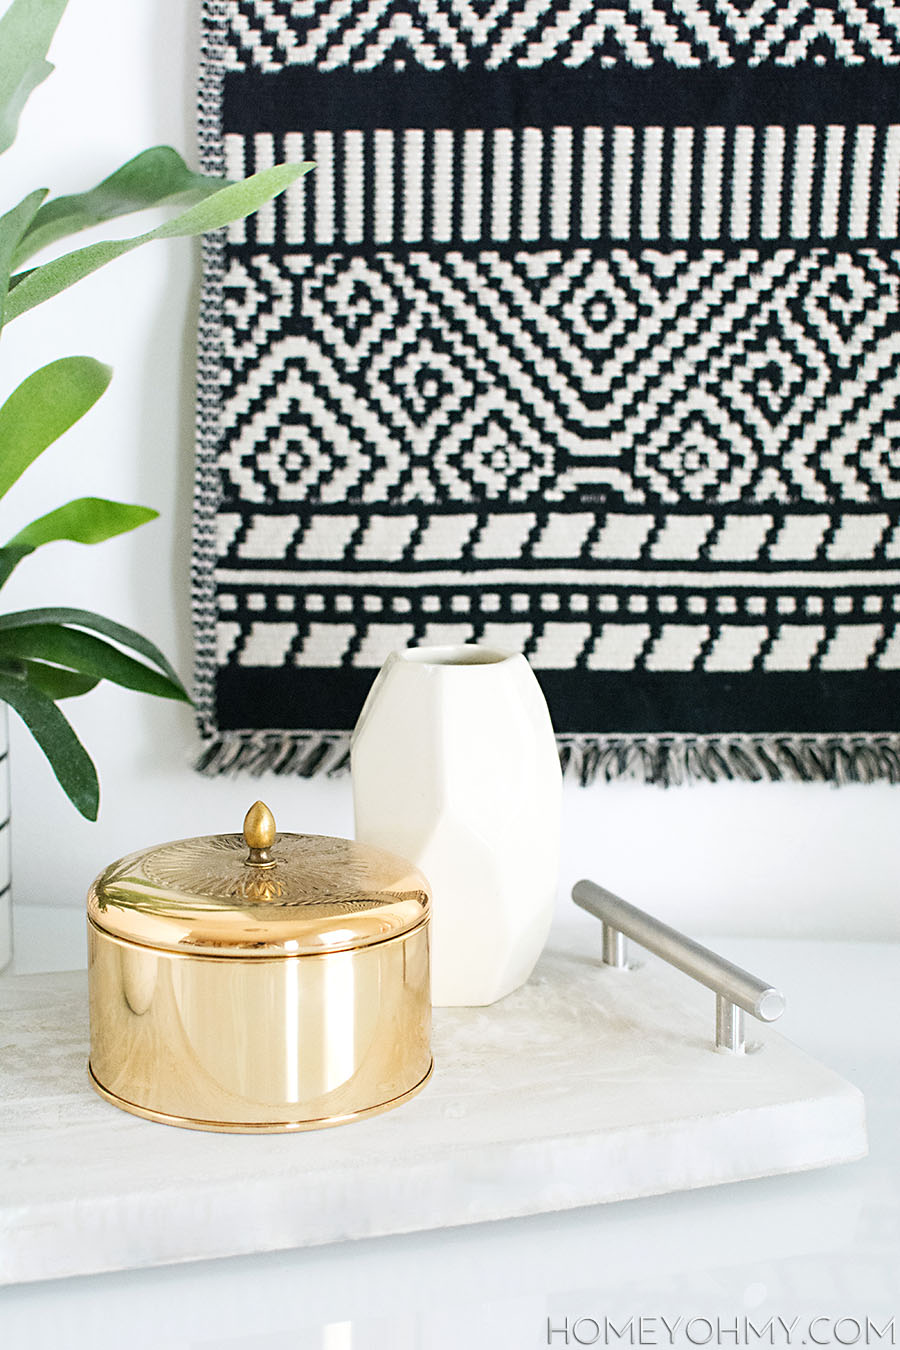
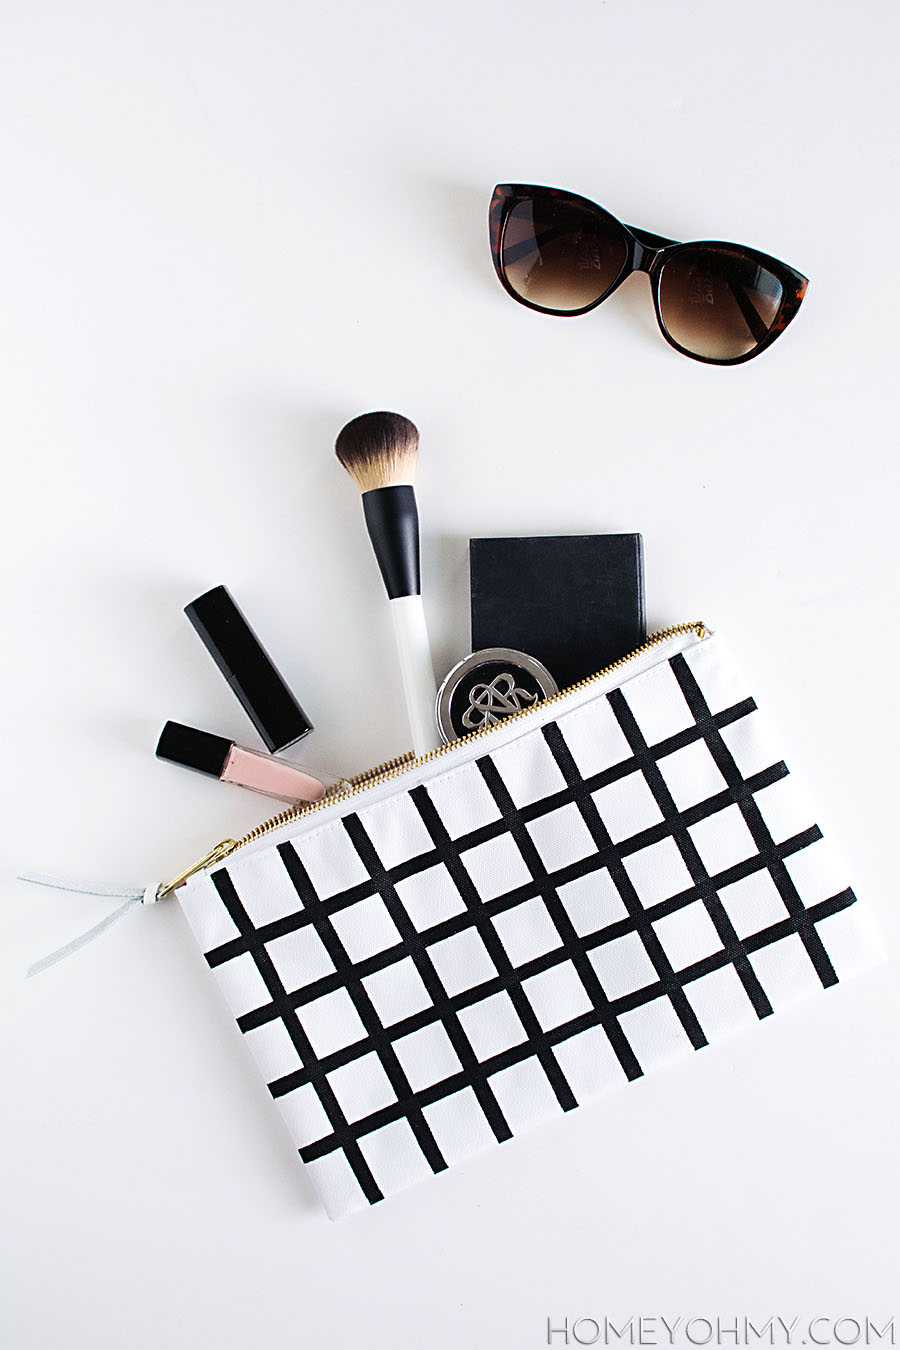 I’m still on that grid pattern, guys. I’ve been spotting it everywhere, like when I was roaming around Instagram and saw a flat lay with a grid-patterned pouch in it. Since then I’ve been hunting for one, and you know how that goes… couldn’t find one I liked, yup, so now we gotta do this.
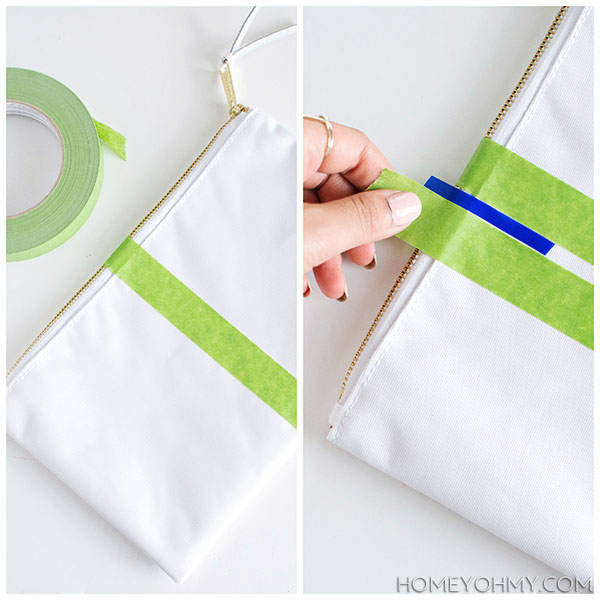 This is my first time using Frog Tape, and I wasn’t wildly impressed, meaning I think regular painters tape would’ve worked fine as well. Granted, the fabric on this pouch is pretty textured so it’s a difficult surface for creating flawless lines on. Still, the lines turned out pretty good, not perfect, but pretty darn good.
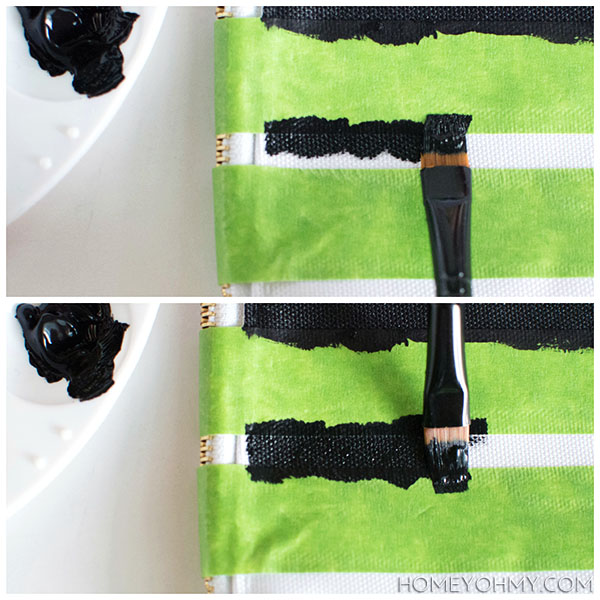 More important than the tape is the painting technique. All it is is brushing on the paint perpendicular to the tape to reduce the potential of paint getting swiped up under the tape. I did it along one edge of the tape, then down the adjacent edge, making the paint overlap in the center of the stripe.
 After removing the tape, the pouch looked like this, and I let the paint dry completely before continuing on to the next steps.
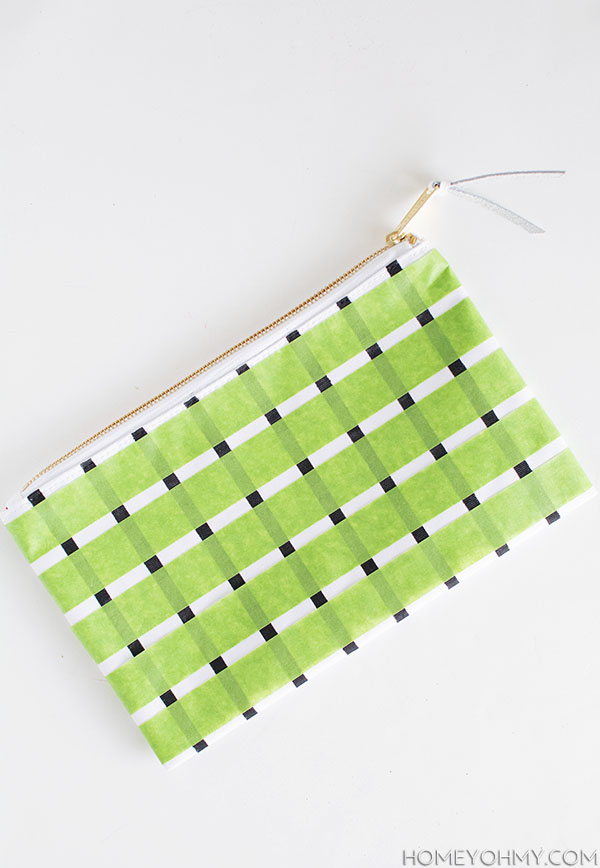 The next part is just repeating all previous steps, but perpendicular to the now dry stripes.
 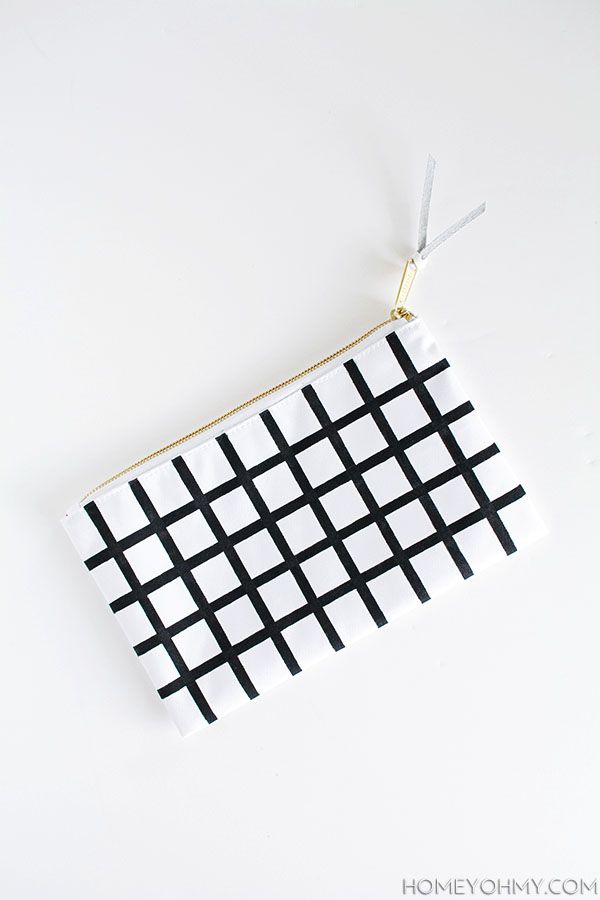 After peeling away the tape and savoring the satisfaction of revealing newborn clean lines, the pouch was good to go after drying.
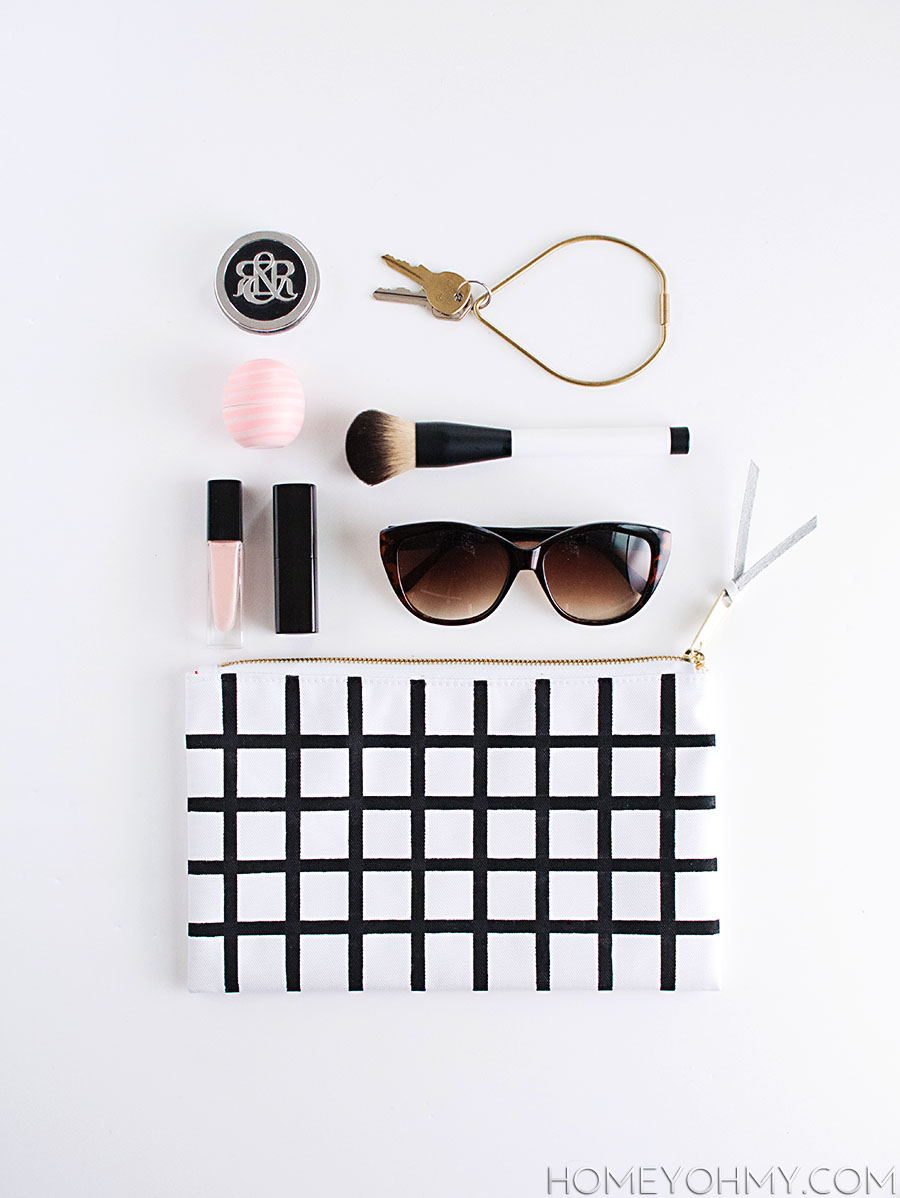 I only painted the design on one side of the pouch because
 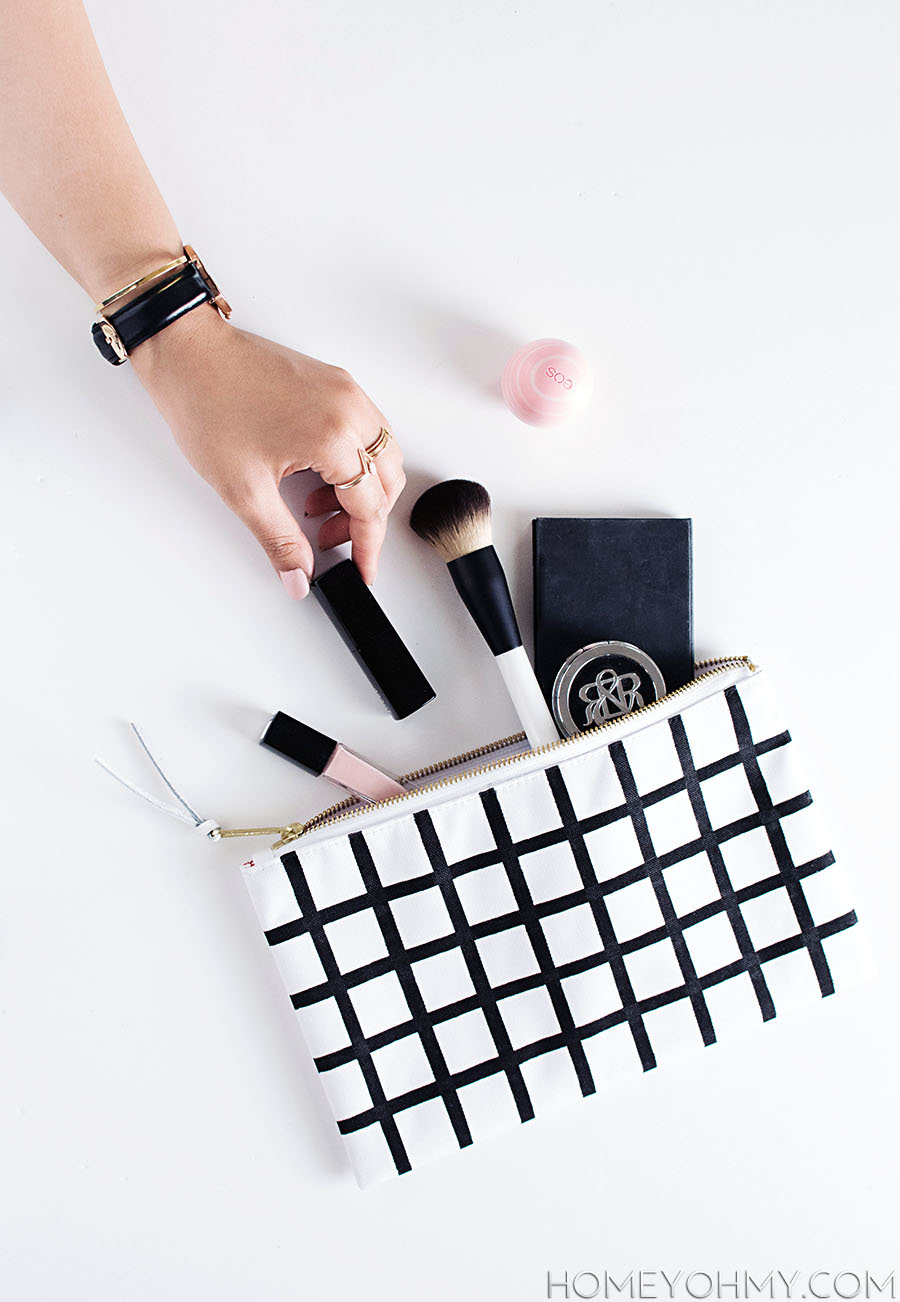 I plan on using this as an on-the-go makeup bag to hold whatever I need for the day and then throw it in my purse. Are you guys into beauty? I very much dig that stuff. If I talked about it around here now and then would you guys find that fun or no? Let me know!
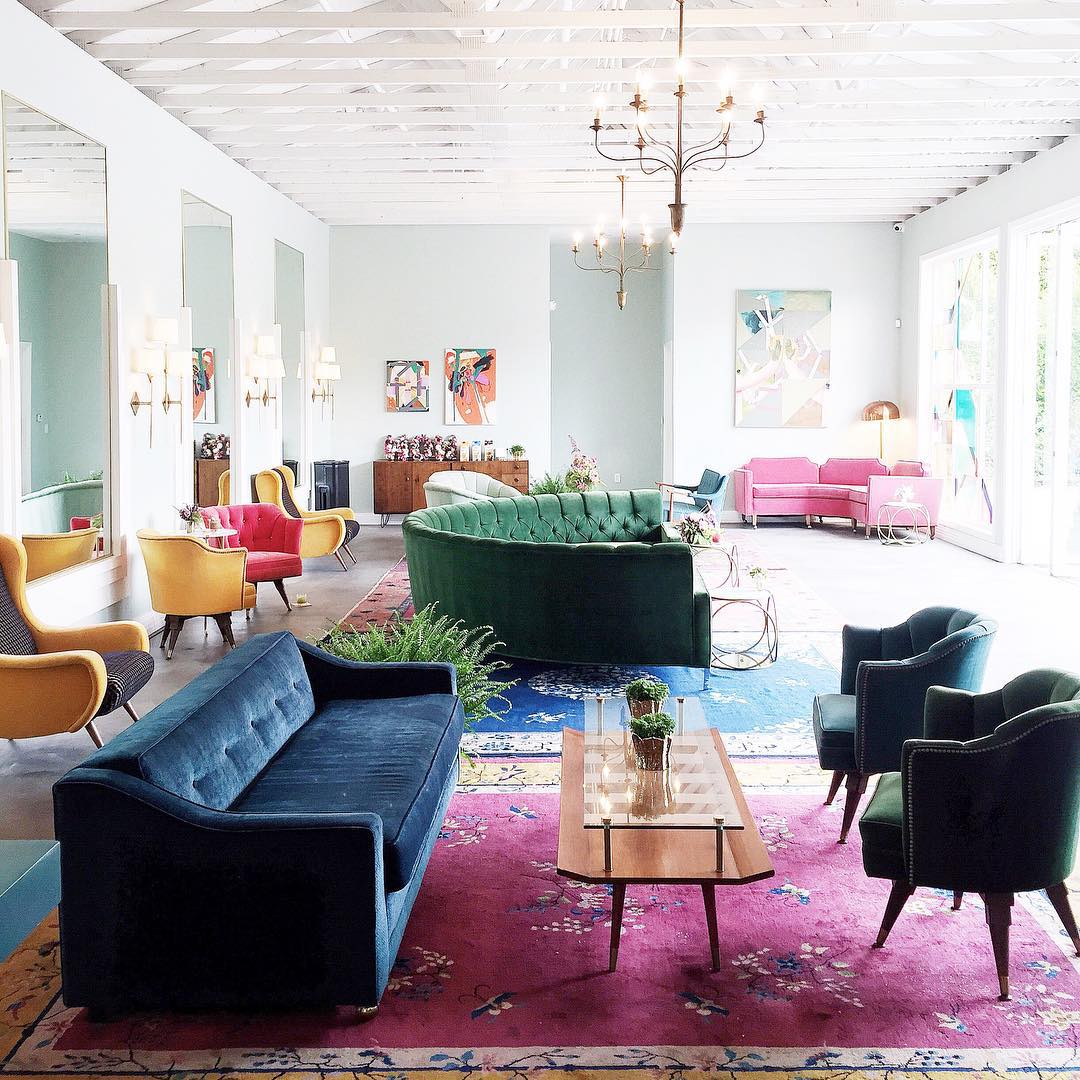
 Alright guys, it’s Inkodye napkins part two. What happened was I initially did two versions of this DIY and only posted the second version, which you saw
 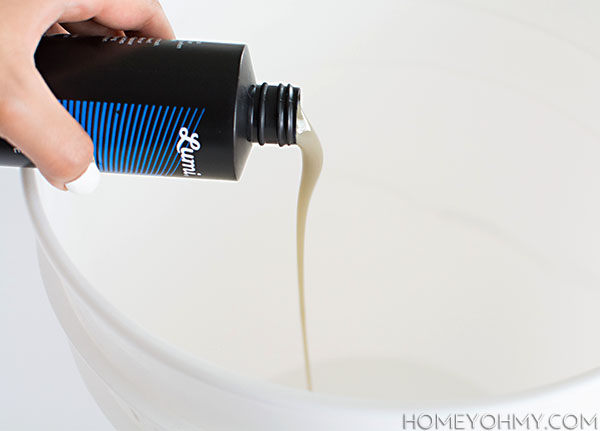 I vigorously shook the Inkodye and poured it into a five gallon bucket. The large size of the bucket felt like overkill at fist, but later I found it so helpful in terms of acting as a splash guard for later steps, so it was actually perfect. Yay.
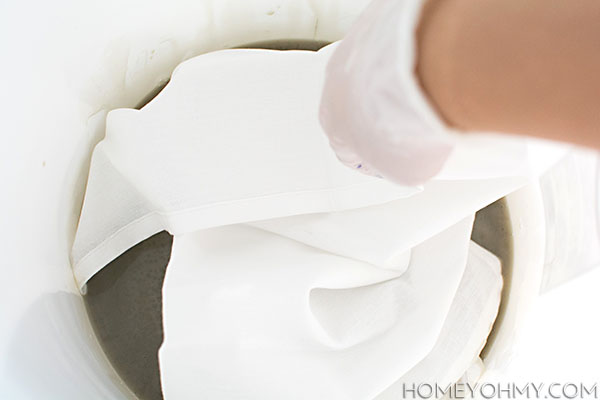 Next I dipped in a napkin and swished it around to soak up some dye, then wrung out as much of the excess dye as possible. Each napkin needs to be evenly soaked without being over-saturated with dye. Also, you can see I’m wearing latex gloves. No. Do not. They ripped and I got dye on my hands, which turned them blue AGAIN (the first time I wore no gloves, why!) Stick to the heavy-duty rubber gloves, friends.
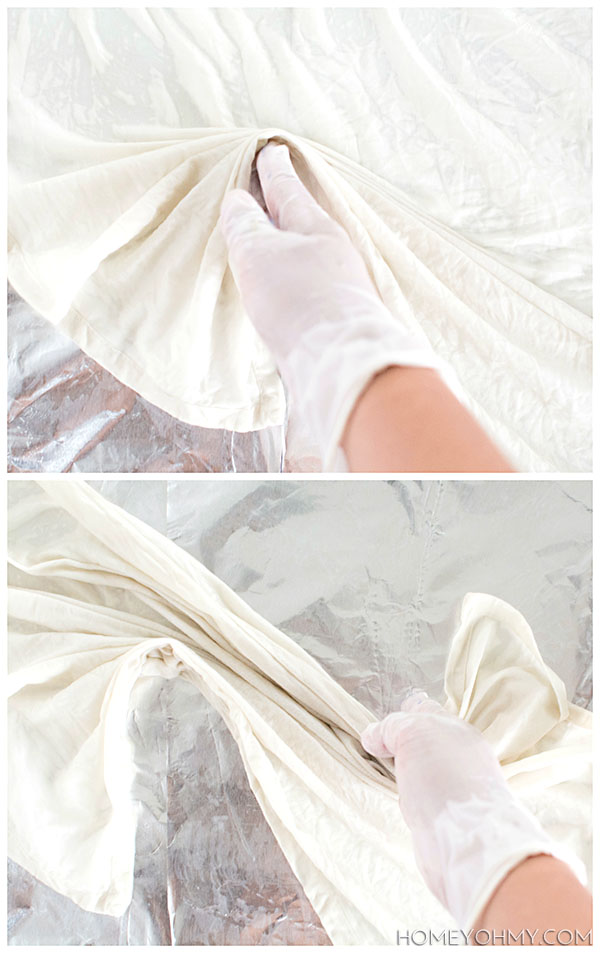 The shiny surface I worked on top of is a piece of cardboard covered in aluminum foil. I mentioned these materials as optional because it can really just be any protected, portable surface you have, but I think this is probably the easiest one to “make”. The foil is only needed if you want to reuse the cardboard for something else, which I did.
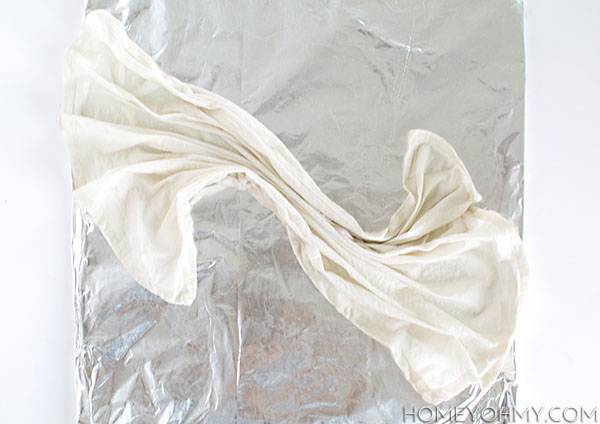 I did this with all the napkins on several pieces of cardboard, then carried them outside and left them in direct sunlight for about 20-30 minutes. The sun activates the Inkodye and turns the exposed areas blue because of magic.
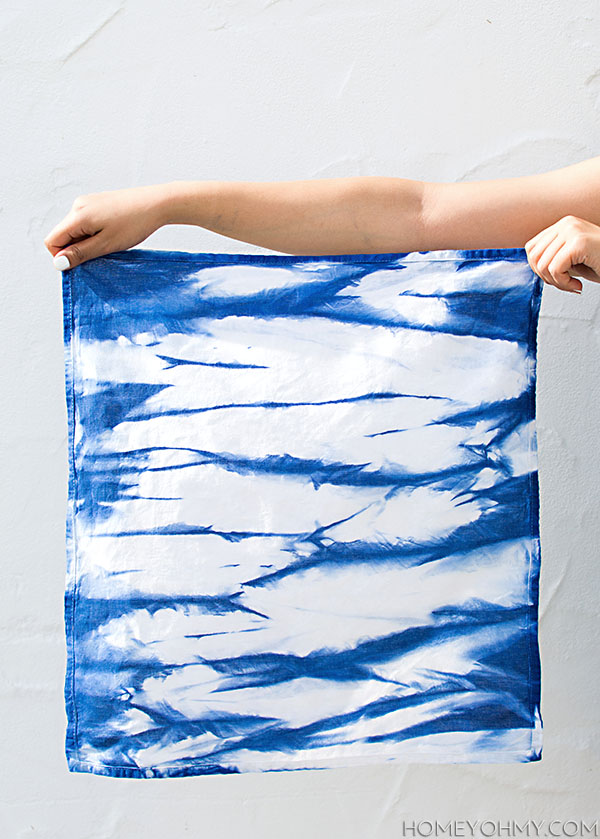
 I thought I preferred the clean, straight lines from the other version I did, but I also love the wild and crazy random designs this folding technique makes. There’s also a lot more blue with this version, which really bumps up the contrast with the un-dyed white portions.
 Gold flatware basically belongs with these napkins. I find this color combo irresistible, and also maybe it channels my Bruin pride.
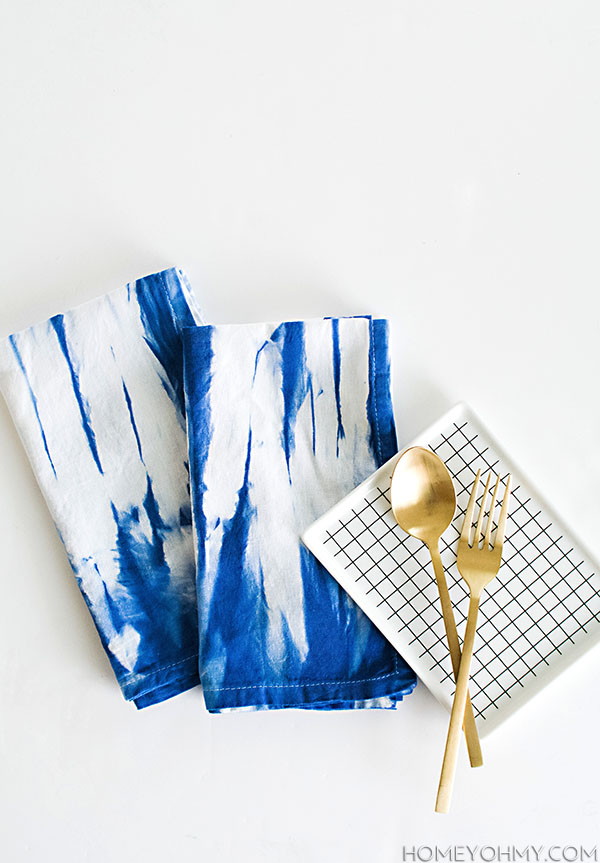 So do you prefer this version or the