I was kind of stressing out about how getting this tree up and decorated for the Michaels Makers Dream Tree Challenge was wayyy too soon, but now that the tree is up I’m like THANK GOODNESS it’s done and I have more time to enjoy the thing (and other things)!!!! This is the first time in my life I got the tree up well before December and now firmly believe this should be the normal thing. It’s like I already completed half the things I need to get done this Christmas, although that’s not true at all, but it’s the feeling that counts.
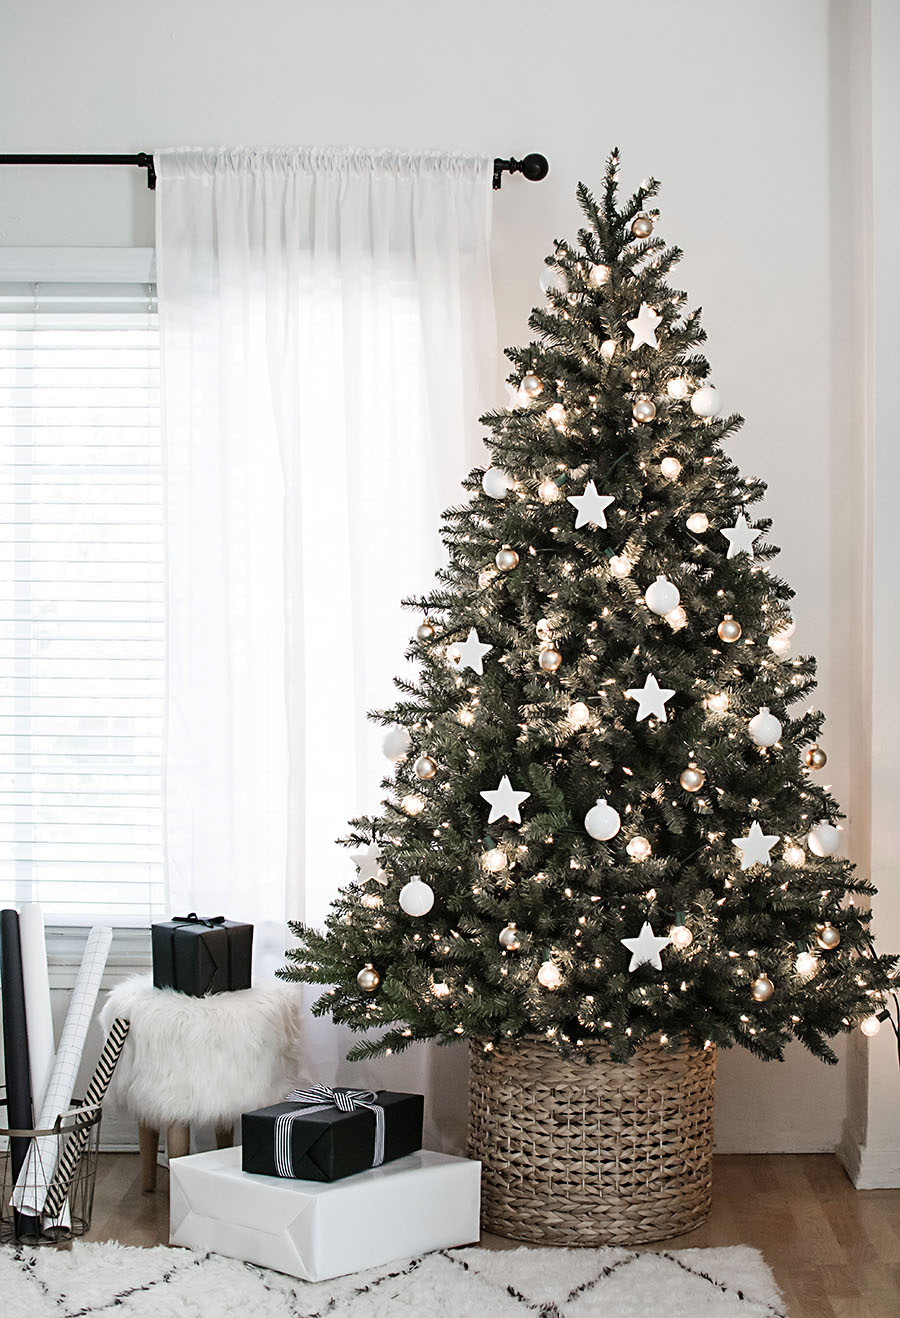
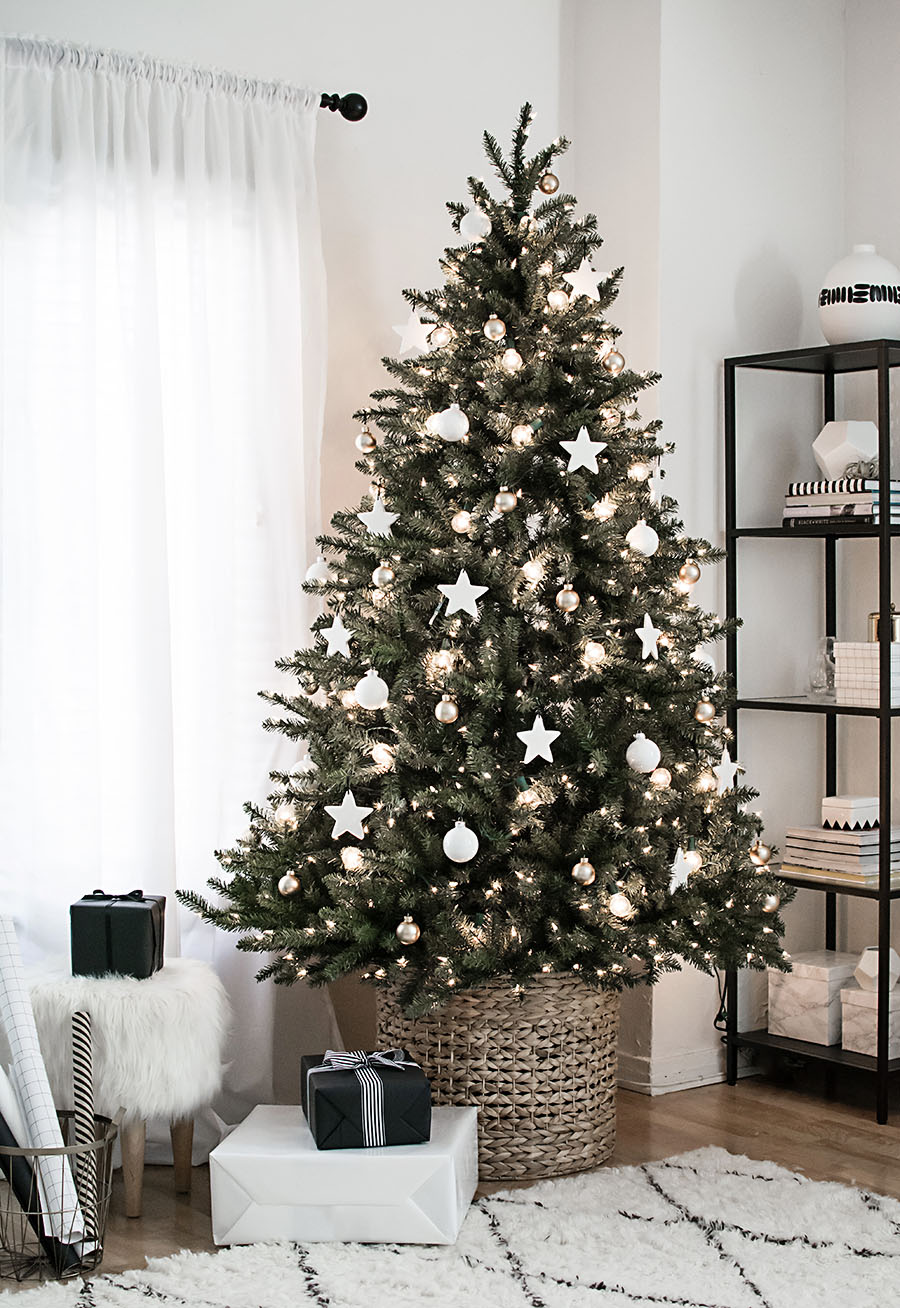
So what constitutes my dream tree? I’ve never not done a tree skirt in the past, but this year would be the year of the basket. I really could’ve just dropped the mic and been done with it once I found this gorgeous basket. My dream is a basket, that’s all I’m trying to say.

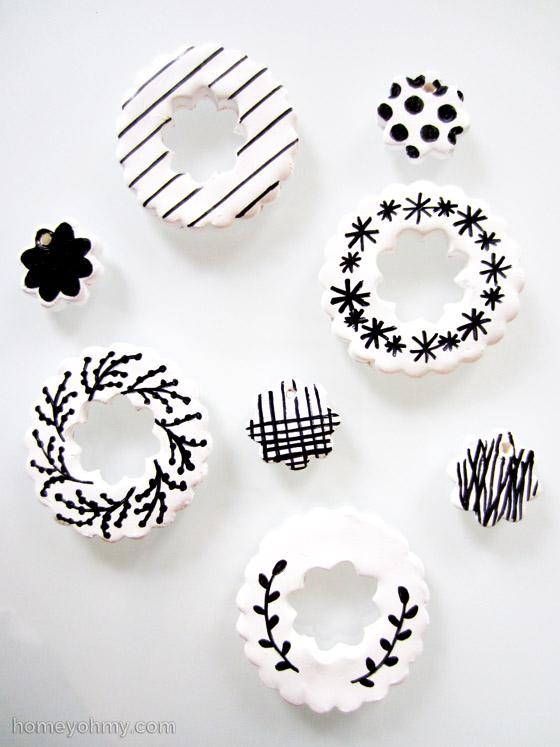
Ok but there’s a whole tree of opportunity to make things more pretty, so why not do some more, sure. I kept my approach simple, taking influence from Scandinavian design by sticking to a max of two colors (white and gold) and not overcrowding the tree with too many ornaments. I didn’t know from the beginning that I’d want white star ornaments, but once I considered the idea, it wouldn’t leave me alone. Good thing they’re really, really easy to make.
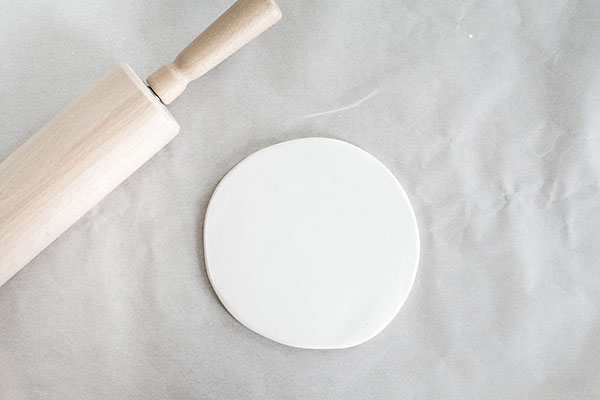 First, roll out the clay with a rolling pin. I worked on top of a cutting board covered with parchment paper.
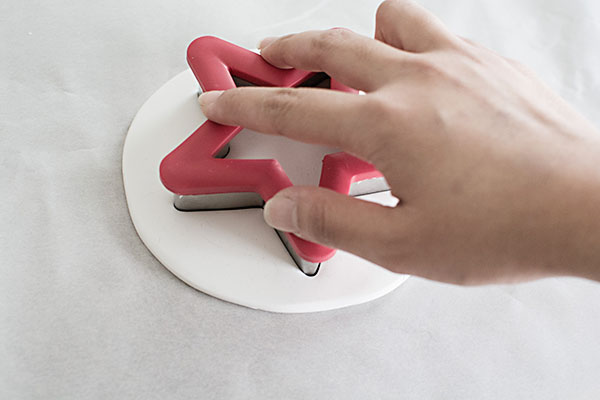 Using a star cookie cutter (I found this one at Michaels), cut the star shape out of the clay.
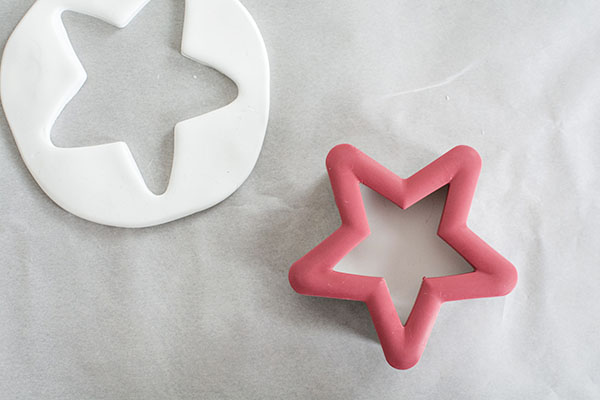 Remove the excess clay before removing the the cutter. I find that this helps keep the edges cleaner and reduces warping of the clay shape.
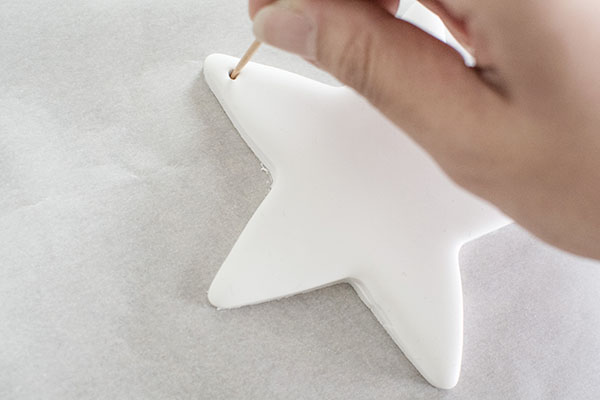 Use a toothpick to poke a hole at the top of the star, going in small, circular motions to enlarge the hole.
Bake according to the clay instructions (I baked mine at 275F for 30 minutes).
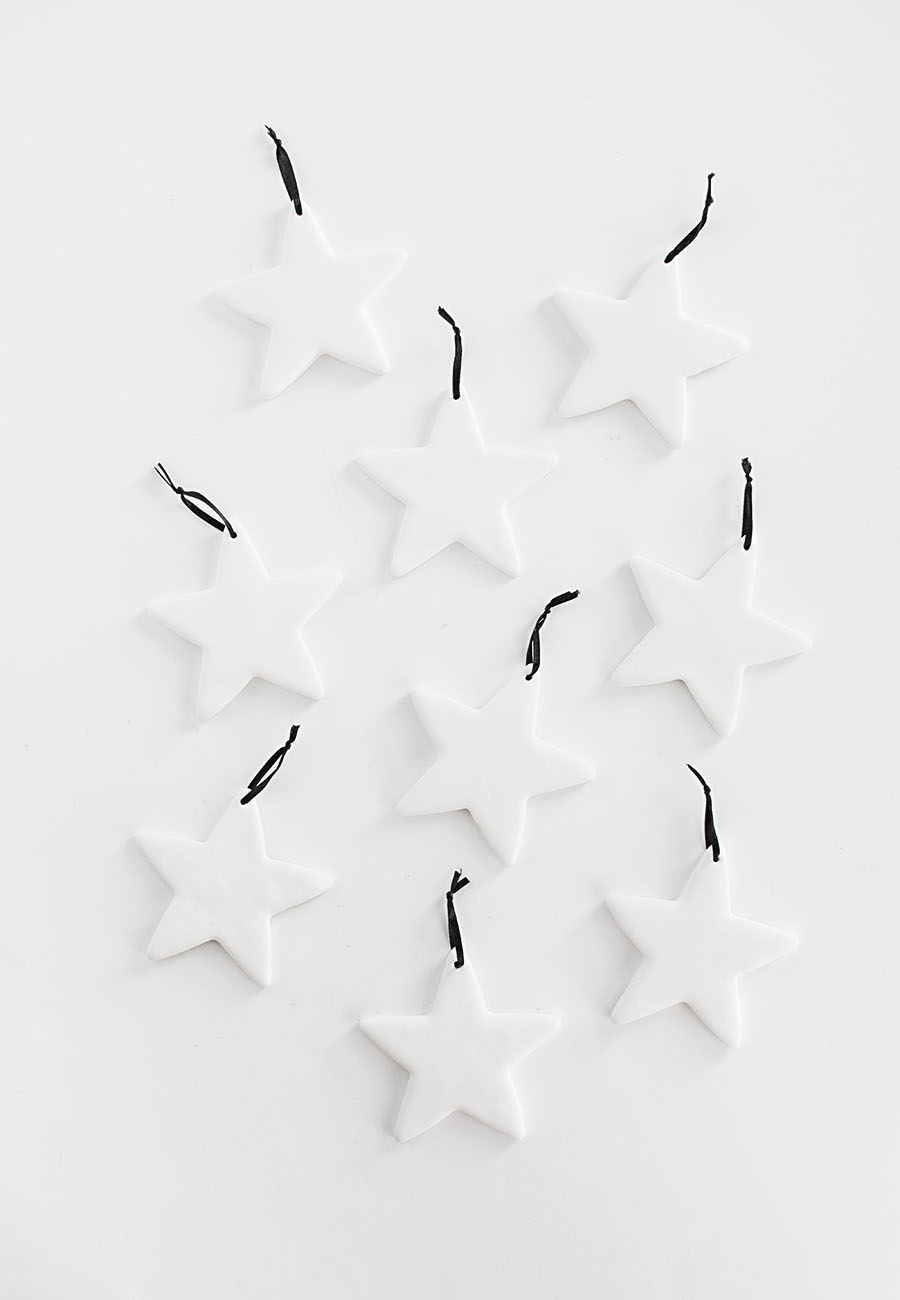
Once cool, string through and knot a piece of thin ribbon or string for the star to hang from.
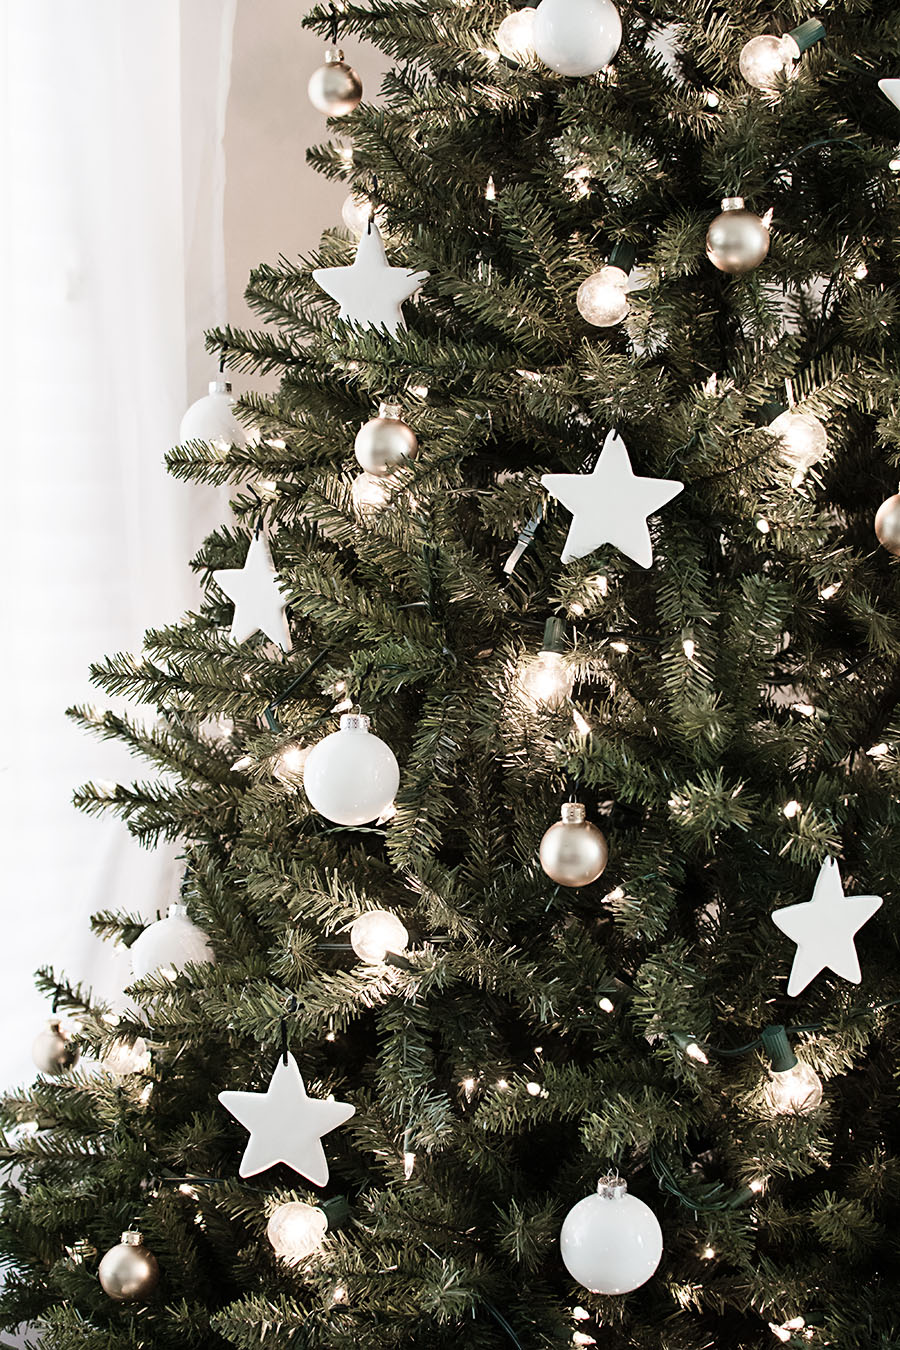
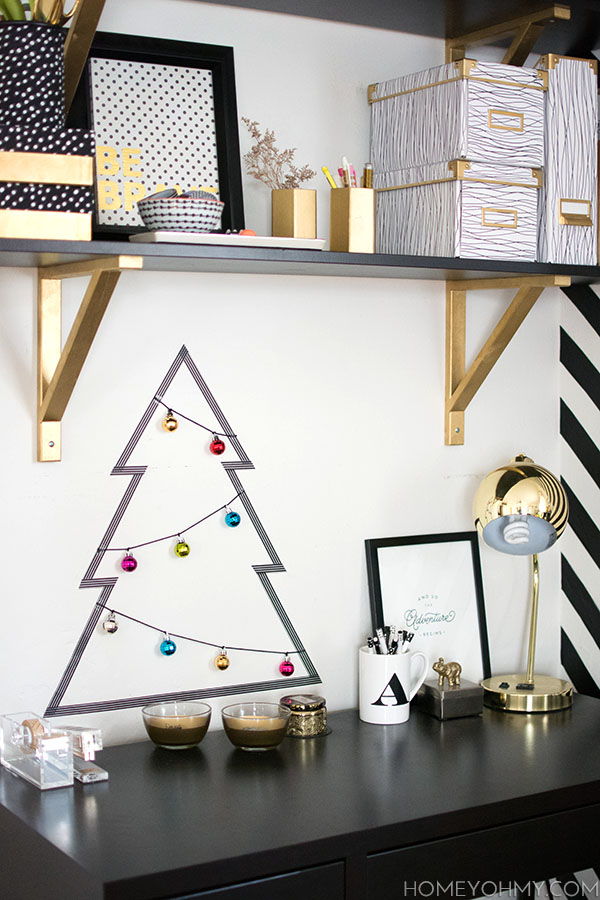
I first dispersed the star ornaments throughout the tree, then peppered white and mini gold ornaments from Michaels in between.
 Another thing I love about not overcrowding the tree with ornaments is that it brings more attention to the lights. On top of the pre-strung lights on this tree from Michaels, I added globe lights and it might have been the best decision I’ve ever made. Those round pops of glowing light bring a magical touch, which is another way of saying they make me very, very happy.
Anyone else put their tree up yet? Or, do you already know how you’ll be decorating it this year? Let me know if you’re into making your own ornaments and whether or not you want to see more on that.
To see the dream trees from the 49 other Michaels Makers, visit The Michaels blog!
Beautiful! Love the way you styled everything and using that gorgeous basket as the base!
Thank you, Andrea! The basket is everything to me haha.
Where do you find the basket to fit the tree!?… Any pointers would be great?
Got it from HomeGoods a few years ago. Don’t know of a more reliable source, sorry!
Target has a large basket as well! Fits great. Different colors available. I went with black. Looks amazing
Loved the basket! Beautiful tree!
Need to know what size basket did you buy?
I love the basket and the white and gold simplicity of your tree!! I admire your “less is more” aesthetic. Mine tends to be more is more is more when it comes to Christmas trees. :)
Thanks, Kristie! I love the more is more approach to Christmas tree decorating, but truth: I can’t help but consider our lack of space and how we just don’t have the room to store a ton of seasonal decor! One day when we have the storage, I’m going to do your approach. <3
This is beautiful! My favorite part is the strand of globe lights you added, it makes the tree seem even more dreamy ;) did you pick them up at Michaels too or a different store? I am totally adding some fun globe lights this year, thanks for the inspiration!
Thank you, Holly! Yes, I got the globe lights from Michaels as well. I used four strings total and just strung them through the front side.
What length was your globe lights? 25ft? 50Ft?
Hi Lucy, Each strand is 12ft total in length. I believe I used a total of 5 strands.
Did you use regular globe lights or faceted ones?
How did you prop your tree up in the basket? Last year I tried and the tree kind of kept tipping over even though I smashed it into a big styrofoam block and put that inside the basket.. :)
I just plopped it in there! The bottom two rows of branches are actually getting squished way up and I think that’s what’s holding it in. Creative idea with the styrofoam, that’s what I would’ve tried.
Wow, very beautiful!
Thanks, Angel!
So glad to see another tree in challenge that isn’t overly decorated, love to be able to see tree among ornaments. I too love more lights and your globe lights are perfect for your tree. Have to keep in mind you used 4 strands for your tree. I always like to read comments, learn so much actually. Your tree is very pretty and I enjoyed looking at it. Nothing wrong with lots on a tree, at this time I’m just in the less is more mode Great job on your tree.
Love idea of making the clay stars, maybe next year can do that on ours. Maybe can get 15 yr. old grand daughter to help me. This year will be having right shoulder replaced on Dec. 7th. so anything too industrious is pretty much out. Need to keep it simple. Hubs will be doing decorating so have resigned myself to very easy and simple. At our age, 74 and 75, simple and easy is good anyway, regardless of surgery. Getting so having a big mess to clean up and put away isn’t much fun anymore.
Happy daze
Less is more is definitely the mode I’m in, too. I basically put priority on if I’ll have room to store things, or if something will be hard to clean haha. My mom used to always contemplate those things and I never really understood it until recently (mom knows best.)
Very heartwarming to know you and your grand daughter can put your tree up together. Thanks for sharing, Jane Ellen!
This is such a cute idea! I love the simplicity of these stars. They are beautiful, and so classic!
Thank you, Monique! Definitely a classic.
That is one of the most beautiful trees I’ve ever seen in blogland. Love the simplicity and clean look, as well as that perfect basket. 👌
Wow, thank you Lisa! Happy you love the basket ;)
The tree is so adorable!! I would like to make the stars for my tree.They are so white!! What brand of clay did you use?? And how long did you bake them? Thanks so much!
Hi Suetta! I don’t remember the brand, but it was a generic, bulk size block. I baked two at a time for about 30 minutes.
Love the basket! Where is it from? I couldn’t find a link in the post…
Hi Emma! I found the basket at Marshalls, so there is no link available for it.
where did you get the tree? Real trees can’t live in a basket like that.. Can they? Very cute ;)
I think they can! So long as the water pot thingy can fit in the basket… right? The tree is from Michaels. Thanks K8 <3
hello, which tree from michaels is it? This is exactly what I am looking for
Hi, it’s the 7.5 ft Jasper Fir.
Its Beautiful….Love the simplicity of it and how it all comes together! I wanted to do a real tree this year
but hated the idea of the clean up after but this tree looks very real and i love the basket : )
I’m late to the party, but I just came across this post and love everything! Is your tree a “slim” tree?
Hi Kailey! Never too late to the party ;) I don’t think this is a slim tree, just a regular 7.5ft tree.
Love your simple and beautiful holiday look! Definitely want to try to make the star ornaments!! Can you share where you purchased your rug by the way? :)
Thank you! It’s from Rugs USA.
Is the tree pre lit.?
Yes!
I am just in love with this tree! Great inspiration for our very own tree in our new house :) What size basket is that to fit a tree? And did the tree come with a bottom stand?
Hi! The basket is 21″ in diameter and the tree came with a stand, though I did not use it.
How big and what type is that tree?
How many ornaments in total did you end up using? I’ve been moving to a more minimalist lifestyle and really like what you did with the tree. Been browsing non stop the past few days trying to find some inspiration for my tree this year.
Hi Aleks! Not including the stars, I’d say I used between 25-30 ornaments.
This looks absolutely stunning! I have recently started a blog and I was wondering if I could use the first image on my “christmas inspiration” blog post? Of course citing your name and this blog post.
A beautiful tree. Right up my alley. :)
Absolutely gorgeous! I am searching for inspiration for our tree this year, and I keep coming back to yours. I love everything about it, from the actual tree, the ornaments, the black and white everywhere, the rug, the actual photo…Actually, can my family and I just come to your house for Christmas? ;) Would you mind sharing the size of the basket? I’m on the hunt for one that would look nice with my similarly-proportioned 7.5′ tree. Thanks in advance!
Haha thanks so much Michelle! The basket is about 21″ in diameter and 20″ tall. Ideally I’d go for something wider because this basket can’t fit the stand the tree came with.
I love your decorations. It is so beautiful!!! It is just breath taken!!! Happy Holidays!!! Thank you for the beautiful ideas!!! Can not wait to make the clay stars for the trees!!!
We have become ‘less is more’ people. Plus the fact that, although we do have ornaments that we will keep forever (my vintage collection), these days we like to do something different every year.
This tree is absolutely lovely.
Where did you get the tree?
From Michaels!
May I ask where you purchased the globe lights for your Christmas tree and how many packs did you buy? Xo
Hi Shannon! I got them at Michaels and I got 4 packs. I hung the globe lights only on the front of the tree.
Absolutely obsessed!!
About how thick did you roll the clay out for the stars? Also, I read earlier that you baked two at a time? ..as in two stars at a time? Did you place them on a cookie sheet first?
Thanks and happy holidays!!
Hi Amanda! I’d say they were about 1cm thick, maybe a little less. I baked two at a time on parchment paper laid on a small baking pan.
I love our tree and especially the basket. Where did you find it?
Hi Cathi! Tree is from Michaels, basket from HomeGoods last year.
Is your tree the cashmere 7.5 ft. one? Running out of time but yours it what I have been looking for. Does it come in three parts??
Did you get the clay from Michael’s also? Were the stars three inches or larger?
Thanks for sharing!
This one isn’t the cashmere one but the one I have now is and it’s beautiful! Comes in three parts, pre-lit. Clay from Michaels as well as the star cookie cutter. Stars are around 4 inches.
Do you have the directions for making the clay?
Hi Kristen, I didn’t make the clay and instead bought it from Michaels.
Michaels sells so many different type of clays. Can you recommend which one to use or which one you used? Thanks!
I used Fimo! Any polymer clay should work.
Love the tree! Using as my inspiration this year :)
Are the lights both warm white ones or one is the bright white?
All the lights are warm!
Where did you get your ornaments besides the ones you made?
They’re all from Michaels!
Was this tree pre-lit and then you added the globe lights? Thanks :-)
Yes, exactly!
I was searching for ideas and showed my 4 year old and she was like yes mommie this is much prettier than the other trees that have to many ornaments.
What is the height of your tree and the size of the basket.?
I love this tree and am trying to have a similar look for our first Christmas tree at our new home! Did you use matte white ornaments and shiny smaller gold ornaments? Or are they both same style, just different sizes?
Hi Julia! The white ornaments are glossy and the gold ornaments are matte.
I tried to find those gorgeous globe lights at Michaels and only found the Ashland outdoor ones. Are those the ones you used or were you able to find ones specifically for Christmas trees?
I used regular globe lights, the string is green!
Did you glaze your stars afterwards? I’m debating to glaze mine or leave as is.
Didn’t glaze them!
marvelous! where can i buy this Christmas tree?
Thank you! Got it from Michaels.
What is the height of this tree?
I believe it’s 7.5 ft
What was the name of the Christmas tree at Michaels
Hi Madison, unfortunately can’t recall the name as this was years ago.
Hi there! Love this look, well done! Are the star ornaments a little heavy? I just bought a tinsel tree that probably won’t hold a heavier ornament very well, so just wondering before I buy the materials to make them.. I love this matte look though. TIA!
Hi Sara! They are a bit on the heavier side for the way I made them. For the branches I hung them on, I bent them upwards to help counteract the weight. To make the ornaments lighter, roll them out thinner but one at a time on their own piece of parchment cut to size so that when you cut the stars, all you have to do is pull away the excess pieces and transfer the star on the parchment straight to the baking sheet without touching the clay at all.
Hi I have just come across this! I absolutely love your tree! Are you please able to link me the clay you used and the white and gold ornaments ? Also the lights you added ? I’m in Australia so hopefully I’m able to purchase. I noticed you said it’s from Michael’s but they have soo much stuff on their website. X
Actually I just found some in australia that I can buy similar to what you described. How many stars did you make ? And roughly how much clay did you need to make them
Hi Angie! The clay is Fimo brand. I made these so long ago I can’t exactly remember how much clay I used, sorry!
Can you please tell me what kind of globe lights you used? I’m finding almost like a frosted look or faceted. If you could take a pic I would really appreciate it!
Hi Dawn, I no longer have these but they were sources from Michales! Clear and not faceted or frosted.