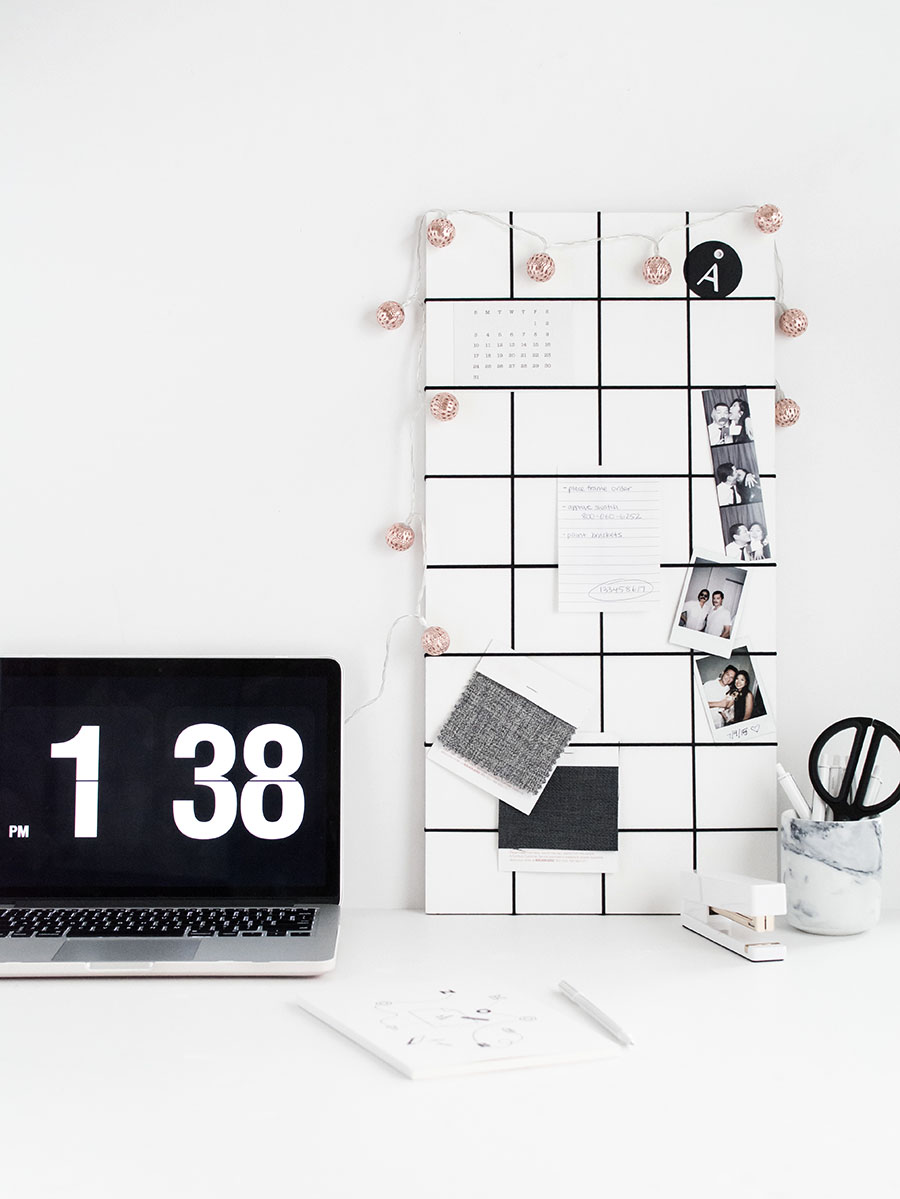
You know those photo/memo boards that get really popular around dorm shopping season, typically seen with the elastic/ribbon in diamond formation? For this DIY, I was thinking about coming up with my own version of one of those, especially since not being able to get over the inspiration from the grid wall display in this work space.
I’d love to get a huge one of those for my much later future work space when I have more room in general, but for now a small one will do. PLUS, I turned to making this elastic version so that I wouldn’t have to deal with using clips or other hanging mechanisms. Convenience is wonderful.
Materials:
-birch plywood (I used a 12×24″ piece from Michaels)
–paint
–foam brush
–elastic cord (I used three packs)
 Paint the plywood with a foam brush. Use a larger foam brush than I did to speed this up. Apply at least two layers or more until opaque and let completely dry.
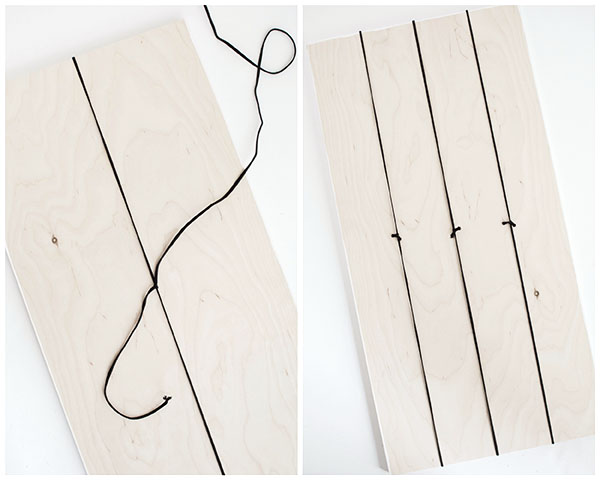
Flip the board over face down and tie the elastic very very very very tightly around lengthwise (it will loosen a little as you tie it unless you are flawless at tying knots without any slip). Double knot it and cut off the excess, and repeat this with each piece of elastic 3 inches apart.
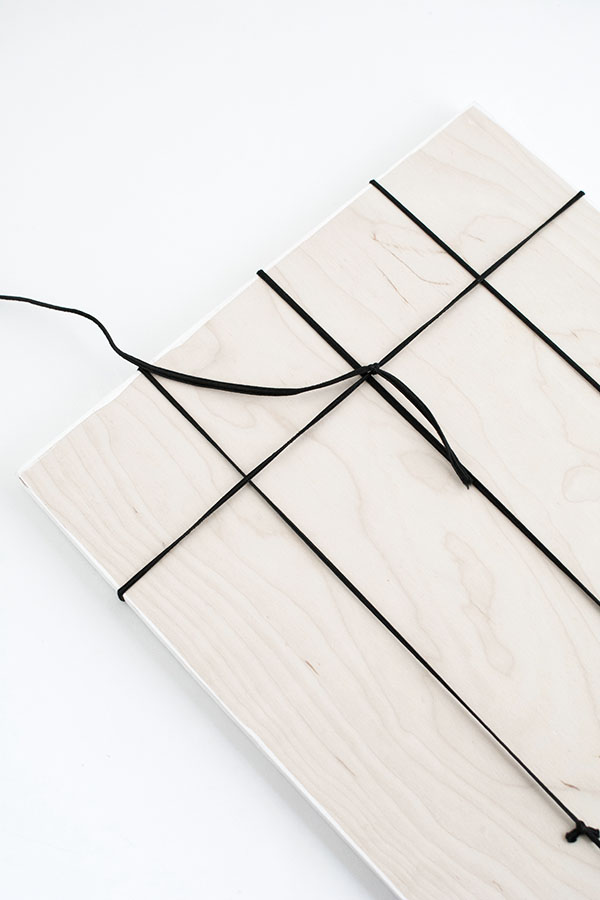
Repeat previous steps but this time horizontally across the board.
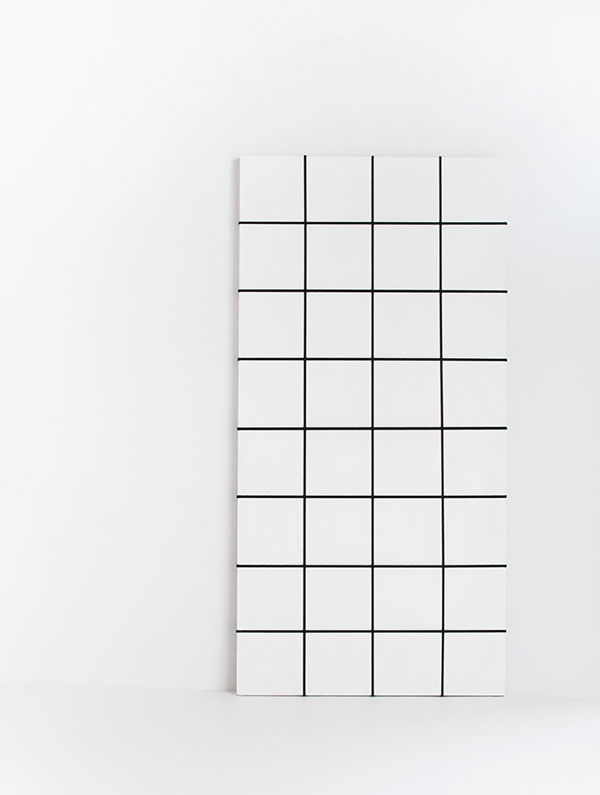
It’s done! Wasn’t that easy? Now put your stuff on it.
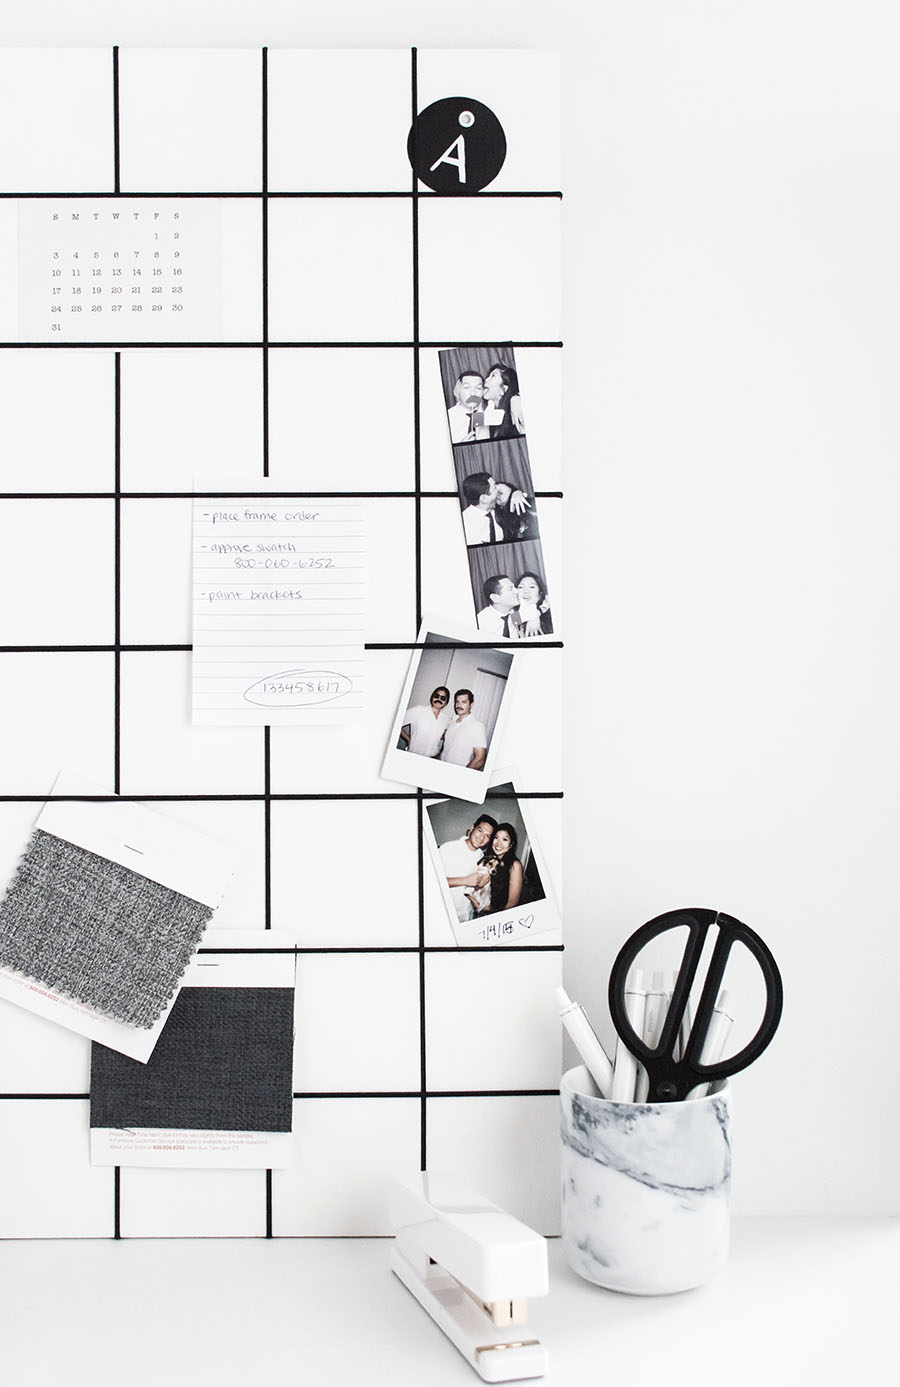
You may have noticed I have a mustache in one of the photos. That’s because we were Gustavo and Pablo for Halloween (you watch Narcos?)
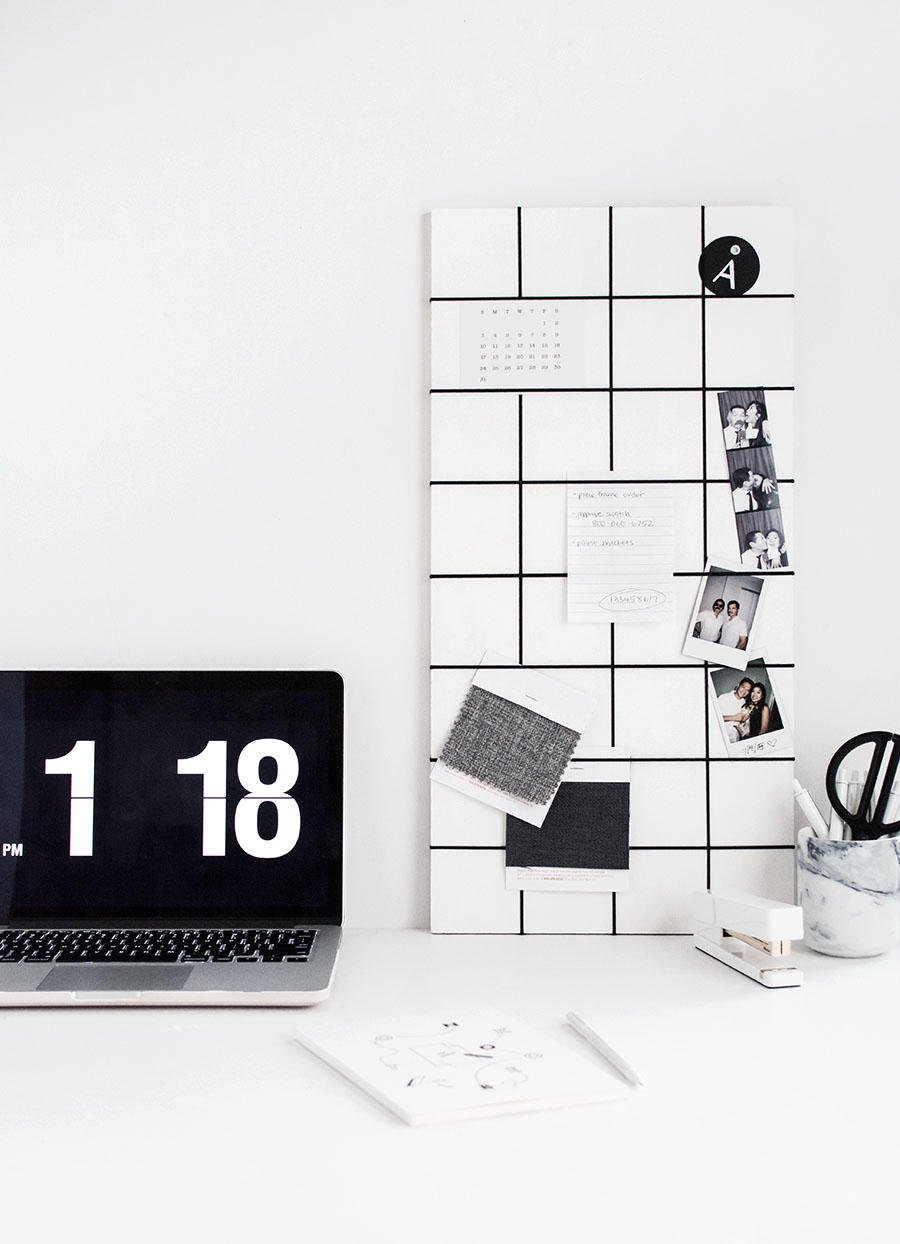
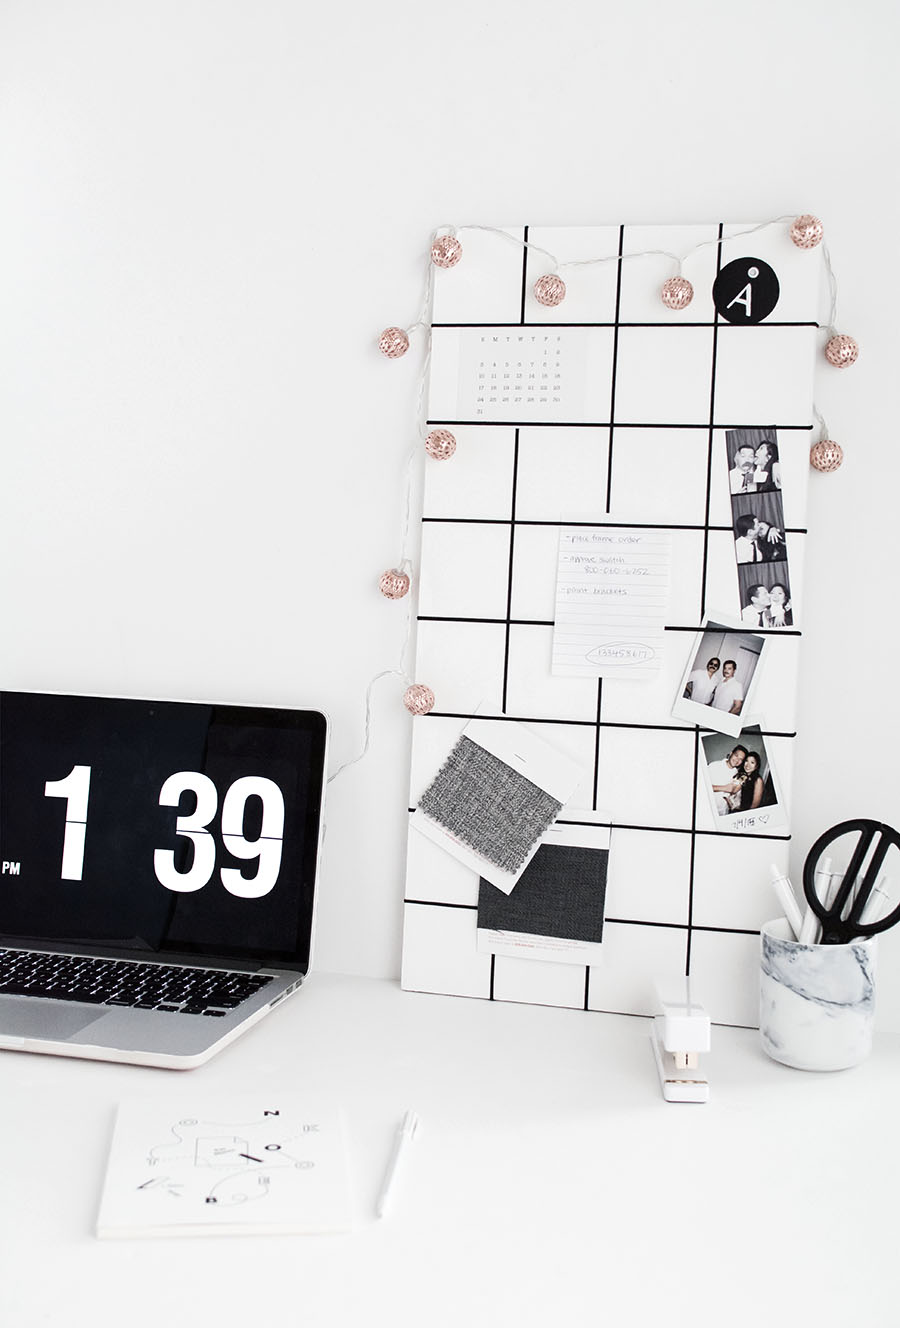
I later strung on these copper string lights which made me realize copper is coming back strong into my life. Gold always sweeps the number one spot in my heart but I can’t stop thinking about copper, or rose gold. I’ll for sure have to play around with this some more in the home.
Are you also working on getting your desk/work space organized? Or, let me know about any spaces in your home you’re trying to get in order!

Awh! This is SO awesome! Lovely DIY, girl!
Thank you! So happy you love it.
Love this!
It’s so easy to make and looks amazing!
Akane
http://www.humancat.co
Thanks, Akane! Confirming: it’s very easy.
This is a fresh take on the classic memo board. It reminds me of graphing paper.
I LOVE graphing paper haha. Thank you, Danielle!
I love how easy and straightforward this diy is- the use of elastic is simple and genius! Your board turned out perfect!
Thank you, Ivana!!
What a pretty board. I would so love to have one of these!
http://tealattewithstyle.com/
You should make one ;). Thanks, Emma!
Love this! The grid is pretty much perfect – it looks painted on!
Aw, you know how much I love clean painted lines haha. Thanks, Alexis!
Cute! Love how easy and chic it is!
Thanks Eden!!
So beautiful Amy!
Thanks Rachel <3
Love this modern take on a memo board and it’s so easy to DIY
Thank you Jenny!
so cute! I will have to try this!
I encourage you to! Thanks, Madison!
So perfectly simple! Love the addition of those copper lights too :)
You would love the the copper ;). Thanks, Bre!
Elastic cord! That’s what makes it perfect :) At first I thought is just paint :)
I absolutely love this! I want a billion of these in my office! Such a good one!
Love it!
This is super cool and minimalistic!!! I love the grid pattern (functional and cool!)
xoxo Annie
http://www.somethingswellblog.com/
my favorite color scheme is black and white so you can simply say that i am obsessed with scrolling though your page!
An awesome and easy project! Love the simple black and white color scheme!
I make these too, using a
20×30 piece of thick foamboard (found in school supplies with bulletin boards),
fabric of your choice to cover board, (I usually get 3/4 of a yard to cover one board)
spray adhesive (least expensive can is found in the car accessories area!),
interfacing material (found in fabrics),
thin cord, ribbon or lace (for hanging), and,
decorations (I’ve used ribbon of all shapes and sizes, lace, puff stickers, etc.)
I spray the entire board on one whole side and cover that side of the board with a piece of interfacing material, that I’ve cut to the size of the board. This will be your top side.
Then I cut enough fabric to cover the board and lap around to the back side, iron the fabric out nice and smoothly and iron the edges under too so the backside will look nice as well.
I smooth the fabric out, centered over the interface-covered board, and carefully flip the board over. I spray ONE LONG EDGE of the board, on the back side, with the spray adhesive and very carefully glue this together.
I then go to the opposite long side, and while pulling the fabric nice and smooth on the front side, glue this side together the same way with the spray adhesive. Leaving the corners unglued (I do them last), I proceed to doing the same thing to the short sides of the board.
Then I tuck in the corners and spray them into place as nicely and sharp as I can get them.
Then you embellish the front side as desired! I’ve used all sizes of ribbons – thick and thin – puff stickers, lace (for girls, of course!)
And, lastly, to hang the board, I use 2 or 3 pieces of thin colored cord, thin ribbon or lace, in colors to match the fabric and/or embellishments, cut long enough to tie into a nice little bow as long as I want it to be from the board. They are glued from the top of the board, back side, (I go about 2/3 of the way from the side of the board on each side) and then I’ll cover them with a small piece of the fabric to tidy it up on the back side…This also helps to add more strength to the bow.
This is so easy to do and I’ve made it look so hard…I am not good at directions! I usually put way too much info in, thinking it will help! I wish I had a way to post pics of some of my finished ones – they are very pretty, if you take the time to iron and glue together without wrinkles and such! I’ve made many, many of these, given some away to grandchildren and friend’s children, and am selling on Facebook. I’m into making some with baby-looking fabrics smsy embellishments for newborn baby pics, for the new mom right now! So much fun! The kids and teens LOVE em. They can hang pics, letters, anything, on them! I usually give some push pins with the board so they can use right away!
It is an easy project, doesn’t take long to make one, and everyone loves them. Please share your thoughts…concern…questions….. with me and any new inspirations you come up with…..I’d LOVE to hear from you too! Thanks!
This seems so simple to make! I might just have to try a reverse colour version seeing as my furniture is all black and decorations are white (I must be the only person in the blogosphere without all-white everything haha)
x Rana | http://thepicassoplaybook.com
That white in blog world is pretty big yea haha. Highly encourage you to do your own color variation- customization is the best part of DIY! Please share if you end up doing that! Thanks, Rana <3
Where did you get that marble pencil holder? I’ve been looking all over online for one and haven’t found any goos ones!
It’s from H&M! I don’t think it’s available anymore though.
I am thinking about making one, but use chalk board paint.