 Last week I announced that we’d be revealing our mystery supply challenge ornaments today, right now, it’s here! I hinted at what my color scheme would be, but you guys really didn’t need that at all to guess what I’d be doing, right??
Here’s a little refresher if anyone is confused about what’s going. Each participant in the mystery supply challenge was given the same list of supplies to create ornaments, and any additional supplies desired could be used. It’s definitely inspired by the TV show Chopped, minus the competition part- this is just for pure, creative fun!
Here are the required supplies for the challenge.
Materials:
– 1 pack of clear glass/plastic ornaments
– 1 Sharpie paint pen, any color (I used gold, naturally!)
– 1 bag of faux snow
– 1 roll of ribbon, any color and width (I used black in 1/8″ width)
The challenge allowed the use of any additional materials, so I added the following:
–gold spray paint
–painters tape
-aluminum foil
–Mod Podge
-3/8″ black ribbon
Creating a gold-dipped look is something I really like to do (y’all know me) but I knew the Sharpie paint pen wouldn’t be as clean as I wanted, so gold spray paint was for sure going to be necessary.
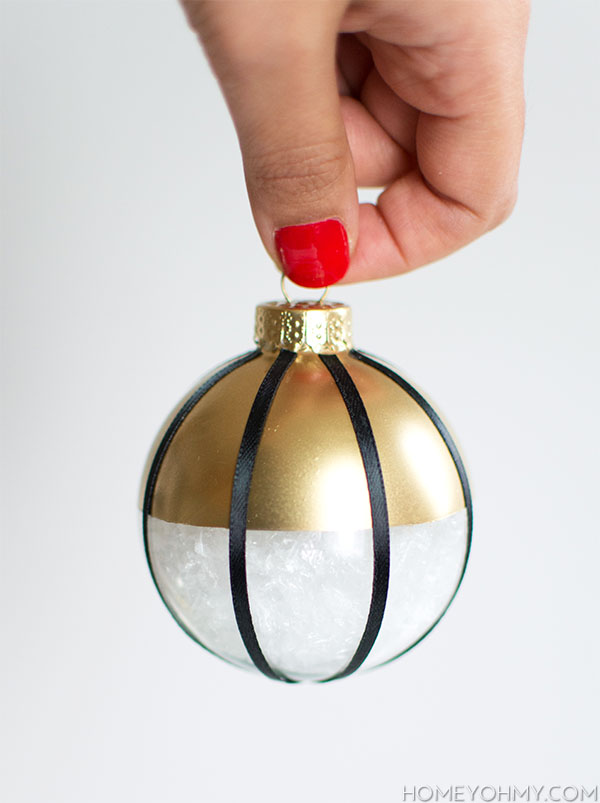
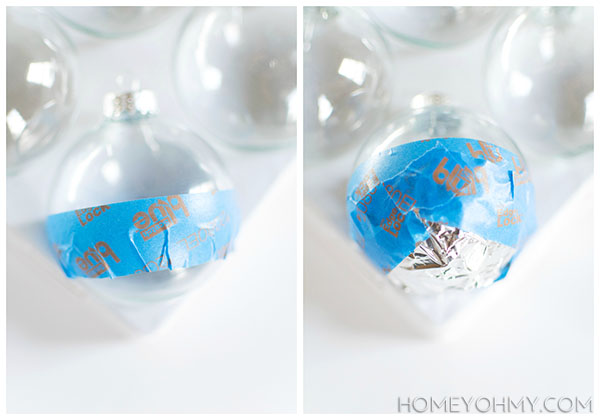 I taped the ornament at about the half way point, then covered the rest of the bottom with aluminum foil. I sprayed 2-3 light coats of gold spray paint across the top of the ornament, including the cap, then removed the tape and aluminum foil.
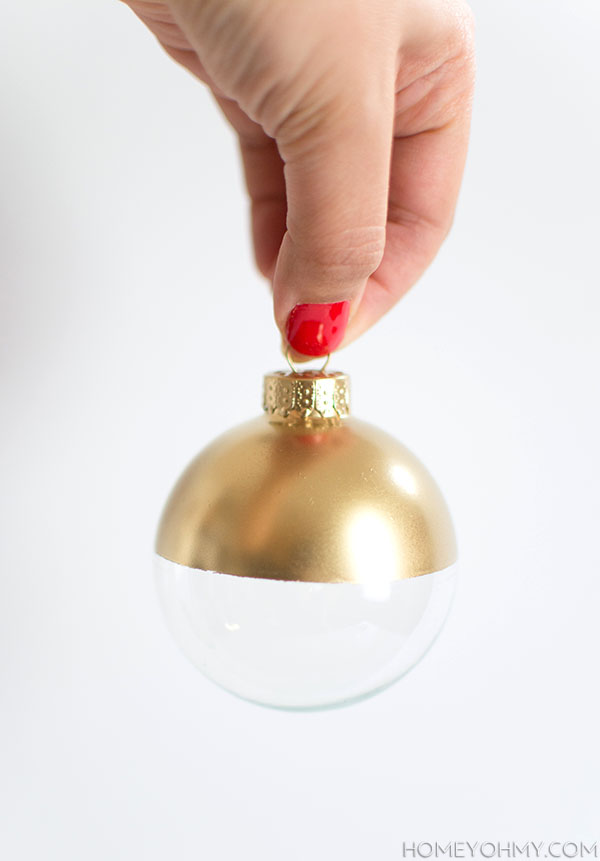 Side note: I get asked a lot how I create straight and clean paint lines, and part of my answer is that I don’t. You can see above it’s not perfectly straight, and my point is that it’s ok! Especially with what I’ll be showing next with the ribbon.
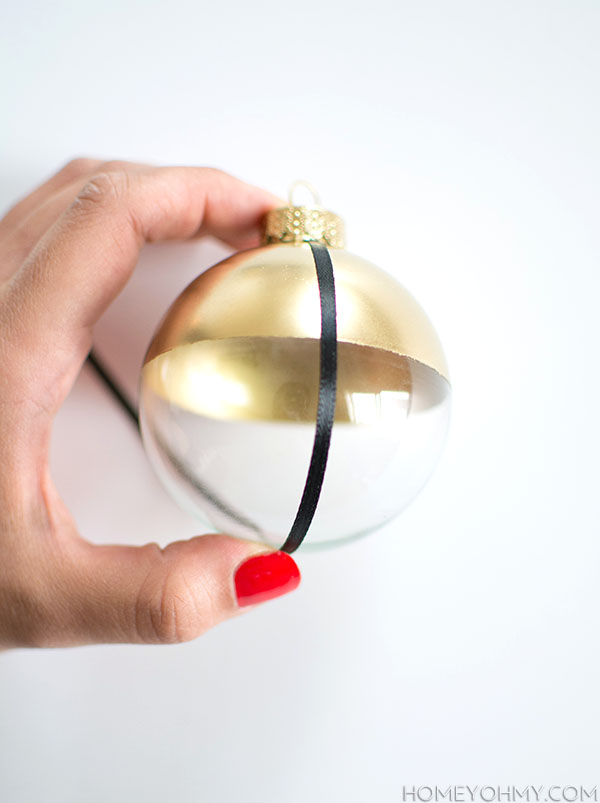 I glued on the 1/8″ black ribbon down the side of the ornament, dabbing Mod Podge with a Q-tip at the start of the ribbon, the middle, and the end of the ribbon so that it came around back to the top again, which is where I cut the ribbon.
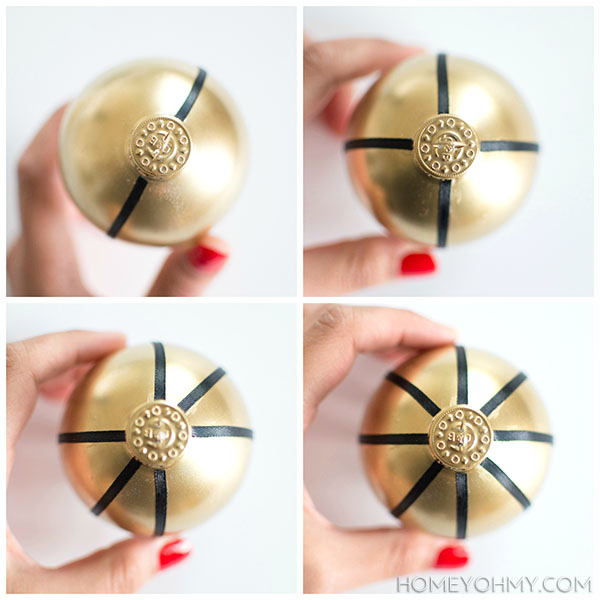 I did this in a radial design, meaning all strips of ribbon intersected at the same spot at the bottom of the ornament (I’ll show a shot of that soon).
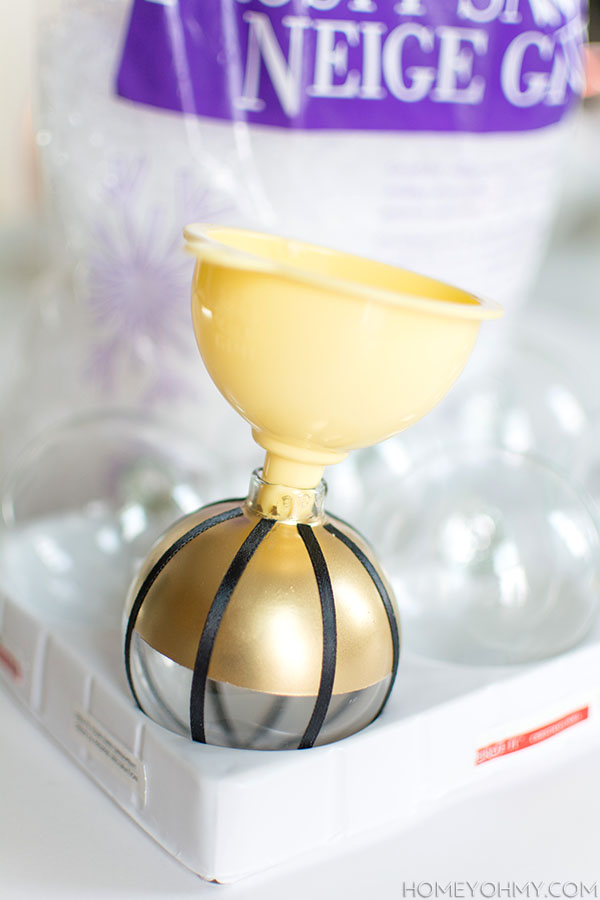 Next, I used a funnel to pour faux snow into the ornament. The type of snow I used wasn’t fine at all, so I repeatedly jabbed a chopstick (so Asian) down the funnel to help it all get into the ornament.
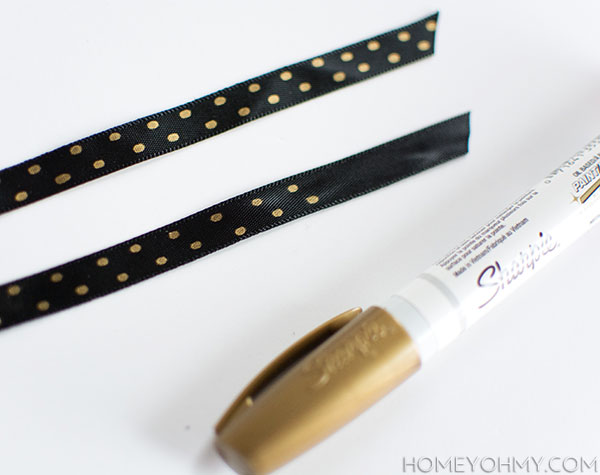 On the 3/8″ black ribbon, I dotted on the gold, Sharpie paint pen to create a polka dot pattern, then tied the ribbon into a bow on each ornament.
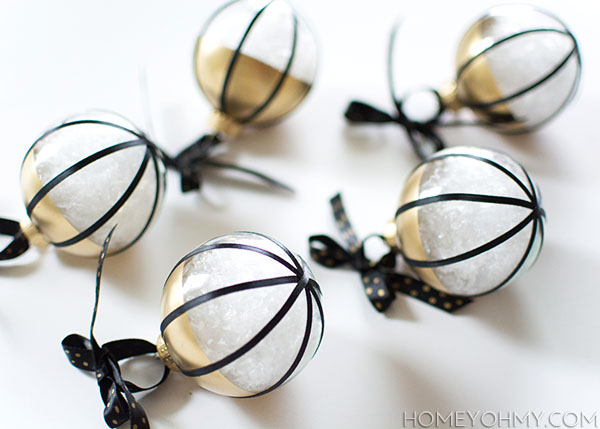
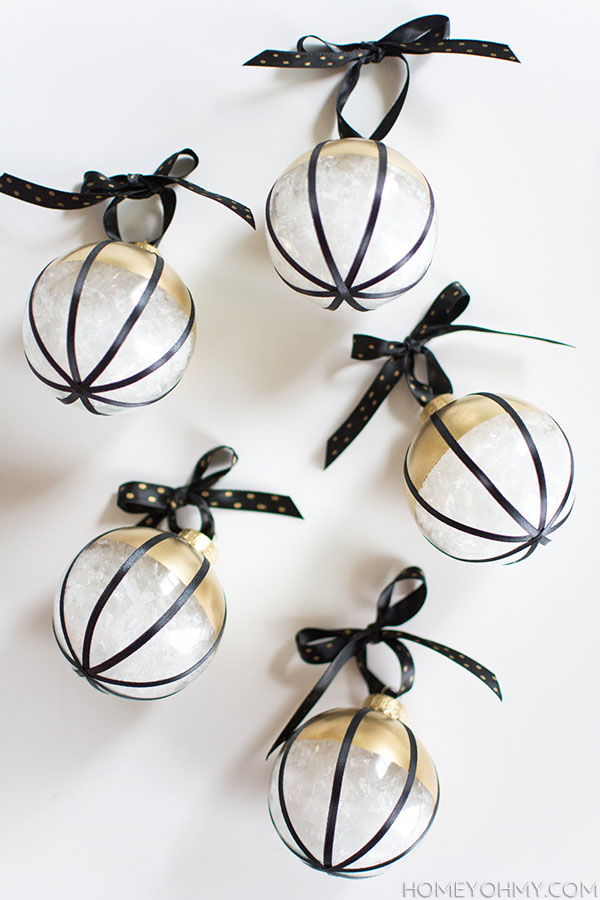
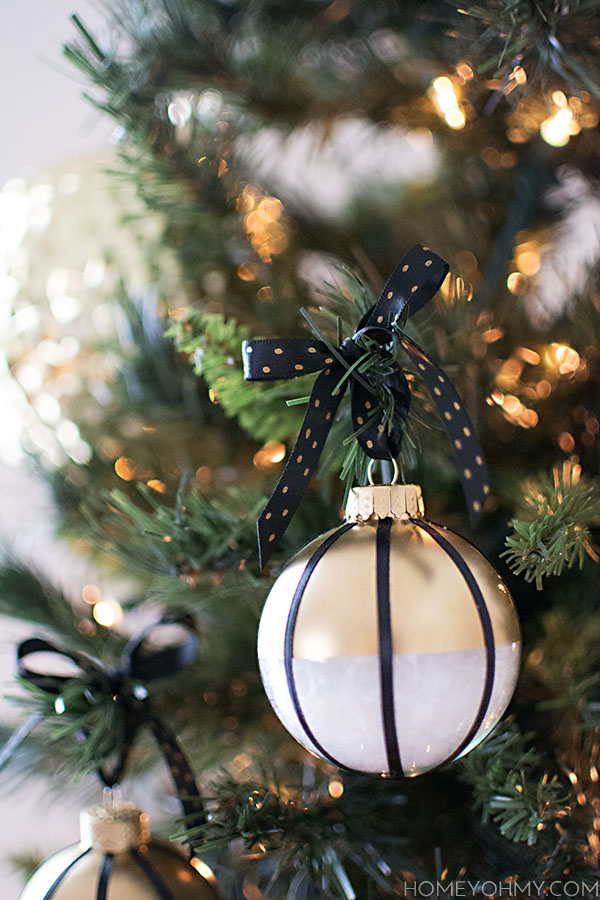 The faux snow was the material I was most not looking forward to because I didn’t think it looked that great, but it ended up giving a subtle, icy effect and it isn’t as terrible as I thought it would be. They’re hanging here from my Christmas tree, which I’ll be showing you guys very soon!
What’d you guys think of this challenge? Would you have done some of the same things I did?
Go ahead and check out all the other ideas for this challenge from the rest of the participants. I know you guys are dying to see them all!
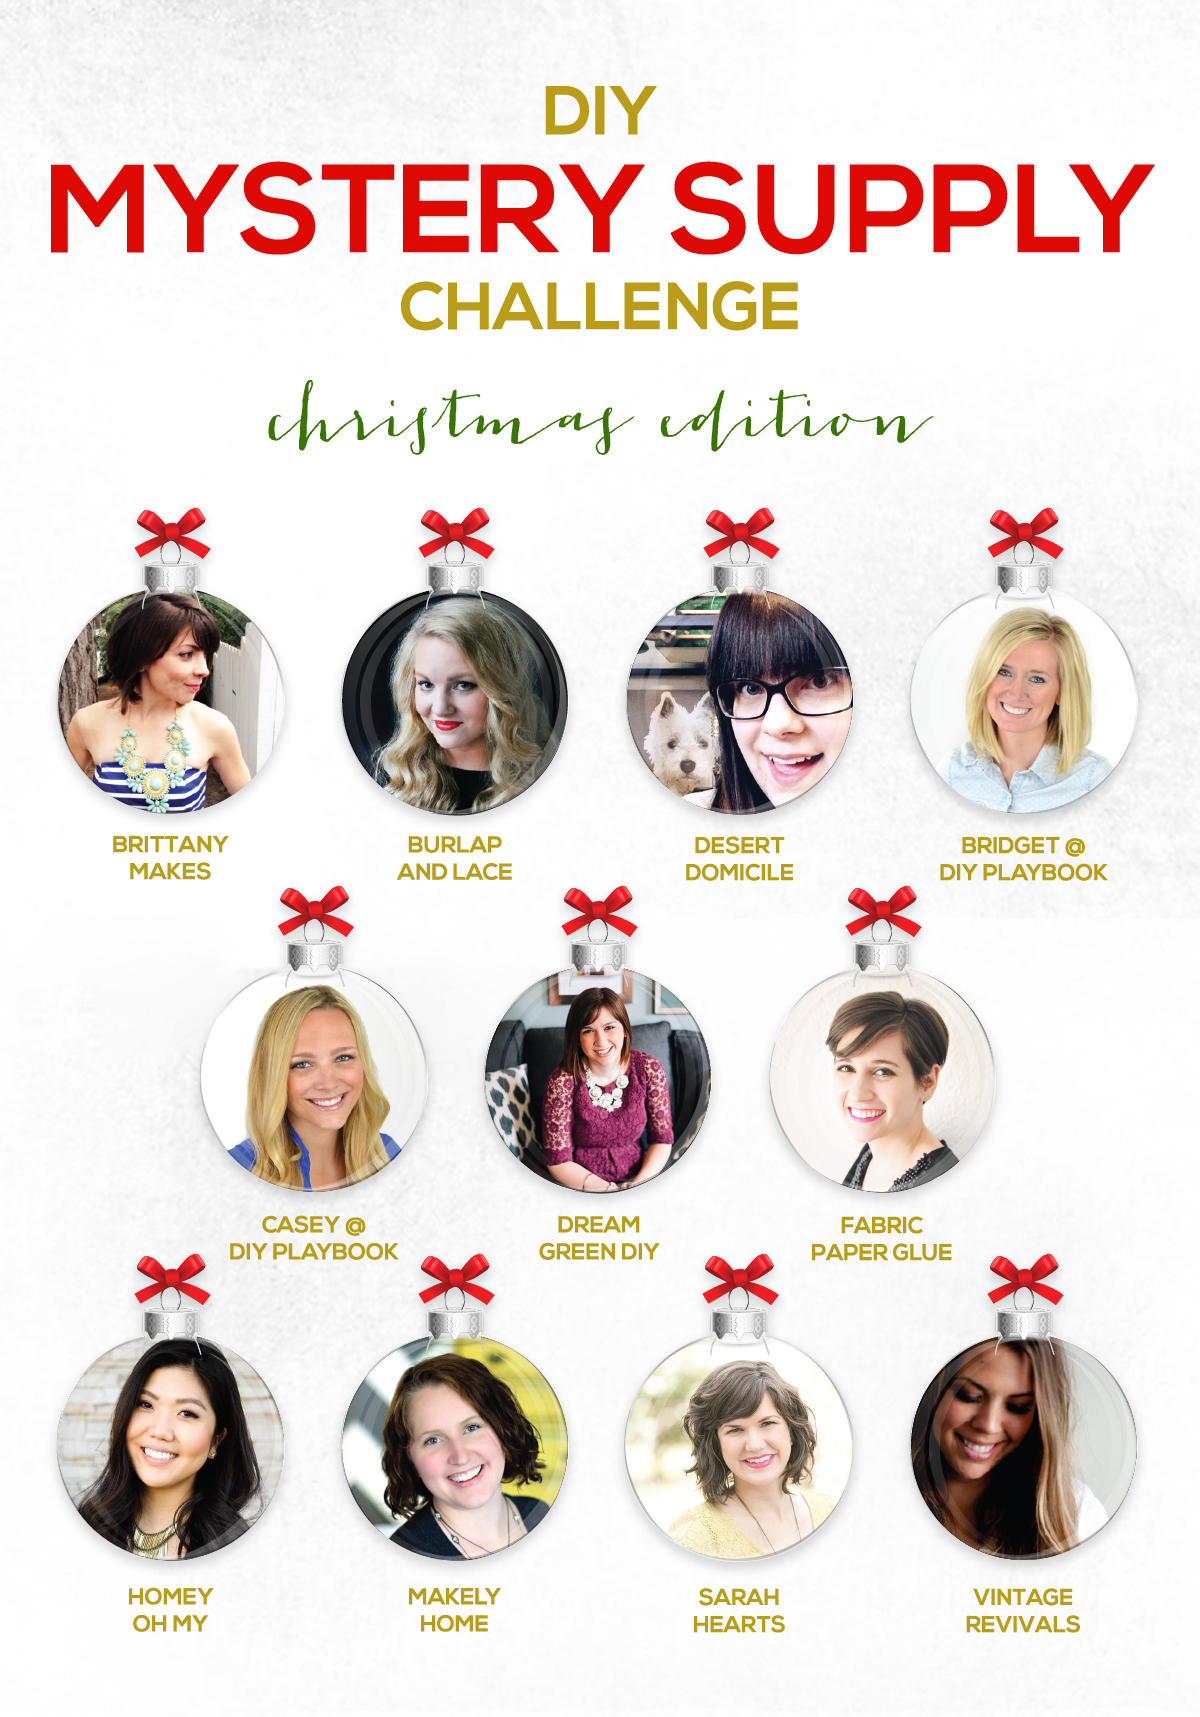
Brittany Makes | Burlap and Lace | Desert Domicile | DIY Playbook
Dream Green DIY| Fabric Paper Glue
Makely Home | Sarah Hearts | Vintage Revivals
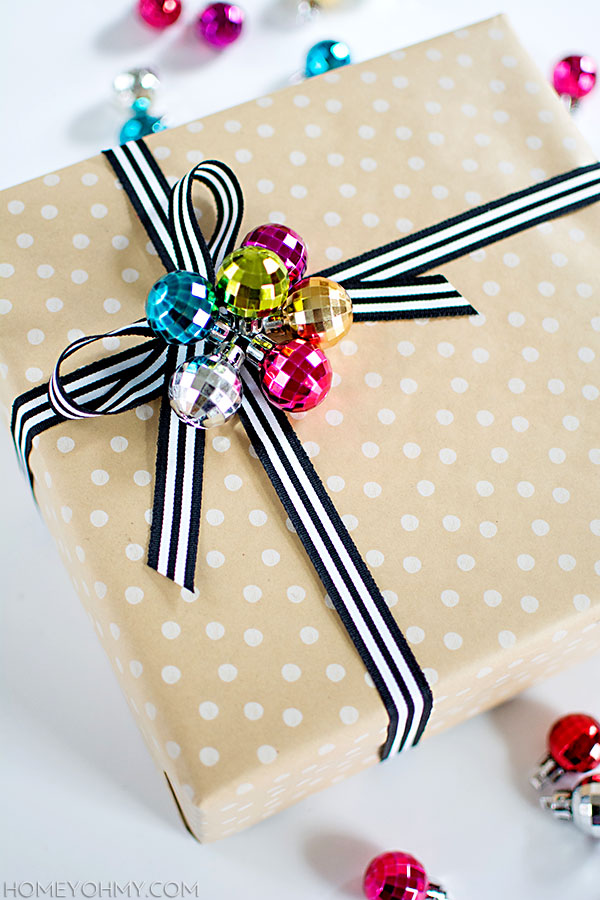
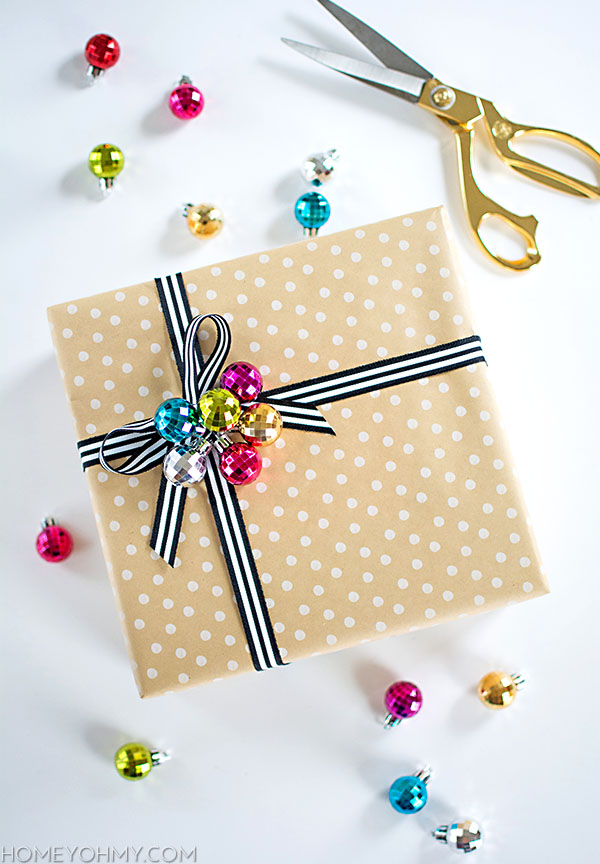 The best part of gift giving? Wrapping. Ok, also that warm fuzzy feeling of spreading joy, but it’s that extra teensy step of wrapping that makes it a whole lot more special. The simplest embellishments can make the biggest difference, and while I’m all for adding personal touches, I also believe these things should be fairly quick and easy to leave us more time for things like hanging out with loved ones, drinking hot chocolate, or watching The Voice (Damien is incredible!)
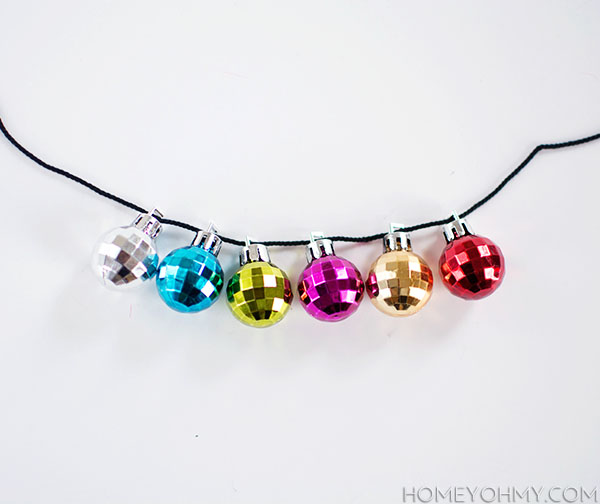 I strung these mini disco ball ornaments in a row like this.
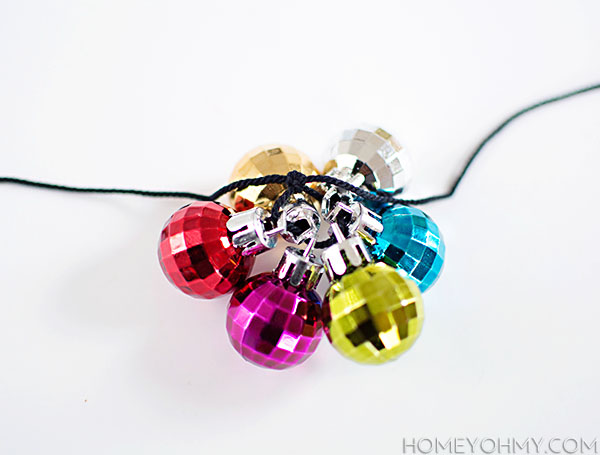 Then I double knotted the ends of the string together to create a small loop.
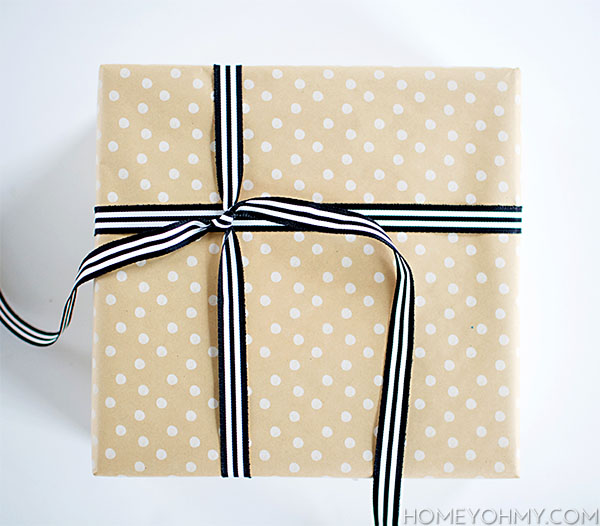 I tied this black and white ribbon around the box and double knotted it off center to one corner.
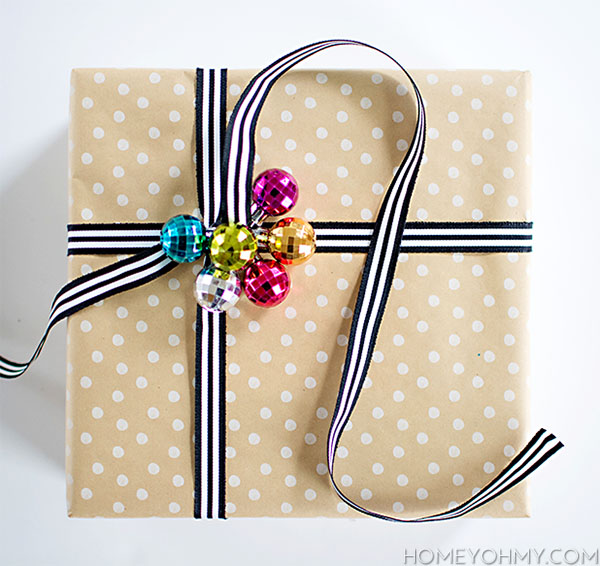
 Tied the ribbon into a bow, cut off the excess at the ends, all done.
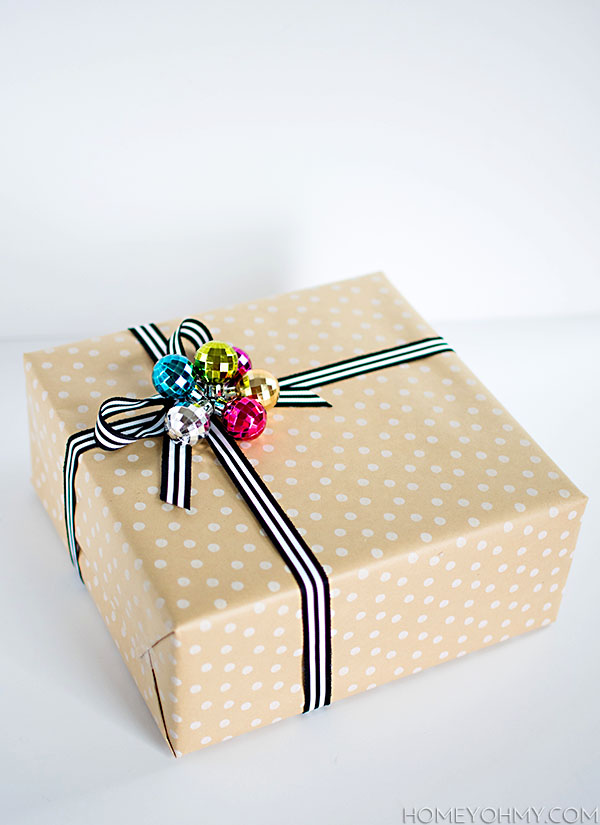
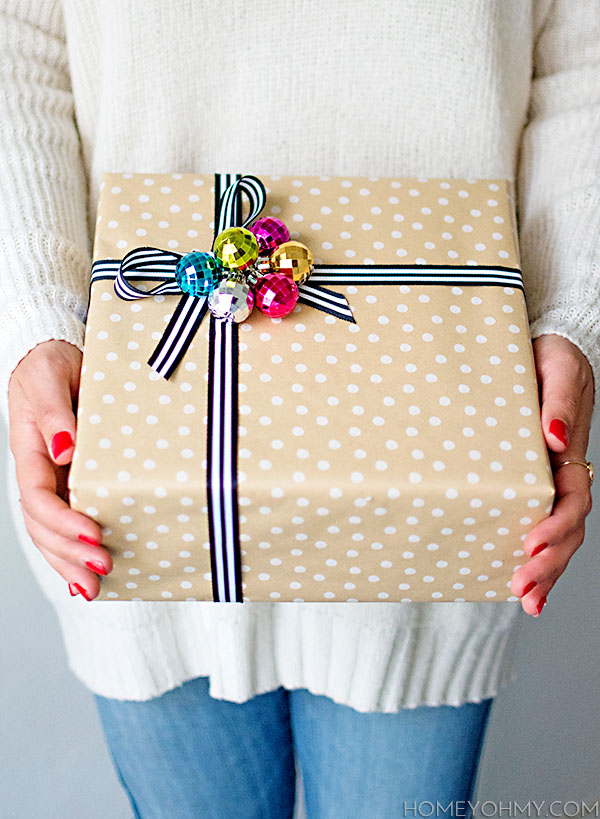 If I received a gift wrapped like this, I’d for sure save the ornaments and repurpose them, maybe like how I used them for my
  By “for her,” we could really say “for me.” I don’t know how else to shop for a sister other than to get her something I’d want for myself (granted that she likes the same kind of stuff, of course). That’s also why I end up shopping for myself while shopping for gifts. I know that happens to you, too! Unless you have self-control, which I immensely commend you for.
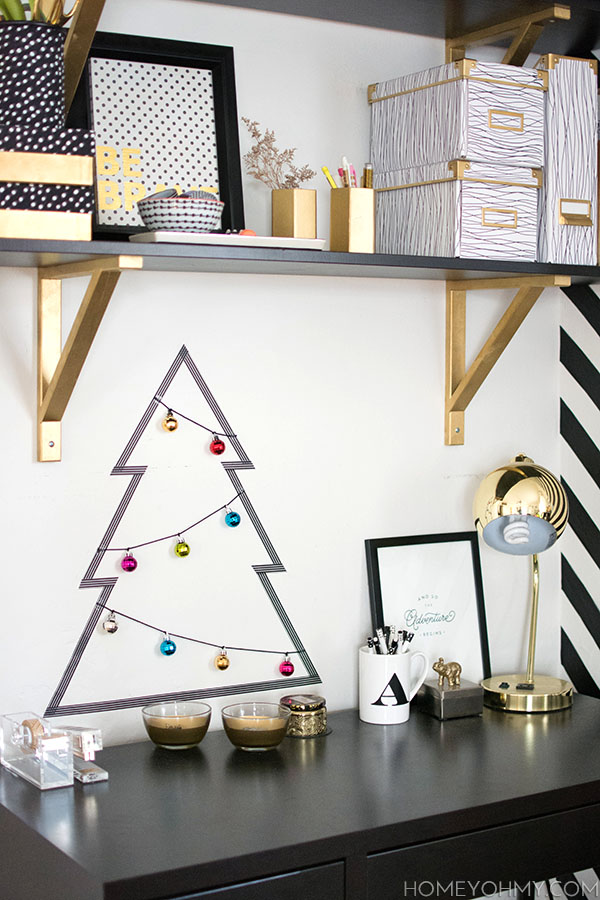 Here’s a really easy holiday DIY for you guys! A Washi tape tree was something I was itching to do, and it was just a matter of where. I did consider doing a gigantic one in place of a real tree (excellent small space solution), but instead decided to go for Christmas-ifying my desk. My desk is becoming more and more an area for regular decorating, and I like the idea of always changing things up as long as it’s simple. This one for sure is very simple and a quick way to add a little Christmas cuteness to any blank wall or nook. Cubicles are welcome as well.
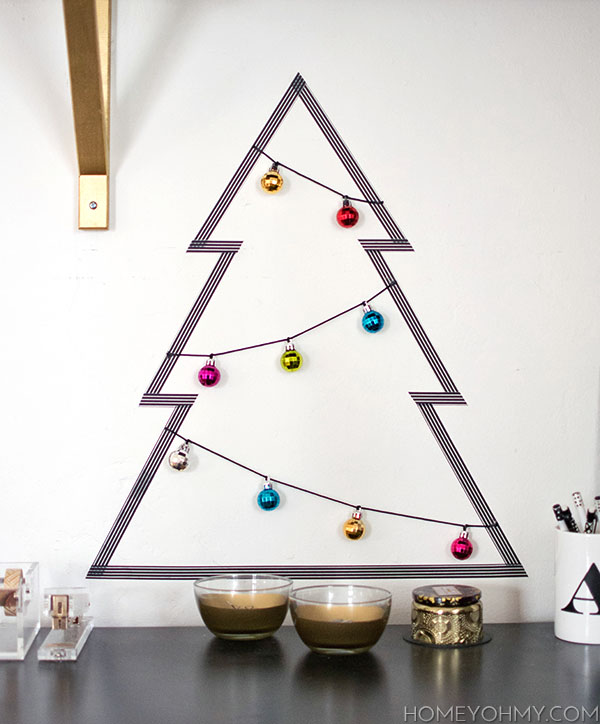 It’s pretty straightforward and very customizable, which makes this a DIY that doesn’t need much explanation (yay). I cut out pieces of Washi tape and taped them to the wall. Boom. The corners were a little tricky and I had to re-do them a few times, but the key was to use scissors in order to have clean and precise corners.
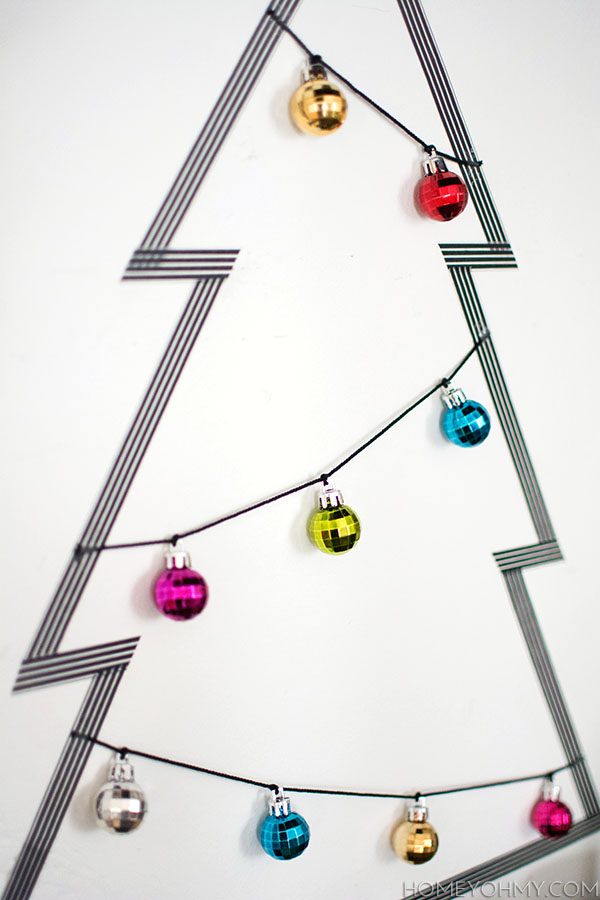
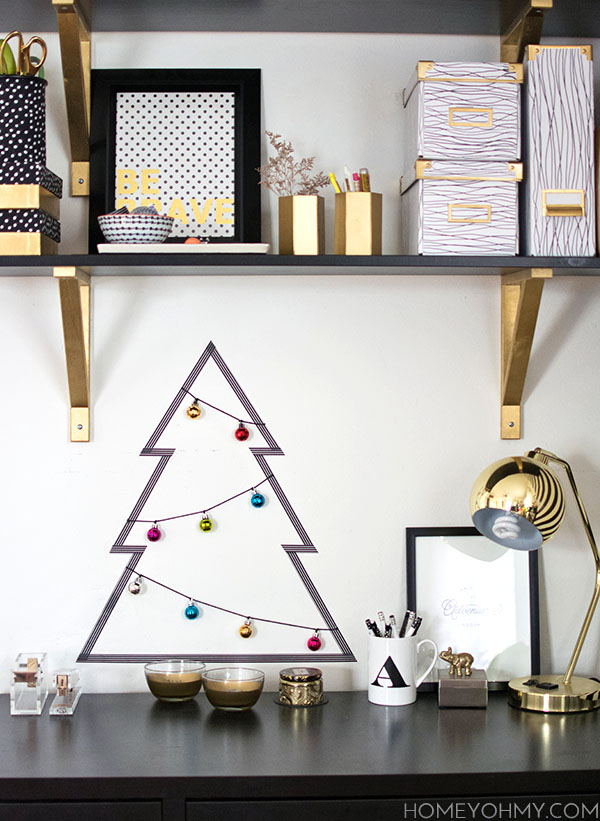 I wouldn’t describe these ornaments as my typical style, but I’m always attracted to anything with a metallic shine, and I love taking advantage of the holidays to add a pinch of whimsy. You can find me staring at them when I’m at my desk and completely forgetting that Thanksgiving hasn’t even passed yet.