I’ve been itching to update the pillows in my living room, and I came across a dilemma I’m wondering if you can relate to… Why is it so hard to find pillow cases in simple patterns and colors?? Or I guess the difficulty comes in hoping someone out there mass produced exactly what I envisioned in my head, ha! This situation absolutely calls for a DIY.
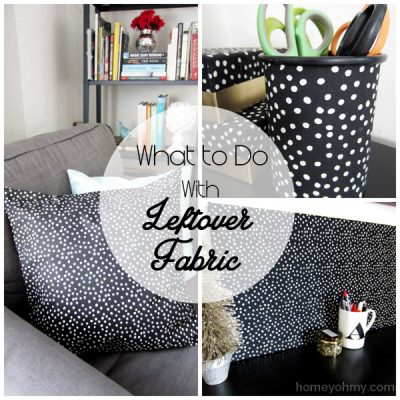
I had shared a no sew pillow cover a while back in a post about using up leftover fabric, and it ended up being the most popular idea from that post, so in addition to feeding my pillow addiction, I thought I’d do an updated tutorial with more details on the how-to.
Materials:
-fabric (I got the ikat polka dot fabric here and the striped fabric here– this pillow size is 16 x 26 in. I painted the purple one, which I’ll briefly show in a bit)
–Unique Stitch Adhesive
-fabric scissors (I LOVE the way cutting fabric with fabric scissors feels… weird?)
-ruler
-pencil
-iron
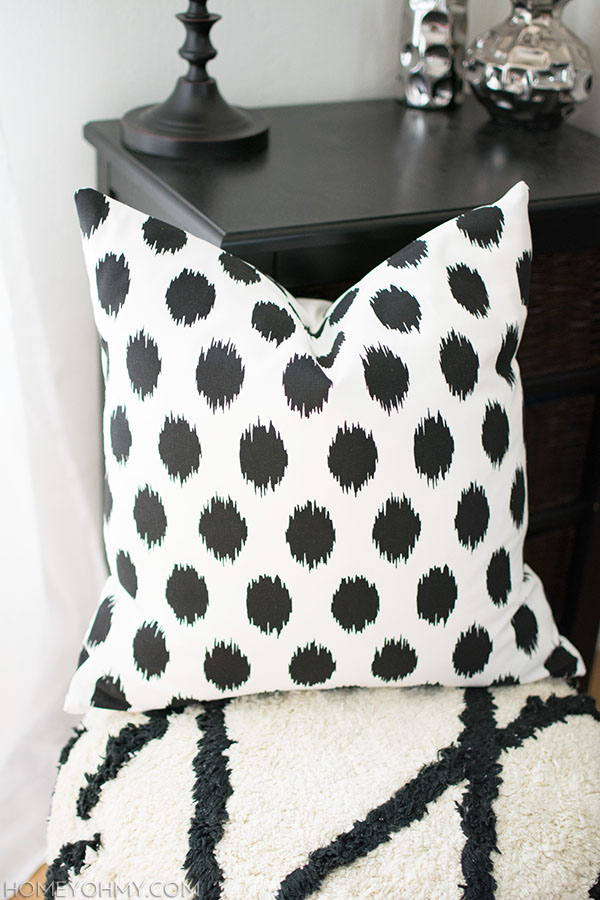
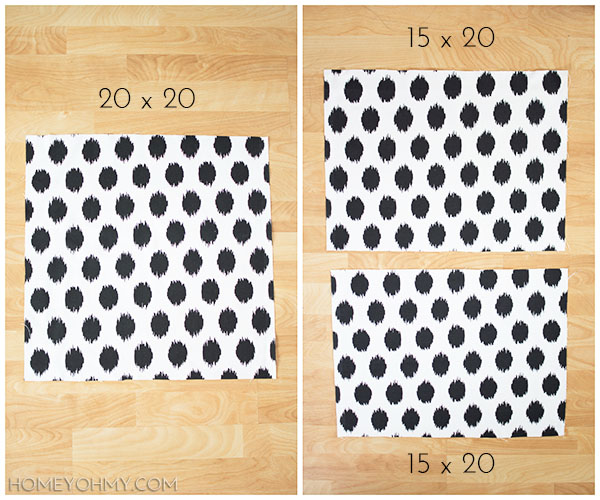 For the ikat polka dot pillows, the pillow inserts are 20 x 20 in., so I measured and cut out a 20 x 20 in. piece and two 15 x 20 inch pieces after ironing the fabric. This will be an envelope style pillow, which is the easiest way to go for no sew.
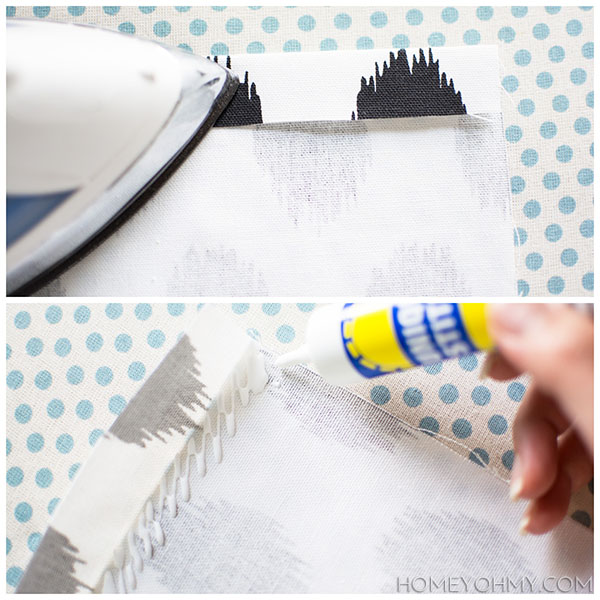 Starting with the 15 x 20 in. pieces, I folded back about an inch on one of the 20 in. sides of each piece and ironed it down. Then I applied the Unique Stitch under the fold to glue it down. This glue is my secret weapon to no sew projects because it holds SO well. I’ve found that the key is to apply enough so that it lightly soaks through the layers of fabric. If I can feel the stickiness of the glue on my fingers as I press down on the fabric after, I know the job is done.
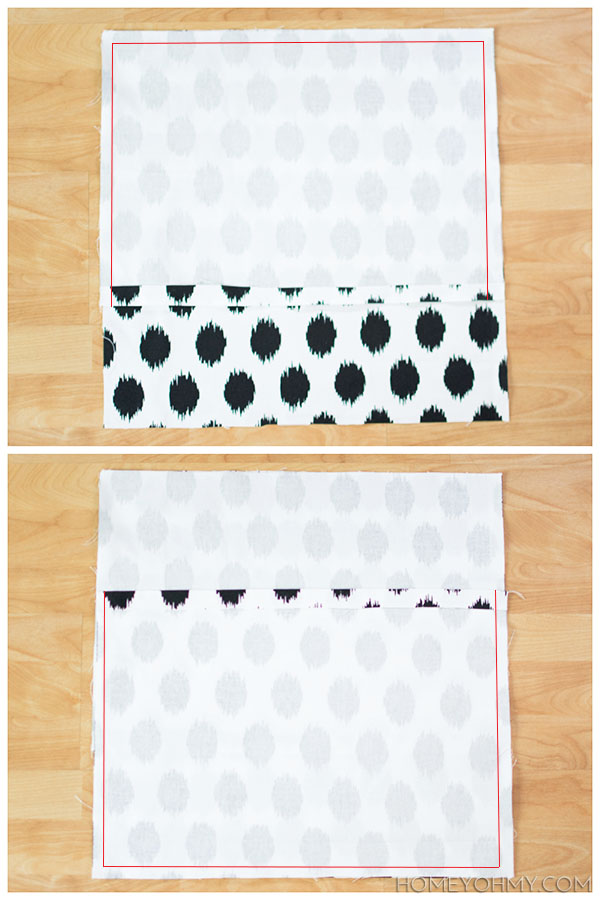 I lined up a 15 x 20 in piece with the top edge of the 20 x 20 in. piece with the fabric faces facing each other. I glued the fabric pieces together where the red lines are in the photo above, which are supposed to be about a quarter inch away from the edges. Then I glued on the other 15 x 20 in. piece lined up with the bottom of the 20 x 20 in. piece. The folded edges of the 15 x 20 in. pieces should be overlapped.
I let the glue dry for at least a couple hours before turning the covers inside out and stuffing them with the pillows.
 Karate chop that pillow and it’s done!
Now here’s another dilemma I encountered… Why is it so hard to find fabric in simple patterns and colors?? Maybe this next one isn’t as simple as I think it is, but it was simple to create it myself.
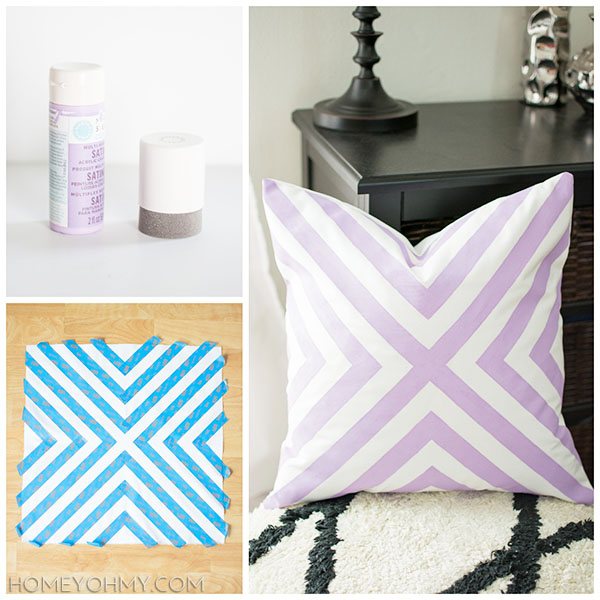
All I did was take some plain white fabric, tape on my design with painters tape, then pounce on the paint over it. I like using the Martha Stewart Satin Paints for fabric since no fabric medium is required. The color I used is hydrangea purple, which is an unusual choice because I don’t own a single purple thing. I was really digging the color for this pillow cover though, and the pretty name sealed the deal. This cover by the way is for an 18 x 18 in. pillow, and the envelope flaps were cut to 13 x 18 in. each.
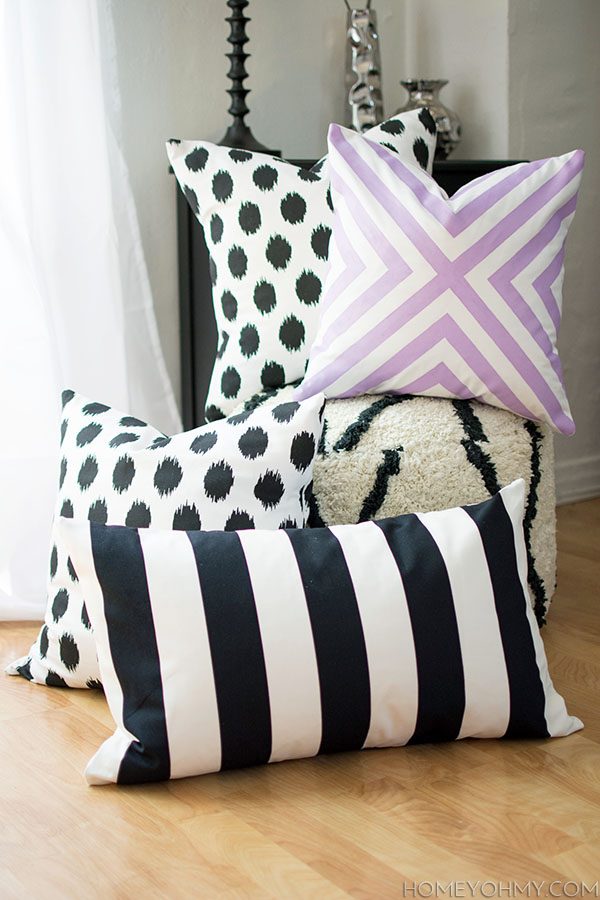
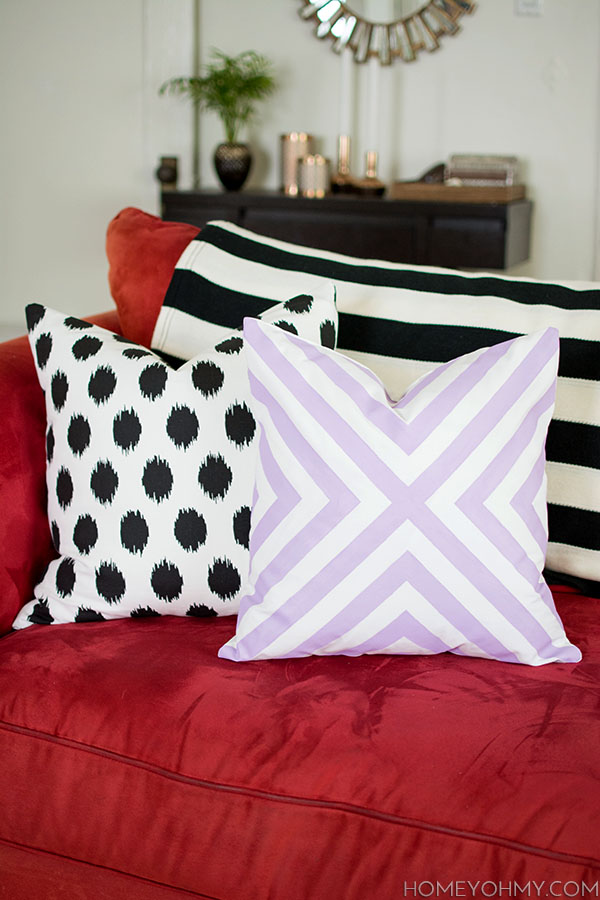 I’m really liking the way the purple looks on my red couch, and of course the black and white never fails to please me. If you feel like the ikat polka dot pillow looks familiar, it might be because you saw the pattern in the background of this post.
**Quick pillow tip- If you’re looking for down-filled pillows, try the clearance section of HomeGoods, TJ Maxx, or any of the other stores like those. The pillow covers will be ugly, BUT, you’ll be getting the down-filled pillow inside them for cheap and then making your own custom pillow covers, like I did with this project!
Which of these three pillow patterns is your favorite? My boyfriend said the purple one was his favorite. Another unusual development!
Those pillows look great! I love the ikat polka dot fabric too. I looked on Etsy for that same pattern and it was so expensive!! So glad there is a cheaper alternative :)
Love that lavender pillow! Great DIY.
These are gorgeous Amy!! I love the fabric you used, and well, no sew is always awesome :)
xo, Tanya
Absolutely adore the ikat polka dot print! It goes so well with the one that you painted (which is beautiful too!).
I your pillows! I sew, but I know a lot of people that don’t/can’t so this is a perfect place to send them for pillow covers! Down pillows are the ONLY way to go! Great tips!
Haha karate chop that mother! Love your design on the purple one <3
You’re speaking my language girl! I’m not a big sewer at all and this looks super simple! Love them both! And no you are not weird for liking the way it feels to cut fabric with fabric scissors. It’s amazing. Awesome job!
LOVING the purple one. I’m a bit of obsessed with lavender everything lately, just may try that.
Amy, these are so adorable! How the heck you get your stripes so perfect without bleed is beyond me! Love these! I was just looking into “non-sewing or ironing” adhesives so I came across this in perfect timing! Can’t wait to test out the unique stitch adhesive!
I love your quick pillow tip! I’ve never thought of that. Cute pillows!
Very pretty! And so easy to make!:-) Pinning!Xo
I love all your pillows and your great tips!
I can’t get over how perfect the painted one looks, you’d never guess it wasn’t a patterned fabric to begin with! And thank you for the Home Goods/TJMaxx tip, never even occurred to me to look under the (usually heinous) pillow cover :)
So good! They look super professionally done. You are a stylish talented lady–but we already knew that! :)
I LOVE THE PURPLE painted one! So cute!
Love that ikat-y polka dot fabric!
I love the purple one! I have two questions though: How does the glue hold up to washing? I’m getting ready to make pillow covers for pillows on a kitchen banquette and due to little grubby hands I know they’ll have to be washed. And second: where can I buy the glue? Is it available at regular craft stores?
Hi Stephanie! I haven’t washed these covers yet, but I’ve washed another item I made with this glue and it held up fine! I washed it cold and tumble dried low, and I’m not sure if that’s how it’s supposed to be washed but so far so good. I got my glue at Joann Fabrics so my best guess is that it’ll be at a regular craft store. Good luck and let me know how yours turn out!
So clever and stylish! I featured your DIY Pillow Covers in my latest post at Bright Settings – you can see the feature here!! http://www.brightsettings.com/BrightIdeas/10-summer-diy-decor-ideas/
Heather
These are fantastic. I love anything no sew. :)
Wow you did an incredible job on that purple pillow!
I think I need to get some of that sewing adhesive. It looks like way more fun than actual sewing
This is such an awesome idea! I’ve had so much trouble looking for the right pillow and I never thought of making my own. Also, the no sew is just wonderful!
I just love pillows, and these are gorgeous. I love painting fabric too, so that purple one is my FAVORITE! That was a great idea-using the painters tape. I’ve actually been trying to figure out how to sew a chevron design on a piece of fabric…that is it! Thanks for the idea. I’m pinning, and when I actually do the project (who knows when it will be!), I’ll link back to you. I’m new here, so nice to meet you, Amy!
Gina @ Gina’s Craft Corner
Amy I love these! I’ve been trying to find pillow shams for our new bed but can’t find exactly what I’m envisioning. Do you think the Martha Stewart Satin Paint would be ok to use on a pillow sham on your bed (which you’d need to wash once in a while)? Does it dry soft?
Love you Amy!
Hi Keidi!! I’d only use the paint on a decorative pillow, not one you’d sleep on. The paint doesn’t dry soft, especially if you apply multiple layers like I did, but I did put it through the wash recently and it held up well! Ask more questions if you have them.
Love you!
Hi Amy! I love all the designs! Not sure if I can pick a favorite.. I am going to make these as a Christmas gift.I only have one question…
Because the glue hardens does it make the edges hard and uncomfortable to use?
I want to make two small sofa pillows and a normal bed size pillow with this method.
Thanks!
Hi, Darrian! Since the pillow is turned inside out after the glue dries, the hard edges will be on the inside of the pillow and they won’t be noticeable from the outside. They are not uncomfortable!
So happy to hear you’ll be trying this out. Good luck!
I have a pillow addiction too. :/ Someone needs to start a PA group for us! Hahaha!
Love your pillows, and thanks for the great DIY instructions! I’m trying to find pillows for my master bedroom that are in good colors/patterns that also don’t cost an arm and a leg, so this will be perfect!
I was following along great until it came to overlapping these pillows. Does the back side end up with two lined up openings or just one as they overlap?
Hi Ashlee! There should only be one opening visible in the back since the two pieces overlap. There’s a brief visual of what the two flaps of the envelope should look like in this video at 2:04 https://www.youtube.com/watch?v=FhZnHhbcN-Q Does this help? Let me know if you need more clarification!
What would the measurements for the pieces of the 16 x 26 pillow size be?
Hi Izzy! The two pieces that make up the envelope in the back are 16×15 and the front piece is 16×26.
I love this idea! Can’t wait to try to out for my first apartment next this year!!! Quick question, where is that adorable ottoman from???
It’s from Target a couple of years ago!
Just Wow! Your tips and work are so awesome! I am excited to try to design a set of no set pillows! Thank you!
Adrienne
What a great idea! Do you think this would work as well with a thicker material – like velvet? Thanks for sharing!
Ooo, I’m not sure. My guess is no, but if you have samples to try on then it wouldn’t hurt to experiment. The reason I think not is because the glue really has to seep in well through the layers, and I don’t see that happening with velvet, but again, try it out. If you do, let me know how it goes!
How do you figure out sizes to cut, i have a bunch of different size pillows, is there a math fomular?
Need to know how to measure for 24×24 pillow How many yds for 4 pillows
Can’t wait to try this! I purchased random pillows from a local thrift shop for .50 to $1 each that I want to make covers for to use with my deck furniture because I cannot find red pillows anywhere! My question is this: how do you determine the back flap size? I have several different size pillows! I thought at first you were subtracting 5 from the first number until I read your answer to someone else’s post! Help! Thank you for these great instructions!