This post is sponsored by Aveeno. Thank you for supporting brands that help bring fun and new ideas for you to discover and try!
I ask myself the same question each time I finish a jar of moisturizer- what can I do with this jar that feels way too nice to toss? Maybe you ask yourself this too, and while I’ve most often repurposed jars for organizational storage, here’s an idea for something decorative for the home that will channel more of your creativity and bring in more of those very welcome Spring vibes. In celebration of Earth Day, I’m partnering with Aveeno as a friendly reminder to recycle those empty jars or try this simple DIY to upcycle them into planters that are useful, adorable, and support a good cause of reducing waste in our landfills.
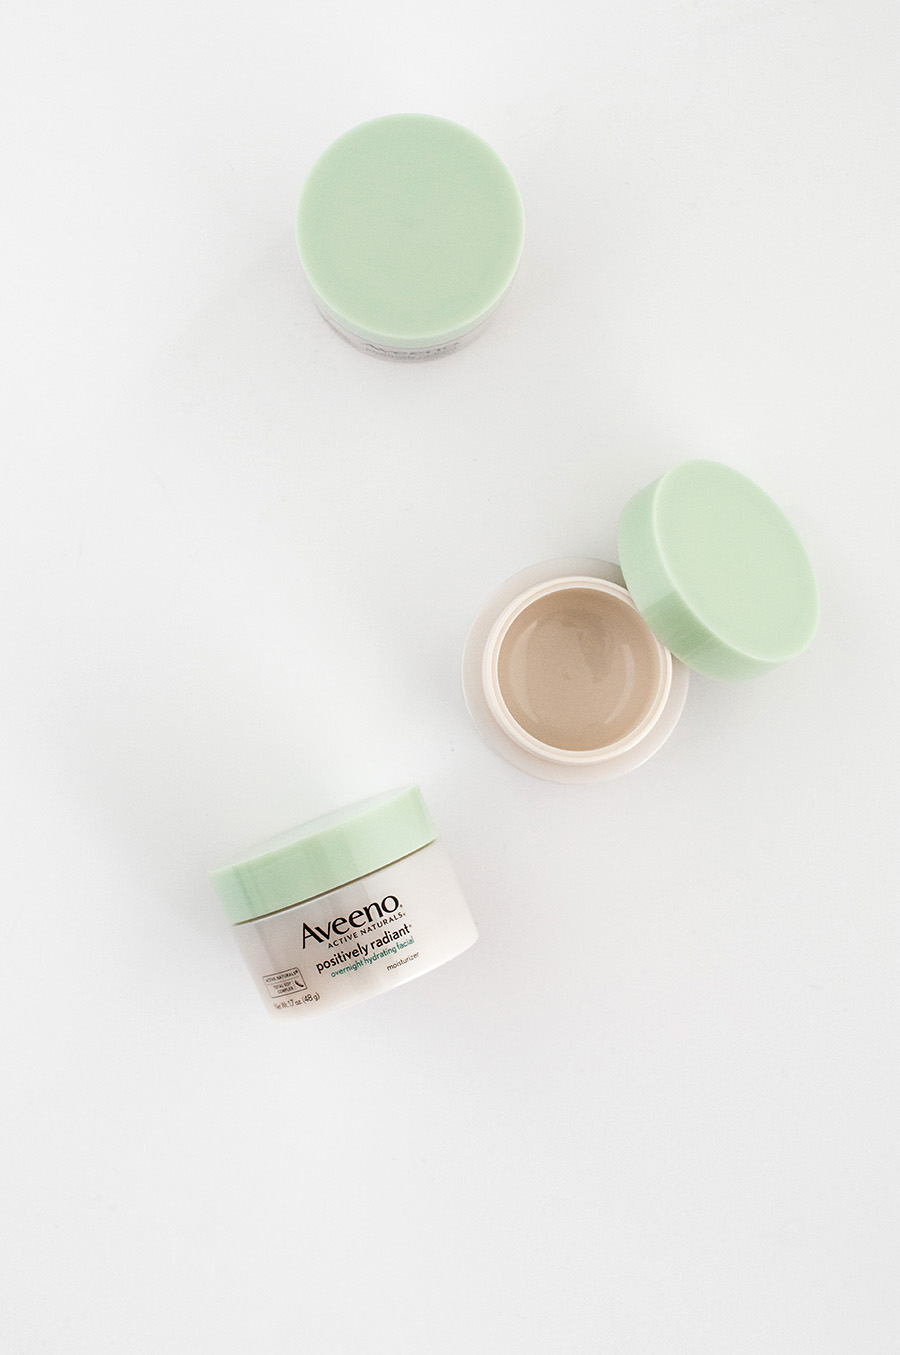
When you’re done with the product, rinse your jars out with water and either toss in the recycling bin or just toss the lids in the recycling bin and move on to the next steps. The jars I used are from the Aveeno Positively Radiant Overnight Hydrating Facial, which have a really good weight to them and work really well for creating sturdy mini planters.
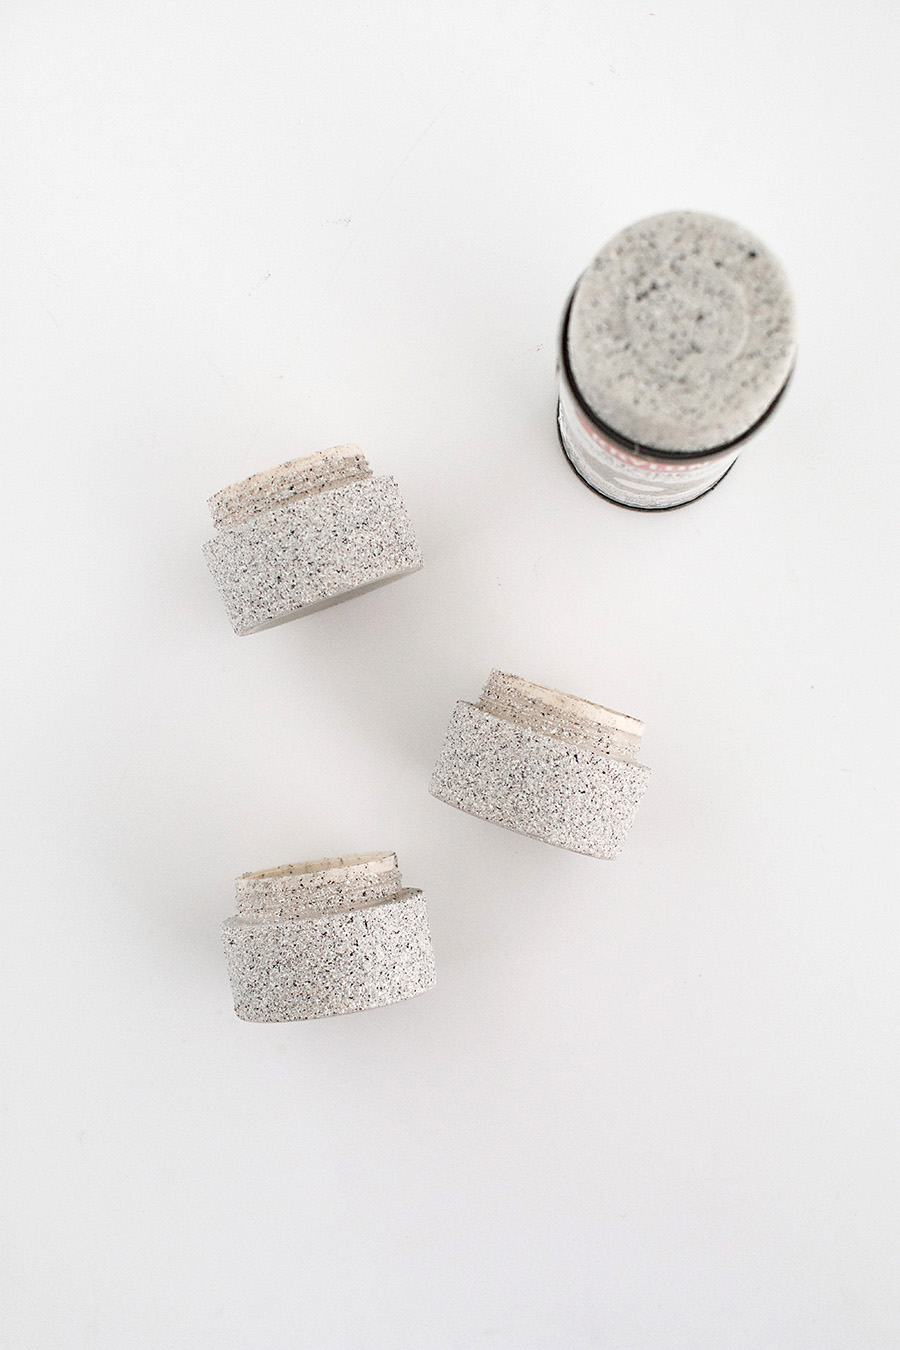
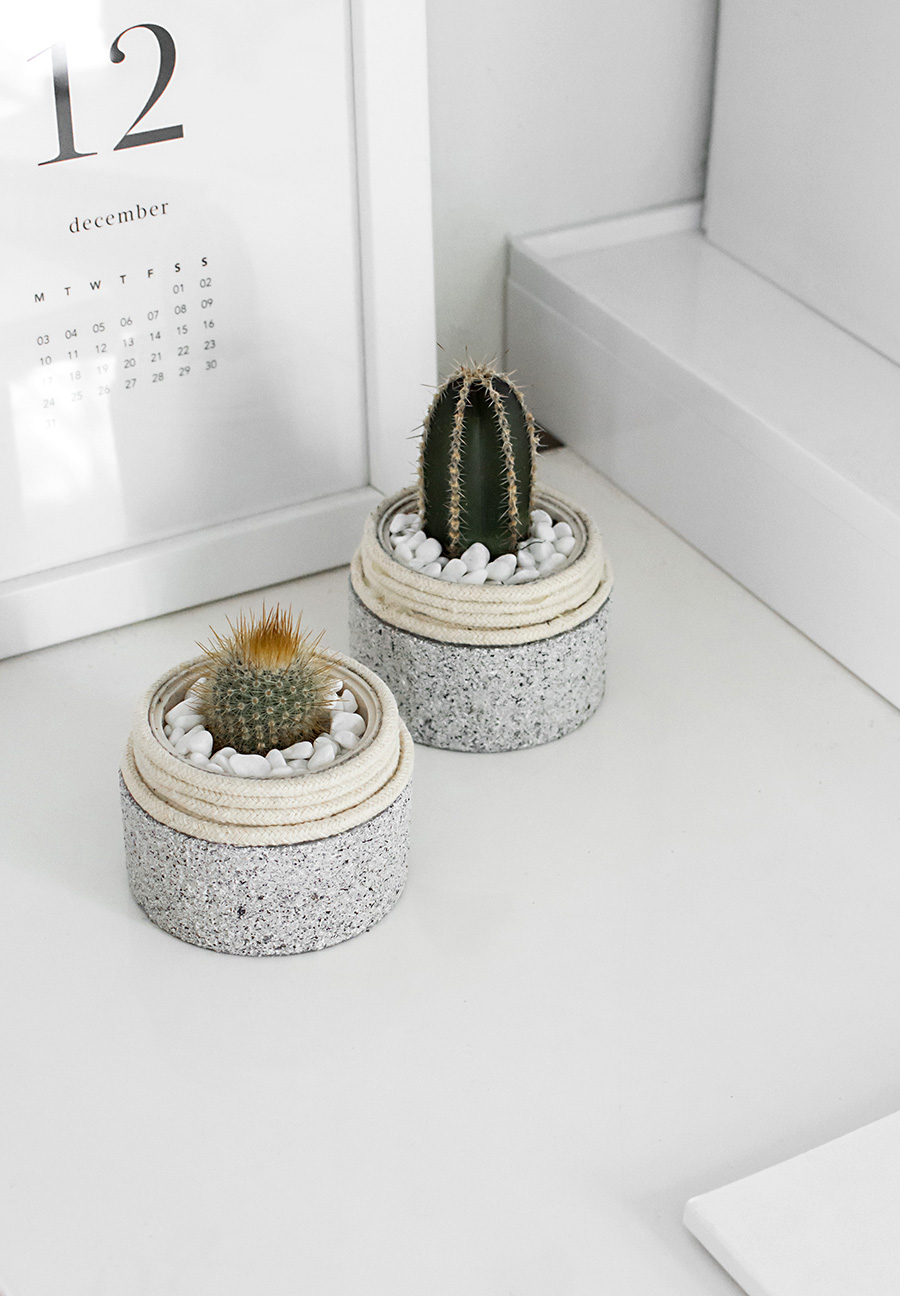
Holding the jar by the top where the lid used to be (wear a glove to protect your hand!), spray paint the jar with about three even layers or as many layers as it takes to get opaque coverage with drying time in between. I used this spray paint that creates a textured stone appearance. It takes longer to dry, so wait 15 minutes between coats and at least 1 hour after the final coat before handling. Spray a clear top coat like this one after the paint is completely dry for extra protection.
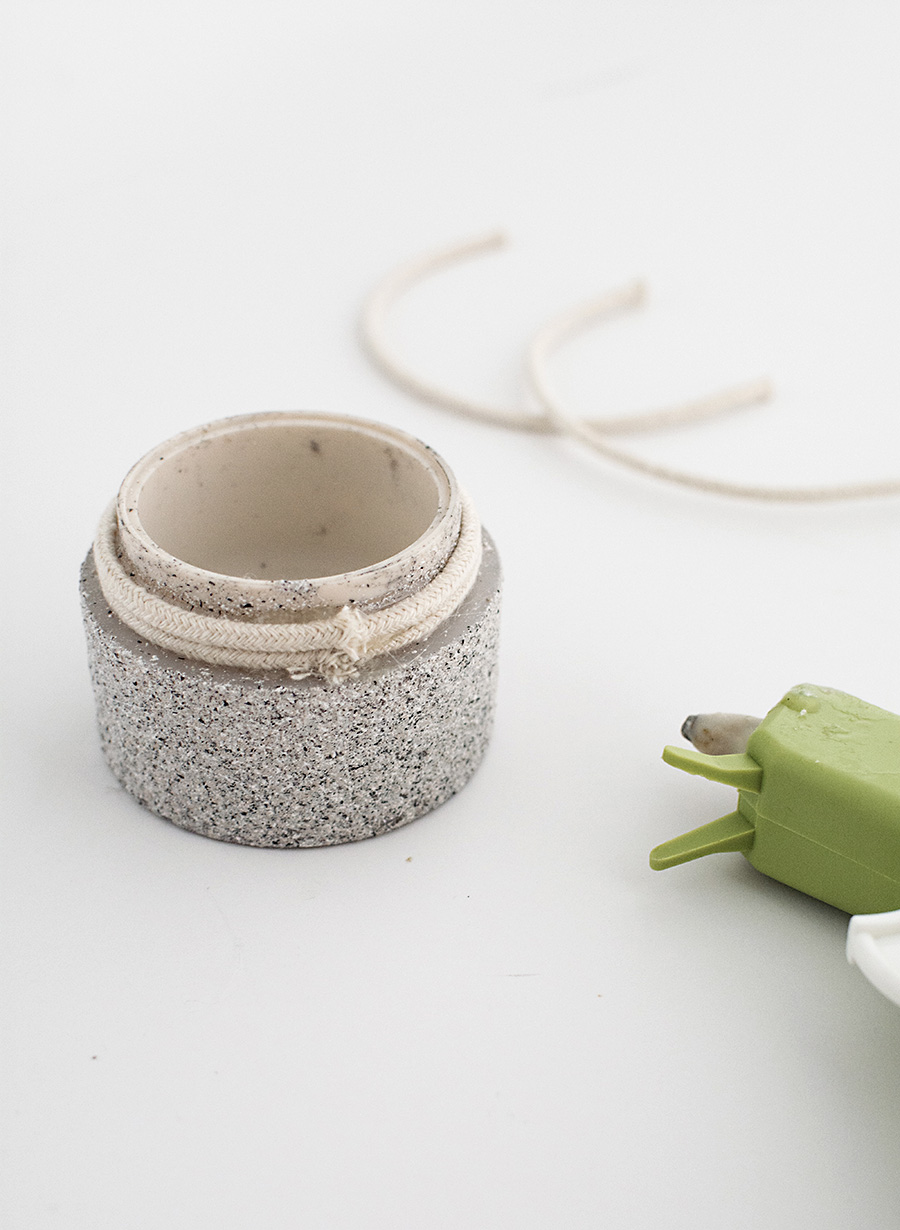
Using a glue gun, glue 3mm macramé cotton cord around the top of the jar one row at a time. Use as little glue as possible and dot it at about every inch as you wrap the rope around the jar, including the endpoints. Measure out the length of the cord around the top of the jar before cutting (mine ended up being about 7.25 in. in length each).
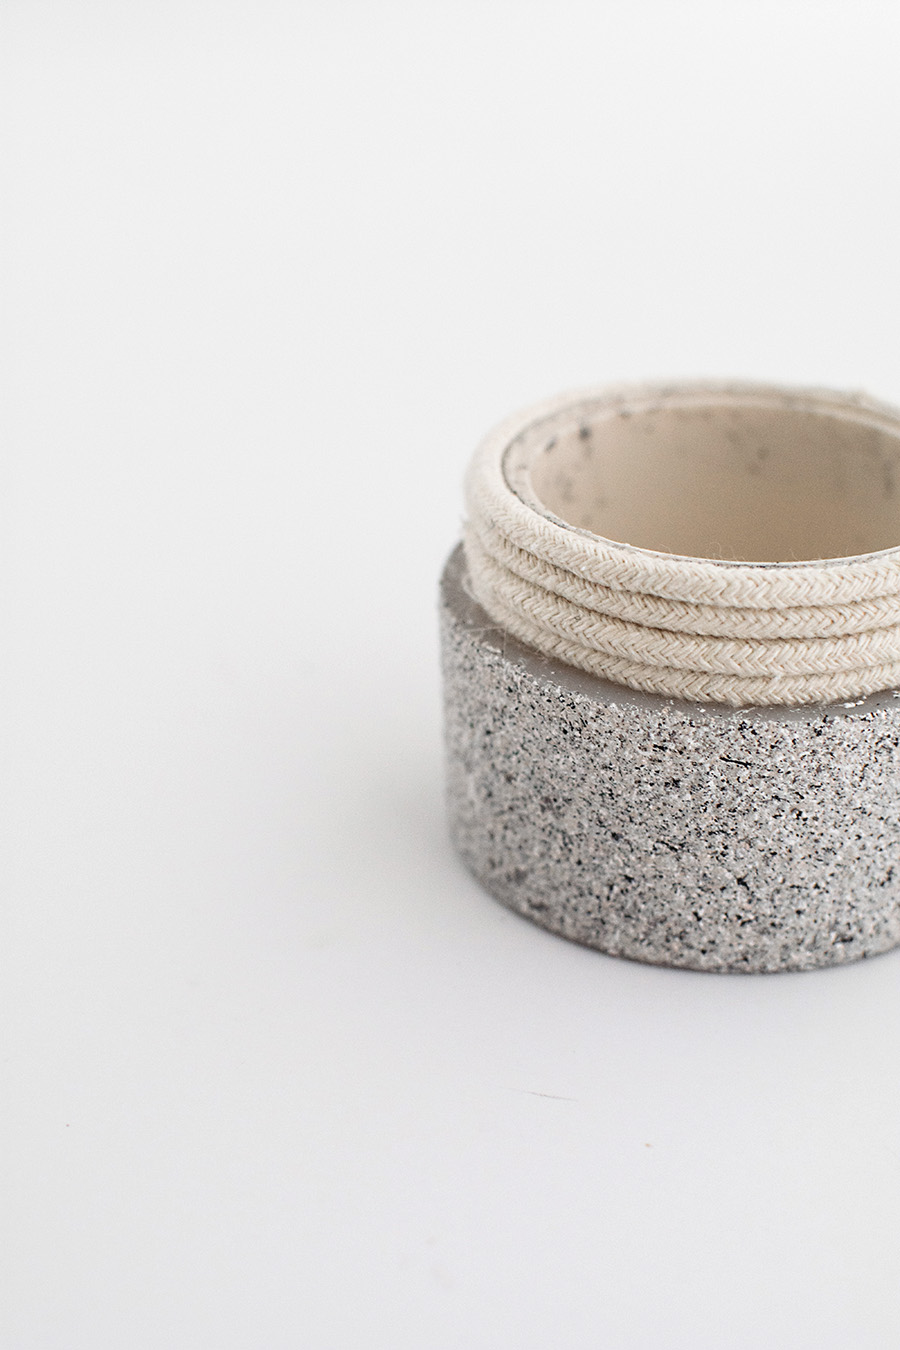
It should take a total of four rows of rope to reach the top like this. Keep the start and end point of each piece of rope on the same side so that it can stay relatively hidden.
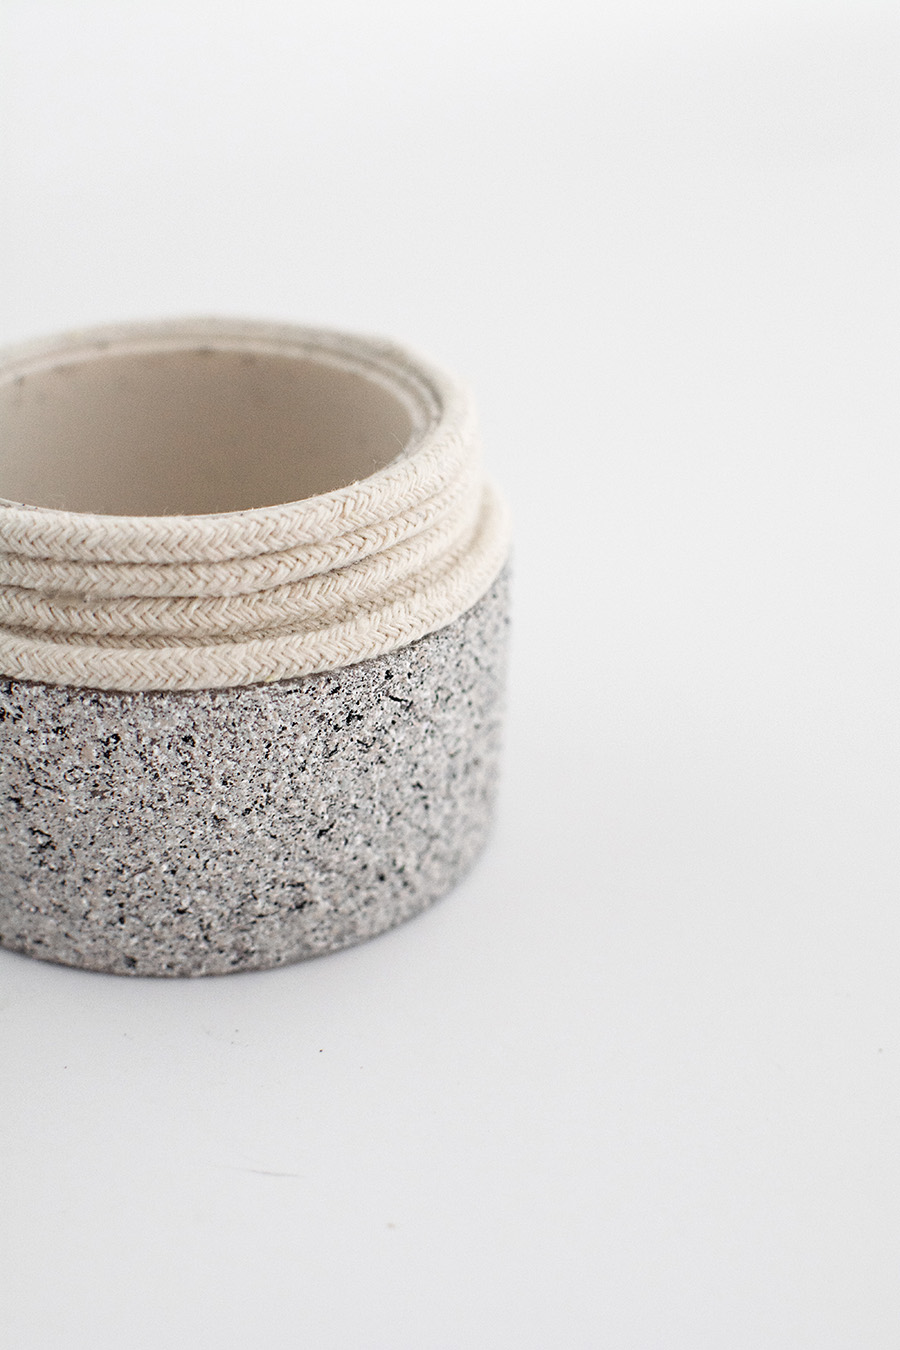
Glue on one more piece of rope around the base of the top of the jar. This piece measured out to be about 8.25 in. for me but again, measure it out around the jar yourself first.
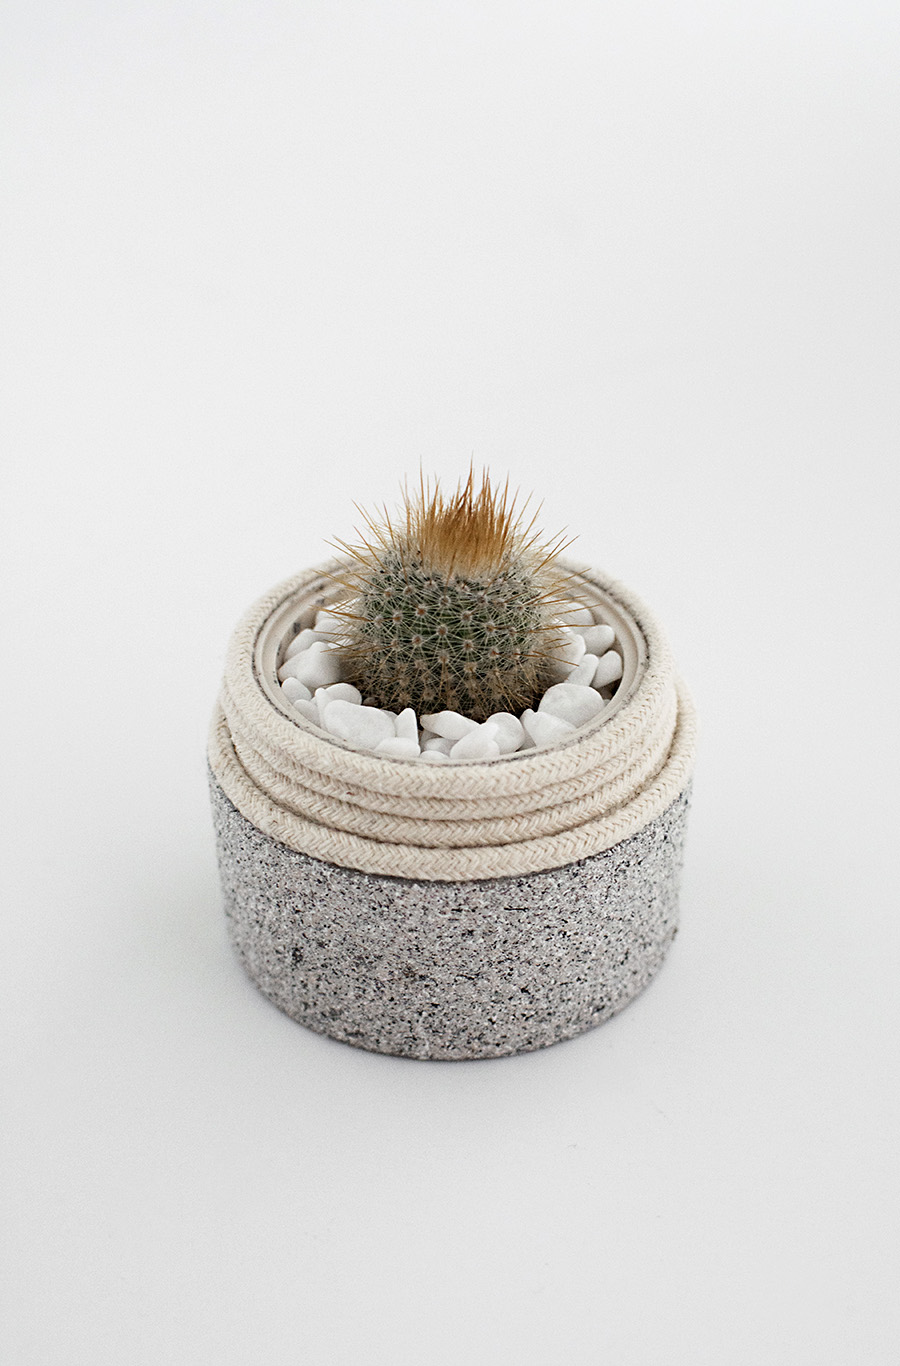
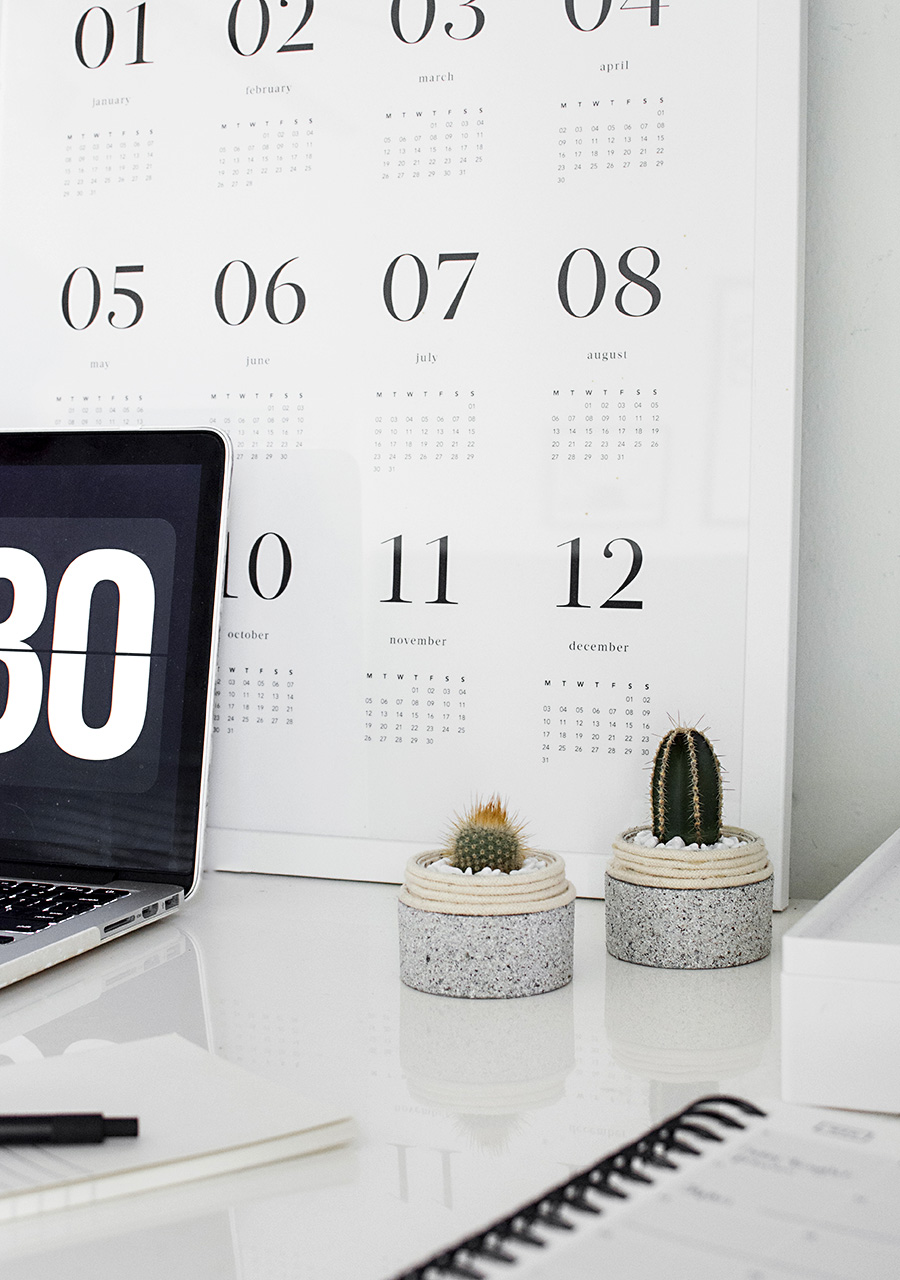
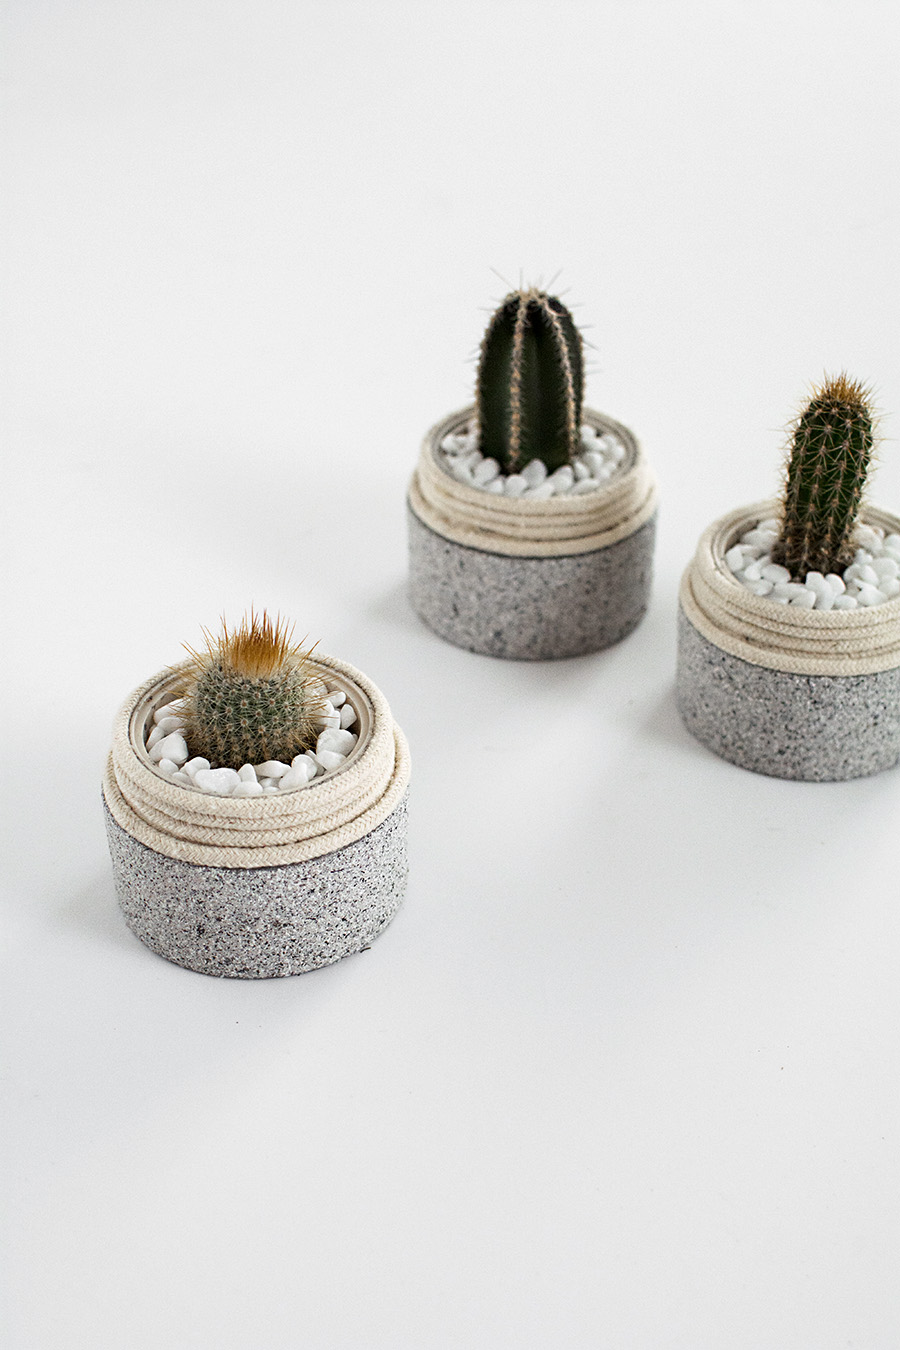
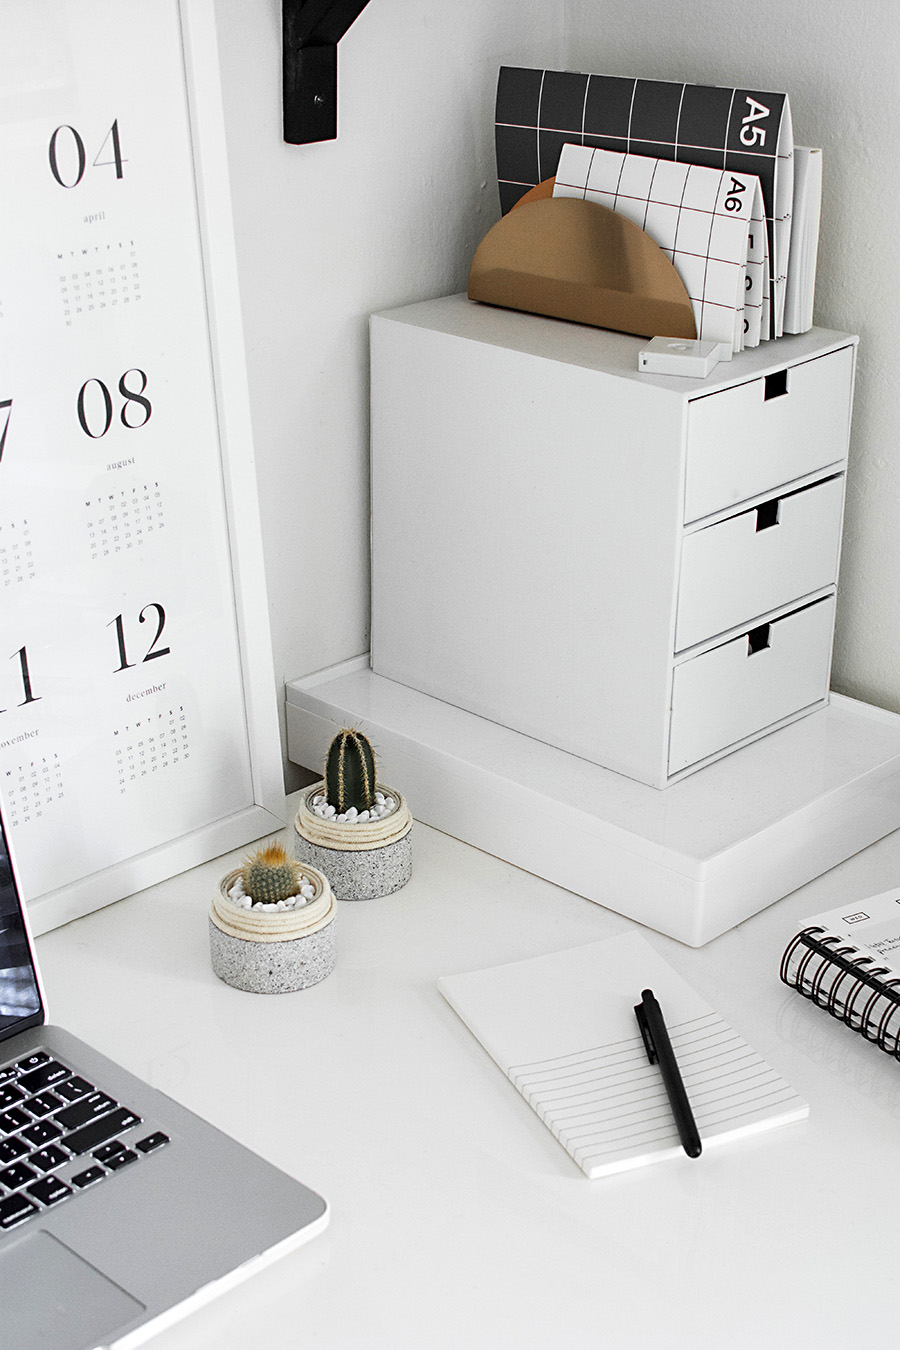
Plant your mini cactus and put a layer of small pebbles on top to make it even cuter. Water very sparingly and make sure it gets plenty of direct sunlight!
I’ll always be a fan of recycling, but it can be even more fulfilling to upcycle using your own hands. It’s also so much fun to see old plastic take on a whole new beautiful purpose right in your home! For more info on ways to recycle and upcycle to help our planet, click here.
They are so cool! I never thought that you could craft something this stylish out of a jar of moisturizer!
https://www.makeandmess.com/
Thanks Michelle!
Love this! I upcycle candle jars and just created little “patches of grass” for my son’s windowsill. Post coming soon! In Colorado we love to recycle, upcycle! xo laura
That sounds like an adorable idea, perfect for a windowsill <3
Holy shoeifhkjfhduifheuhf! You are amazing. Everyone should sponser you.
Hahahaha thank you for the enthusiasm <3
Wow, this idea is so cool. Amazing upcycling idea you have ! Thanks for posting.
OMG they are actually the cutest!! Might have to give this a try
http://www.petiteelliee.com
Ellie xx
Thank you Ellie!
This is an exciting way to upcycle an empty jar. These would make sweet little Mother’s Day gifts.
For sure a great gift idea. Happy you enjoyed this Maureen!
Such an awesome idea! Especially with Mother’s Day coming up soon!! I will definitely be gifting a few of these :)
Thank you so much Lorena! Enjoy <3
I would advise drilling a hole in the bottom for drainage – cactus and succulent roots will rot if they are sitting in water. Adding rocks at the bottom of containers for “drainage” isn’t sufficient.
Fantastic looking planters though!
Yes, that is a great point! I also realized later that the lids can be placed underneath as saucers to catch the water that drains out!
Hello! New follower here!
I’m wanting to do a Boho theme Bridal Shower and was looking into DIY favors. I couldn’t decide between dream catchers or plants. I LOVE this DIY mini cactus planters! I better save up my moisturizing cream jars (;
@happilyeveralanis | Happily Ever Alanis
Hi! This is a great idea and I love the textured stone appearance! Regular spray paint just would not compare — what type of paint did you use for this project?
Hi Leslie, it’s one of the stone spray paints from Krylon!
I absolutely love these. I’m a jar/packaging hoarder and I’ve always planned on trying out the stone effect spray paint. So definitely pinning!