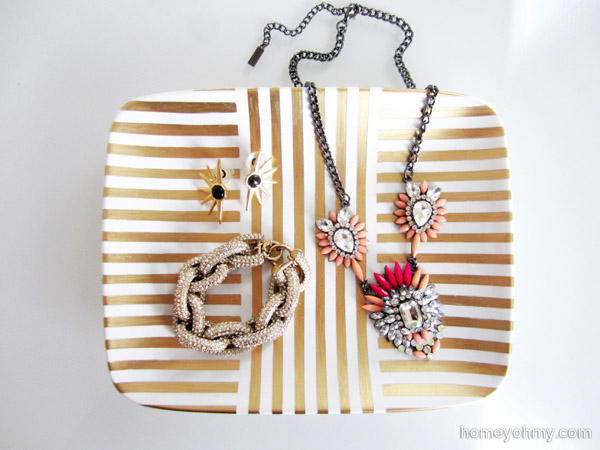
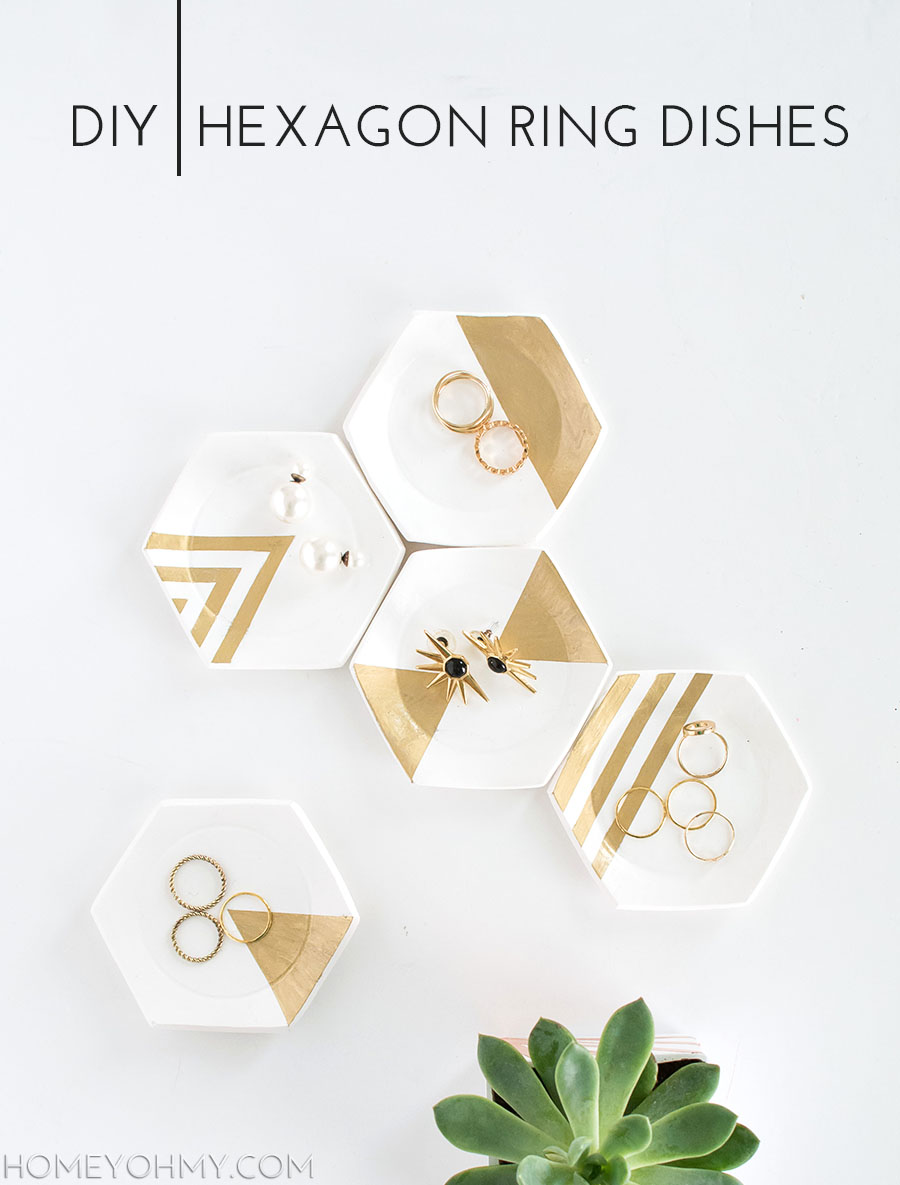
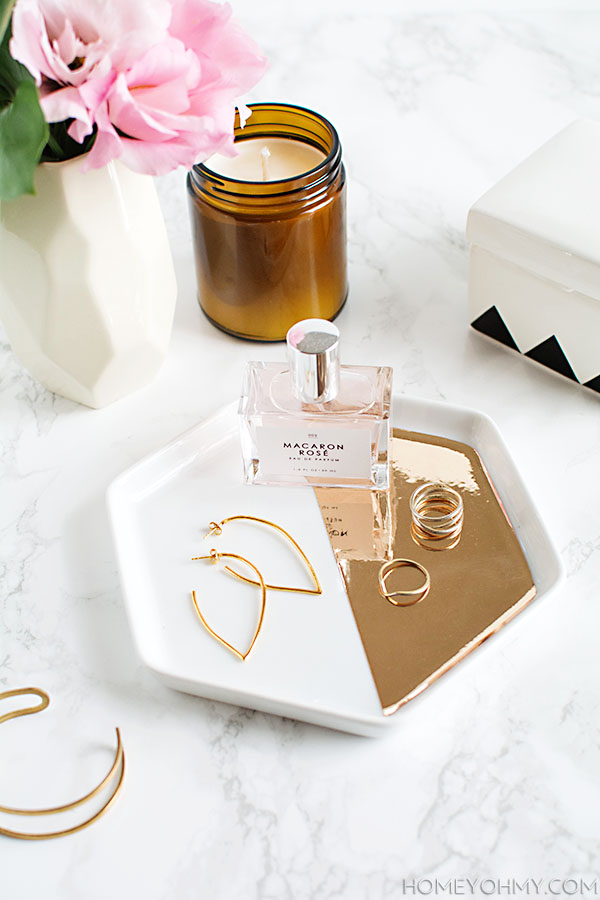
I love gold, and I love jewelry, so the idea to decorate this tray was an easy choice. Stripes are also a huge favorite of mine, so you’re seeing a lot of what I love through this DIY!
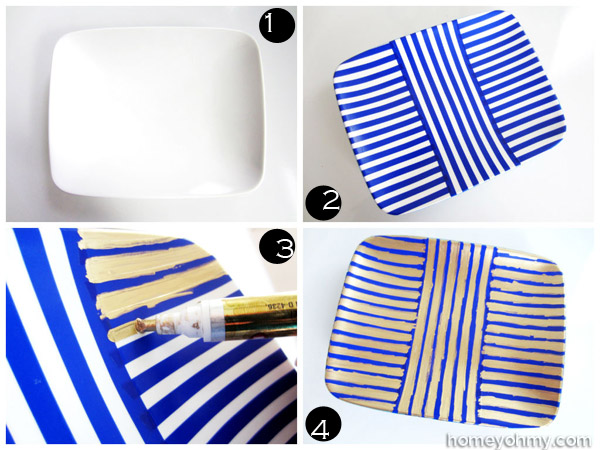
The tray is actually a ceramic “salad plate” I got from Target, though that should not suggest this project is food safe (it’s not!). I taped the design with 1/4″ 3M blue tape, then applied a gold leaf pen in between the tape. This took a few strokes on some parts and I also needed to apply a second coat on little areas after the first layer dried. That means the overall look is not a factory finish but a more organic texture that shows the gold leaf strokes, which I like! This could also easily be done with a gold Sharpie, followed by curing in the oven (ask me how if you want to know).
After removing the tape, I took a Q-tip dipped in rubbing alcohol and cleaned up any imperfect edges.
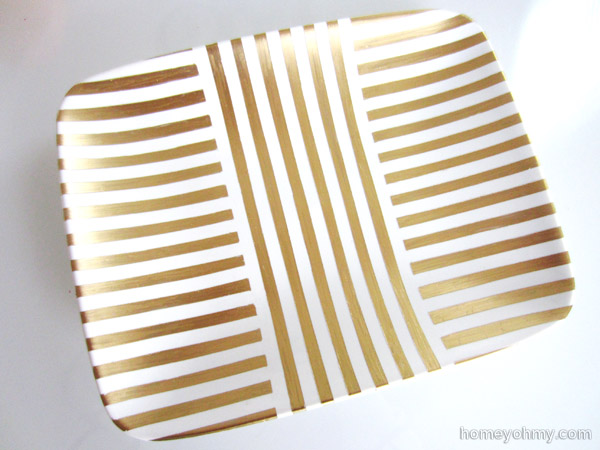
I applied a few layers of clear acrylic spray on top to protect the design. Mod Podge or another similar sealant would work as well. The protective coat can be skipped all together, but I figured with all the jewelry traffic this tray will be seeing, the protective layer would be best to have.
I’m in love with how it turned out! Organizing my accessories is something I’ve been needing to work on and plan on doing soon, but for now what I needed most was a place where I could just throw off my jewelry at the end of the day. That still counts as organization, right?
What do you think of my jewelry tray? Would you have a use for one of these as well?
SO cute. I love that pattern you created too ;)
Beautiful! It looks really luxe. Seriously.
Amy ~ this is awesome!!! The end result turned out beautiful! xo
It is so pretty Amy!!
In fact… I love this so much I am featuring it tomorrow at Work it Wednesday. Hop by to grab your button if you get the chance! Thanks for sharing it with us- hope to see you back!
~Krista from the happy housie
This is too cute! I love how the design is simple yet makes such a statement. Awesome idea : )
Love love love love love! Love.
Featuring it tomorrow :)
This looks really expensive! And you’re bracelet collection is beautiful. :)
This is stunning! The lines are so crisp that it totally looks store bought! LOVE!!
Love this! Awesome job!
You’ve been totally rocking the gold leaf and I LOVE it. This pattern is amazing and I might just have to make one JUST like it. And kudos for mentioning that it’s not food safe :)
this turned out really well and it’s super cute! A simple DIY that makes a huge difference!
Emmett – Hippie Lace
This is gorgeous!! I love it!! Thanks so much for linking to our Best Of The Weekend party! Pinning now and have a great week!! xo
love!
Um…. adorable?! I love it! I love how the width of the stripes is a bit more narrow compared to the more standard width you see. The pattern that you did the stripes in is different and original, I haven’t seen it around. Anyway what a great DIY… so cute!
I’m obsessed with all things gold and glitter. Definitely see one of these in my future!
Cute! I love the stripes and the gold! Cute jewelry, too!
Navy Wifey Peters @ Submarine Sunday Link Party
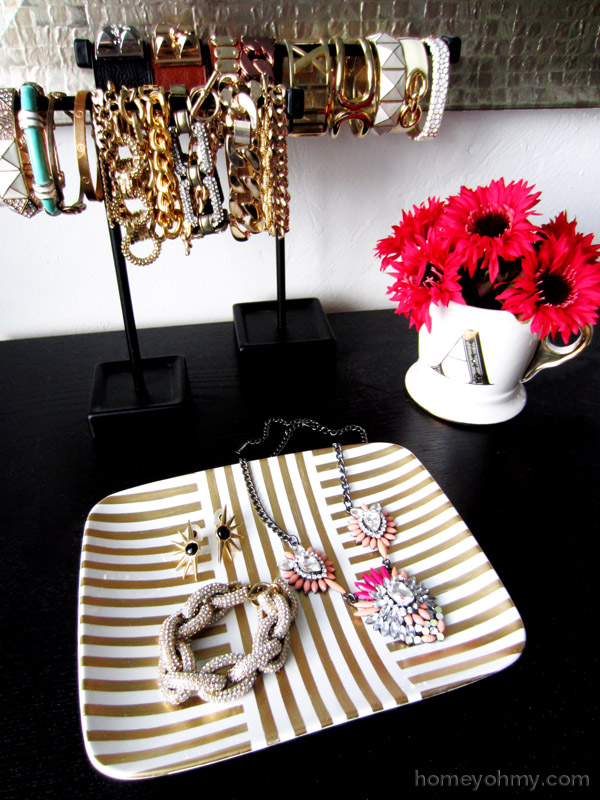
Super cute! I love the photo with it on the top of your dresser with the bracelets and flowers. Very pretty!
I love the plate. Cute idea.
Debi
Super cute! I love how the stripes in the middle separate the stripes at the sides. Just stopping by to pin this, and let you know I featured it on my blog today; thanks for sharing at Creativity Unleashed!
Absolutely love this! Quick, easy and super adorable projects are my all time favorite!
I’m in love wit your gold striped DIY! So much so it’s my favorite feature from last week’s DIY Sunday Showcase. Thanks for bringing your awesomeness to the party! Hope to see you this Saturday at 6pm too!
cheers
Amy, this is GORGEOUS! Absolutely pinning. Great job!
this is just so fabulous! Thanks so much for sharing at Creativity Unleashed last week and sharing tomorrow at 7 am EST at One Project Closer for another great party!
This is such a great project! I love how it turned out. Just wanted you to know that I’m featuring you on DIY Weekend today! http://homecomingmn.blogspot.com/2014/01/diy-weekend-projects_17.html
I absolutely love the DIY plate tutorial! Thanks for sharing so many of your great ideas. I would love to know the curing details, thanks in advance.
.
thank you for linking up @ Craft, Create & Inspire linky party last week .. Your awesome project is featured this week :)
http://livel0vecreate.blogspot.co.uk/2014/01/craft-create-inspire-linky-party_18.html
Hope you will stop by and join us again this weekend xo
Uhm, no surprise here but I’ll be featuring this lovely at my link party tomorrow!
It’s gorgeous Amy! First I’m really impressed you were able to get all those stripes so straight! The gold is perfect. I love pretty little jewelry trays and this one looks like something you’d pick up at a fancy boutique. Just beautiful!
hi amy! you’re on my top 3 from last week’s The DIY’ers party♥ congrats to you and thanks for sharing this really awesome project! I’ve pinned this project onto my “The DIY’ers Party Favorites board”.
this week’s The DIY’ers is now live, so come and link up your latest project with us!
huggies♥
rea
Absolutely lovely! It’s so stunning! I featured you on Facebook this week; thanks for linking up to Do Tell Tuesday!
Congrats! You are featured on this week’s Do Tell Tuesday link party and have been pinned to our features board! Feel free to grab a button and link up this week too. :) http://www.vintagezest.com/2014/01/do-tell-tuesday-7-with-features-co-host.html
Diane @ Vintage Zest
Loving this!Featuring you tomorrow at Work it Wednesday!Hugs~
Featured you tonight on Centerpiece Wednesday!! http://thestylesisters.blogspot.com/2014/01/centerpiece-wednesday-110.html
Karin
Love this! Pinned :)
So gorgeous! You are being featured EVERYWHERE – including at Link’n Blogs. The party goes lives at 10pm MST, so stop by to see your feature and please link up again.
http://iputabirdonit.blogspot.com/2014/01/linkn-blogs-9-link-party.html
xo
Daniela
Put A Bird On It
This is PERFECT! The finished product looks amazing! I need to make one :) xoxo
I LOVE this!!! Been looking for a classy way to display my jewelry :) Found you in the “featured” section on Put A Bird on It! Nice work!
Hi Amy,
I know you already ventured over to my site to see this project in this month’s Mad Props! But, I just wanted to drop back by and say I think your site is amazing. You are a seriously talented blogger and DIY’er! I can’t wait to see more! :D
xo Megan
That’s so awesome! Now I just need some jewelry
I just love this! It’s so pretty and elegant! Great job!
Beautiful! What a great way to catch your jewelry at the end of the day.
So cute and the gold makes it look rich! Thanks for the idea!
Stacy
http://www.anygirlcandoit.com
Popped over from I <3 Organizing, and really like this. Have you shared how it would work with a gold Sharpie? I would love to know how that works!
xx Johanna
Super chic! I just bought some gold spray paint to hype up a silver candle holder I was recently given. I like your gold leaf pen idea better! Great job!
This is adorable! I might have to make this for my desk at work – would be perfect for holding car keys, phone, etc. too! Thanks for sharing.
Would you believe I bought this very same plate from Target today?! That’s serendipity, I tell you. Love this DIY–it’s oh so pretty!
Love this! I went through a Putting Gold On Vintage Wood Thingys a few years ago and I’m amazed that I am not sick of this idea AT ALL.
http://www.smallvictoriesdesign.com/everything/2011/10/26/put-gold-on-everything-right-now.html
Love the tray.. so simple but the stripes make it so glam…