I never print my photos. Never. As much as I love taking them, I rarely go beyond having them exist anywhere other than on my phone or the blog. Oh, but you already see where this is going, yea? I had some printed out! For all that effort I put into snapping shots of my favorite places, things that inspire me, and moments I loved, it’s nice to have little mementos to actually look at IRL.
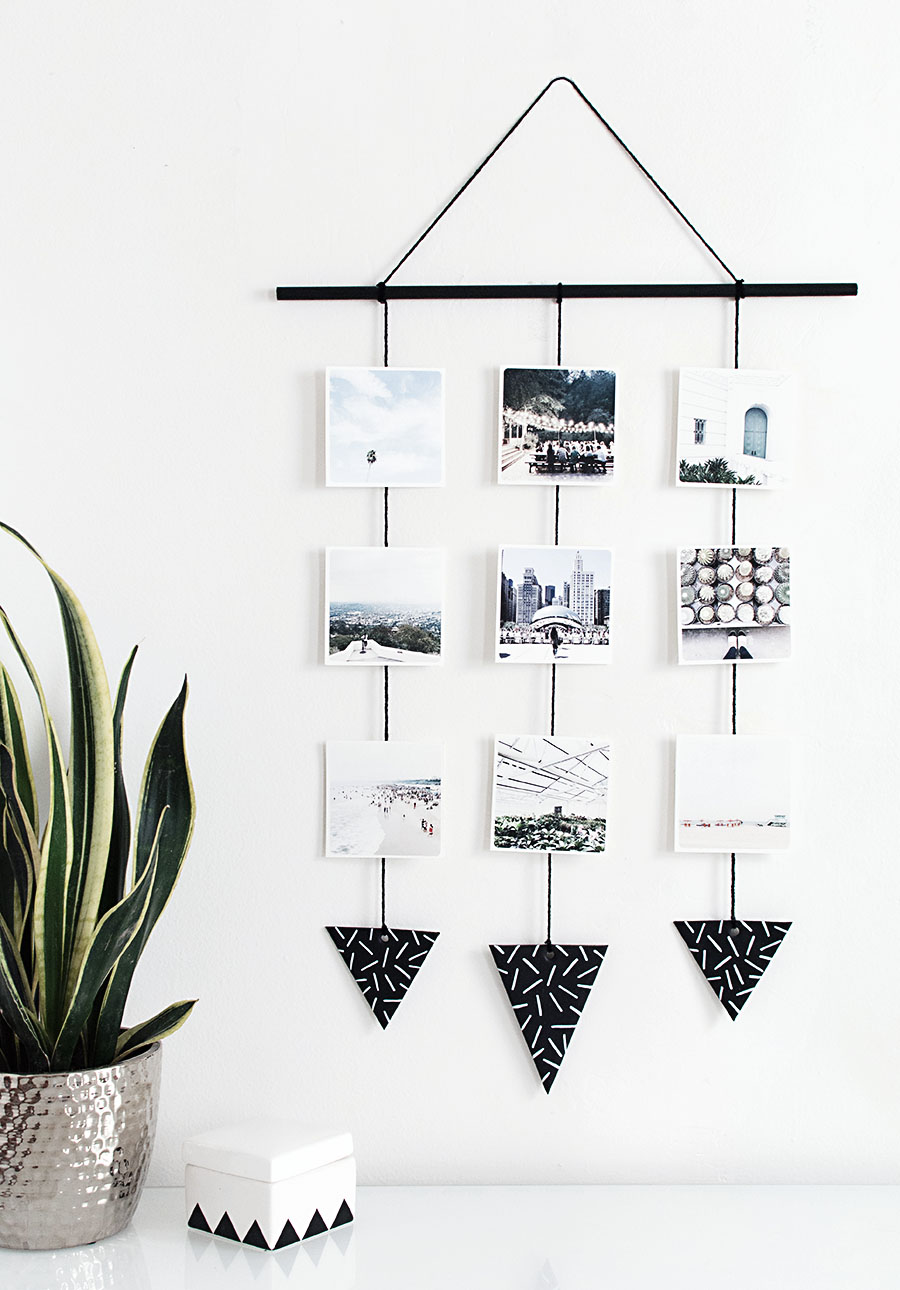
So I came up with this really simple wall hanging DIY in partnership with SnapBox to put those Instagrams on the wall in a cool and modern way, perfect for hanging up inspiration in a work space or just a casual way to house memories.
Note: the long list of materials does not indicate the difficulty of this project. It’s easy, really.
Materials:
–photos
-wood dowel
–acrylic paint
–foam brush
-yarn
–super glue
-cardstock
-pencil
-ruler
–clay
-clay blade or knife
–paint pen
–parchment paper
-Washi tape
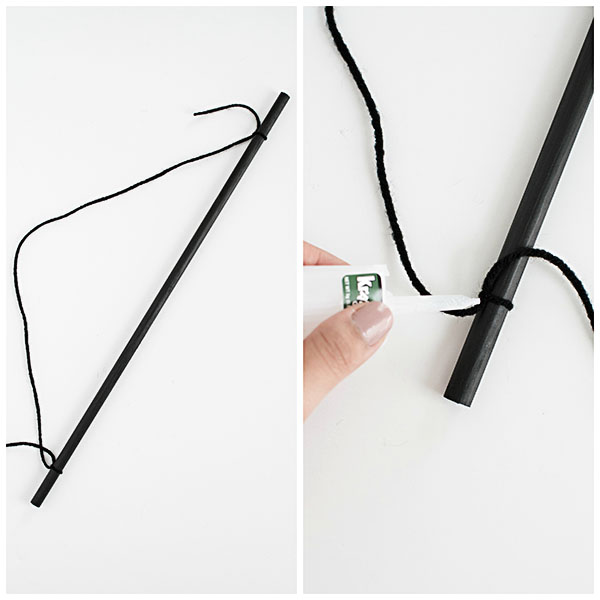 I painted a round wood dowel with black acrylic paint using foam brush. Once dried, I tied each end of a piece of yarn to each end of the wood dowel, applying super glue to each double knot to secure in place before cutting off the excess yarn. From this point forward, every double knot of yarn is secured with a couple dabs of super glue.
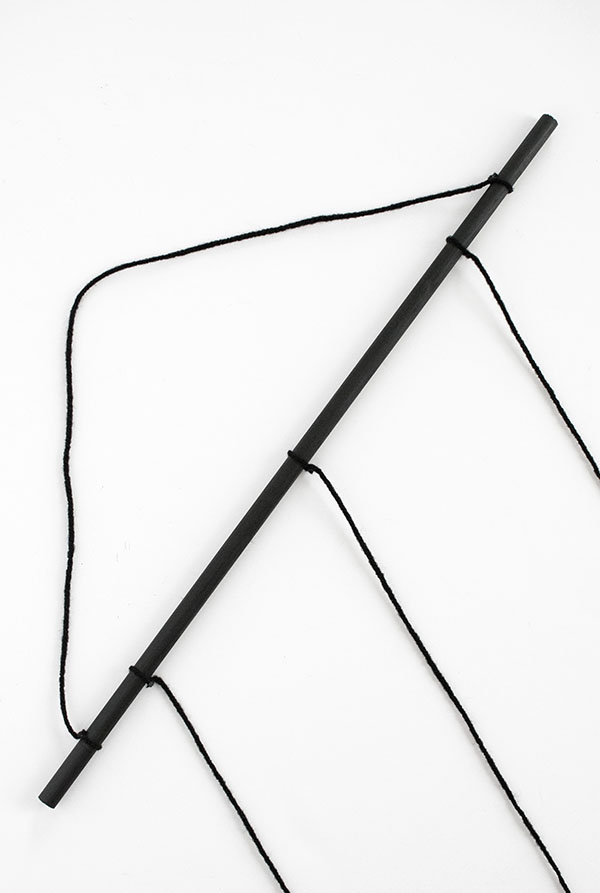
Next, I double knotted three long pieces of yarn across the dowel and cut off the excess yarn.
We could stop here and be totally fine. BUT, I wanted to add an ornamental element because that’s fun, and it helps weigh down and keep the yarn taut, so the next steps are for those triangle thingies that are hanging at the bottom.
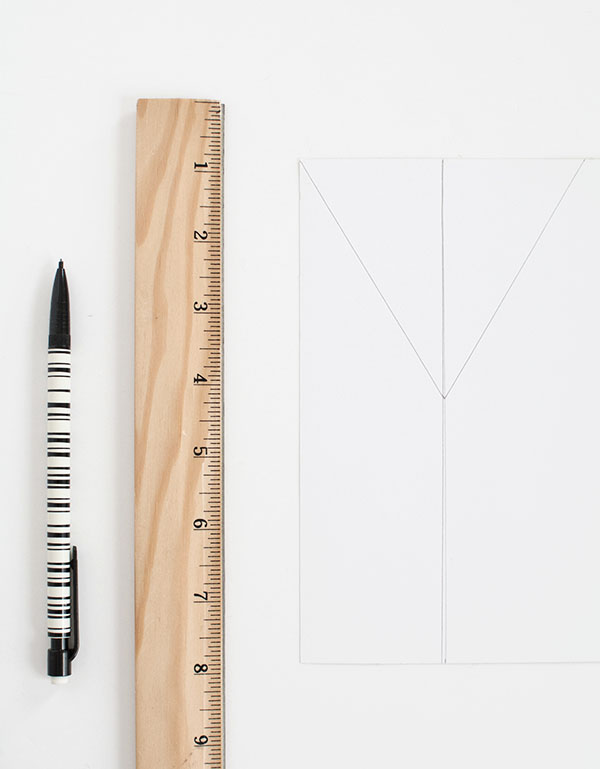
I measured and cut out an equilateral triangle from a piece of card stock. Really simple: I measured 4 inches for the base, drew a straight line down at the midpoint (2 inches in), then drew 4 inch lines from each end of the base to the center line. I did the same thing for the larger triangle, only I made the two longer sides 5.5 inches long.
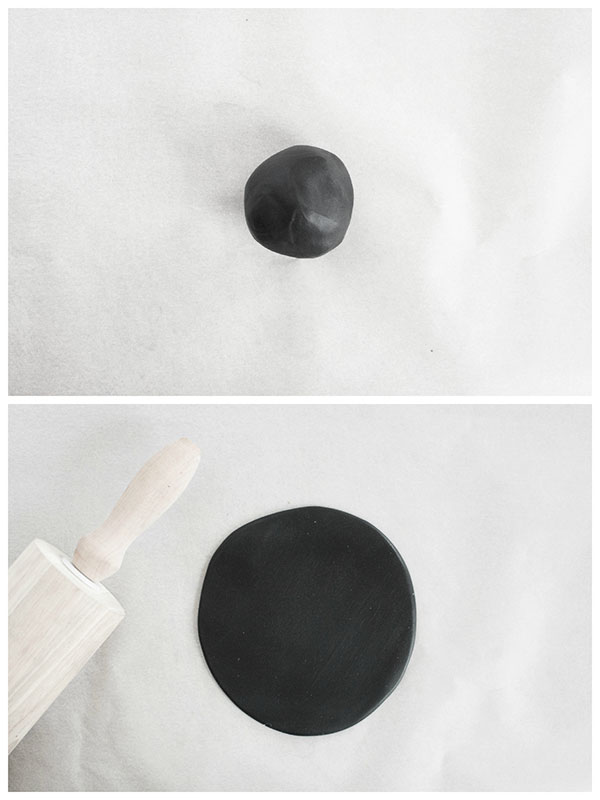 Working on top of a cutting board lined with parchment paper, I rolled one block of black clay into a ball then flattened it out until it was just large enough for the triangle card stock.
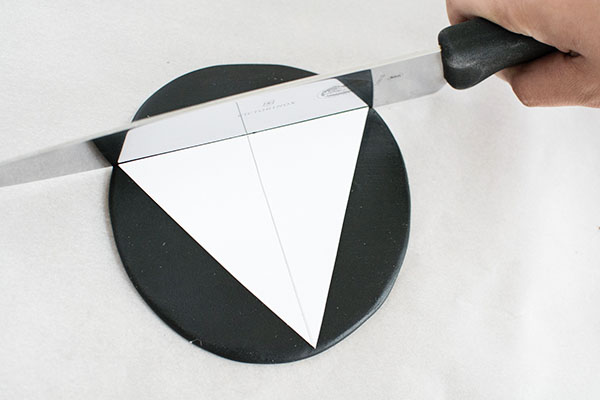 I cut along the triangle with a knife. The “proper” thing to do would be to use a clay blade, but a knife works perfectly fine heyyy. This also cut out the parchment paper backing with the triangle, which I left stuck on to the triangle.
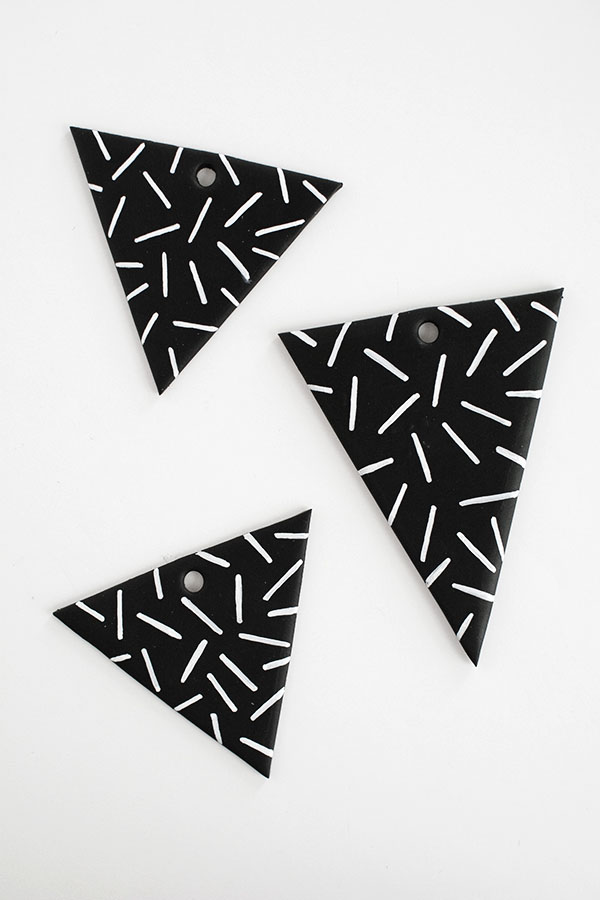
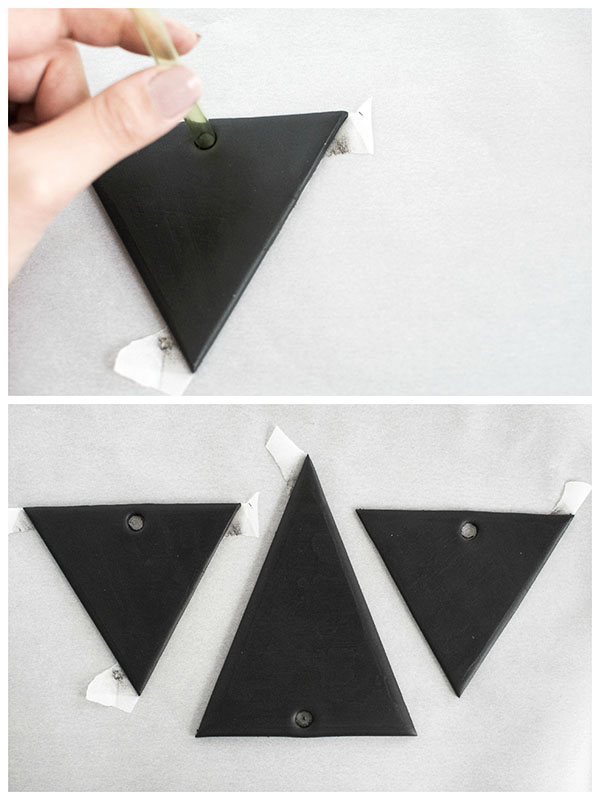 For each clay triangle, I used a straw to poke a hole out from the top. The key is to twist and wiggle the straw so that the clay from the hole pops out with the straw. I then transferred each triangle to a baking sheet lined with parchment paper. Baked them at 260F for about 30 minutes, and honestly, I don’t know the science to this and just played by ear. All that the instructions on the plastic packaging of the clay said was not to exceed 265F. Hopefully your clay has more to tell ya.
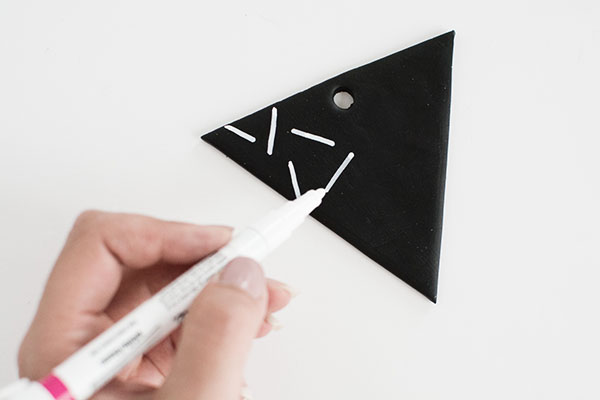
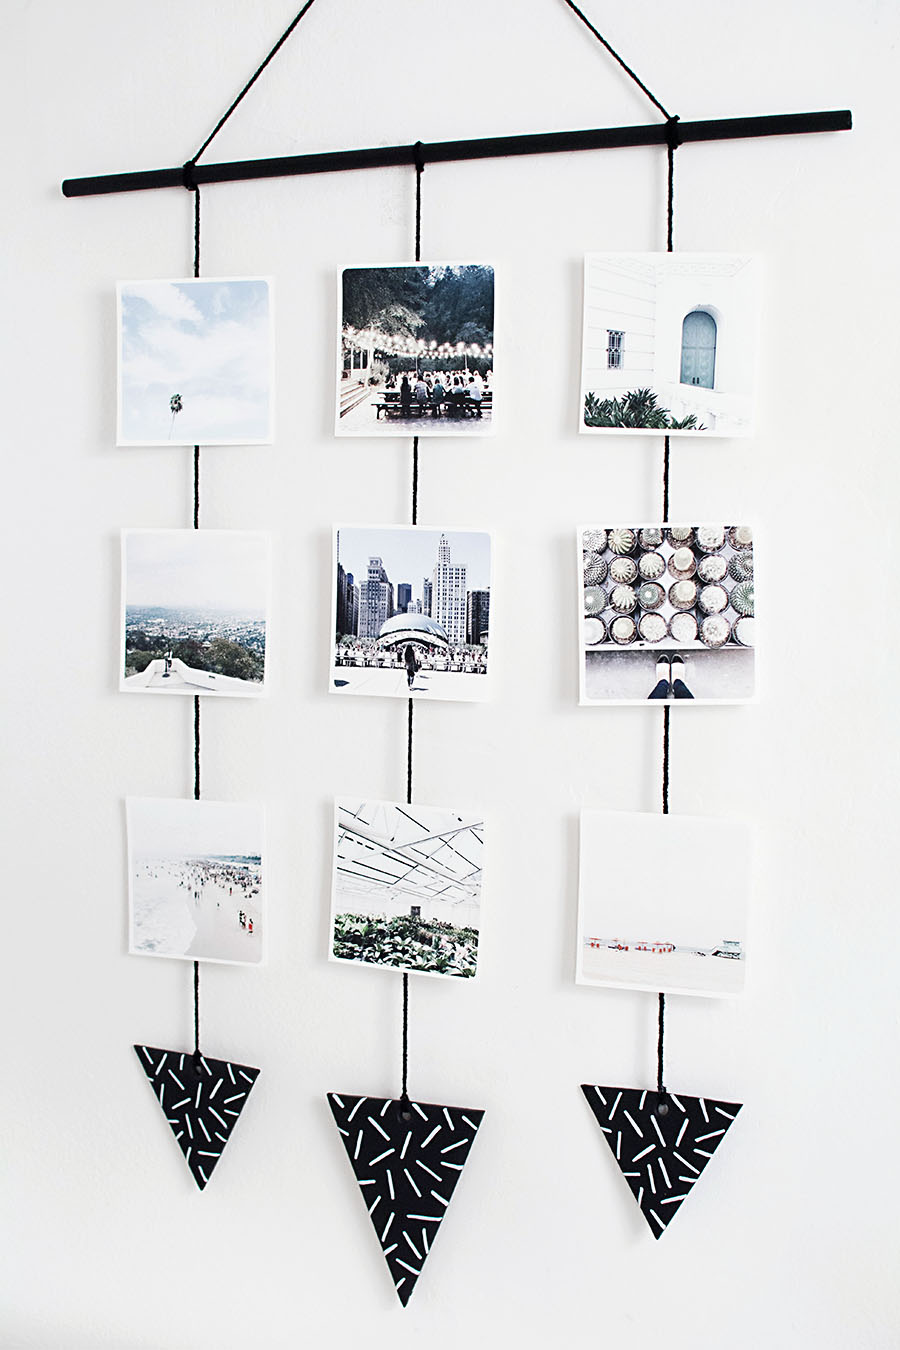
Once cooled, I used a white Sharpie paint pen (oil-based) to draw this sprinkle-like pattern on each triangle.
 Each triangle was double knotted at the end of each yarn that I previously tied to the dowel. I feel a strange urge to eat them.
Now the fun part.
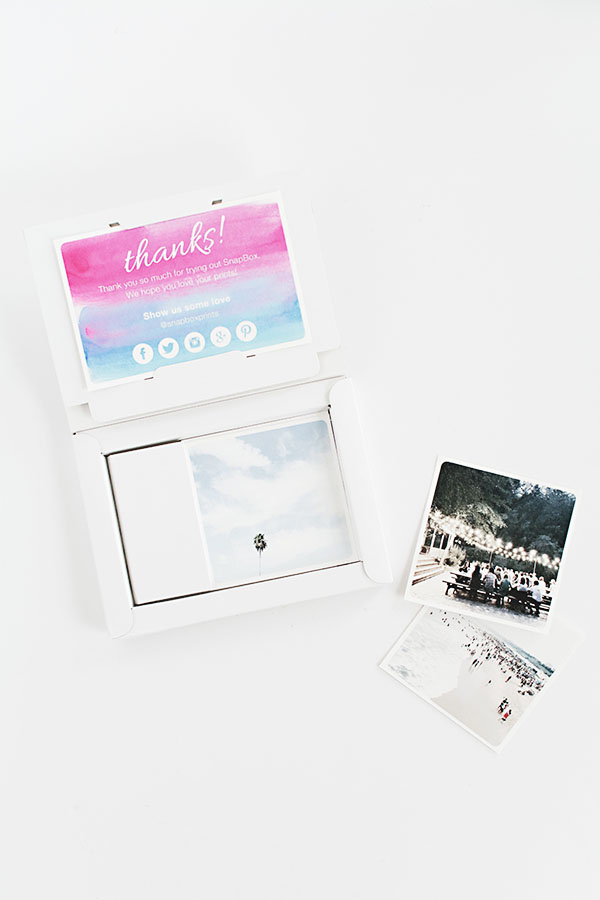 I ordered 4×4 prints of some of my Instagrams through SnapBox, which was so so easy to do because the photos were imported directly from my Instagram account. What I loved most was that I was able to make edits to the photos (have you ever posted a photo to Instagram and later wished you had edited some aspects of it more? Am I crazy?) I definitely did all those “wish I had done that” things to some of these Instagrams, like bumped up the brightness on that one, or turned down the saturation on this one. LOVE that feature.
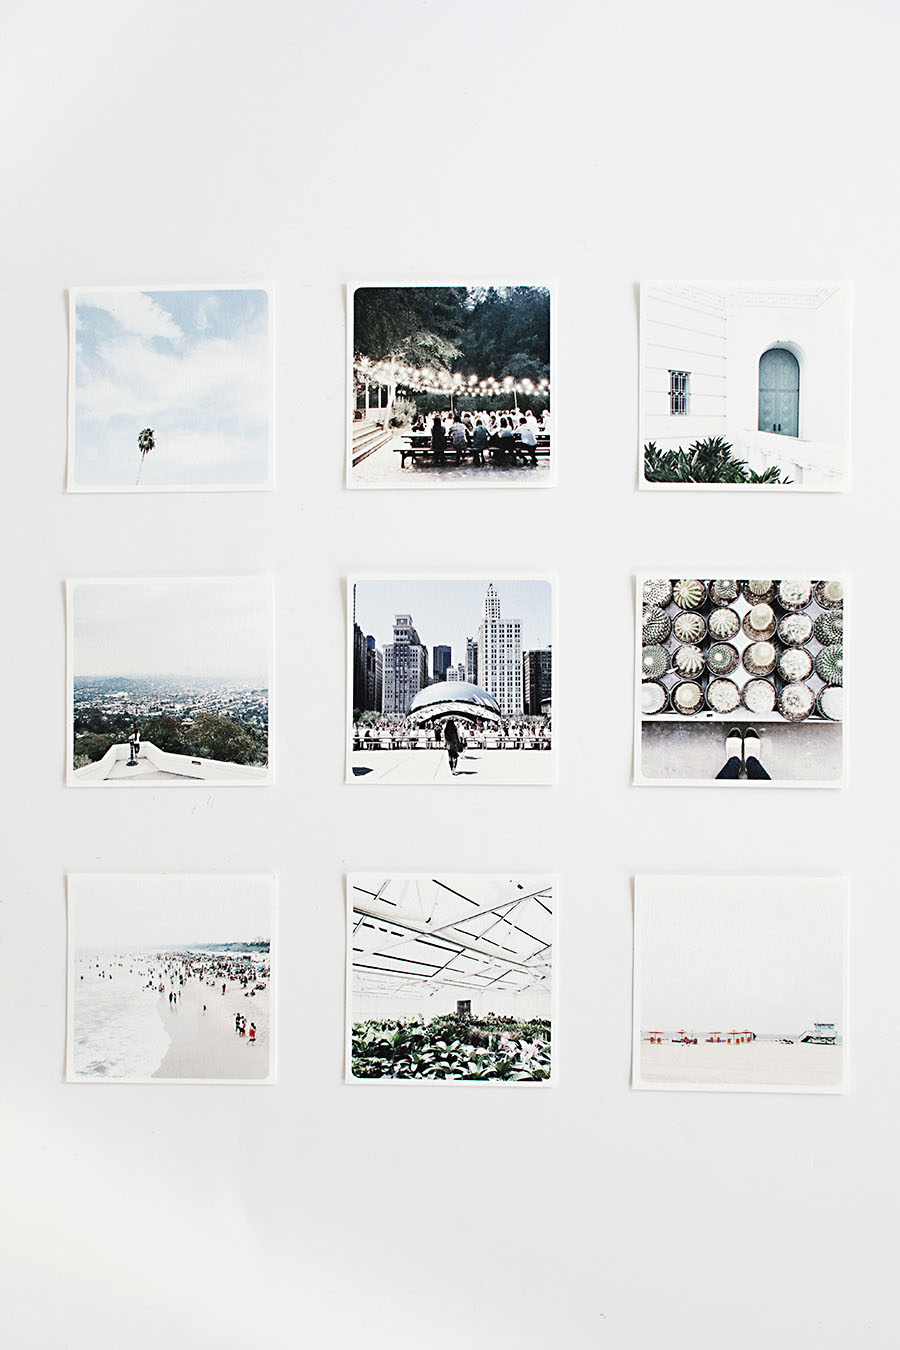
I planned the layout before putting the photos up on the wall hanging.
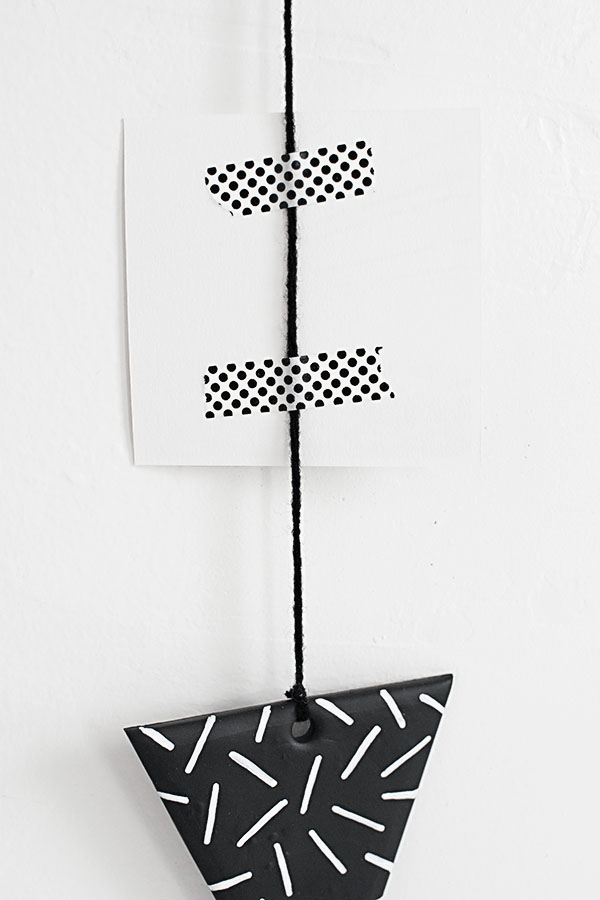 I used Washi tape on the back side of each photo for three reasons: 1) it looks cleaner than other methods like paperclips or punching holes in the photos 2) it allows the photos to be easily swapped out with your mood and 3) it makes photo placements adjustable once stuck on by gently pulling the photo up and down the yarn.
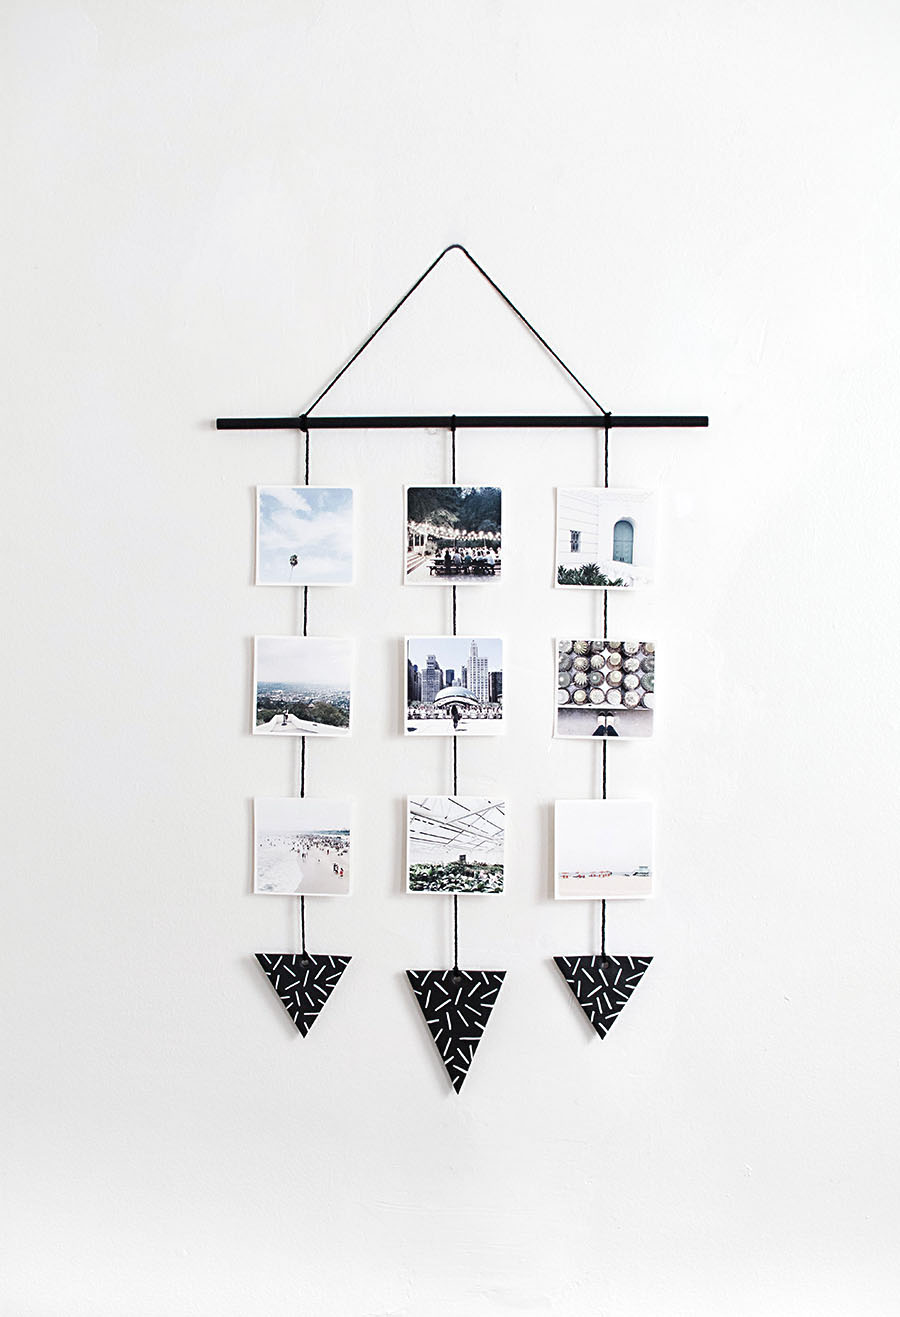
 I’ve said multiple times how much I love wall hangings, and I dig this one for how it serves a function while still being decorative. It’s also the first time ever I’m displaying my grams. Do you print your photos? Am I super late to the game??
This post is sponsored by SnapBox. All thoughts and opinions are always my own. Thank you for supporting brands that keep the fun stuff coming!
Ah, washi tape, is there nothing it can’t do :) Do the clay pieces help keep the ‘breeze’ factor in check too? Great idea!
Washi FTW! Yes, I love the way you worded that. The clay definitely helps weight everything down in place.
Thanks so much, Claire!
Great idea, I have Grands so this is another way to show them off! Also, if you tape two photos together you could step it up to a Mobil! It would be great to see their cute little faces turning in the breeze! Keep the great ideas coming!
That’s so ironic! I’m making this for my grandmother. Hahaha!
I absolutely LOVE this Amy!! I never print mine either but I may start now!!
xoxo, Tanya
It’s just so easy to print, why not! Thanks, Tanya!
Love this! And the clay on the bottom to weigh it down is super smart.
Aww thanks, Alexis!
I LOVE this! You can easily customize the color and the clay shapes on the bottom too!
Yup, always a good point to remember! Thanks, Britta!
This is gorgeous Amy! Such a great way to print and display photos!
Thank you, Andrea!
This is such a cute idea. It will definitely be my next projekt!
http://tealattewithstyle.com/
Good to hear- make sure to show it to me when you do it! Thanks, Emma!
I have always loved all of your wall hangings but I think this one is by far my favorite! I love anything that uses printed photographs. Great work!
That is excellent news. Thank you so much, Sam!
Gorgeous my dear!
Thanks, Rachel <3
I love how changeable this is – so smart!
Really glad you appreciate that. Thank you!
Such a cool result! I love printing my photos, but usually I print them together in a kind-of-album book.
Best Regards,
Angelina Stroumpouli
http://www.just-angelina.com
I’ve gotta do that kind of thing more. I have yet to print a photo book but I bet my first one will be of my wedding :).
This is such a creative idea! Can’t wait to try it!!
Daily Opulence | http://www.DailyOpulence.com
It’s such a creative way to display photos, simple and modern! We used to print all the photos and stored them in many albums in the old days :) But not anymore since we can now store the pictures in digital format. It’s kinda pity though because some elderly members complain that they don’t get to see the pictures especially they don’t know how to use tech stuff.
It’s good to print some if not all. BTW, your pictures are beautiful!
I hear ya. Digital has made photo storing much simpler but the old-fashioned way still has value aside from convenience. I hardly print anything anymore and have been wanting to change that. So encouraged to know that you like this display! Thanks, Erina.
This is awesome! Great way to show off photos in modern form.
Thanks for the detailed project Amy.
Gavin
Love this idea, have been making a few of these the past week. I was searching on Pinterest for some different ways of displaying postcards and small art prints, and this came up. I had to be resourceful with the materials I had already lying about, and ended up using thick foam cards instead of the clay (I tried making homemade clay but wasn’t worth it!) and personalised the shapes to match the content of the art prints. They look really well, thanks for the idea :)
YES girl, that is exactly what the heart of DIY is. I’m so happy to hear you did your own twist to make this project work for you! Thanks for sharing how it went!!
I was thinking of using large washers, painted whimsically, instead of the clay.
This is amazing! Where do you get those inspirations and ideas? All the DIYs are gorgeous! Love them!
I love your blog! We have been considering making photo jewelry to organize photos. Do you have any experience with this? What are your thoughts?
This is so cool! I love this idea!
Love this!! Do you know the length of the wood dowel you used?
Hi! It’s about 19.5 inches long.
Awsome idea..
This would be a great idea to hang paper cutouts, especially by using clay pieces t0 weigh everything down in place. Thank you so much for this tutorial.
What size wooden dowel did you use?
This is a great idea. I don’t actually have photos to print – I’m looking for a way to display my small watercolors that I’ve been making by following tutorials. They are all about 3×3 (because that way I get 9 from one sheet of watercolor paper). I think your wall hanging project might just do the trick.
I love this so much! Could I replace the wood with a bamboo stick?
That would work great!
I’ve had some problems with loose photos curling. I would use double stick tape and put something like cardstock on the back of each photo to help keep it flat.