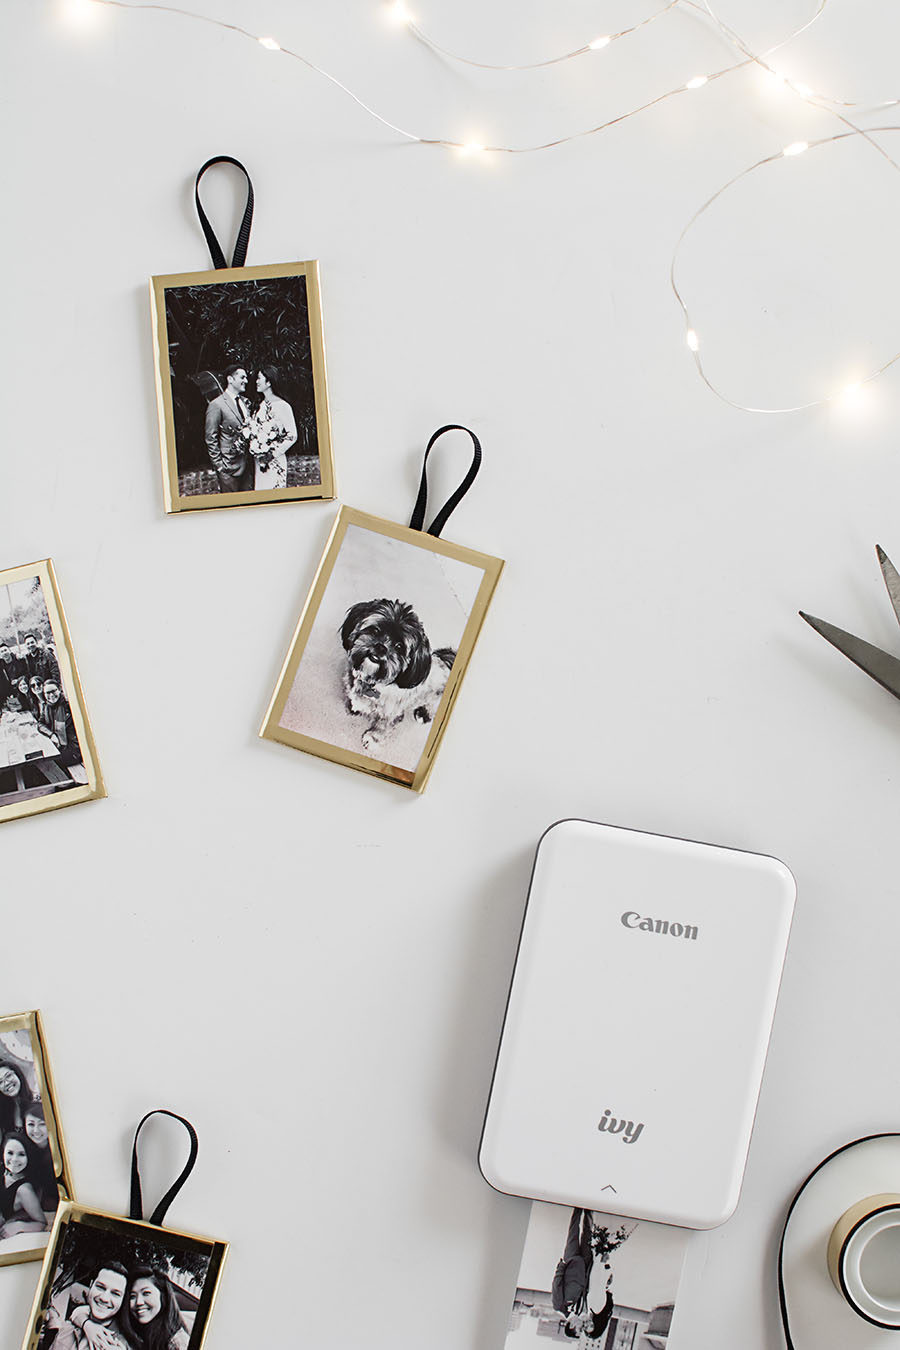
This idea has been floating around in my head for a few Christmases now- I’ve been wanting to have ornaments that are personalized and sentimental. Of course all the decor and lights are major to the festive coziness of the season, but nothing matches the warm feels you get from hanging up photos of your favorite memories and people. SO, why not combine photos with Christmas decor for ultimate good holiday vibes? It’s an idea I fully realized once playing around with the IVY Mini Photo Printer from Canon, who I’ve partnered with to share this easy tutorial for how to make your own photo ornaments.
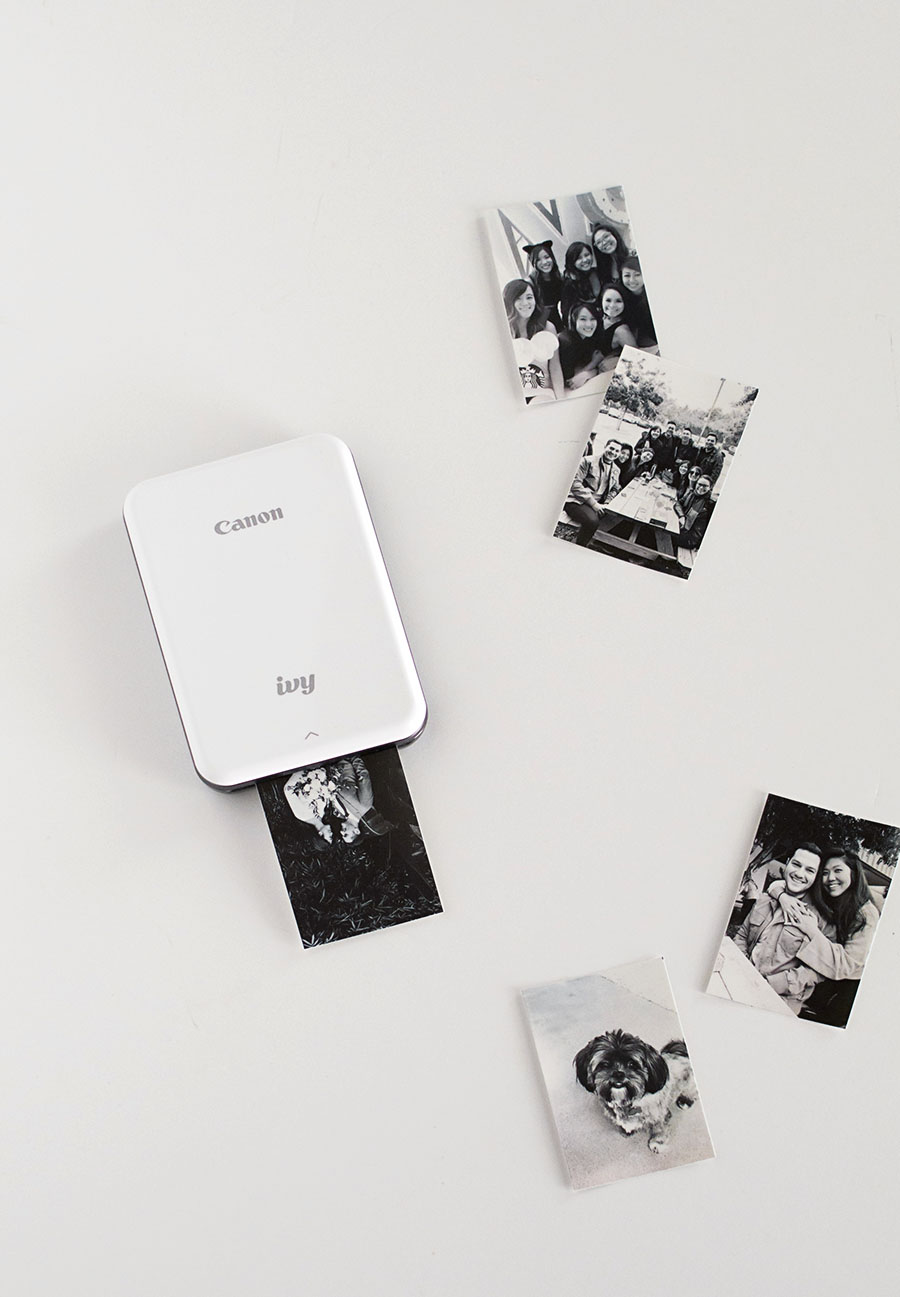
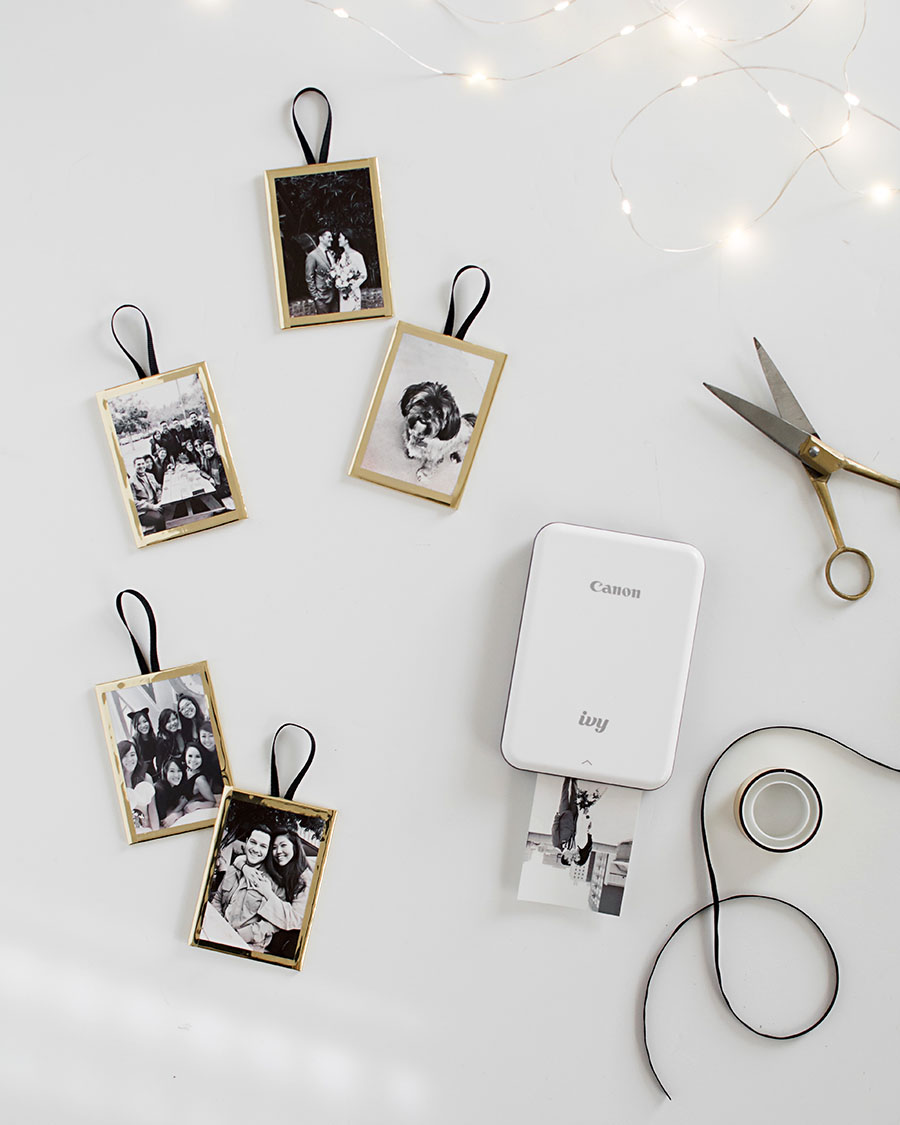
The IVY Mini Photo Printer prints 2×3″ photos from your phone onto peel-and-stick photo paper, which takes care of a lot of the work for what would have been a project with more steps. No need to order photo prints and wait on them, and no need for adhesives or paper cutters. These photos are ready to GO.
What’s most impressive to me is that this mini printer doesn’t use any ink, which is one less wonderful thing to worry about. The IVY uses ZINK (zero ink) technology which features colorful dye-based crystals embedded inside the paper. This means there’s no dry-time after printing since there’s no ink that can smudge (again, they’re ready to go!)
The photo paper is smudge-free so your fingerprints won’t show on them. It’s also tear-resistant, which I appreciated a lot for when I’ve had to remove and re-stick some photos from other projects. It stands up really well to all the ways it can be handled.
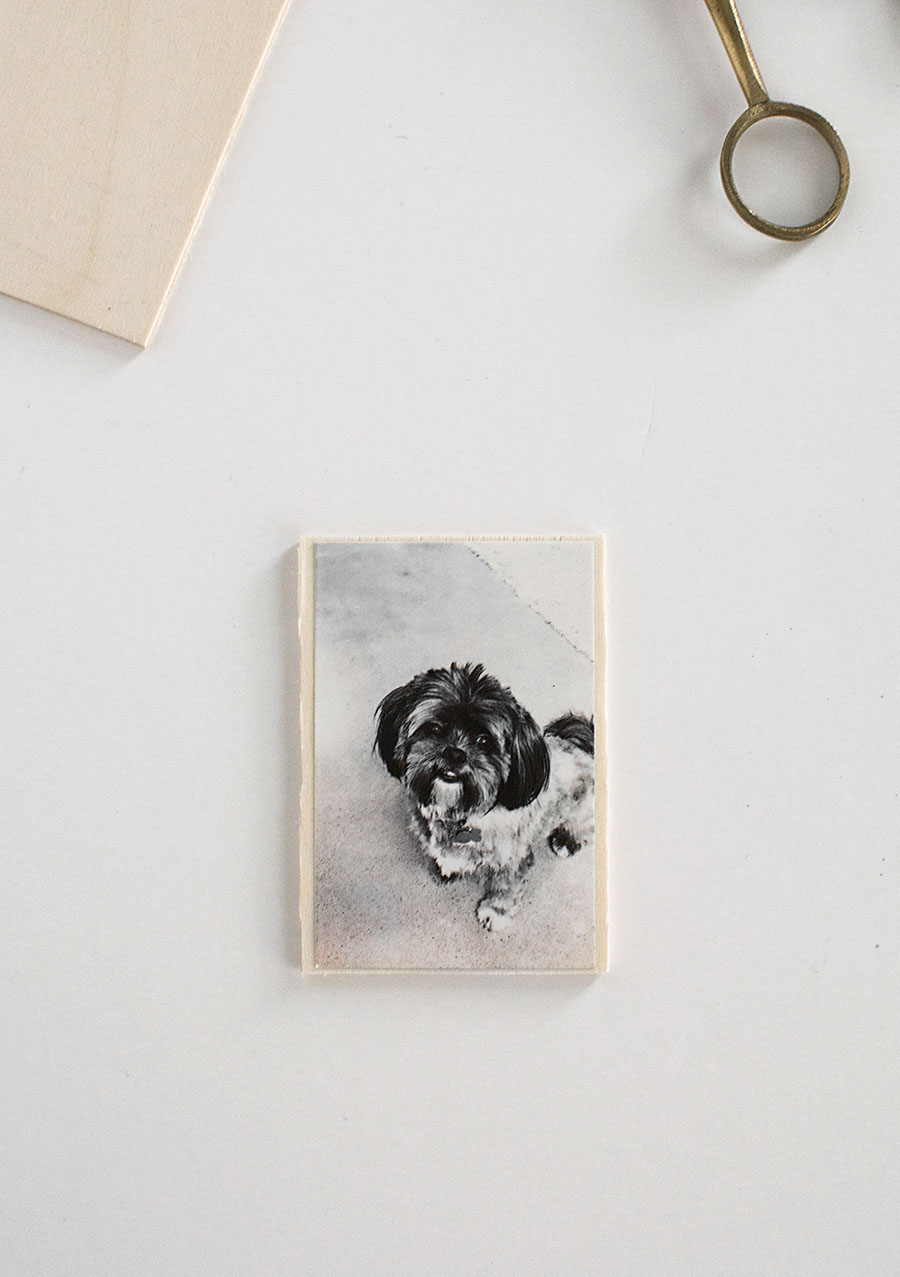
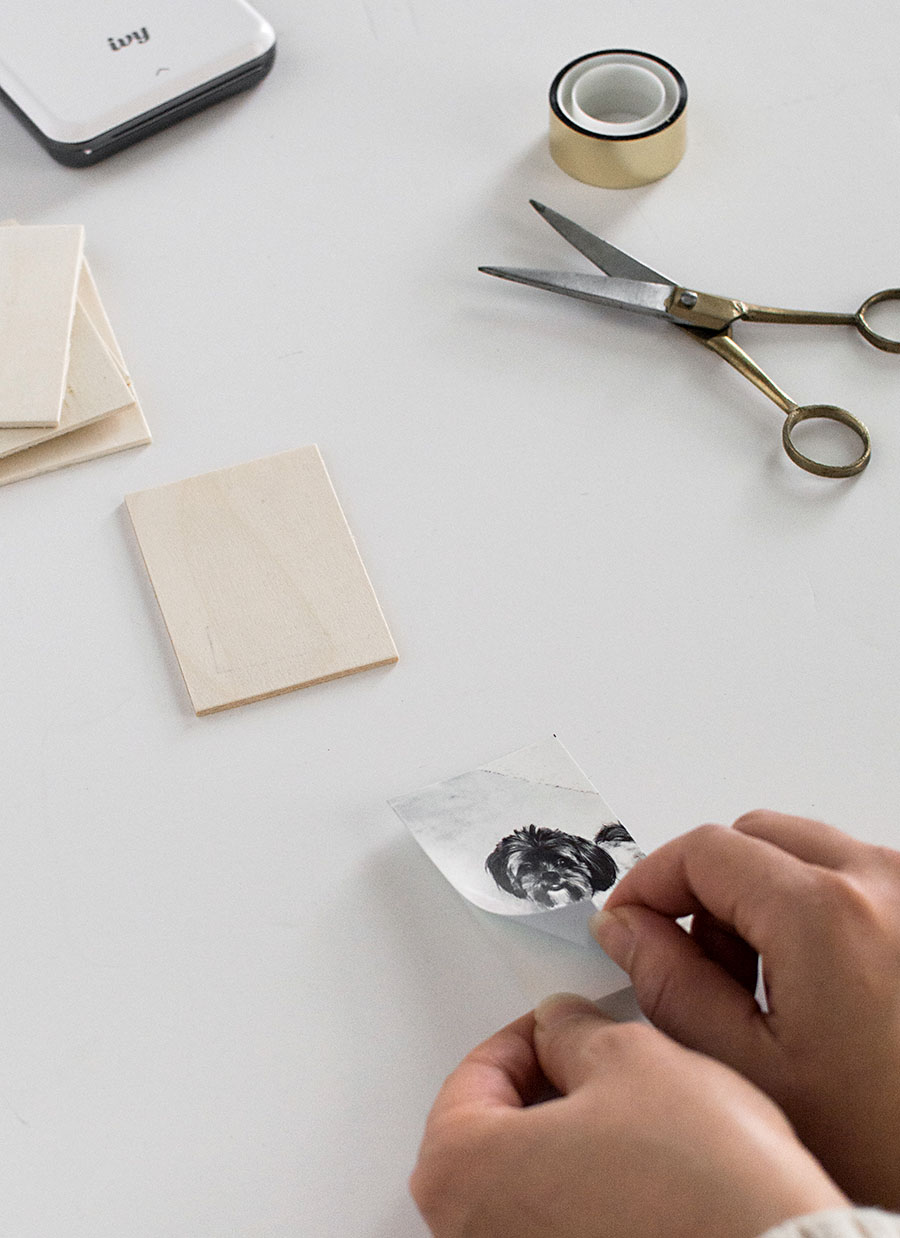
The IVY printer prints in color, but for these ornaments I wanted them all in black and white so I edited the photos beforehand. There’s also the option of editing your photos in the Mini Print app before you print. Once printing my photos, I stuck each one onto a roughly 2×3″ piece of wood that I found pre-cut at my local craft store. If you can’t find any 2×3″ pre-cut wood pieces, try cutting your own pieces out of balsa wood or any soft wood that’s easy to cut either with a small saw or blade.
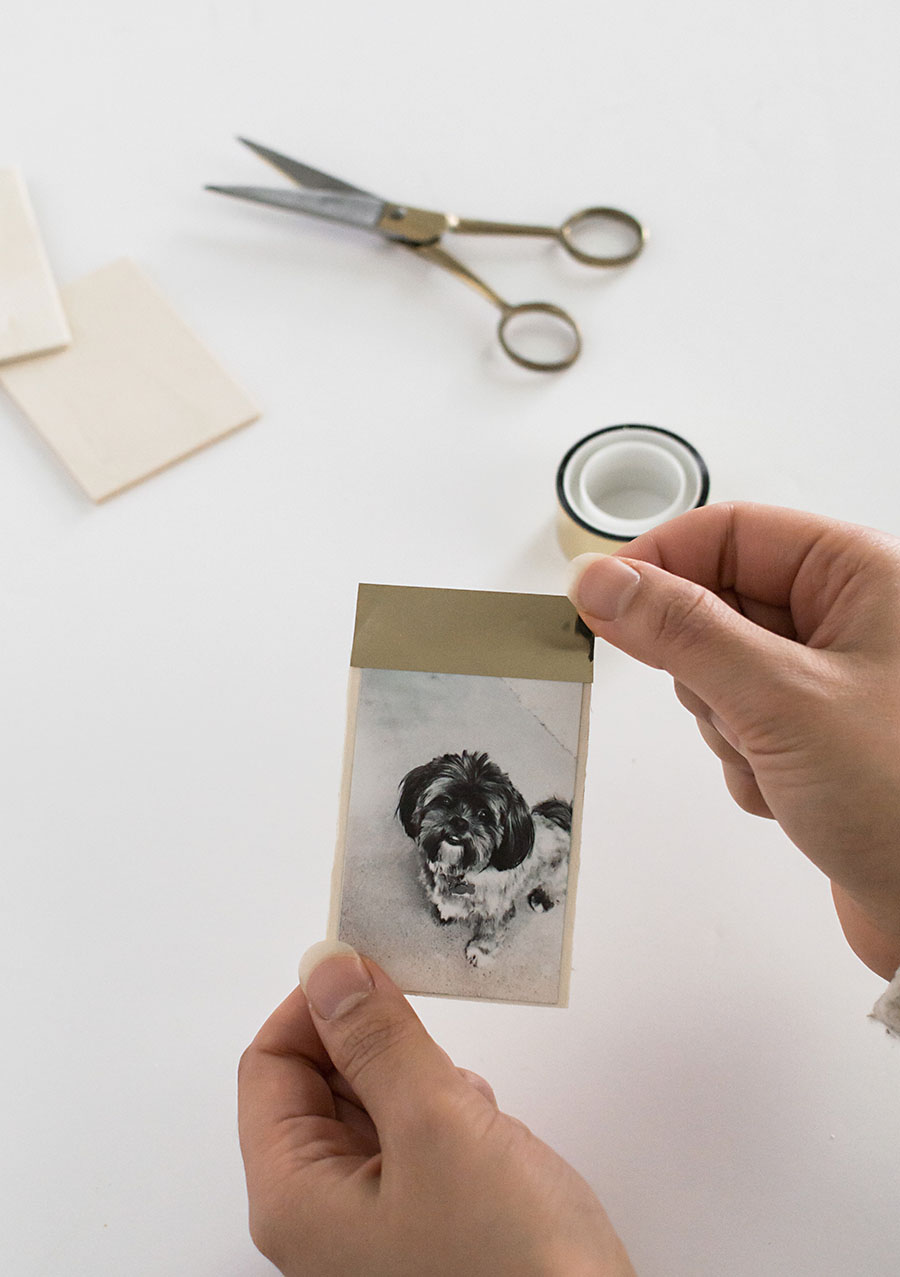
Cut pieces of Washi or any decorative tape to the length of each side of the wood. Starting with one side, stick a piece of tape to the front side of the wood. Consider how close you want to align the tape to the edge of the wood since this is going to determine the thickness of the frame you create around your photo.
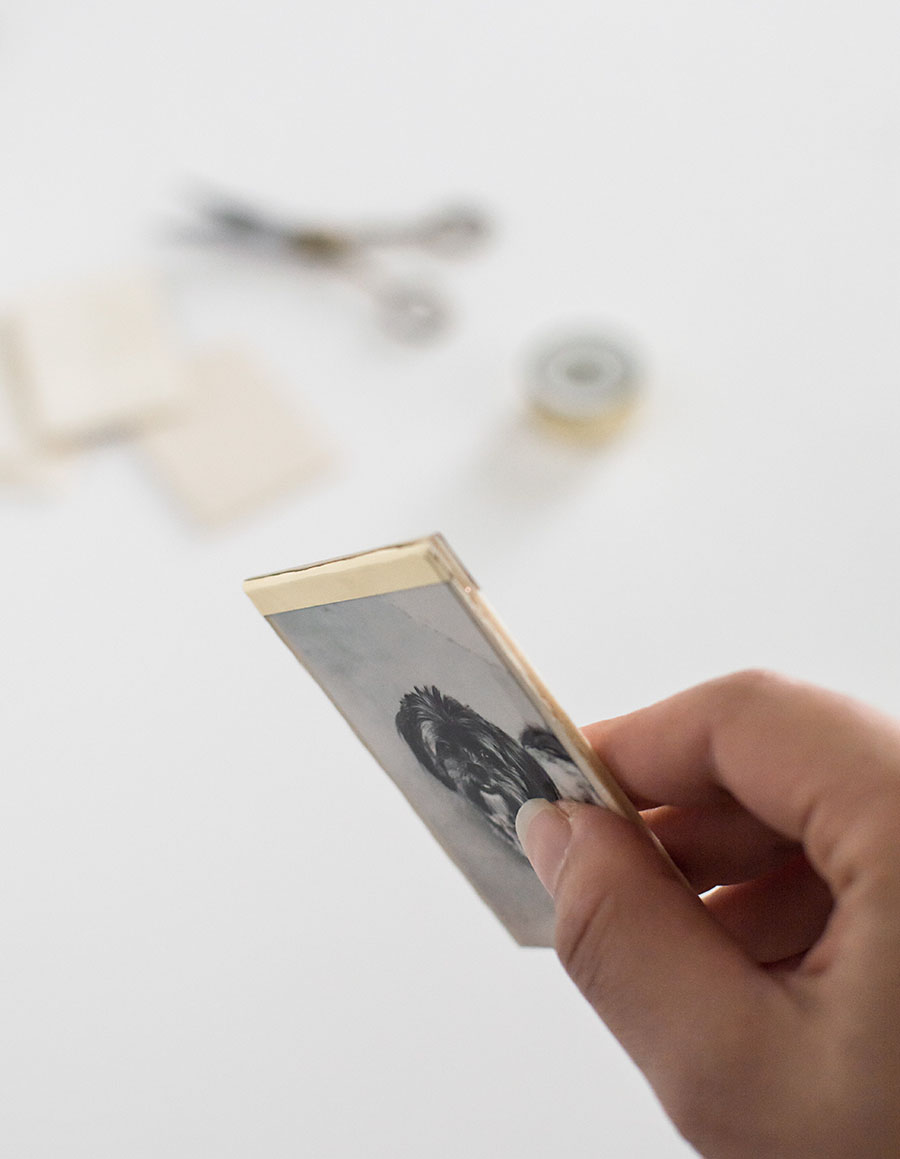
Wrap the tape over the edge of the wood and firmly stick it onto the back side of the wood. Repeat this on all sides.
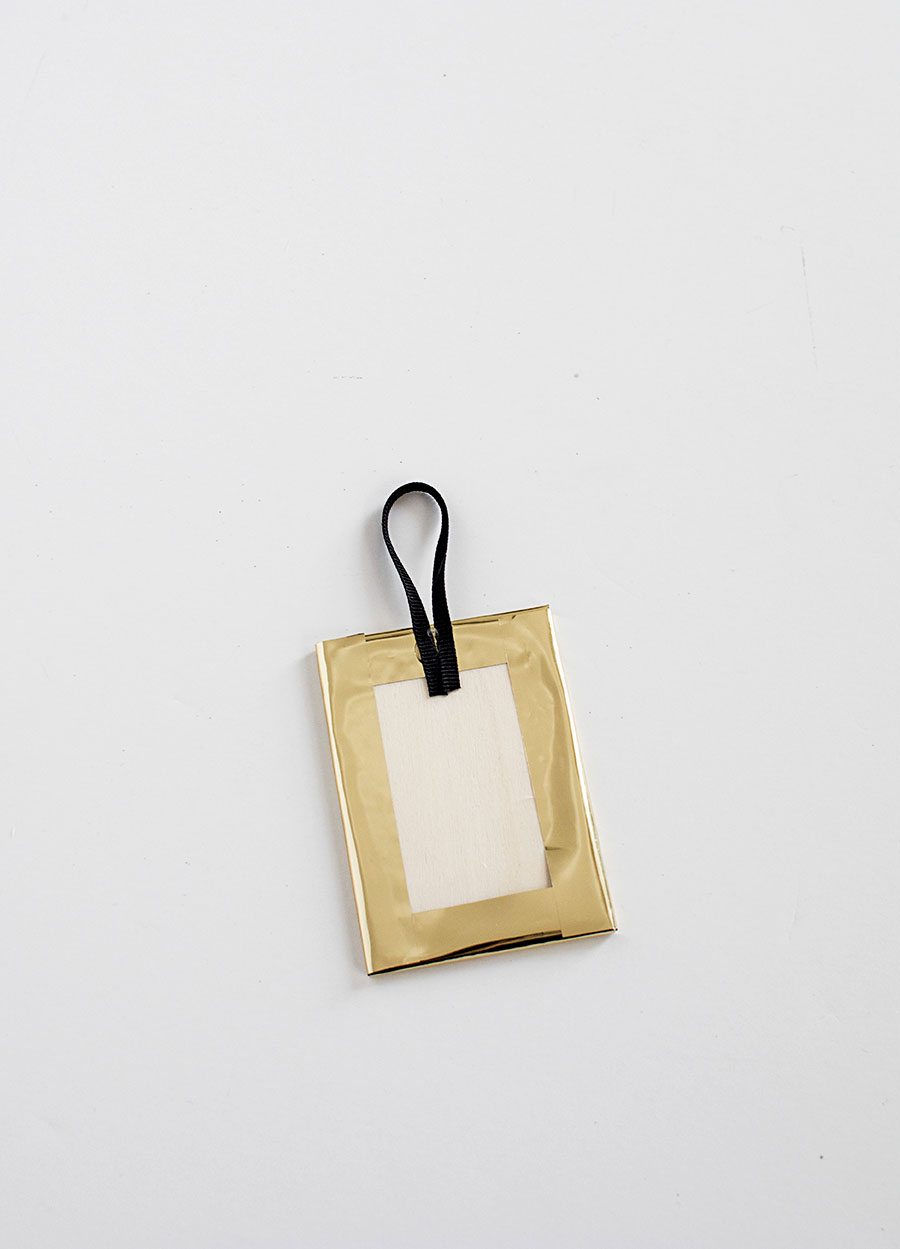
Once all the edges have been taped, attach a piece of ribbon to the top of the back side of the wood with a glue gun so that it creates a loop. This is what the ornament will hang from.
The colors/designs of the tape and ribbon you use will do everything to make these into whatever style you love while still keeping it simple. I knew before anything else I’d go with a gold foil tape since I wanted it to mimic a metal photo frame. Also, it’s shiny. What are the holidays without extra shine??
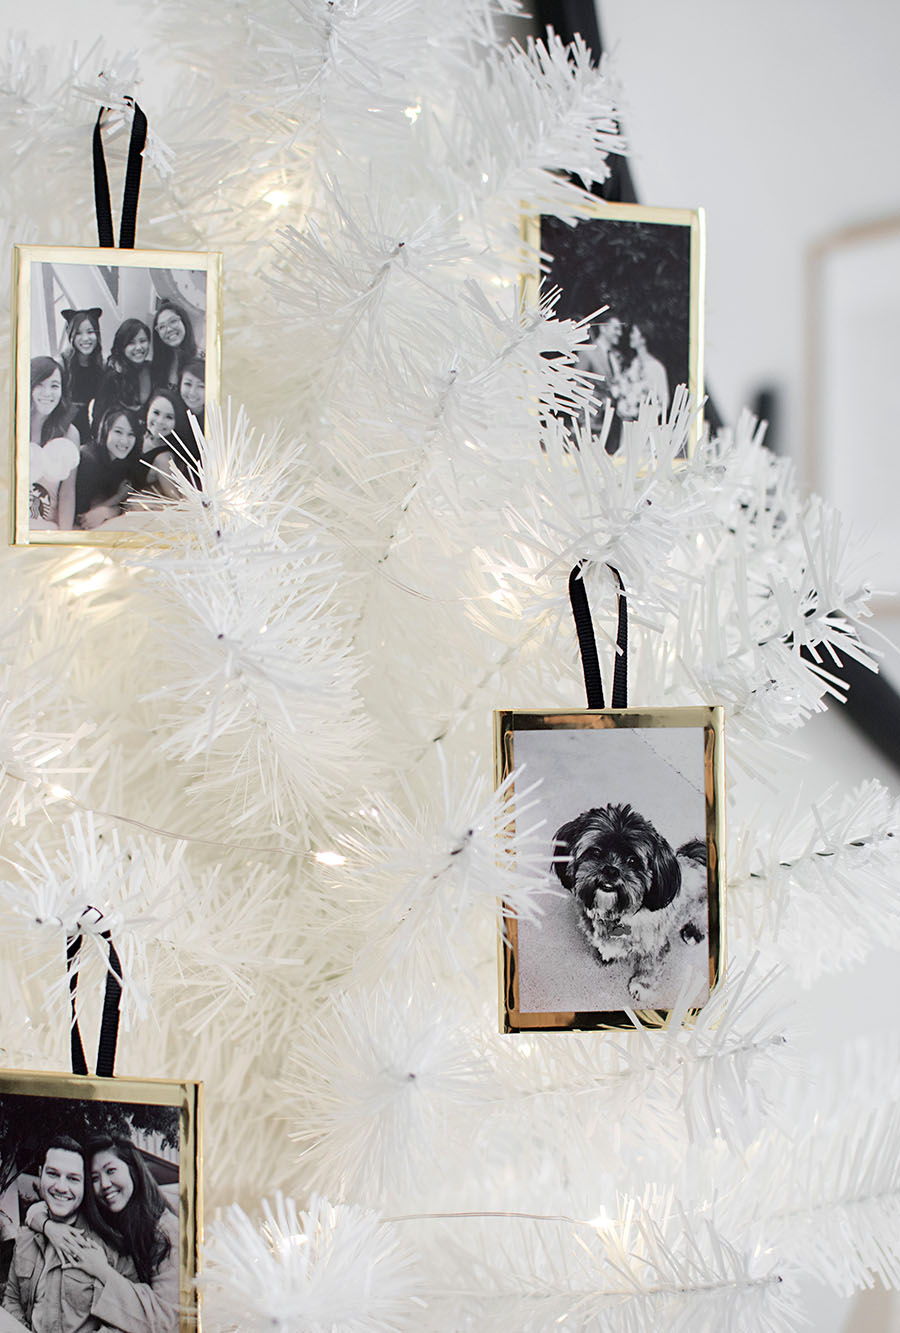
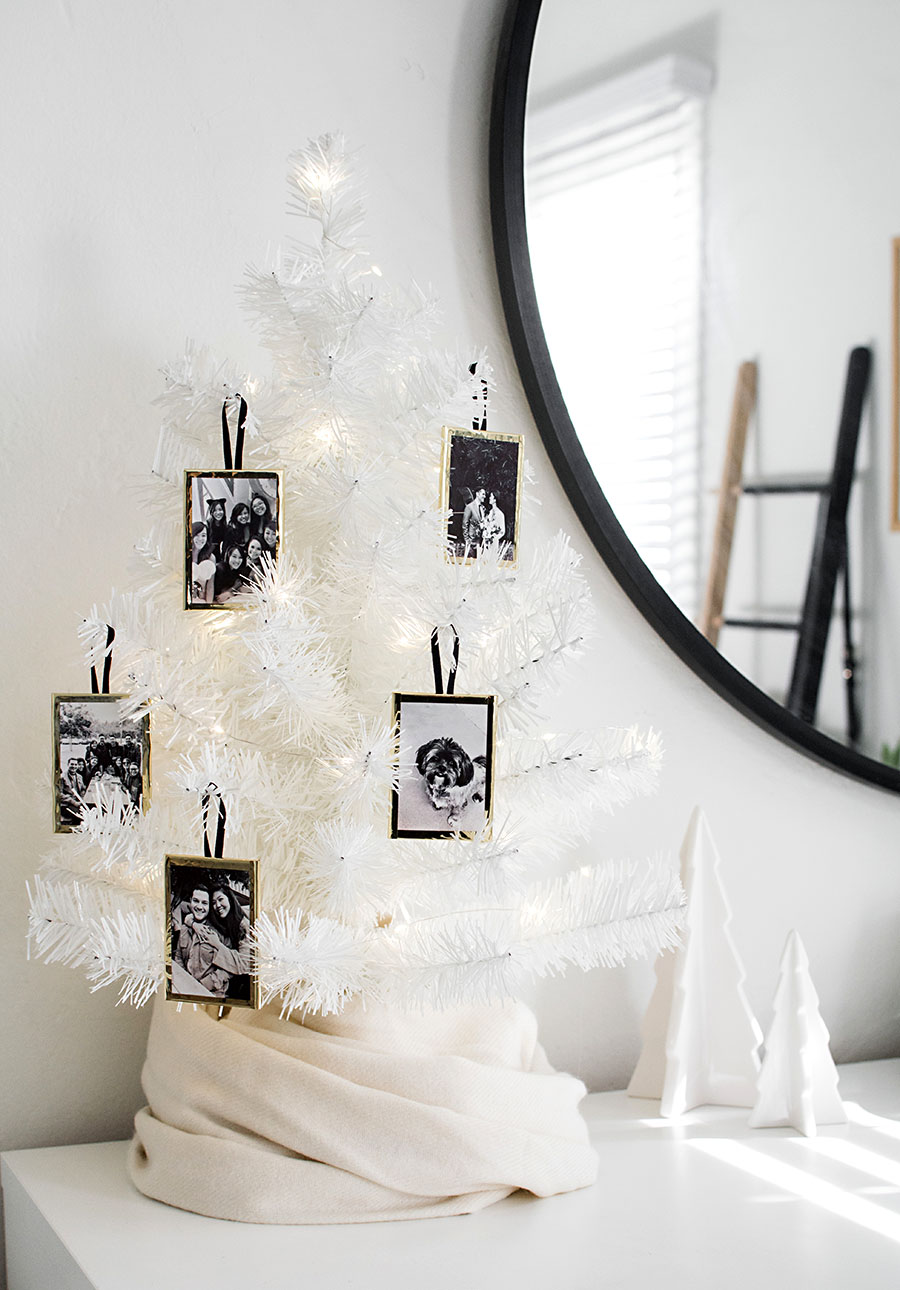
Since our big tree in the living room is already decked out, I set up this mini white one to exclusively hold our photo ornaments. It really makes me smile to pause and look at the photos, briefly taking me back to those moments and filling me with joy as I think about people, and dogs, that I care a lot about. That little fur baby is Bernie. He belongs to a friend and I adore him. Not creepy at all, right? I got permission from his owner to turn his photo into an ornament, no worries.
Yes, these would make wonderful handmade gifts this season, and if not the actual gift itself then certainly an adorable gift wrap accessory. Take it a step further and write a small note on the back, or write down when and where the photo was taken. Guaranteed to fill any recipient with warm fuzzies.
This is a sponsored conversation written by me on behalf of Canon. The opinions and text are all mine.

This is such a lovely, simple craft. The gold and black are so sophisticated. Thank you for sharing!
I love love love this! Can you tell me the type of gold tape you used? I found the wood pieces. Thanks!
Thank you! Found the gold tape at Target years ago, unsure if they still have it. It’s in the craft section!
Thanks for sharing this simple craft idea. It looks great.