05/08 DIY

How to Create a Striped Accent Wall Without Paint

How to create a striped accent wall without paint.
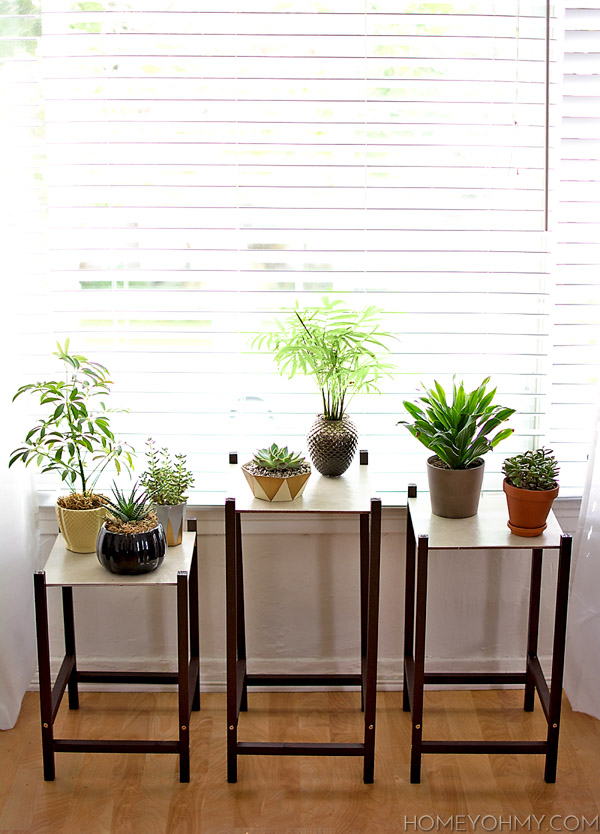
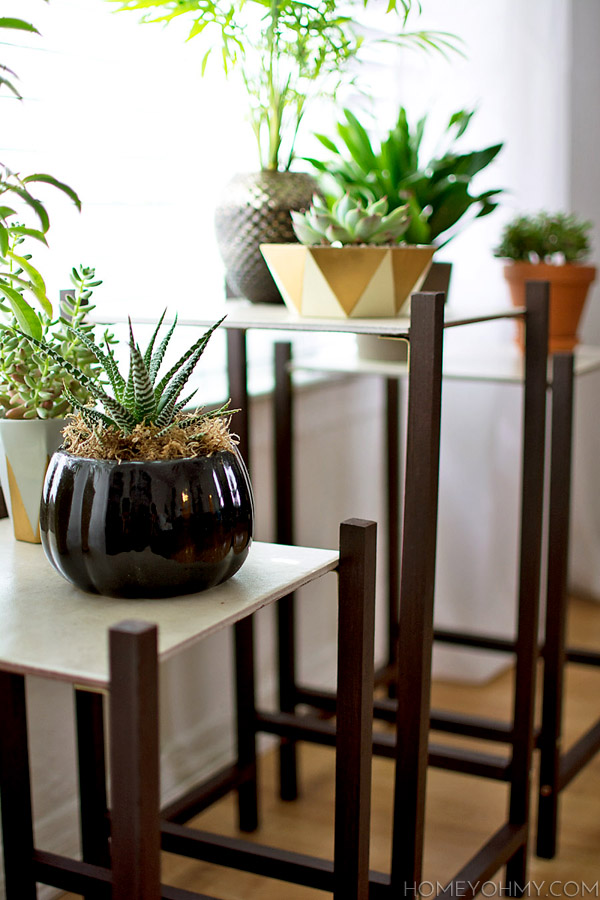
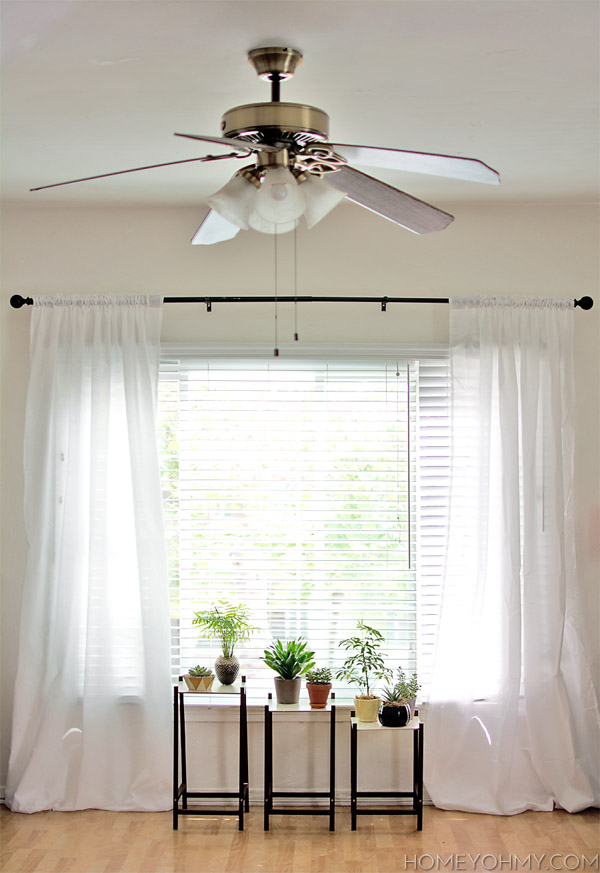
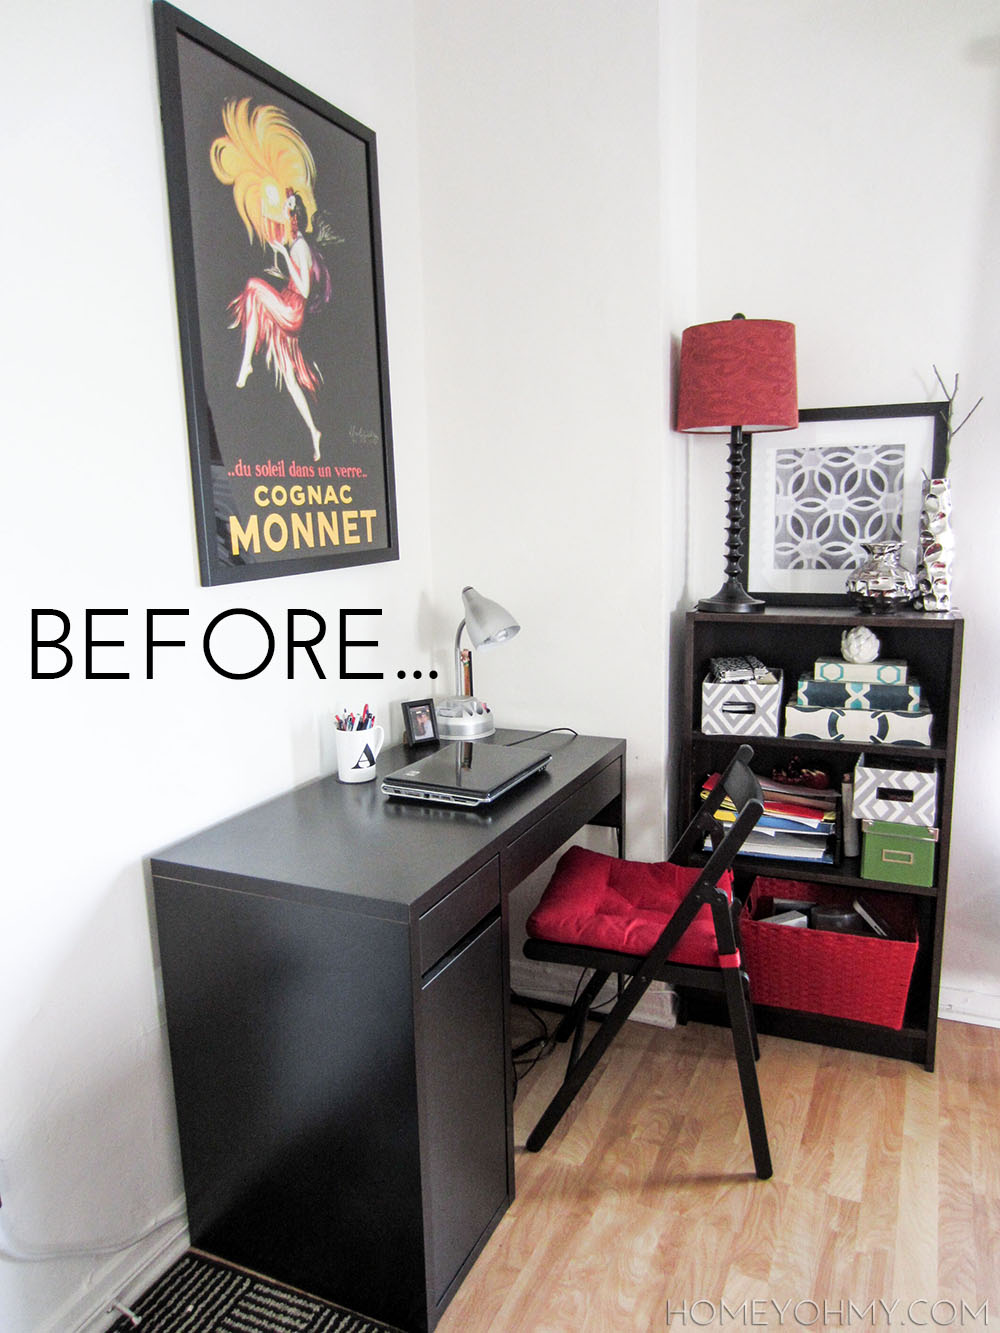
The response I’ve been getting for my work space reveal has been phenomenal.  I didn’t expect everyone to love it as much, if not more, than I do and it’s been so amazing reading all your comments and positive feedback everywhere.  Thank you all SO much for the love <3.

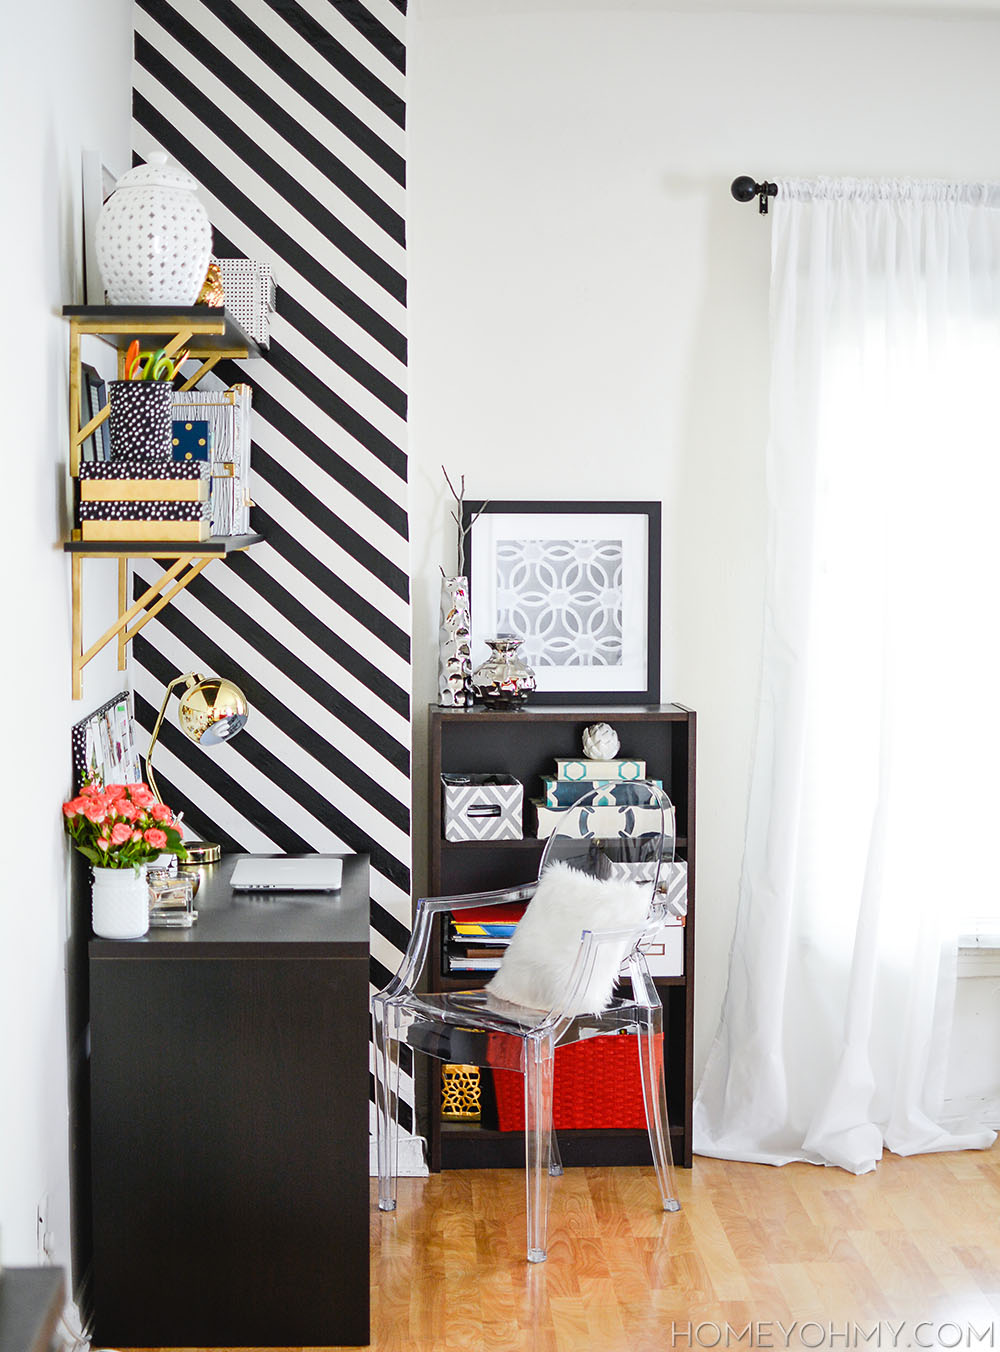
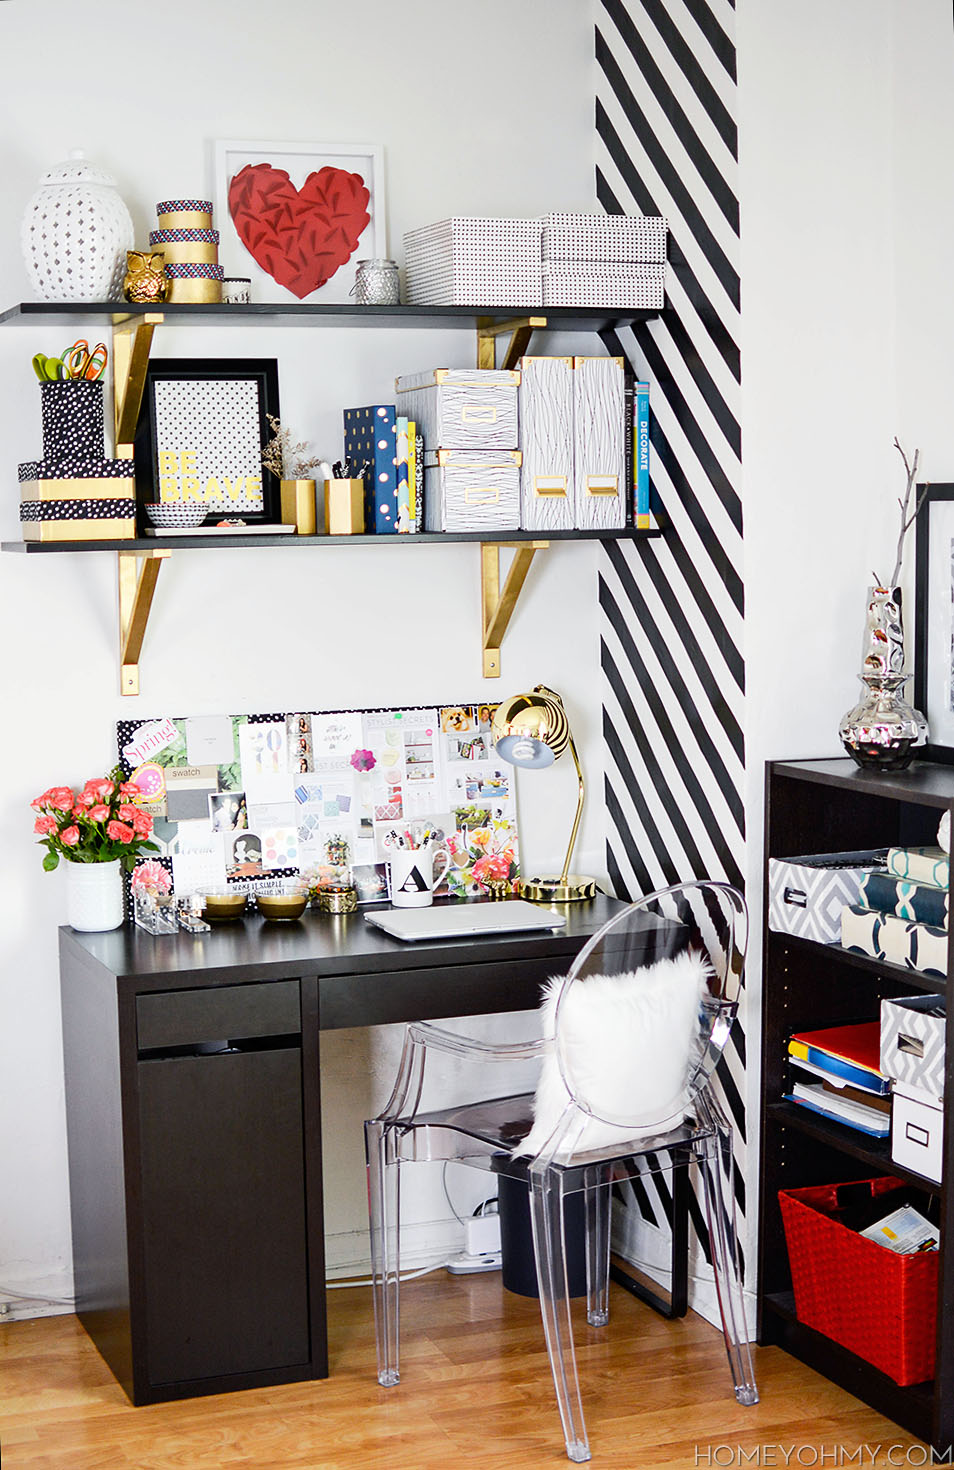
As I had promised, today I’m showing how I created the striped accent wall, which seems to be most everyone’s favorite part of my work space!

Here’s the secret weapon.

Black vinyl tape

Boom.  Black vinyl tape.  I got the 2 inch vinyl tape here (affiliate link) and I’m SO impressed with how this worked out.  It sticks on strong but can still be repositioned without leaving any residue behind.  Especially if you’re like me and live in a rental and don’t want to mess with painting your wall, this is absolutely the way to go.

Tape outline copy

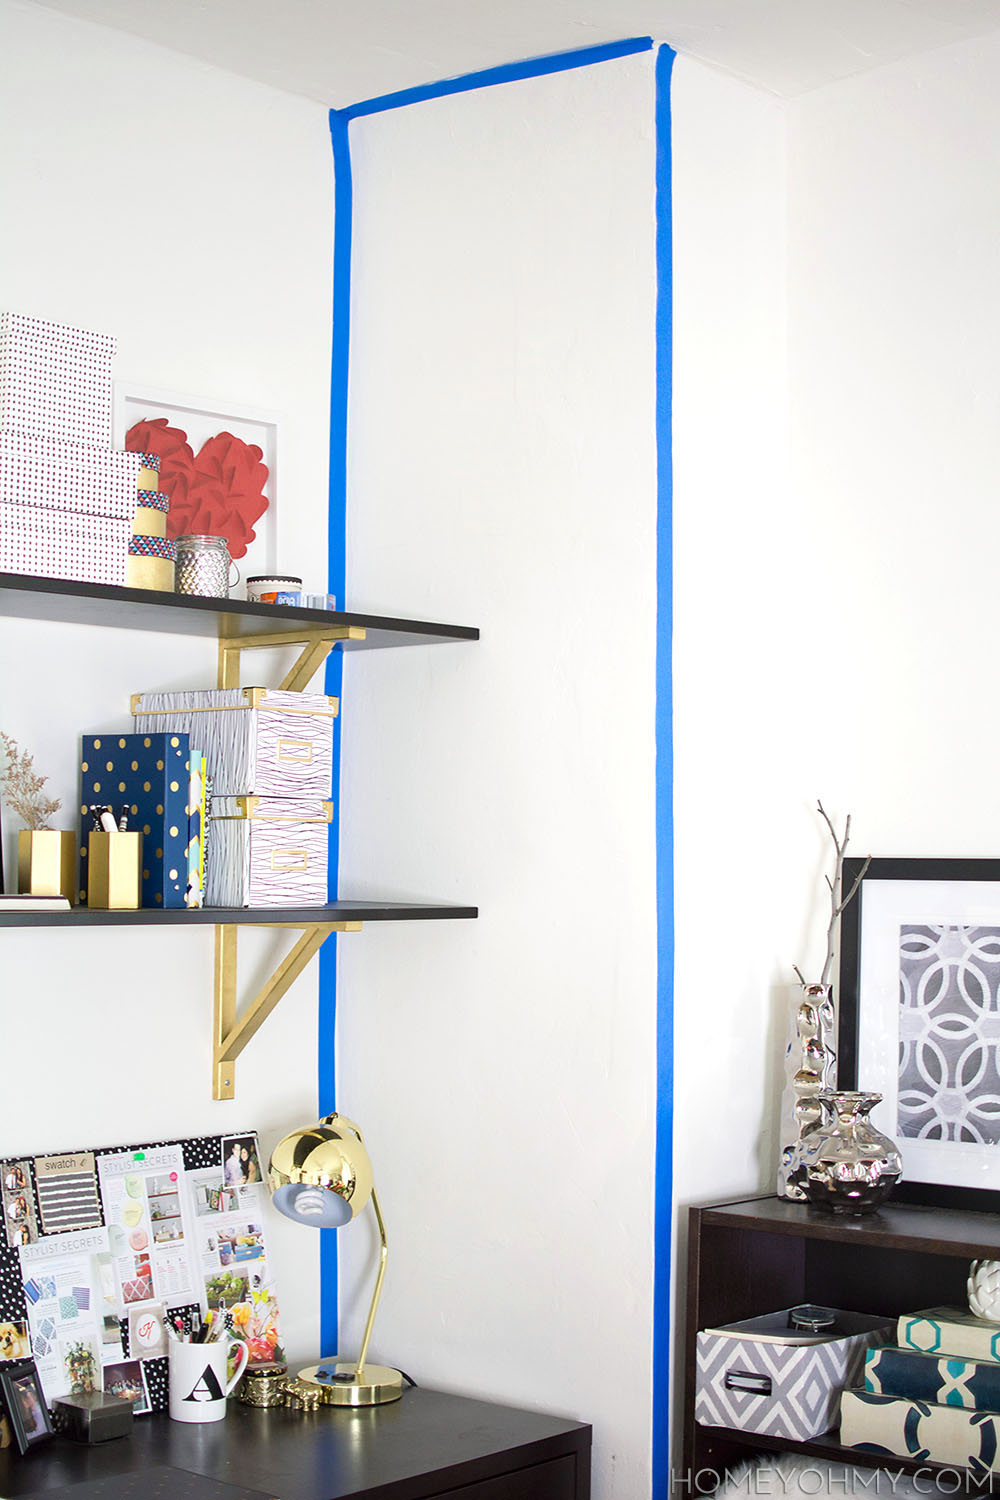
First, I applied painters tape around the outer edges of the wall.  I’ll explain why in a little bit.

Taping around the accent wall
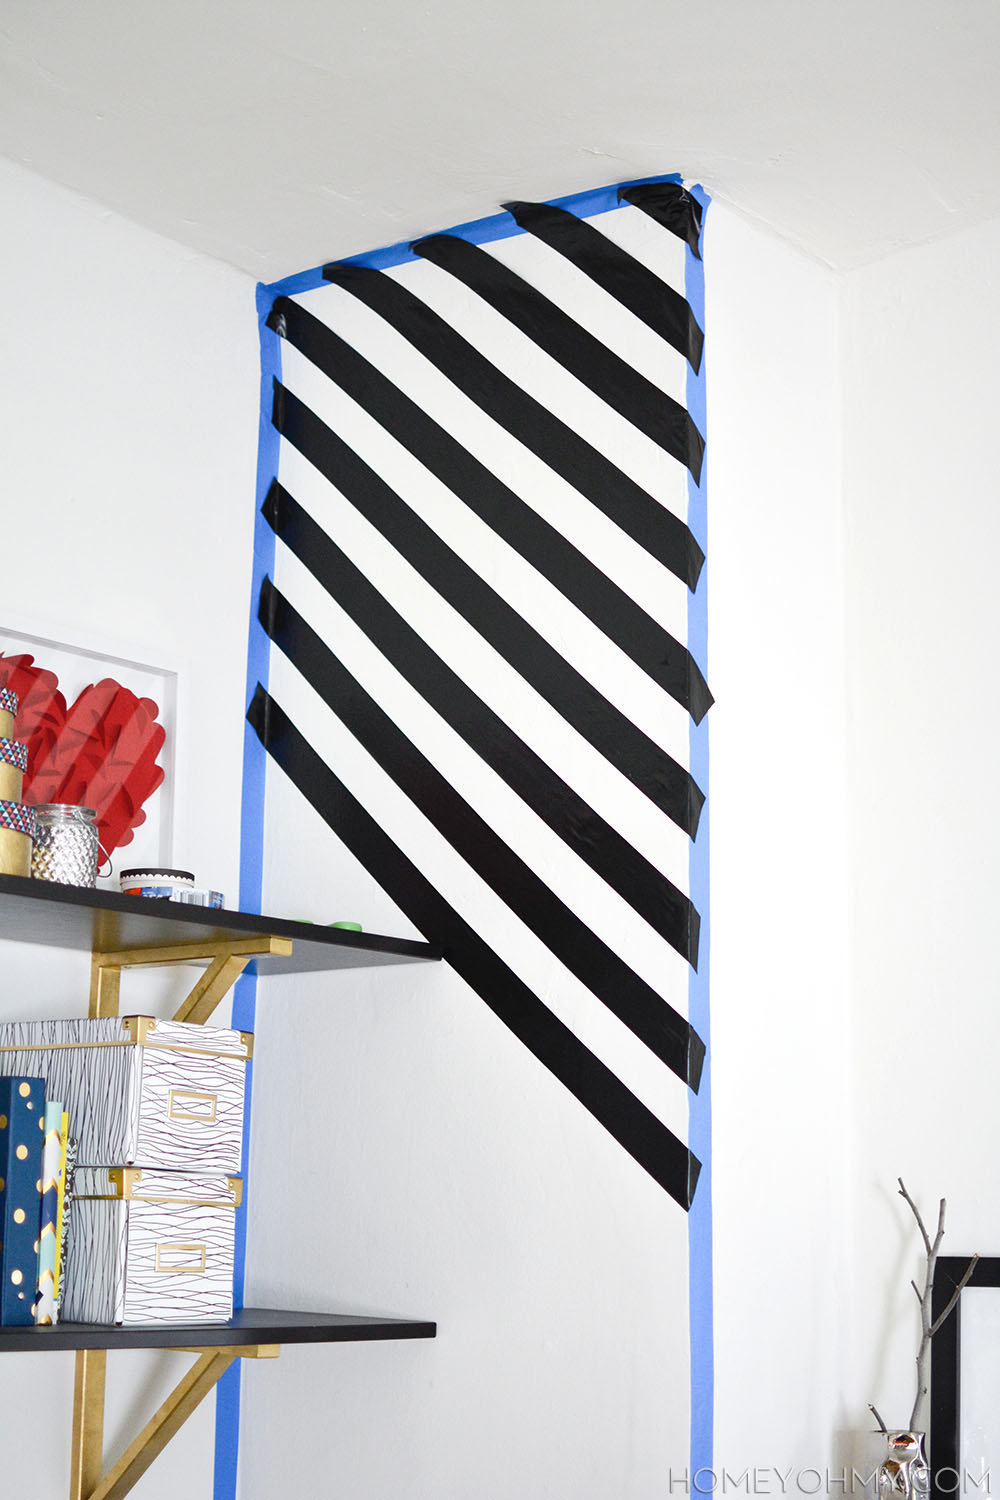
Then I just started taping on the black vinyl tape diagonally, making sure the ends of the tape overlapped with the painters tape.  I eyeballed this mostly because my wall is actually pretty warped and uneven.  It would have killed me to try and measure things out perfectly, so I just did what looked right, occasionally stepping back far away and making sure it all looked fairly straight and evenly spaced.

Cutting Tape B
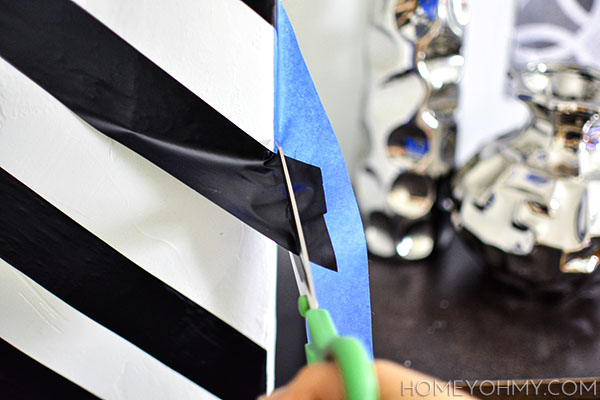
After applying all the black tape, I cut along the inner edge of each strip of painters tape as I lifted and peeled it off.  The painters tape is there as a guide for where to cut to ensure that the ends of the black tape match up perfectly with the edges of the wall.  It did require peeling off the black tape a bit for each stripe, but once cut it just needed to be stuck back on the wall.  Neat little trick, yea?

How to create a striped accent wall without paint.
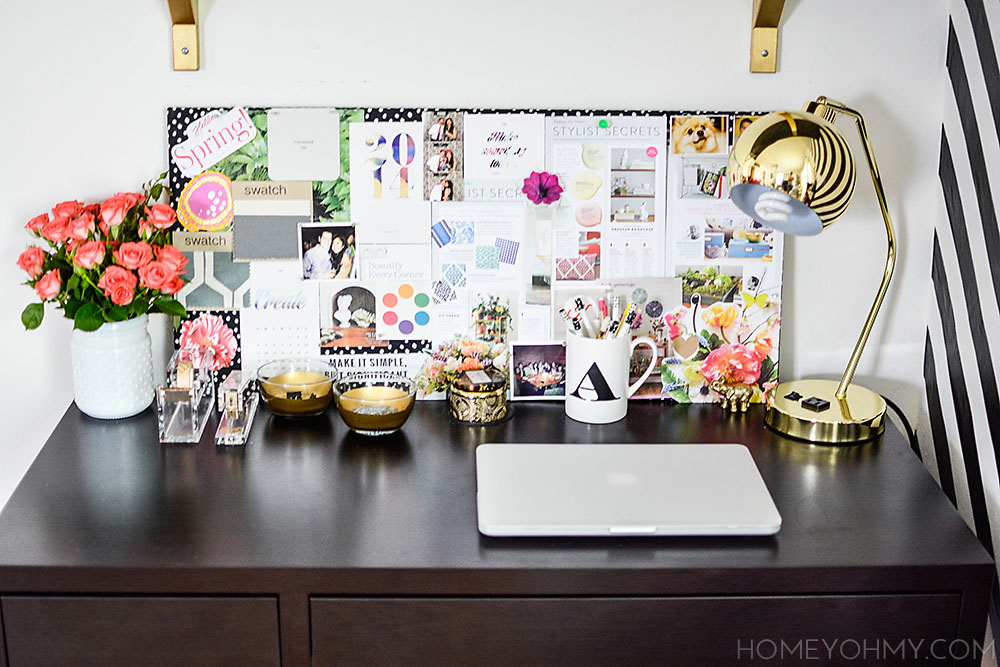
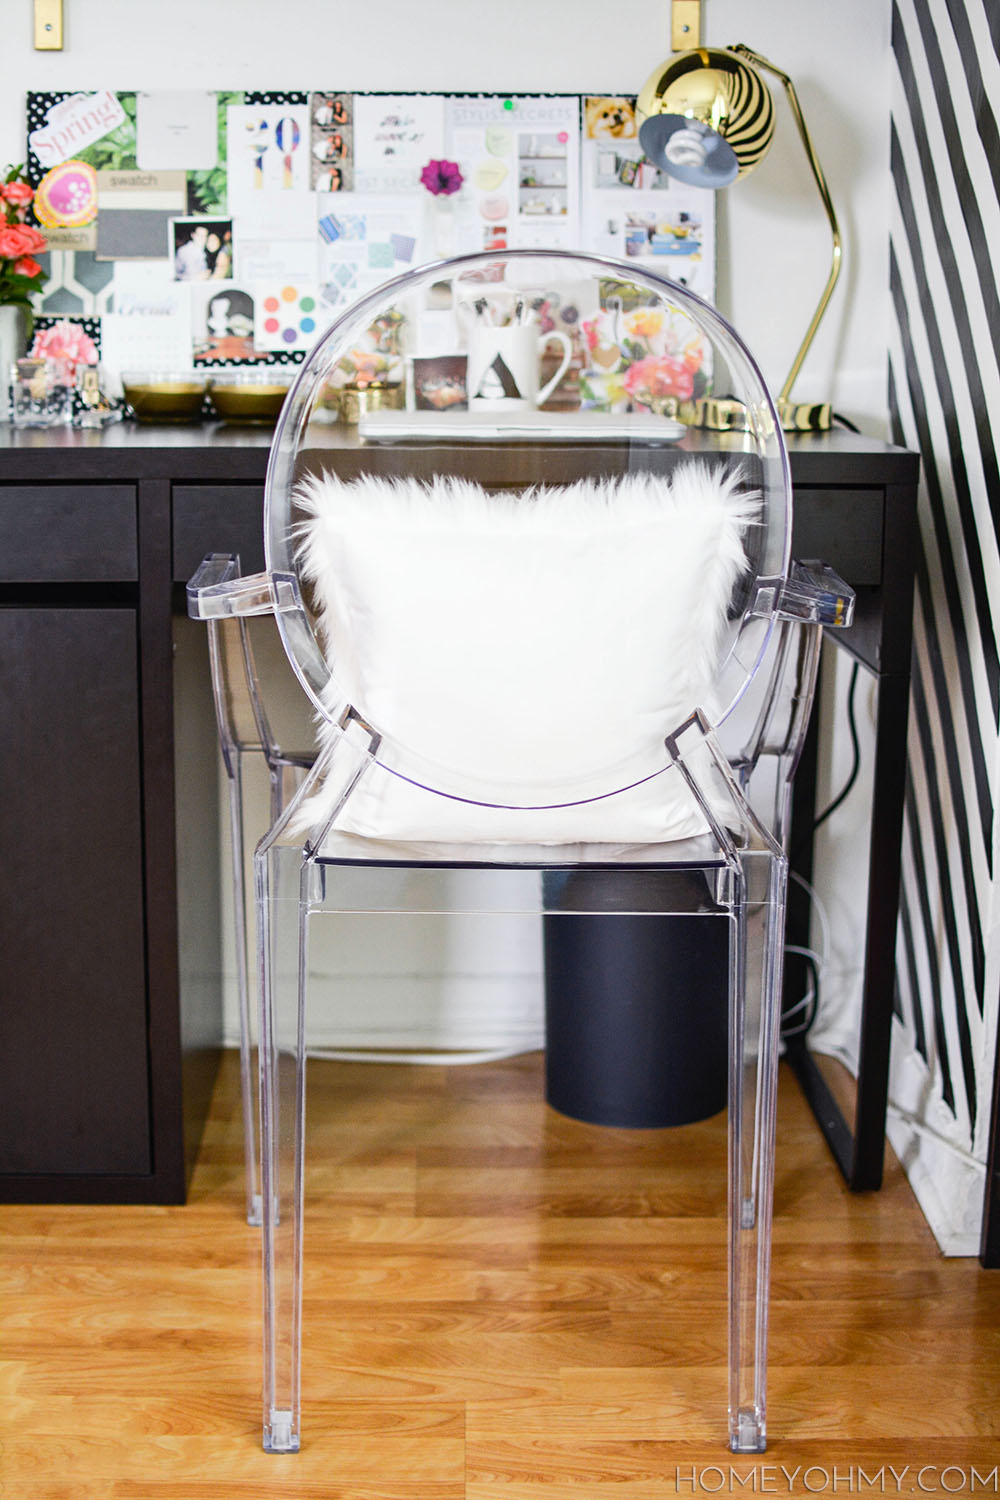
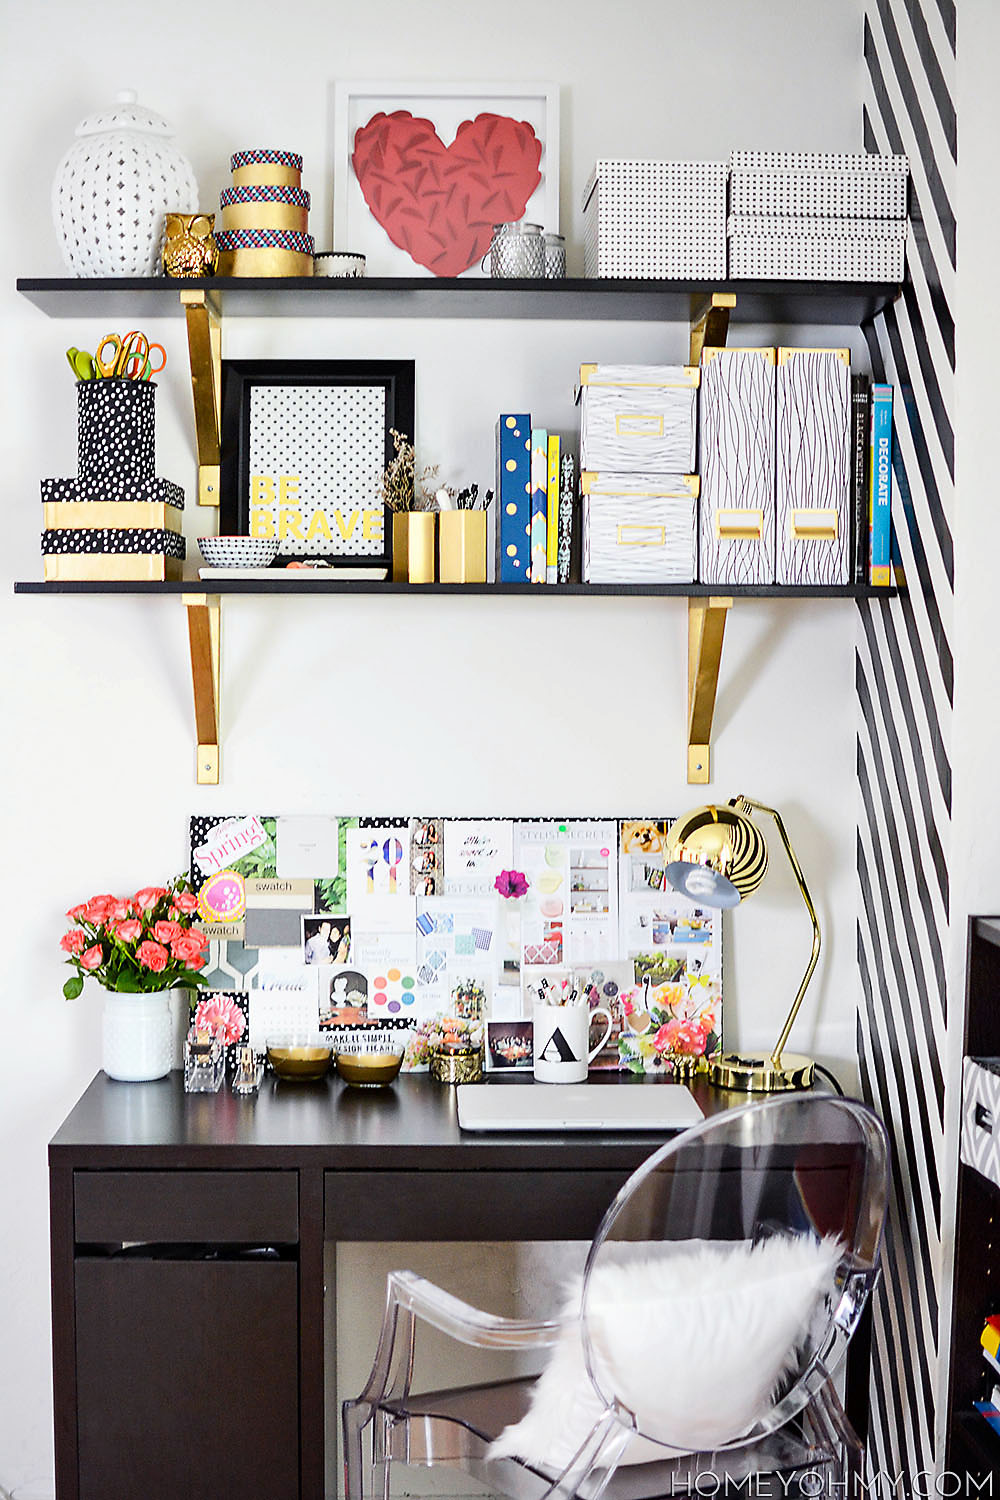
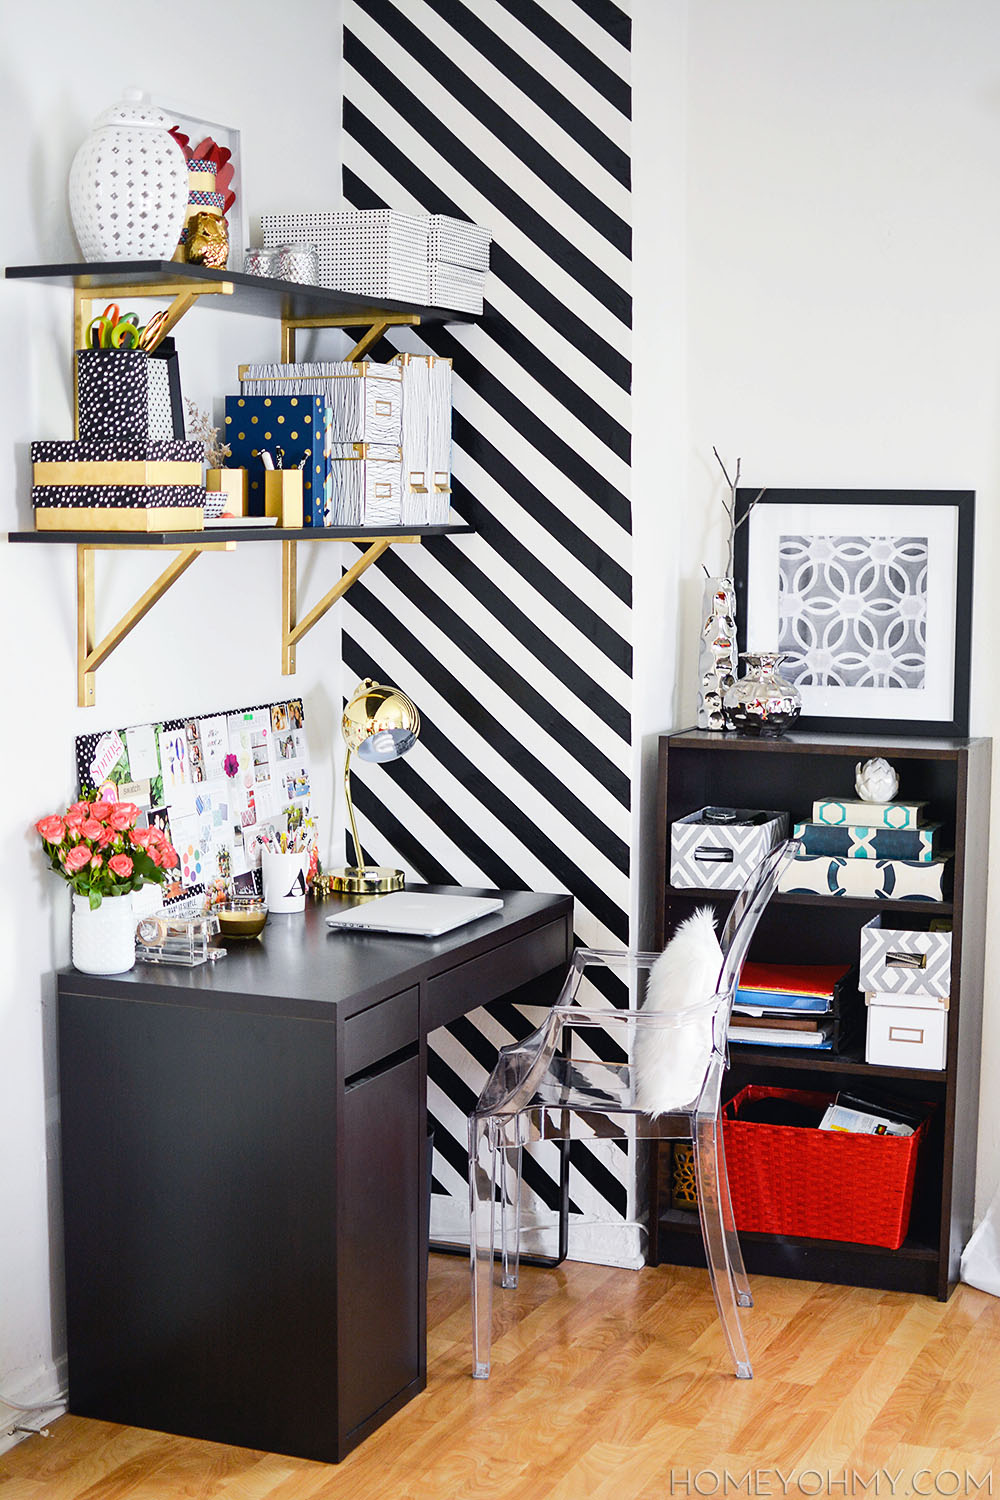
I had thought of a few different options for how to fill up this wall, but this one packed the highest impact for my buck and creates a simple yet stunning focal point for my work space.  It also really helps draw the eyes up and emphasizes the high ceiling, making my little corner look just a bit bigger ;).

Was that as easy as you expected it would be?  All you need is tape and some patience.  Not bad, I say!

PS.
Do you use Bloglovin?  It’s how I stay up to date on all of my favorite blogs.  Visit my Bloglovin page and follow along to stay connected with  me!Follow on Bloglovin


05/05 DIY / Our Apartment

Work Space Reveal

Work SpaceGuys, I’m so so so excited about this one!  A while back I had mentioned I was working on this area and shared a bunch of DIY projects related to it, and now I finally get to show you guys how it looks all together.  Before I walk you through the changes, let’s take a look at how things were before…

Before

Not terrible, but definitely looks very temporary.  Because I’d be spending so much time here (hello, blog life!), it was important to me to make this space more inspiring and functional, and with that comes the necessity to increase storage, so I started by replacing the wall poster with a couple of shelves.

Work space shelves

The shelves are the Ekby Hemnes shelves from IKEA.  Also from IKEA are the Ekby Valtar brackets, which I spray painted gold, of course!  On top of the shelves is where I express my love for boxes and tchotchkes.

Desk styling

On my desk is my fabric covered magnet board that I use as a mood board, consisting of magazine clippings, photos, and anything else that’s inspiring me at the moment.  It’s been pretty fun posting things up on it  and I plan on updating it regularly.  Also, I’m sure you’ve noticed all the gold accessories galore, and I’ll be including a DIY and source list for everything on my desk at the end of this post, so stay tuned!

Desk accessories

Acrylic tape dispenser and staplerI shared the acryclic tape dispenser and stapler on Instagram a while ago and y’all went nuts for them!  I’m nuts about them, too ;).  And I also recently posted a little sneak peek with the African roses, which you guys loved as well.  Isn’t it great how we can all love the same things together?  You guys are the best <3.

Ghost chairWe’ve arrived at my favorite part.  I mentioned in my Ghost Chair Inspiration post that I got me one of these babies and I love her more than I ever could have imagined.   Surprisingly comfortable, and mega gorgeous.  The best chair splurge of my life, and it makes me look forward to sitting at my desk even more.

Desk decor DIYs and sources listSo here it all is.  Everything that’s numbered is either a DIY I’ve shared on this blog or the source for the item, but mostly they’re DIYs!  Check them all out here:

1) DIY Washi Tape Boxes
2) DIY Heart Wall Art
3) DIY Fabric Covered Pencil Cup
4) DIY Fabric Lid Boxes
5) DIY Typography Wall Art- Be Brave
6) DIY Gold Pencil Cups
7) DIY Custom Magazine Holders
8) DIY Fabric Covered Magnet Board
9) Acrylic Tape Dispenser
10) Acrylic Stapler
11) DIY Gold Desk Dishes
12) DIY Washi Tape Pens
13) DIY Monogrammed Cup
14) Ghost Chair
15) DIY Striped Accent Wall

*UPDATE* I’ve gotten a lot of questions about the gold lamp, so here’s the link for it:  See it here.

Desk full of DIY decorDid you notice everything is mostly gold, black, and white?  How appropriate, since they’re my FAVS.  Red naturally made it’s way in since my work space is in a corner of my living room, which has a lot of red accents.

Gorgeous small workspace with black and gold accents
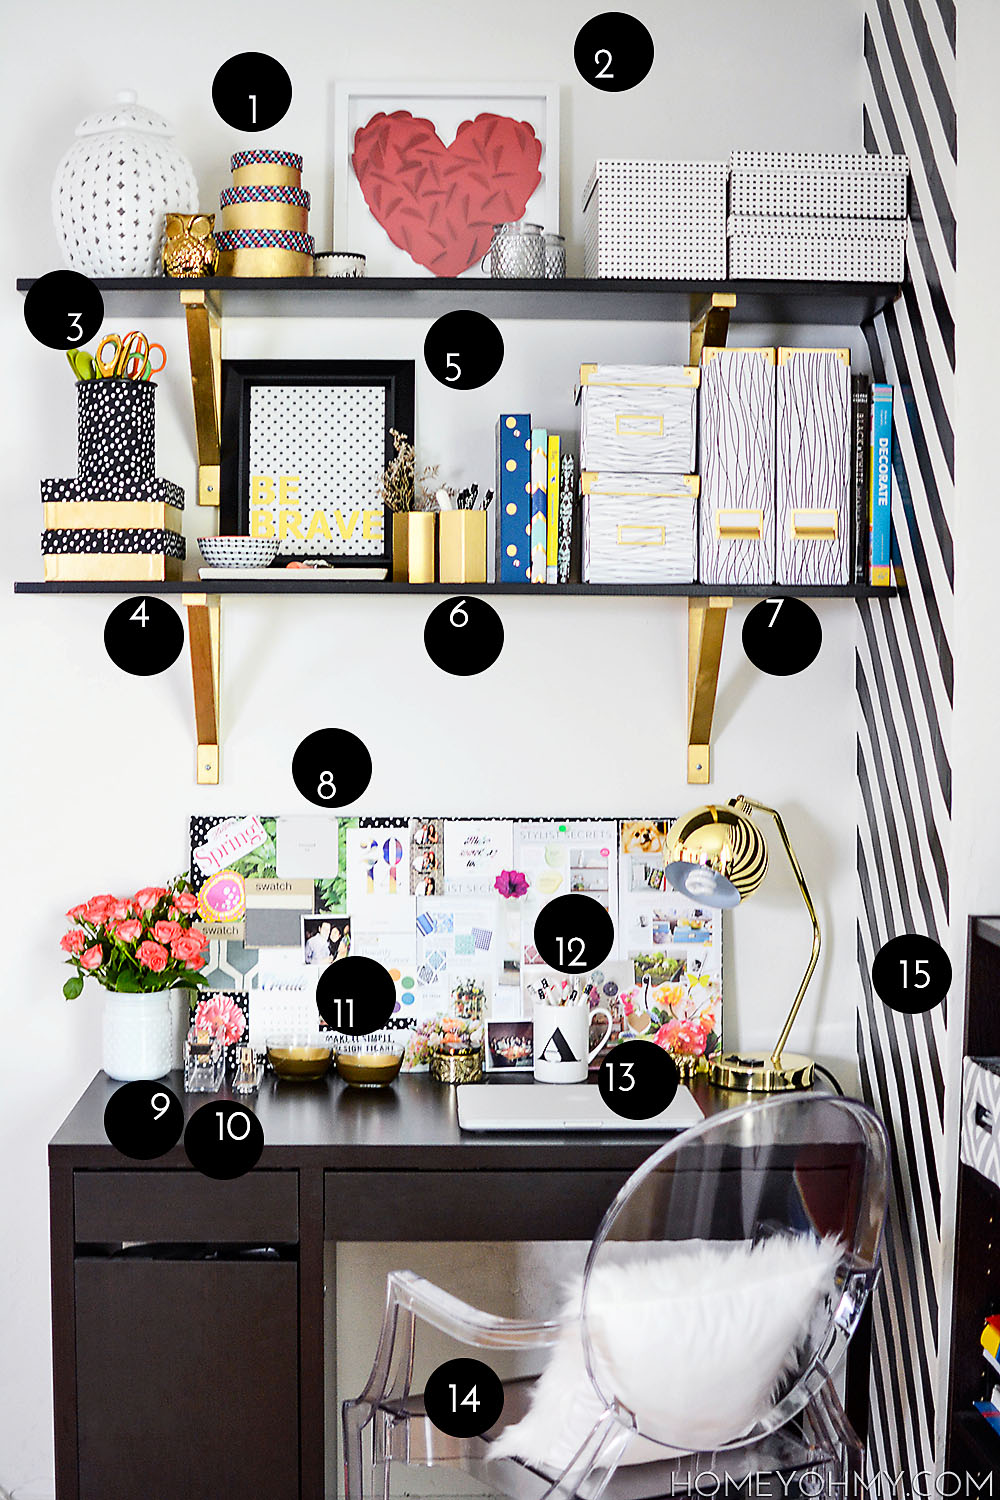
As already mentioned, the striped accent wall tutorial is yet to be posted up, so make sure to come back for that!  If you have any questions about anything else in my work space that I didn’t cover, leave them in the comments below and I’ll get back to you.  Or if you just want to say hi that’s cool too :D.


05/01 DIY

DIY Gold Goblet Planter

DIY Gold Goblet Planter

Let’s call this week planter week, shall we?  I really hope you guys aren’t getting tired of all this recent plant talk, but in case you are, fear not!  This will be the last one for a while, unless of course inspiration holds me hostage, because I’ll be real… almost every container or vessel I come across makes me think about how I can turn it into a planter.  It’s a sickness, and especially if you’re always rolling through the Target dollar spot like I am, there’s tons of planter inspiration to be found, like this one:

Target plastic goblet

A $1 plastic goblet that I can spray paint gold and turn into a planter?  Oh heck yes!  And that’s basically what I did.

Decorating a gobletI sprayed two coats of my favorite gold spray paint (affiliate link) and then used a black Sharpie to draw on a design inspired by my Nate Berkus vase that made an appearance here.

Gold Goblet PlanterOf course I had to plant my donkey tail burrito (yes, that’s the name, no typos here) in it, which I had mentioned in my succulent haul as being the one I was most excited to find a planter for.  I knew I wanted something elevated for it, and while I think it would have been fun to plant it in something with a face, I think this turned out to be a pretty cool and spontaneous alternative.  Besides, gold <3.

Bonus: this would make an adorable gift, maybe even for that holiday coming up soon (Mother’s Day:  Sunday, May 11th.  This is your official reminder!)

I cut up a gift tag out of card stock, applied Washi tape on one end, wrote a tiny message on it, and tied it around the base of the goblet with twine.

Gift tag

DIY Gold Goblet Planter with Gift TagWouldn’t this make such an adorable addition to your Mother’s Day brunch table?  Or if not for Mother’s day, this could be such a cute hostess gift.  The message on the tag for that would probably be different though, ha!  Or maybe not!

Happy Friday eve, everyone!  Will you be up to any planting shenanigans this weekend?  Celebrating Cinco De Mayo?  Prepping for Mother’s day (for those of you who are really on top of your game)?  Whatever your plans, I hope it’s a beautiful weekend <3.

04/29 DIY

Gold Dipped Plant Pots- Guest Post at PBteen

Gold Dipped Plant Pots

I’m SO excited to be doing another guest post at The Stylehouse, the Pottery Barn Teen blog!  This time I’m sharing how to make these fun and colorful gold dipped plant pots perfect for Spring (and my plant obsession).  They’re very simple while adding so much life and vibrancy to anything planted in them.  Head on over to the PBteen blog to see how easy they are to make and let me know what you think!  See the post here at The Stylehouse.

DIY Gold Dipped Plant Pots


04/24 Life

27 Random Facts About Me for My 27th Birthday


Jumping

Yup, I turn 27 today!  Would you have guessed I was younger?  I only assume that because most people guess that I’m around 23 or still in college.  I had one stranger guess that I was 19 :( … c’mon now…

For my 27th birthday, I thought it’d be fun to share 27 random things about me.  I’ve never done anything like this before and am liking the idea because I rarely just chat with you guys on the blog, let alone just share things about myself.  Hopefully you guys find this fun and interesting!

1)  My favorite color is green, though if we want to get super technical, it’s gold.  Black and white are high on the list too.  And creeping up on the list is copper.

2)  I live in an apartment with my high school sweetheart.

3)  My major in college was physiology and I picked it because I was interested in studying cadavers.  That sounds unintentionally morbid when really I just have a fascination with the human body!

4)  I was born and raised in Chicago, which I genuinely believe is one of the greatest cities, minus the weather.

5)  I danced on a competitive hip hop team during my four years of undergrad and led the team my senior year.  It’s one of my proudest accomplishments and many of the people I danced with are still my best friends today.

6)  My parents have been working in the floral design business my whole life and I think that might have something to do with my flower and plant obsession.

7)  Biggest celebrity crush is Leonardo DiCaprio and my boyfriend enthusiastically approves of this.

8)  I have an older brother and three nephews.

9)  One of my childhood dreams was to be a professional figure skater, which came from having taken lessons for a couple years and loving it.

10)  I’m a crier.  Sad movies or seeing other people cry = instant tears.

11)  My biggest life goal is to raise a happy and healthy family.

12)  I cut my own hair because I don’t trust anyone else to do it.

13)  I got my first job at 15, and it was at Dairy Queen.  I’d always come home completely speckled in ice cream because of the blizzard machine.

14)  I think The Twilight Saga is so bad that it’s so good.  I call it deliciously painful entertainment.

15)  My boyfriend and I have a tradition called Steak Sundays, where he grills a steak every Sunday on a cast iron grill pan.  It is most delicious.

16)  Top 5 favorite stores in no particular order: Target, Home Depot, Anthropologie, H&M, and HomeGoods.  Darn, I left out Trader Joe’s… Top 6, then.

17)  I love staying at home.  LOVE.  It’s my favorite Friday night activity.

Let's stay in.

18)  My drink of choice is whiskey on ice.

19)  I have a wide range of taste in music, and I currently mostly listen to electronic artists, but my favorite band is probably Fleetwood Mac.

20)  The only sports I ever played competitively were volleyball and badminton.

21)  I’m very good at sleeping.  Some places where I can’t resist falling asleep are during long car rides or boring movies.

22)  I’m on Team Gale.

23)  Some topics I had considered blogging about before I started Homey Oh My! were fashion and beauty, which feels SO strange thinking back on that now because I’m such an awkward bird when it comes to taking photos of myself.  But still, fashion and beauty are big interests of mine.

24)  I’m a HUGE dog lover.

25)  Cats have a soft spot in my heart too, which only happened because I lived with my old roommate’s cuddly cats a few years ago.

26)  My favorite TV show is Mad Men.  So happy the new season is here!!!

27)  I’m a major advocate for flossing.  I can’t live without flossing my teeth everyday.

Can you relate to any of these things??  Please someone tell me they appreciate Twilight the way I do…

Year 26 was probably the best year of my life so far.  I made new friends, started sharing a home with the love of my life, and discovered my passion- this blog!!!  My soul has never felt more awake and I’ve never been more excited about the future.  I have high hopes that 27 will be even bigger and better, and I’m so thankful you guys are coming along with me for the journey. Thanks for sticking by me, guys <3.

I’ve got a weekend full of celebrating coming up, including some old friends traveling in from out of town, and I. Can’t. Wait!  Hope you all have an amazing weekend to look forward to, which for me would only require sweatpants and ice cream (am I right or am I right?)

04/21 DIY

DIY Modern Plant Stand

DIY Modern Plant Stand @homeyohmy

With all this recent talk about plants, it would probably be a good idea to address where to put them!  My “indoor garden” has grown so much and while my previous setup near the window was a temporary and quick solution consisting of two old IKEA stools, it became more permanent as almost a year later the cramped and uninspiring situation remained the same.

Well!  I finally got sick of my plants looking cluttered and messy and did something about it.  I made not one, but THREE of these modern plant stands using wood and ceramic tile.  Here’s how it goes.

Wood pieces for modern plant stands @homeyohmyI used square birch wood sticks to create the stands.  The 24 inch sticks were used as is but I cut up 9 of the 36 inch sticks into all the other pieces shown in the bottom photo.  Why such random measurements for the connectors, you might be asking?  The ceramic tile I picked out to use as the table top is exactly 11 5/8″ square, and since I wanted the tile to sit in between two pairs of legs, that meant the legs in each pair needed to be separated by exactly 11 5/8″.  The 10 1/8″ is the difference between 11 5/8″ and the 3/4″ widths of each leg so that the leg pairs would be connected at a combined total distance of 11 5/8″ (10 1/8″ + 3/4″ + 3/4″ = 11 5/8″.  Did I lose you?)  The point is, these measurements are all based on the size of the table top, so measure accordingly!

*NOTE: save the wood-staining for after you’ve put the stands together because it’s simply easier.  I stained the wood first in this case because I needed to take advantage of some precious free-time I had and unfortunately didn’t have a power drill on me at that moment.  So, do not do what I did (unless you really want to, of course).  Stain the wood later!

DIY modern plant stand frame @homeyohmyEach of the stands were assembled in this way.  I first drilled the 10 1/8″ sticks about 1.5 inches up from the base of each pair of legs, then connected the leg pairs by drilling in the 11 5/8″ sticks about an inch higher.  I used brass screws and liked the look of them, so I didn’t bother trying to cover them up in any way.  As I mentioned earlier, now’s the best time to stain the wood and let it dry.

Applying a tile tabletop @homeyohmyNext, I drilled in brass corner braces (4 for each stand) about 1.5 inches down from the top of the legs on the sides connected by the 11 5/8″ wood sticks.  This is for the ceramic tile to sit perfectly on top of.  I applied Gorilla Glue (affiliate link) on top of the brass braces and set the tile on top.  I let the glue dry fully before testing it out, and I tell ya, I trust my life with this stuff.  Ok, that’s an exaggeration, but seriously, this glue has never failed me!

Modern Plant Stand DIY @homeyohmySo there’s one stand, and here’s all three!

DIY Modern Plant Stands @homeyohmyI call this plant stand arrangement the Olympic medal ceremony.  I’m so so happy with the way these stands elevate (pun intended) my plants and they’re a major upgrade from what I had before.

Side above view @homeyohmy

Modern plant stands @homeyohmy

DIY modern plant stands @homeyohmyA little update about my curtains.  The previous black and white striped ones I had were so thick and heavy that they blocked a lot of light.  So, I replaced them with semi-sheer white curtains to brighten up our living room.  They still need to be hemmed, but for now I’m just pretending that they are :).  They’ve made such a huge difference!  An EXCELLENT and simple way to change things up and brighten the home for Spring!

Did you spot my DIY Geo Planters?  And did you also notice the stands re-arranged in the last photo?  Can’t decide if I like them better in the Olympic medal ceremony arrangement or in descending order.  Which do you prefer?