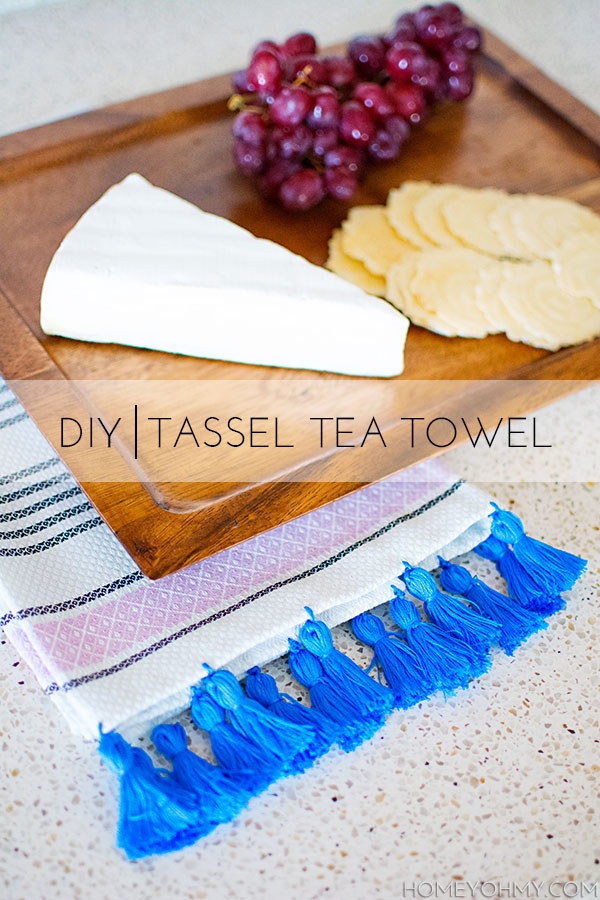
Maybe the summer season has something to do with it, but I’ve been quite the tassel fanatic recently. I’m consistently drawn to these adorable embellishments wherever I go and am certain they have the power to make most everything cuter.
It was at Anthropologie where I was admiring a tea towel that had mini tassels along the edge, and like with a lot of things there, I put it back down when I saw the price.
My eyes wandered over to this tea towel that was on sale for a third of the price, without any tassels, and to me the trade-off was worth it. I would tassel-ify it myself.
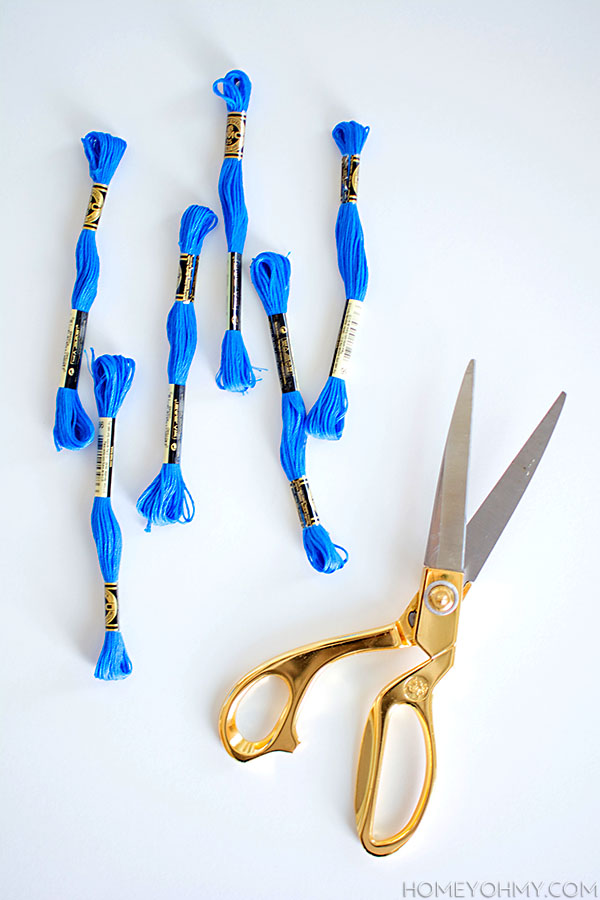
In case you aren’t familiar with embroidery floss, let me assure you- it’s very affordable, and at JoAnn’s the color selection is diverse, meaning I spent an hour standing there contemplating the options. Thankfully, I’m still happy with my choice to go with this beautiful royal blue color.
I cut out a small piece of cardboard and wrapped the floss around it about 30 times. After cutting the floss down one edge of the cardboard, I laid down the folded strands on top of a piece of floss that I used to tie the head of the tassel. Once double-knotted, I cut off any excess, scraggly ends.
With a threaded embroidery needle, I passed it through the head of the tassel then double-knotted it at the top. I added a dab of super glue to the knot for what I like to call insurance. Then, I sewed the tassel on to the edge of the towel, double-knotting and supergluing the knot like I did previously.
I repeated this all along the edge of the towel while watching Jimmy Fallon (doesn’t he seem like the nicest guy ever?)
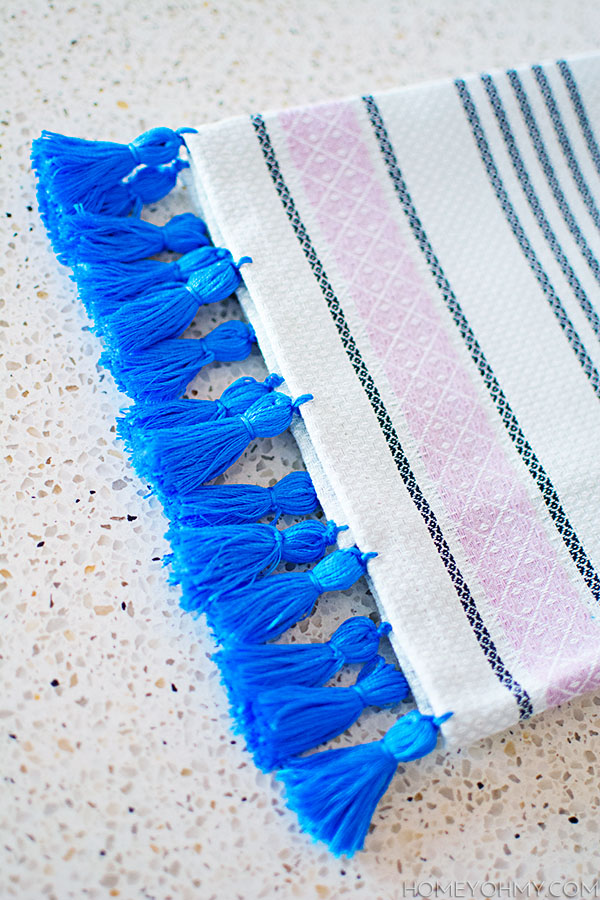
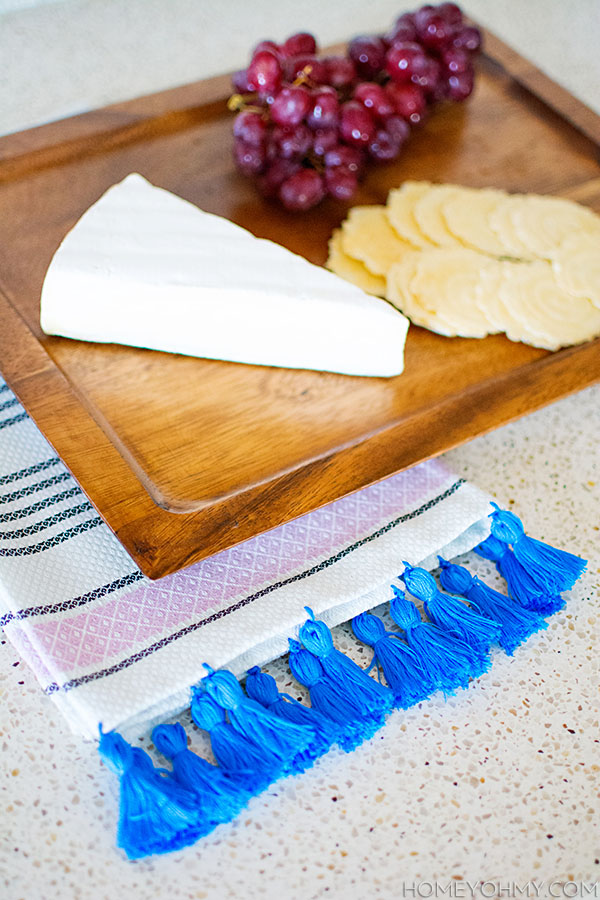
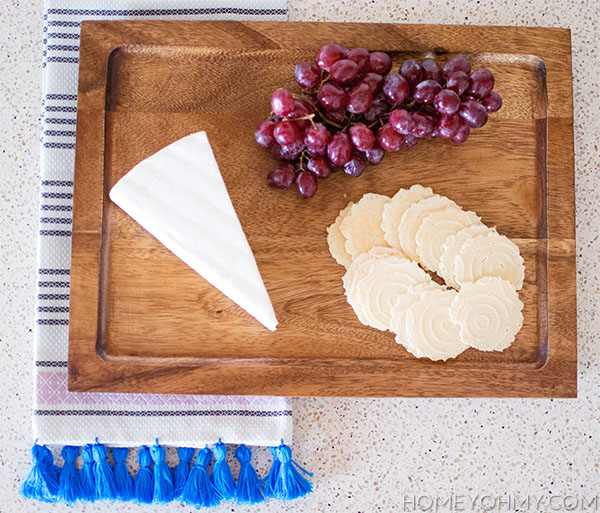
With the towel folded up, we have now entered tassel city.
This is definitely a decorative towel that I won’t be mopping up any big spills with, and it’s the first of its kind that I own, a nice departure from the rags we have hanging around the kitchen. Funny how it took tassels to push me to get one! Anyone else as smitten about tassels as I am??
This project actually started off somewhere completely different and ended up here at this unforeseen creation over a period of weeks. I really surprised myself with this one because I had dismissed it early on as a fail. I’ll explain shortly.
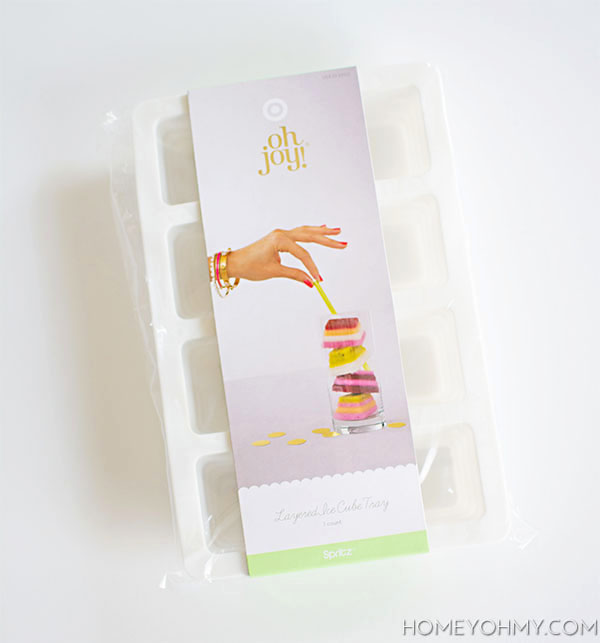
This layered ice tray from the Oh Joy! Spring line is the star of today’s show. I know, I’m in the wrong season of Oh Joy! gear, but I missed my chance at getting it the first time around and gave up after seeing a couple product displays sucked dry. It was much later that I accidentally found it in a random section at Target. Clearly it was a sign that I needed to get it.
Well, I tried making layered ice cubes into mini popsicles for a 4th of July project and it failed, at my own fault, and I set the tray aside and forgot about it. Later, while I was working with cement on another project (still to come!) I thought hey, I should fill this tray with cement!
I mixed Cement All with a tad bit more water than recommended in the package instructions to make it thinner, so that it would fill the tray up more evenly.
After the cement dried, I was left with these interesting looking cement pieces that I thought would look really cool pieced together in varying ways, so I glued some together with E6000.
I spray painted them white in three light coats, then I lightly sprayed the bottom portions with a turquoise spray paint in this subtle, ombre style, which I learned from my friend Rachel at The Crafted Life. I’ve always wanted to try this after being so inspired by how she’s done it with some of her projects, and I felt like it would look especially cool with the ridges and layers of the cement. All I did was aim the spray mostly at the bottom layer of cement and let the overspray naturally create the ombre look.
Now I thought these were just going to be neat little decorative cement objets (dust collectors), but it hit me that I could turn them into candle holders (my fav) if I could find something aesthetically pleasing to hold the candles. Home Depot came to the rescue.
I came across these 3/4″ copper plugs and they PERFECTLY hold my tapered candlesticks. It was like magic. All I had to do was glue them on to the cement pieces with E6000.
Look at that. An idea for popsicles turned candle holders.
For now, they’re sitting here on my dining table lazy susan.
This story is one reason why it can be so difficult for me to plan out projects way in advance. A good amount of them don’t work out, or if they do, they work themselves out over a long period of time. Those situations tend to yield some interesting results though, like this one, and I embrace it all as part of the process, or madness :P.
Now that I’m seeing the potential in making candle holders, I won’t ever look at ice trays the same. The shapes and possibilities are endless. Maybe you won’t be able to find the same ice tray I used, but I’d be so interested in seeing how differently shaped trays could be used in this same way!
This past weekend, I spent a morning in Manhattan Beach… and took my camera with me! I’m hoping to do this whenever possible so that I can visually take you guys around town with me. In all honesty, I don’t get out much, but recently I’ve been taking a lot more pride in where I live and really appreciating what’s around me, and what better way to do that than to share it with all of you :).
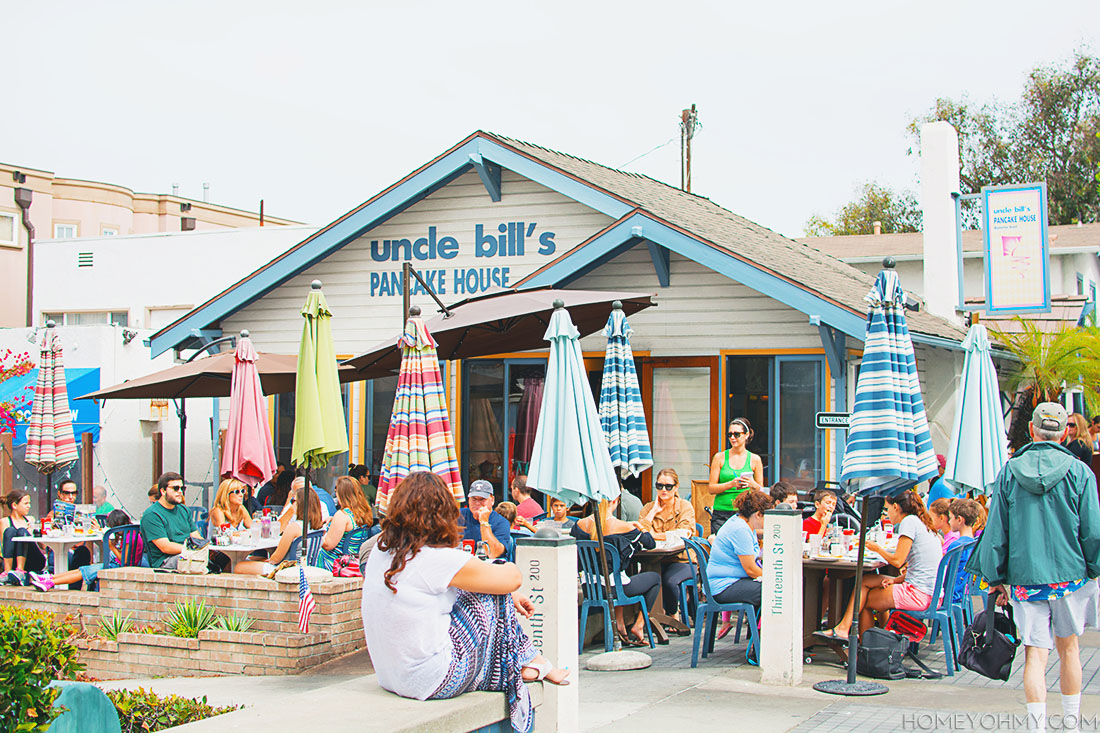
So Manhattan Beach- this is probably my favorite beach to go to. It isn’t the closest one to where I live, but we love making the trip for one particular reason.
Uncle Bill’s, y’all. This is our most favorite breakfast spot, and as shown, it’s always packed. I’ve never not had to wait for a table whenever I’ve come here. The people know what’s up. This is actually where we came to have our end of the juice cleanse victory feast, which I shared on Instagram.
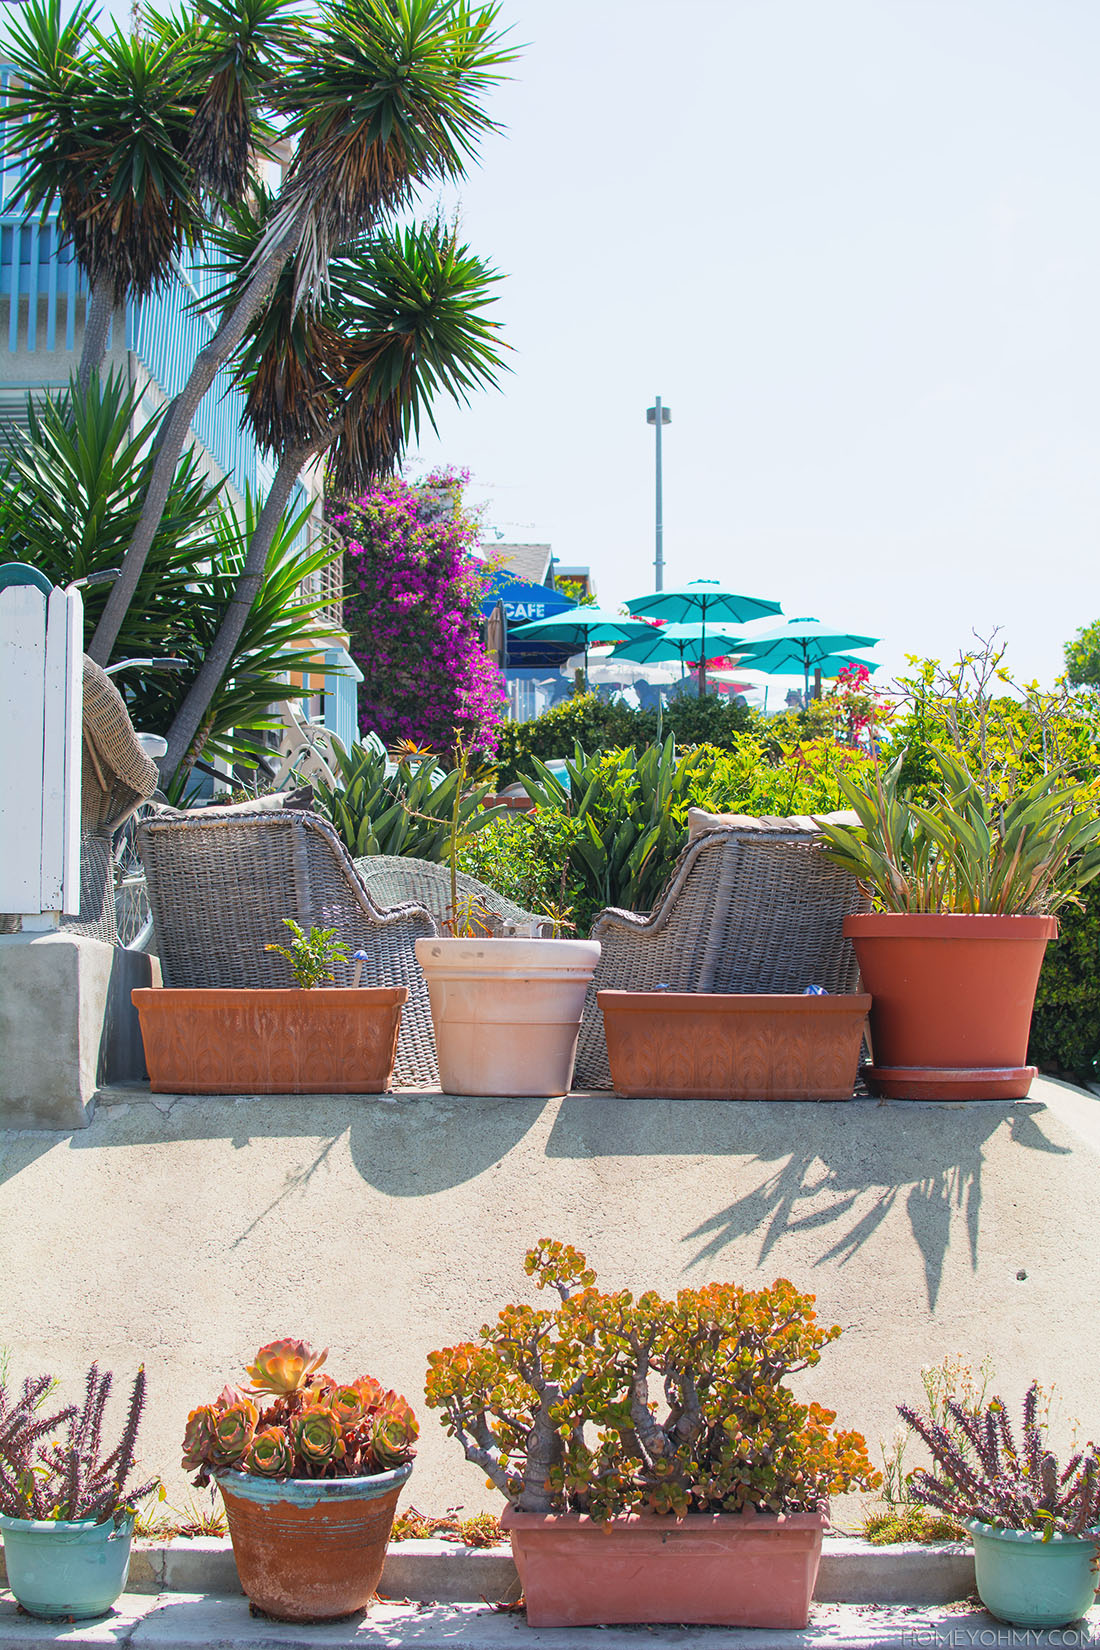
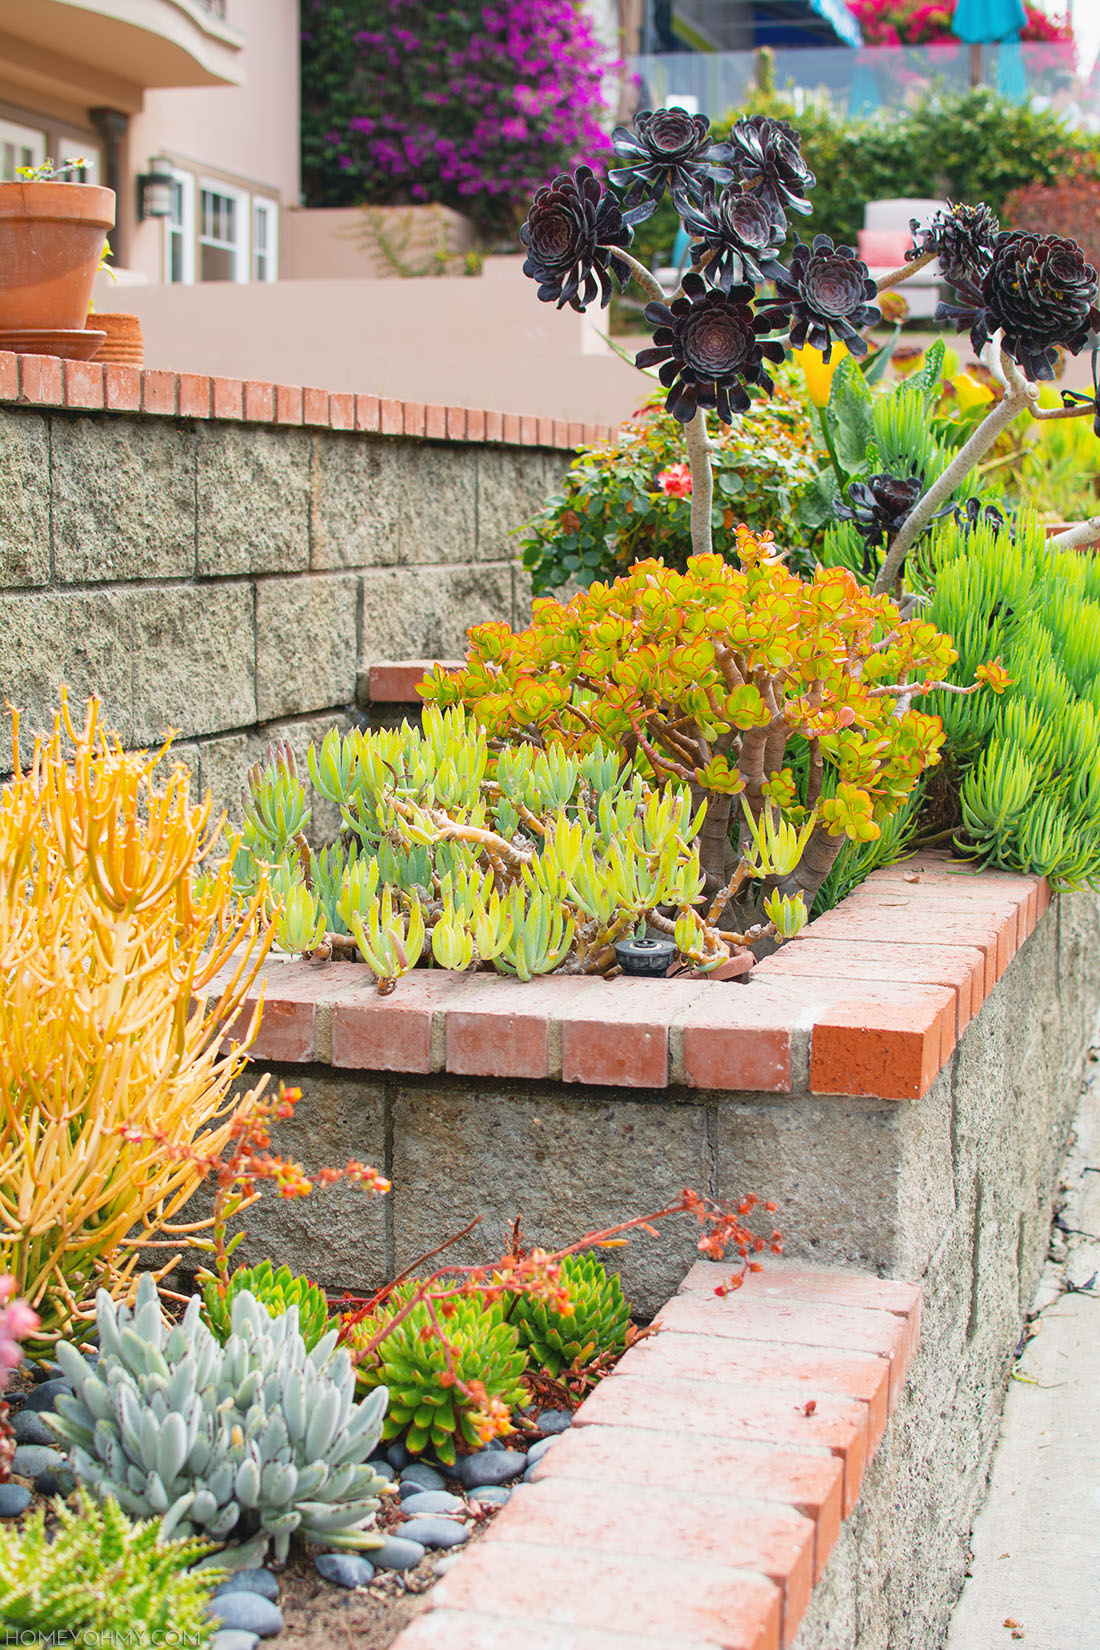
The other thing I really like about this town is not necessarily the beach itself, but the beach houses.
I love walking around and gawking like a creep at the patios and decks. How can you not when they’re just right there along the pathways down to the beach?
No, this isn’t a movie set. It’s an ocean-front mansion. Isn’t it ridic??
I believe I’ve only walked down the pier once, and there was something unexciting at the end of it, like a bathroom, ha! I’ll have to walk down it the next time I come back and make sure.
Alright guys, I’m ducking out for the rest of the week, but wanted to wish you all a very happy 4th before I head out. Got any fun plans for the holiday? I’m going to be kicking back low-key with a few good friends, food, and drinks. Ain’t much that’s better!
I’ve got a lot of fun DIY’s lined up, which will kick-off next week, so see you all back here then <3. Have a beautiful weekend!
While everyone’s talking about barbecues and patriotic treats for this 4th of July, I’m going to be sharing the details of the three day juice cleanse I just went through… Still interested??? Stick with me, guys. Juices are delicious, too!
I shared the news on Instagram and after getting a positive response and expressed interest in how it went, I thought yea I’ll have to post on the blog about it. Thanks for that by the way everyone, and for all your encouragement. I didn’t think I was going to make it D:
And that brings us to the disclaimer: I am NOT an expert on this topic. This was my first juice cleanse ever, and it also happened to be one I JIY’ed (juice it yourself). I’m writing to share the details of my experience rather than to advise you on what’s the best way to do a juice cleanse, because there’s no way I would know that information. At the very least, this is about sharing some delicious juice recipes you at-home juicers will love. <3
So let’s start with an important question…
WHY DID WE GO ON A JUICE CLEANSE?
My boyfriend has been struggling with acid reflux. At the recommendation of his doctor, he went gluten-free for a couple weeks. A miracle… his acid reflux subsided. So we continued on, and the next part of the plan was to eat only raw veggies and fruits for three days, which I did with him (’twas difficult), and then… a three day juice cleanse. The idea was to reset the system, clear everything out, and then after the cleanse, to start re-introducing foods back in to see what the culprits are. Ultimately, this is the beginning of becoming a lot more diet conscious.
So my reason for the cleanse is him. I wanted to support him, and especially since we cohabitate, it would have made things unquestionably harder for him had I been cooking my own delicious meals while he juiced by himself. We did it together, because we are a team <3.
Before you say that was nice of me or anything, I’d like to share that I complained HARD, and often, especially in the beginning. He would gladly tell you all about it. “Hangry” is a real thing.
THE JUICES
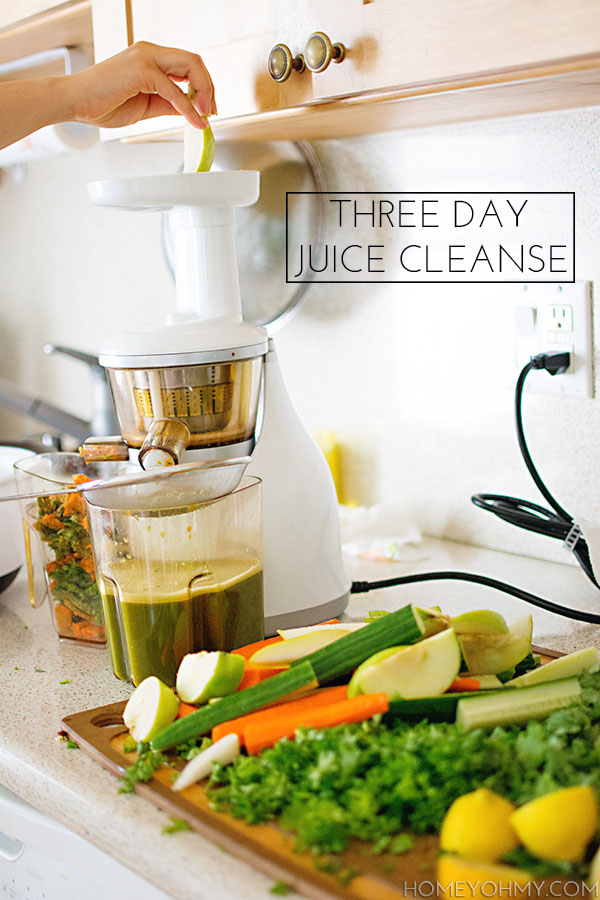
We based our recipes and schedule off of a local, pre-made juice cleanse package that we had considered purchasing, but decided instead to save some money, put in the extra elbow grease, and put our own juicer to use.
This is our Omega Juicer. It’s a masticating juicer that crushes the fruits and vegetables instead of shredding them, which gets more of the juice out. Thing is, some of the pulp comes out with the juice, so we used a strainer to catch and remove it.
We made three different juice recipes, two green and one red. Each day we made one day’s batch for the both of us, which is all three juices in the following quantities. Some of it we made up as we went, and we weren’t exact on quantities, but this is roughly what I can remember about how we made each juice. Everything we used was organic.
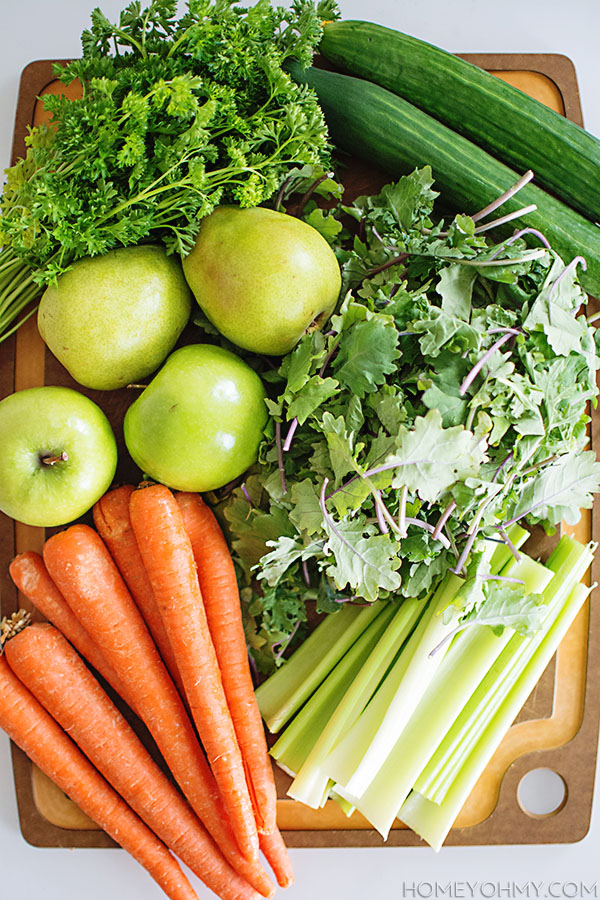
Green Juice One (makes roughly 64oz)
-2 green apples
-2 pears
-5 large handfuls of kale (we used baby kale leaves)
-2 large cucumbers
-1 medium handful of parsley
-10 stalks of celery
-8 carrots
This juice was the mildest of the three. Had a very clean taste.
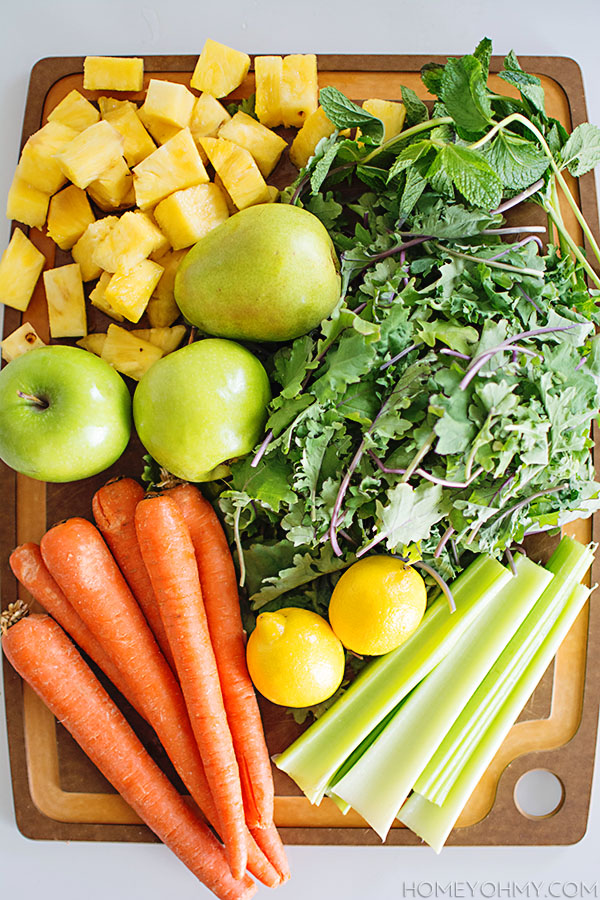
Green Juice Two (makes roughly 64oz)
-2 green apples
-1 pear
-5 large handfuls of kale (we used baby kale leaves)
-1/2 pineapple
-handful of mint
-8 stalks of celery -6 carrots -2 lemons, no rind
The mint was sooooo gooood, especially with the pineapple. Made this one extra refreshing, and it was my favorite.
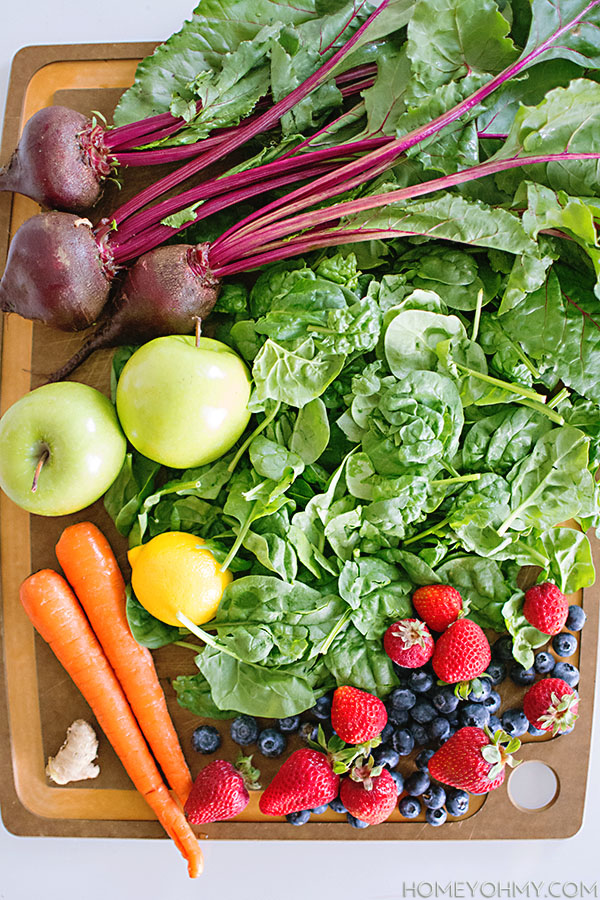
Red Juice (makes roughly 32oz)
-3 beets, including the stems and leaves
-2 green apples
-4 large handfuls of spinach
-2 carrots
-1 lemon, no rind
-handful of blueberries and strawberries (We only added these because we had them in the fridge and they were soon to go bad, but they added a nice tart flavor to the juice that I really liked. They did make the juice thicker though, which might not be preferable.)
-little bit of ginger to taste
The first round of red juice, we used about an inch of ginger, which I loved, but my boyfriend hated it. The kick was too much for him, so we reduced it down to about the size of a fingertip.
So each of us drank 32oz of green juice one, 32oz of green juice two, and 16oz of red juice total in a single day, as shown in the mason jars above. The quantities in the recipes provide two sets of these.
THE SCHEDULE
I mixed up the order as I pleased, but the idea is to space out 16oz servings 5 times a day
1) Breakfast- 16oz of Green Juice One
2) “Snack”- 16 oz of Red Juice
3) Lunch- 16oz Green Juice Two
4) “Snack”- 16oz Green Juice One
5) Dinner- 16oz Green Juice Two
All in between, we drank water often. It was also important to get good sleep every night and make sure we were well-rested, and really, we didn’t have tons of energy during this whole thing, so we were happy to go to bed early.
TAKEAWAYS AND THOUGHTS
This cleanse required a lot of stuff, and juicing each day took us about two and a half hours. Contributing factors were that we had to cut the stringier veggies (greens, herbs, celery, beets) into tinier bits since these things tend to jam up a masticating juicer, and we also cleaned out the juicer in between each juice. Summary: it was a LOT of work, and I can see why purchasing a pre-made cleanse would be worth it. If we didn’t already have a juicer, we absolutely would have gone that route, and maybe even still now if time were more of an issue.
Were we hungry all the time? Yes. The nights were especially hard, and we’d cope by going to bed early and sleeping through the hunger, then tossing and turning while talking about all the things we wished we could eat at that moment. It was just as fun as it sounds… but the point is that this would have been so much harder to do alone. This is absolutely something I’d need to do with a friend if I ever do it again.
It wasn’t all bad, though. Again, the juices are delicious, and it felt good at times to be “eating clean”, a nice departure from feeling bloated after a large, greasy meal, although I do love those.
The first night, I dreamt that I was shoveling all kinds of food in my mouth and that was it. I remember it so clearly. Can we take a moment to think about how awesome eating is?? I’ve come away from this with a heightened appreciation for food and being able to chew.
I don’t see myself doing a cleanse again, but after eating raw for a few days and drinking all these juices, I’m convinced that I need to incorporate fruits and veggies more often into my regular diet. It’s true that it just feels good to eat things that are good for you, and for a while I had fallen off the horse and was just going for the quickest, easiest stuff I could eat. I would say we are generally pretty health conscious, but we are absolutely even more now.
All in all, it wasn’t terrible, but I think three days is my max. The first day after the cleanse was over, everything tasted a little strange! We both agreed that it felt like our taste buds were off, and we were starting to crave fruits and veggies again. Still, I much preferred that than to have continued on with the cleanse. I’m proud of having gone through it, but I love food too much. This isn’t the end to my juicing, but now it will just be in addition to regular meals.
Have you ever done a juice cleanse before? Did you JIY it? I’d love to hear about your experience and any delicious juice recipes you know of!
Happy Friday! I usually feel like the week flies by, but this week slowed down a lot towards the end because… I started my first juice cleanse ever. I shared on Instagram that I’m doing it with my boyfriend and let me tell ya… nothing slows down time like constantly feeling hungry does. The only thing we’ve been talking about is what we’re going to eat once it’s over.
So this weekend, I’ll be looking forward to my first real meal in three days. That sounds so weird, but I’m seriously SO excited for it, which sounds even more weird. In the meantime, here are some things I love and what’s been inspiring me lately!
Some stuff I got from H&M recently! For the affordable prices, I had to check out the pretty marble-y stuff. Also couldn’t say no to the pitcher because of the simple sleek shape and the gold rim. Swoon. I can absolutely see myself using it for flowers.
Do you ever look at perfectly curated shelf decor and wish you could just transport it into your home? That’s how I feel about this etagere, and really about everything from the Apartment 34 office reveal.
Delia Creates shared TEN simple popcorn recipes, and they all look aaaaaamazing. Out of all of them, I’d want to try the marshmallow one most, but right now I’d like to eat all of them all at once.
Free printable geometric wrapping paper from Something Peach. I love anything geometric and summer has me craving bright, bold colors, so naturally, this wrapping paper is perfect <3.
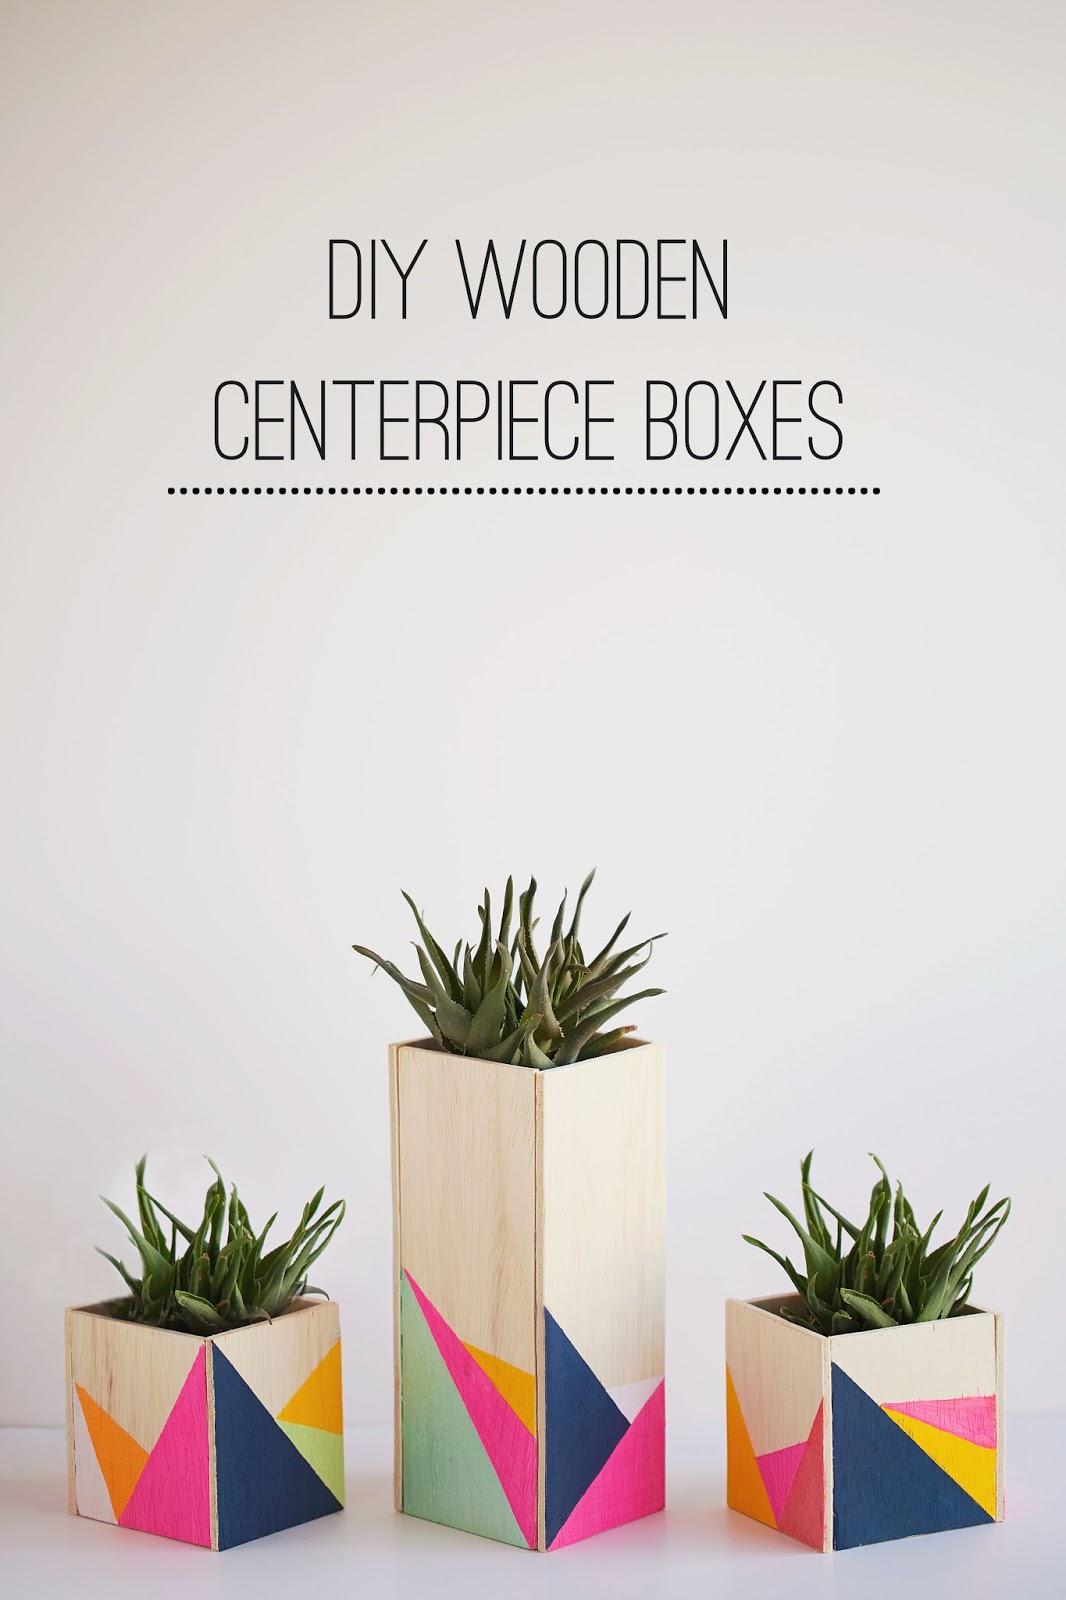
Please tell me you are following Sara at Tell Love and Chocolate. She is such a stylish lady and you can see it in everything she makes, like these stunning centerpiece boxes.
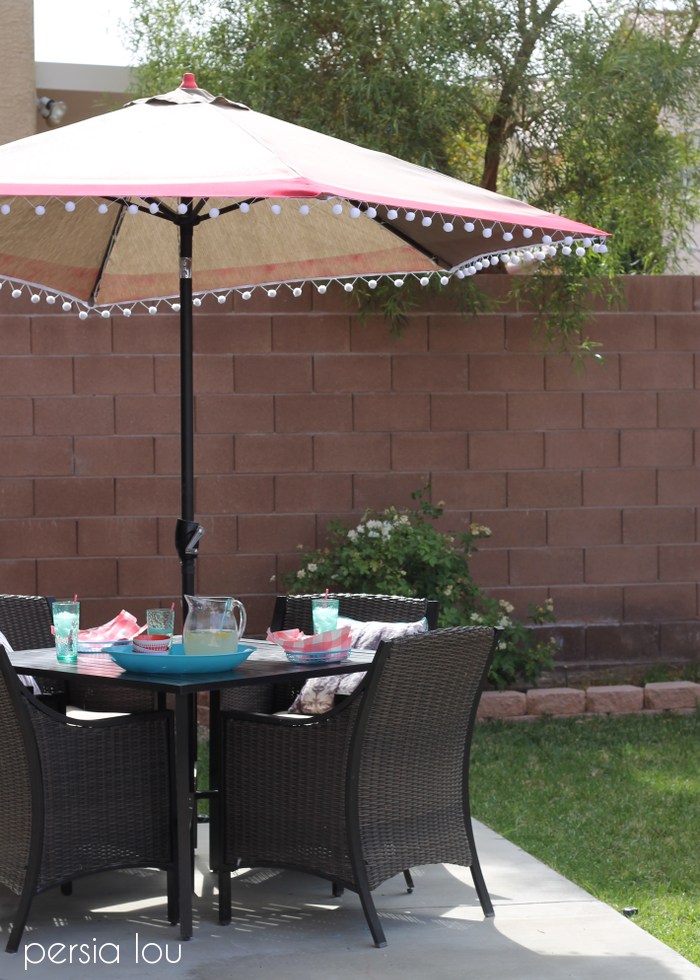
Alexis from Persia Lou, one of my fav crafters out there, gave her outdoor umbrella a most adorable makeover. She also made a really cool spray painting mistake that you need to see.
I didn’t know there was chalk paint for glass until I saw these adorable spice jars from Stephanie at Make and Tell. I love her simple and clean style!
So inspired by Sarah Brown’s home tour shared on A Beautiful Mess. You might be able to guess that I love the predominantly black and white color scheme, and it’s my dream to learn how to mix different styles so seamlessly like this.
Any of these jumping out at you or inspiring you to get crafty? I’d love to hear your thoughts, or what you last ate, because I’m so hungry right now.
Sometimes you don’t need to be carrying around a big and bulky hard case for your sunglasses. Sometimes you just need something simple and compact on the days where you won’t be throwing them in a giant bag to get lost and crushed under every single thing you own. All of this basically means the bag I’m carrying that day is small, so I need to consolidate. I guess I could have started this off with just that, ha, but the point is there’s more than one reason why you might want to make this leather drawstring sunglasses pouch, on top of it being so easy to make without any sewing!
Another reason for me is summer. Coping with summer heat means lightening the load for everything- lighter clothes, lighter hair, and carrying around less or lighter stuff. This pouch serves to lighten at least one thing, and maybe not by much, but that leads us to the main reason why I made it: because it’s cute. That’s reason enough for anything, right? Thanks for playing along, guys <3.
I found this fabric at JoAnn’s and it was one of those fabric quarters they have on the front ledges of their fabric shelves. Isn’t the marbled design gorgeous? I usually spend embarrassing amounts of time walking up and down every aisle until I can no longer tell where one fabric ends and another begins, but this time around, my eyes locked on it immediately and I had no doubt it was meant to be.
Using my sunglasses as a guide, I roughly measured that I needed two fabric pieces that were 4×8″ in size. I cut them out after ironing the fabric first.
I applied the Unique Stitch glue on the back side of one of the short edges on the fabric and folded it over about a 1/2 inch, pushing down on the glue and making sure it lightly seeped through both layers of the fabric. This creates the openings where the leather lace will be strung through later, and this was done to both fabric pieces. As shown in the photo, I’m working on top of a protected surface aka a scrappy, old towel.
On the front side of the fabric piece, I applied glue on the edges below the folded edge I previously glued down, then placed the other fabric piece on top (face to face) and pushed down on the edges for adhesion.
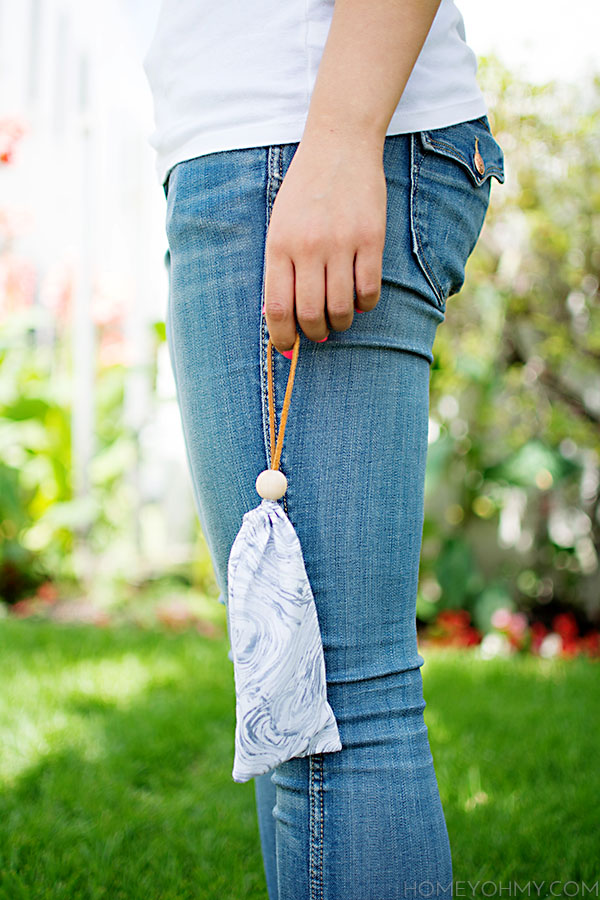
After letting the glue dry for a little bit, I flipped the pouch inside out and strung the leather lace through the openings on one side of fabric, then strung it back the opposite way through the openings on the other side of fabric. I cut the leather, slid on a wood bead, and tied a knot.
And then it was done.
And then I pulled the leather drawstring shut and closed the pouch.
Will I ever carry it around just like this? Probably not, but I think it’s a fun idea.
Speaking of fun, here’s a fun fact- I worked at a Sunglass Hut when I was in high-school, and after seeing so many sunglasses that were wrecked from people wearing them on their heads, I swore I’d stop doing it myself. Unfortunately I haven’t come close to achieving that ever. I bet you wear your sunglasses on top of your head, too!
So what do you think of this pouch? Do you have a use for one this summer?


 Maybe the summer season has something to do with it, but I’ve been quite the tassel fanatic recently. I’m consistently drawn to these adorable embellishments wherever I go and am certain they have the power to make most everything cuter.
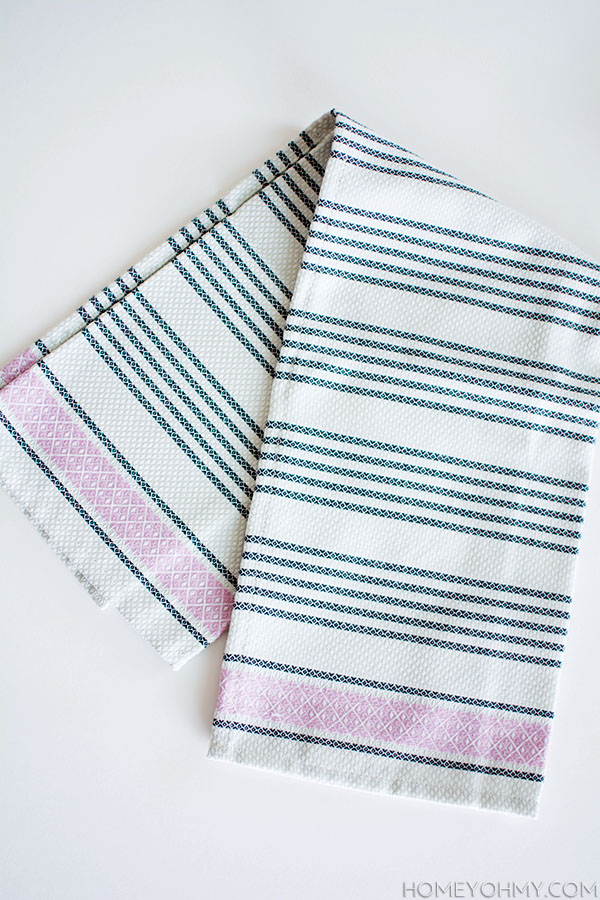
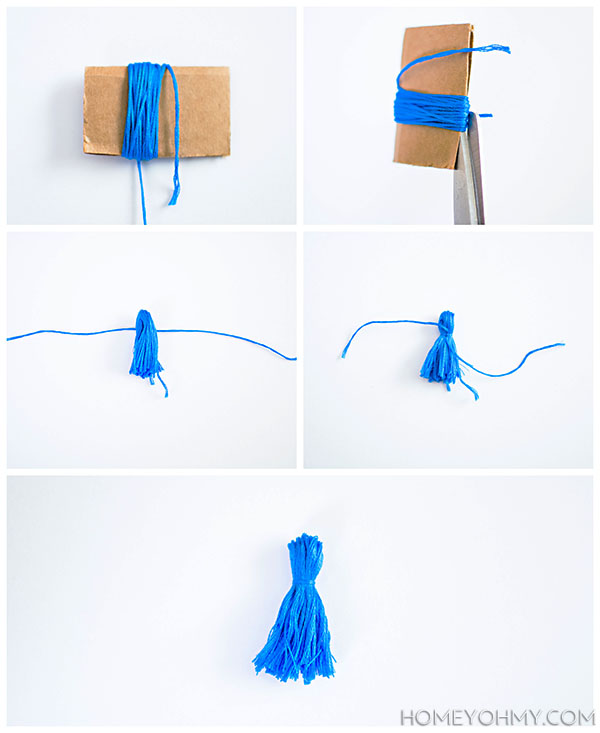 I cut out a small piece of cardboard and wrapped the floss around it about 30 times. After cutting the floss down one edge of the cardboard, I laid down the folded strands on top of a piece of floss that I used to tie the head of the tassel. Once double-knotted, I cut off any excess, scraggly ends.
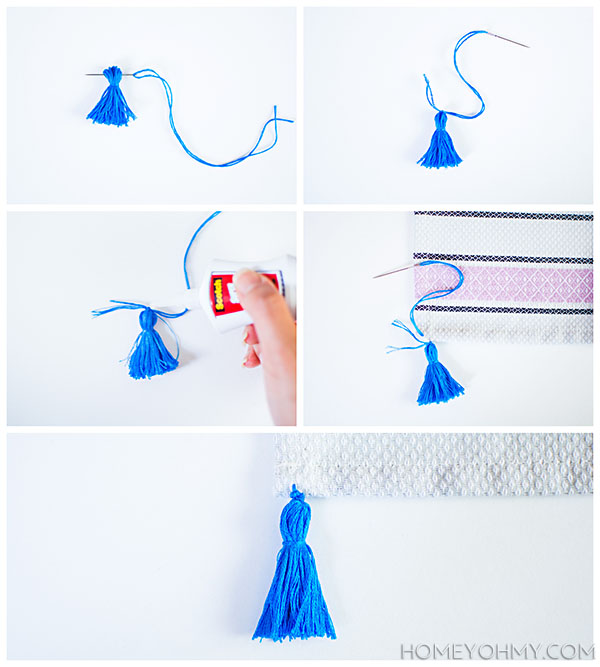 With a threaded embroidery needle, I passed it through the head of the tassel then double-knotted it at the top. I added a dab of super glue to the knot for what I like to call insurance. Then, I sewed the tassel on to the edge of the towel, double-knotting and supergluing the knot like I did previously.
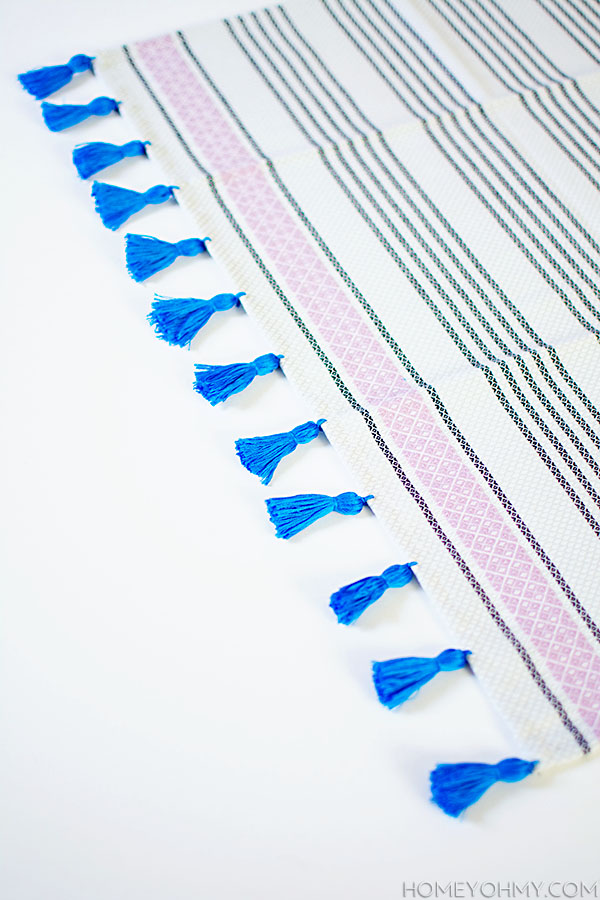

 This layered ice tray from the Oh Joy! Spring line is the star of today’s show. I know, I’m in the wrong season of Oh Joy! gear, but I missed my chance at getting it the first time around and gave up after seeing a couple product displays sucked dry. It was much later that I accidentally found it in a random section at Target. Clearly it was a sign that I needed to get it.
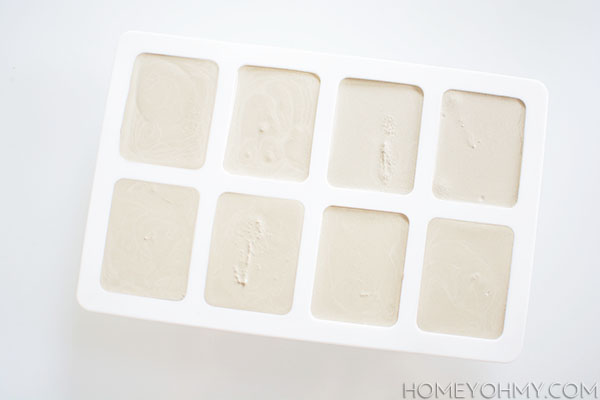 I mixed
 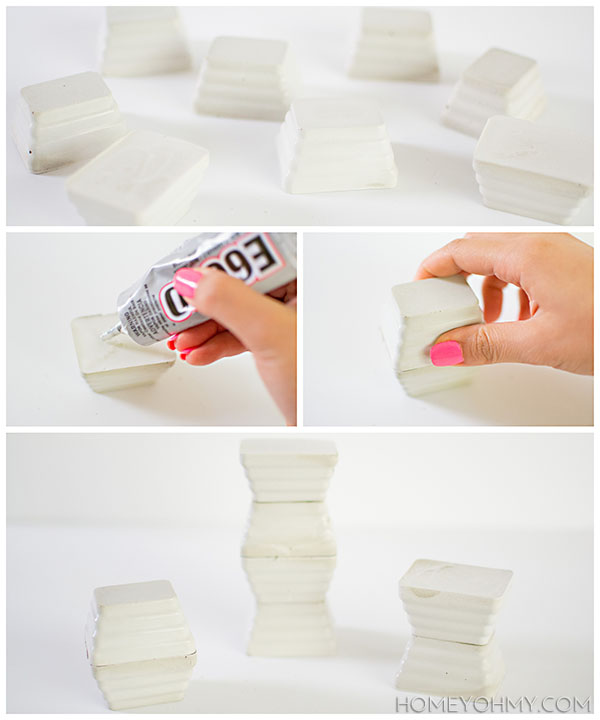 After the cement dried, I was left with these interesting looking cement pieces that I thought would look really cool pieced together in varying ways, so I glued some together with
 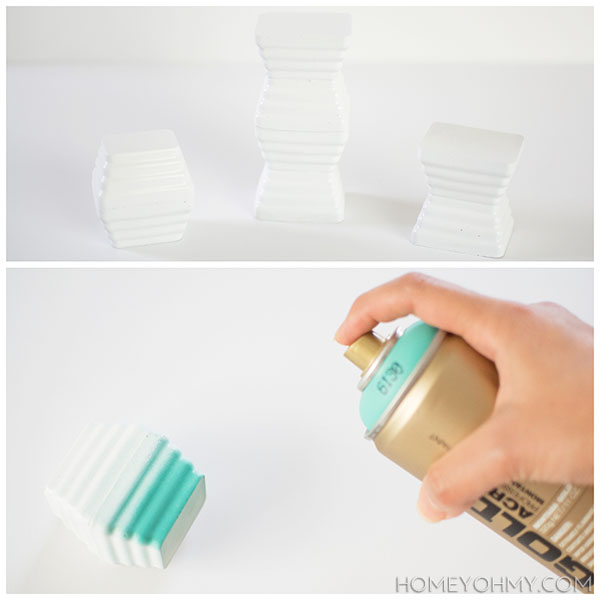 I spray painted them white in three light coats, then I lightly sprayed the bottom portions with a turquoise spray paint in this subtle, ombre style, which I learned from my friend
 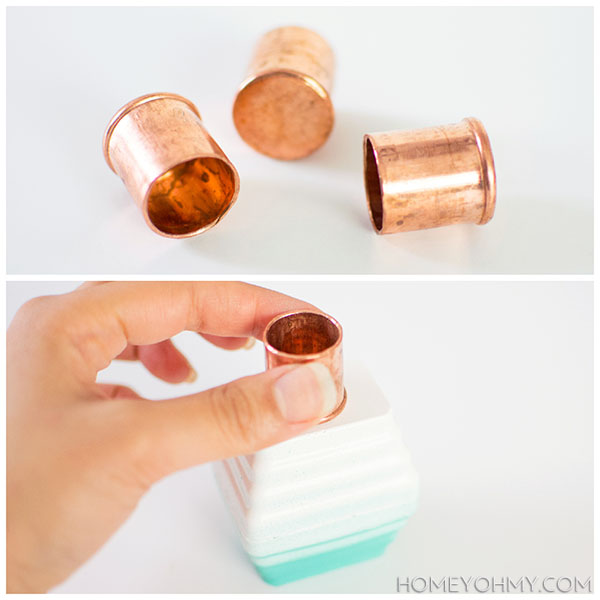 I came across these 3/4″ copper plugs and they PERFECTLY hold my tapered candlesticks. It was like magic. All I had to do was glue them on to the cement pieces with
 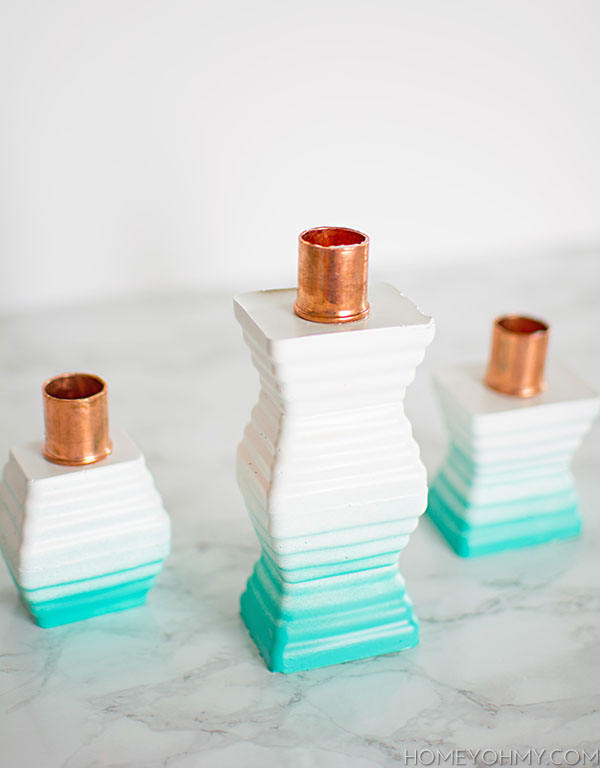 Look at that. An idea for popsicles turned candle holders.
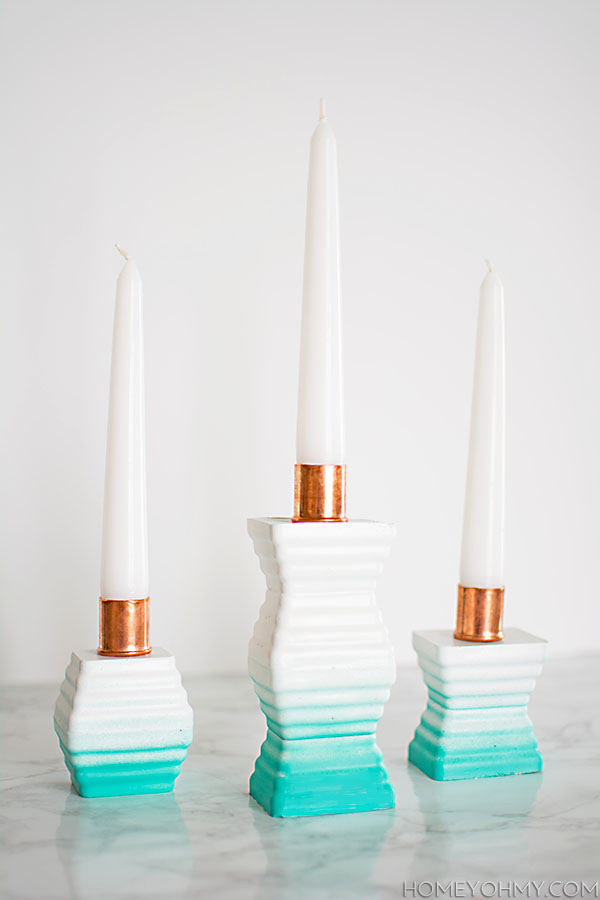 For now, they’re sitting here on my dining table lazy susan.
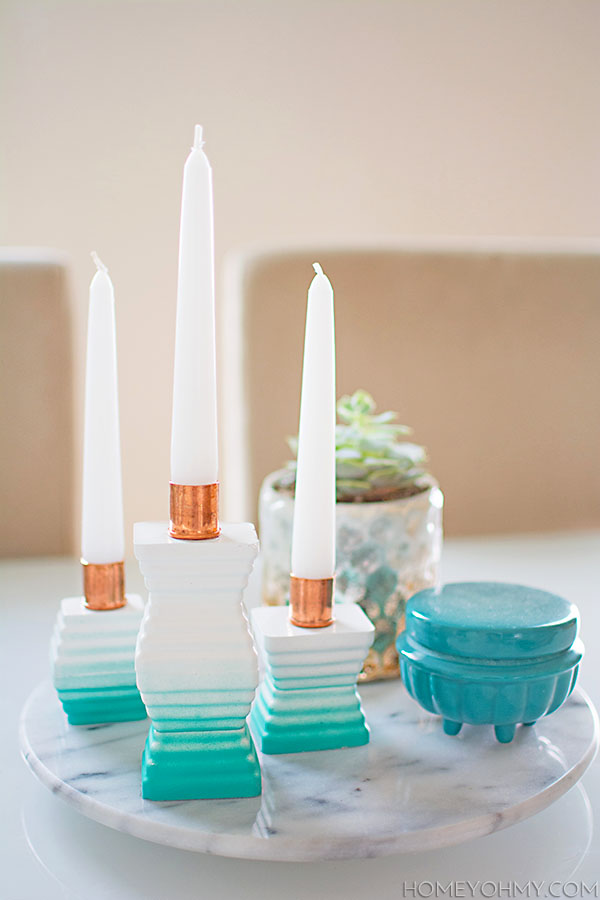 This story is one reason why it can be so difficult for me to plan out projects way in advance. A good amount of them don’t work out, or if they do, they work themselves out over a long period of time. Those situations tend to yield some interesting results though, like this one, and I embrace it all as part of the process, or madness :P.
 Uncle Bill’s, y’all. This is our most favorite breakfast spot, and as shown, it’s always packed. I’ve never not had to wait for a table whenever I’ve come here. The people know what’s up. This is actually where we came to have our end of the juice cleanse victory feast, which I shared on


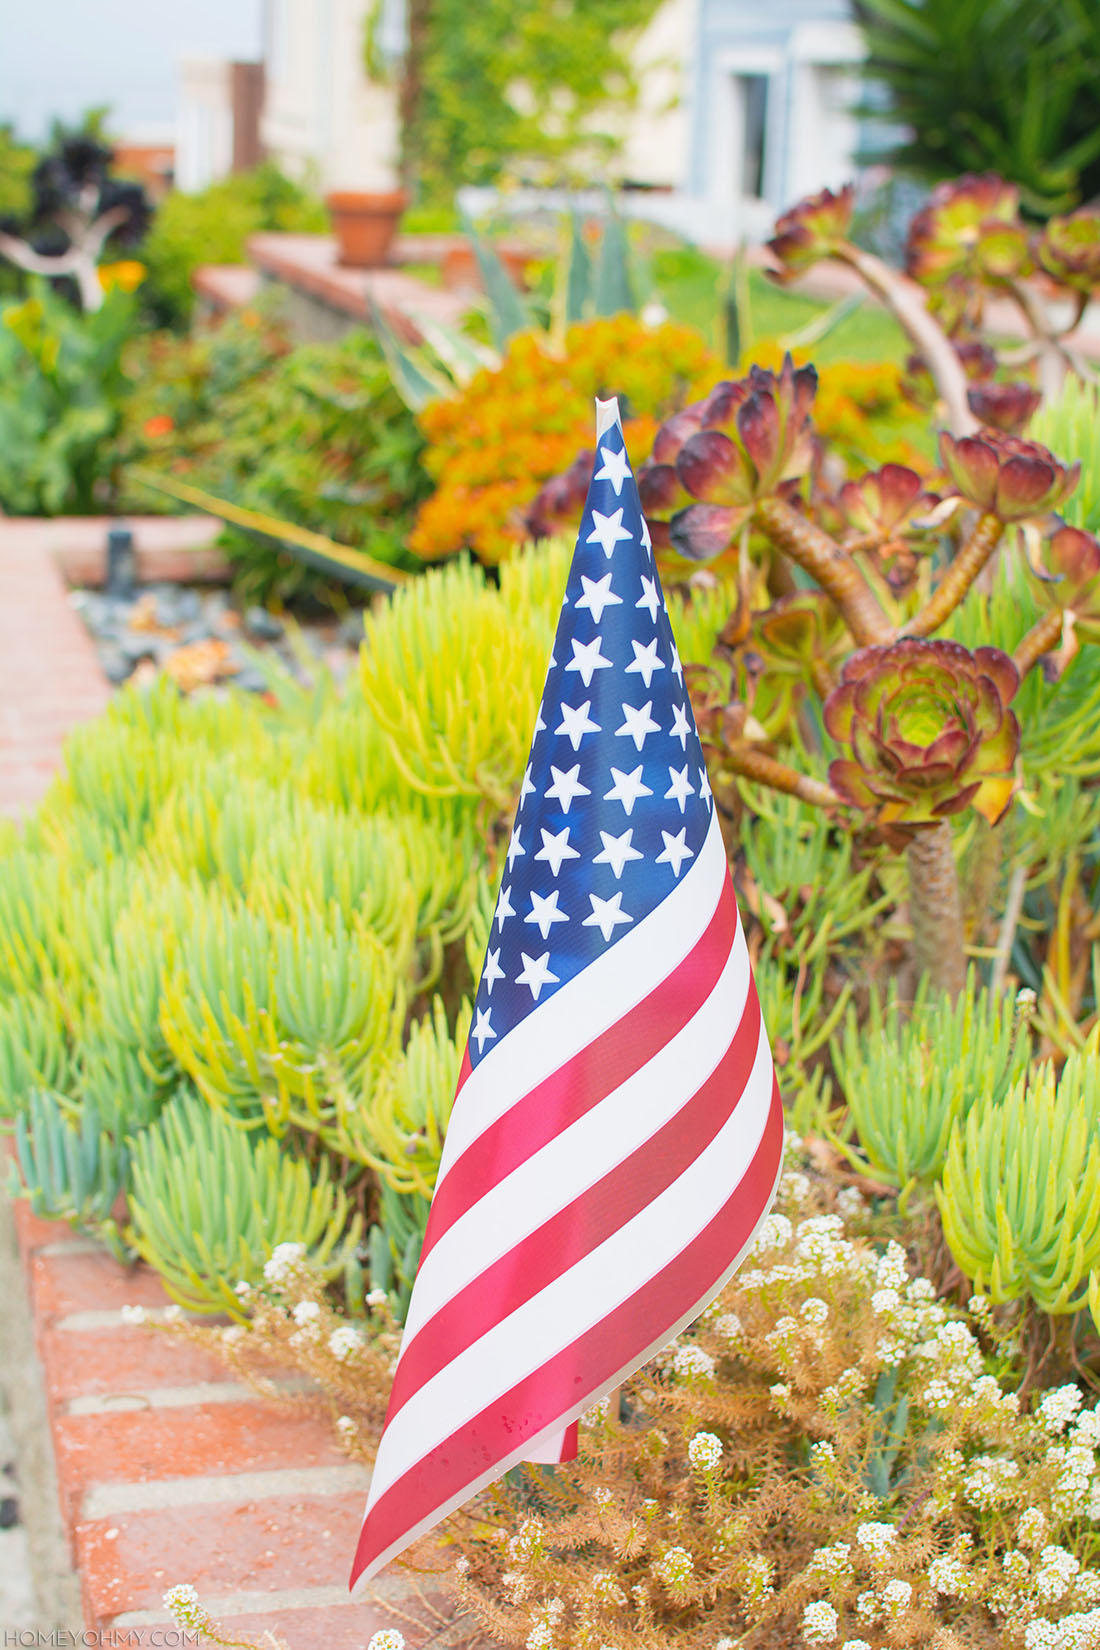
 While everyone’s talking about barbecues and patriotic treats for this 4th of July, I’m going to be sharing the details of the three day juice cleanse I just went through… Still interested??? Stick with me, guys. Juices are delicious, too!
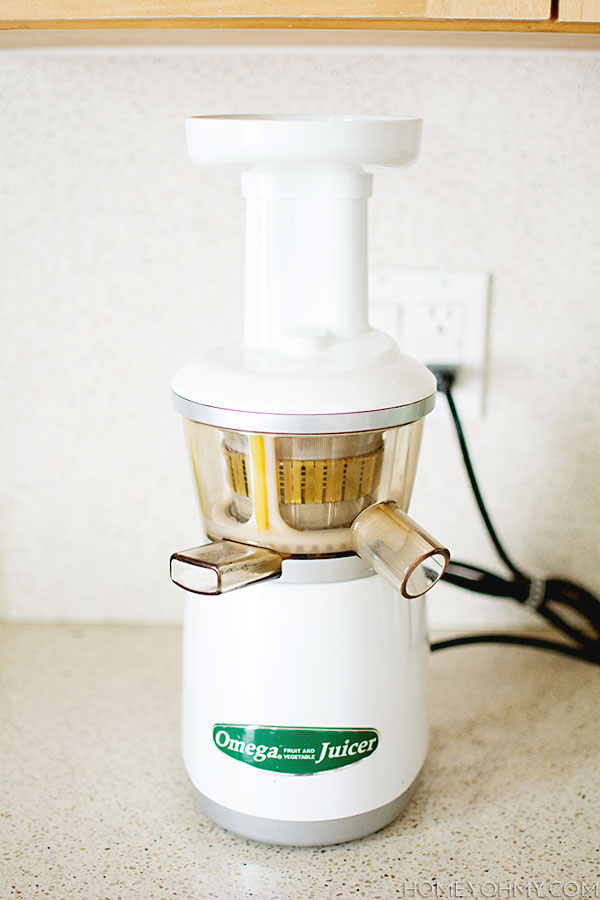
 Red Juice (makes roughly 32oz)
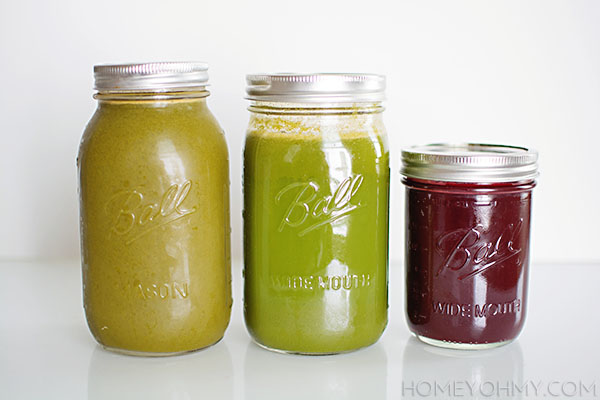
 Happy Friday! I usually feel like the week flies by, but this week slowed down a lot towards the end because… I started my first juice cleanse ever. I shared on
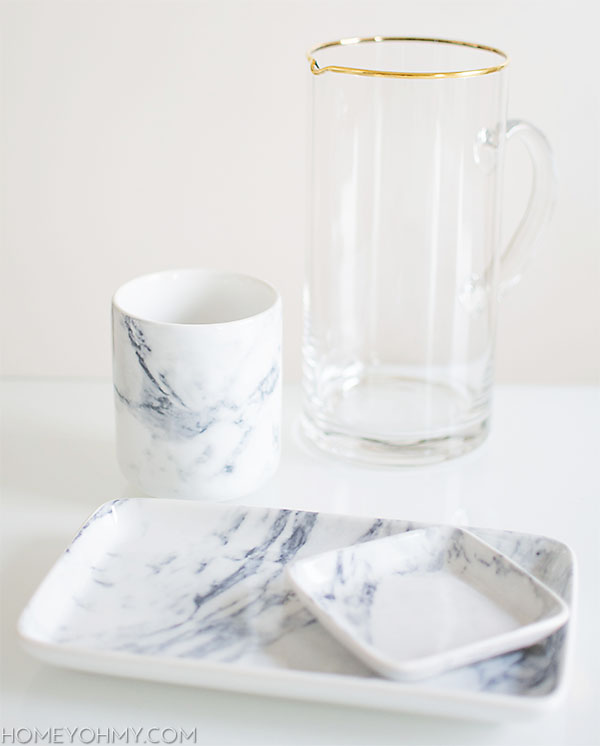
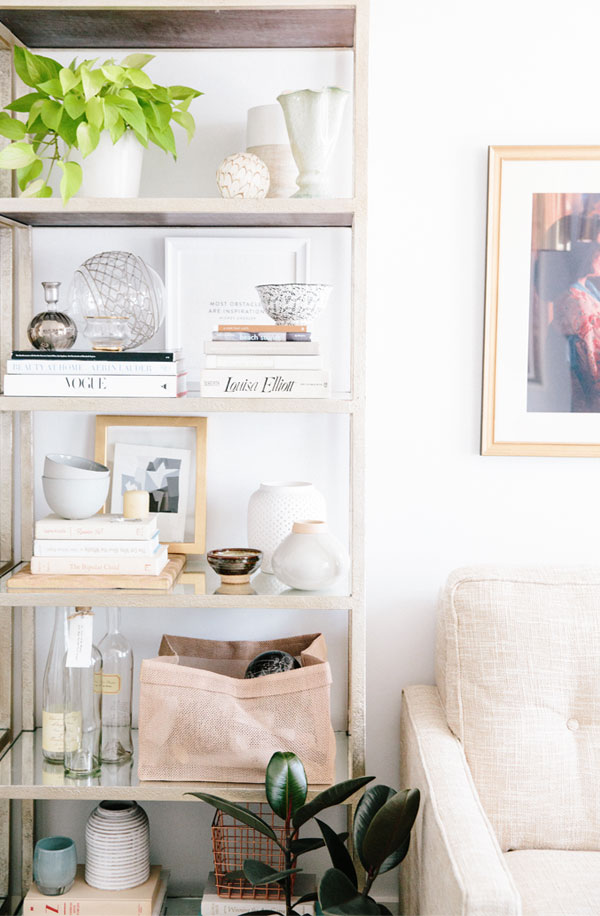 Do you ever look at perfectly curated shelf decor and wish you could just transport it into your home? That’s how I feel about this etagere, and really about everything from the
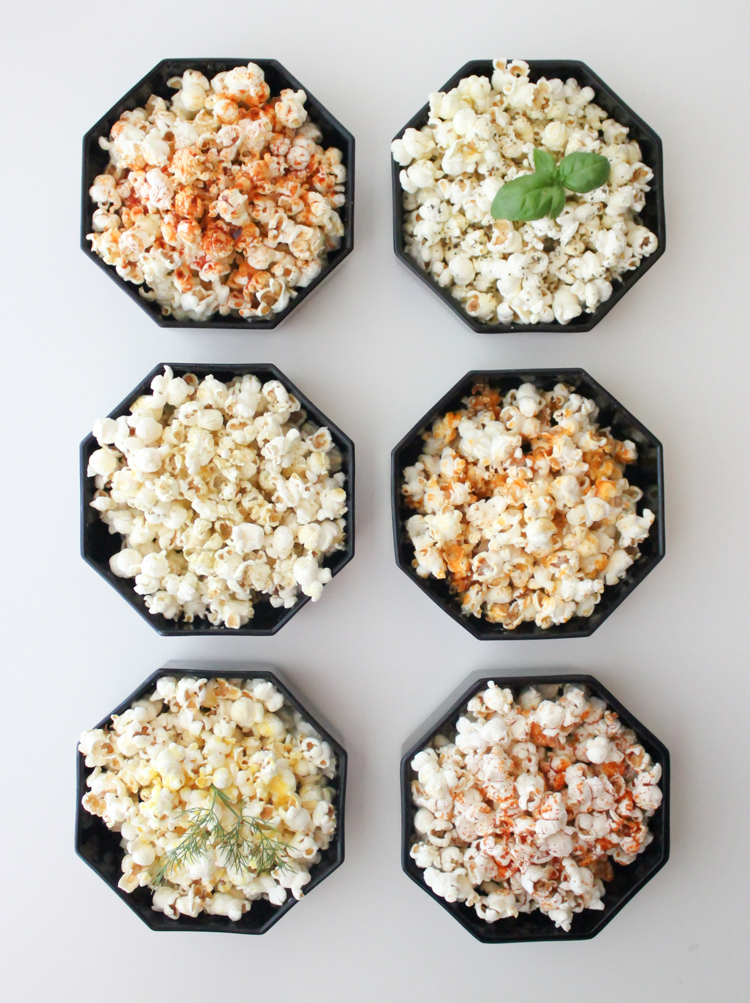
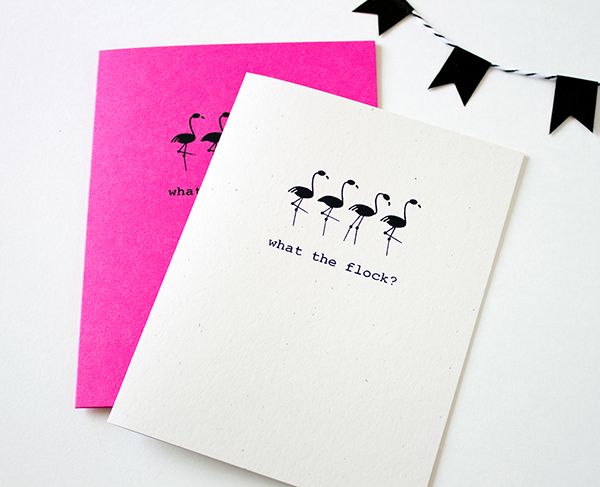 Isn’t this card so flocking cute? So is everything else in
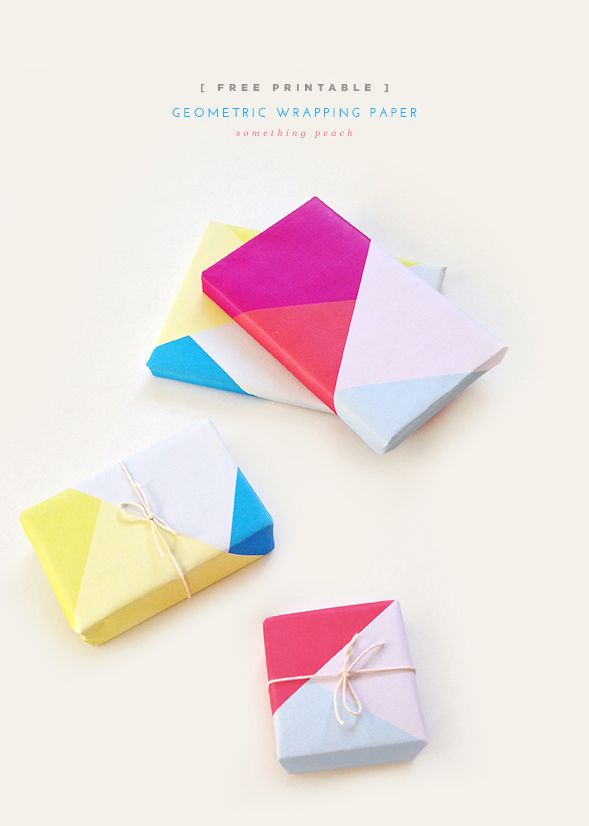
 Alexis from
 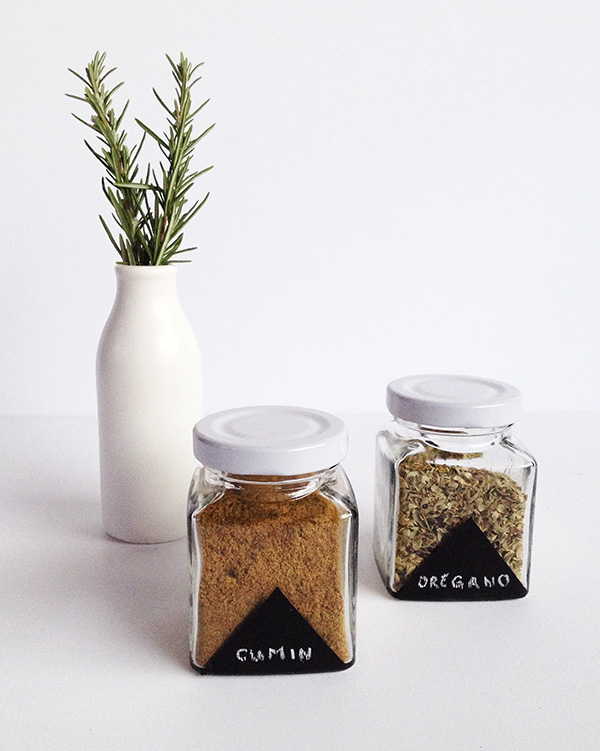 I didn’t know there was chalk paint for glass until I saw these adorable spice jars from Stephanie at
  So inspired by Sarah Brown’s home tour shared on
  Sometimes you don’t need to be carrying around a big and bulky hard case for your sunglasses. Sometimes you just need something simple and compact on the days where you won’t be throwing them in a giant bag to get lost and crushed under every single thing you own. All of this basically means the bag I’m carrying that day is small, so I need to consolidate. I guess I could have started this off with just that, ha, but the point is there’s more than one reason why you might want to make this leather drawstring sunglasses pouch, on top of it being so easy to make without any sewing!
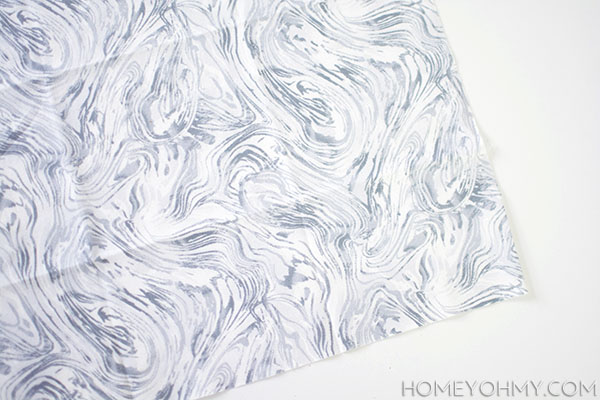 I found this fabric at JoAnn’s and it was one of those fabric quarters they have on the front ledges of their fabric shelves. Isn’t the marbled design gorgeous? I usually spend embarrassing amounts of time walking up and down every aisle until I can no longer tell where one fabric ends and another begins, but this time around, my eyes locked on it immediately and I had no doubt it was meant to be.
 I applied the Unique Stitch glue on the back side of one of the short edges on the fabric and folded it over about a 1/2 inch, pushing down on the glue and making sure it lightly seeped through both layers of the fabric. This creates the openings where the leather lace will be strung through later, and this was done to both fabric pieces. As shown in the photo, I’m working on top of a protected surface aka a scrappy, old towel.
 On the front side of the fabric piece, I applied glue on the edges below the folded edge I previously glued down, then placed the other fabric piece on top (face to face) and pushed down on the edges for adhesion.
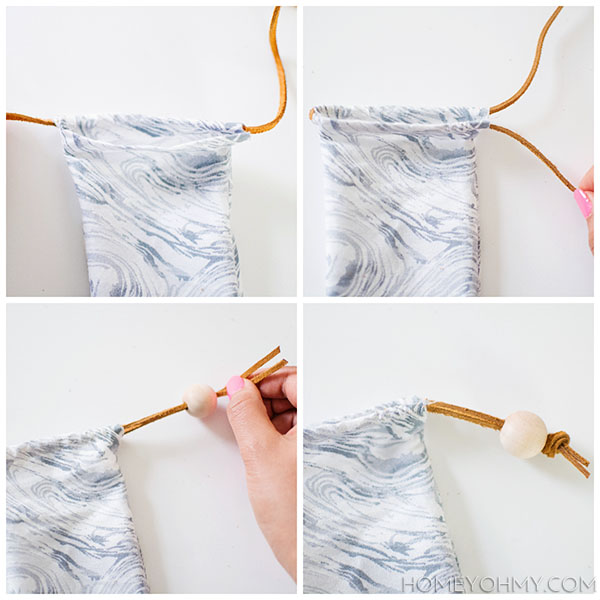 After letting the glue dry for a little bit, I flipped the pouch inside out and strung the leather lace through the openings on one side of fabric, then strung it back the opposite way through the openings on the other side of fabric. I cut the leather, slid on a wood bead, and tied a knot.
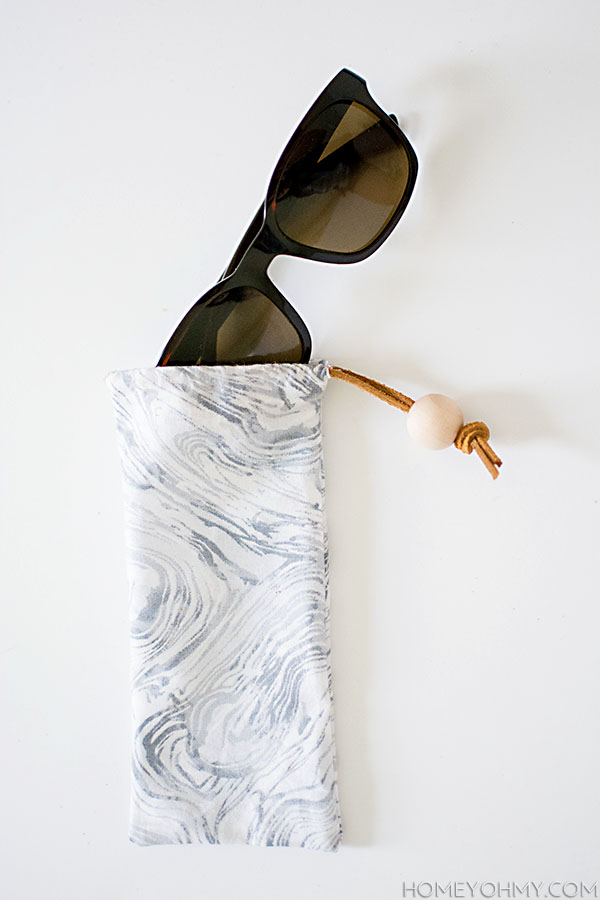 And then it was done.
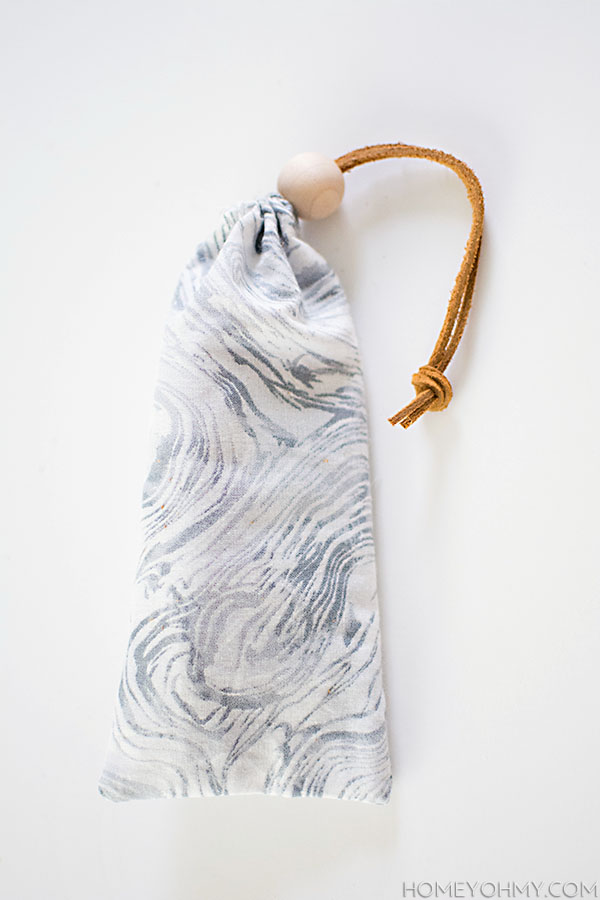
 Will I ever carry it around just like this? Probably not, but I think it’s a fun idea.