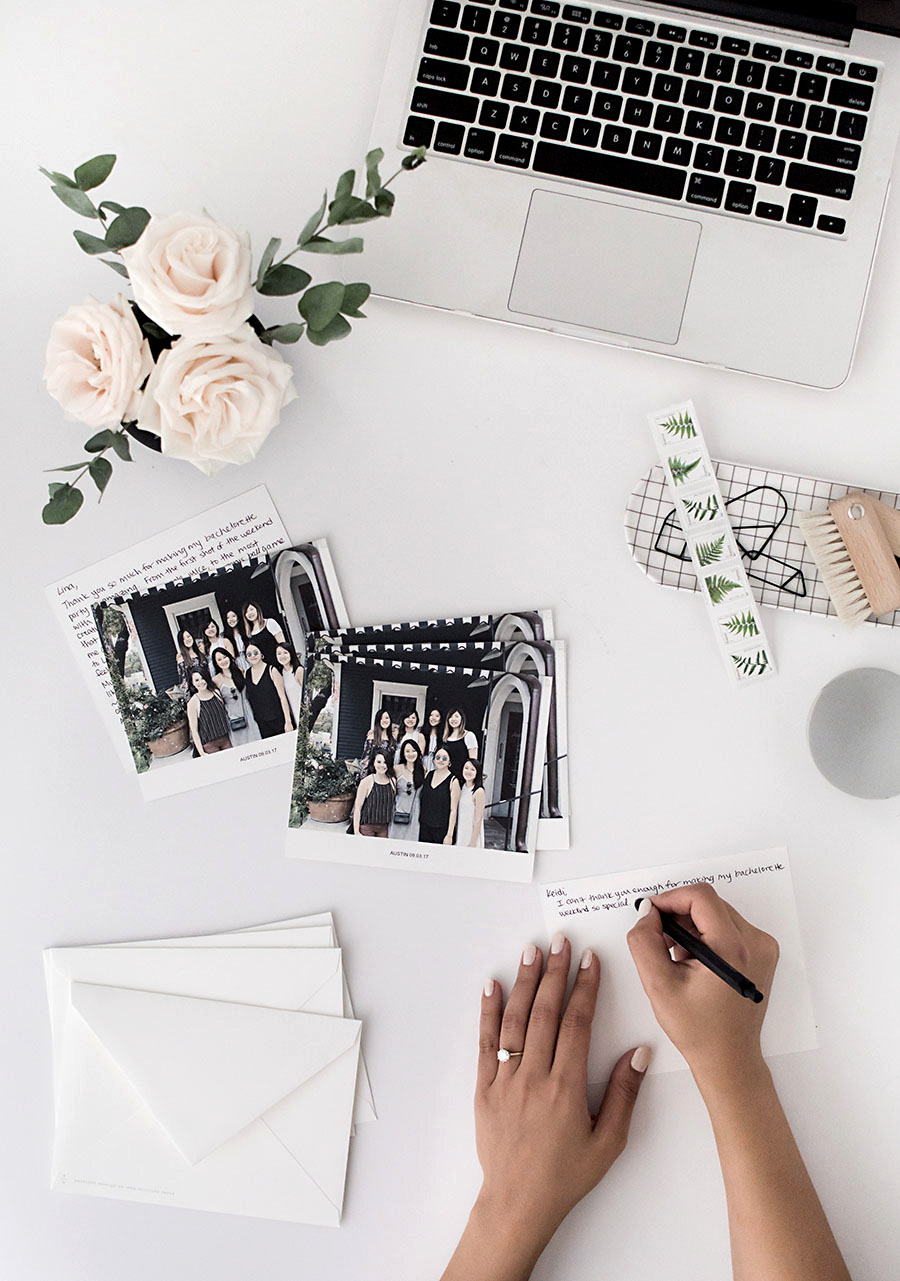
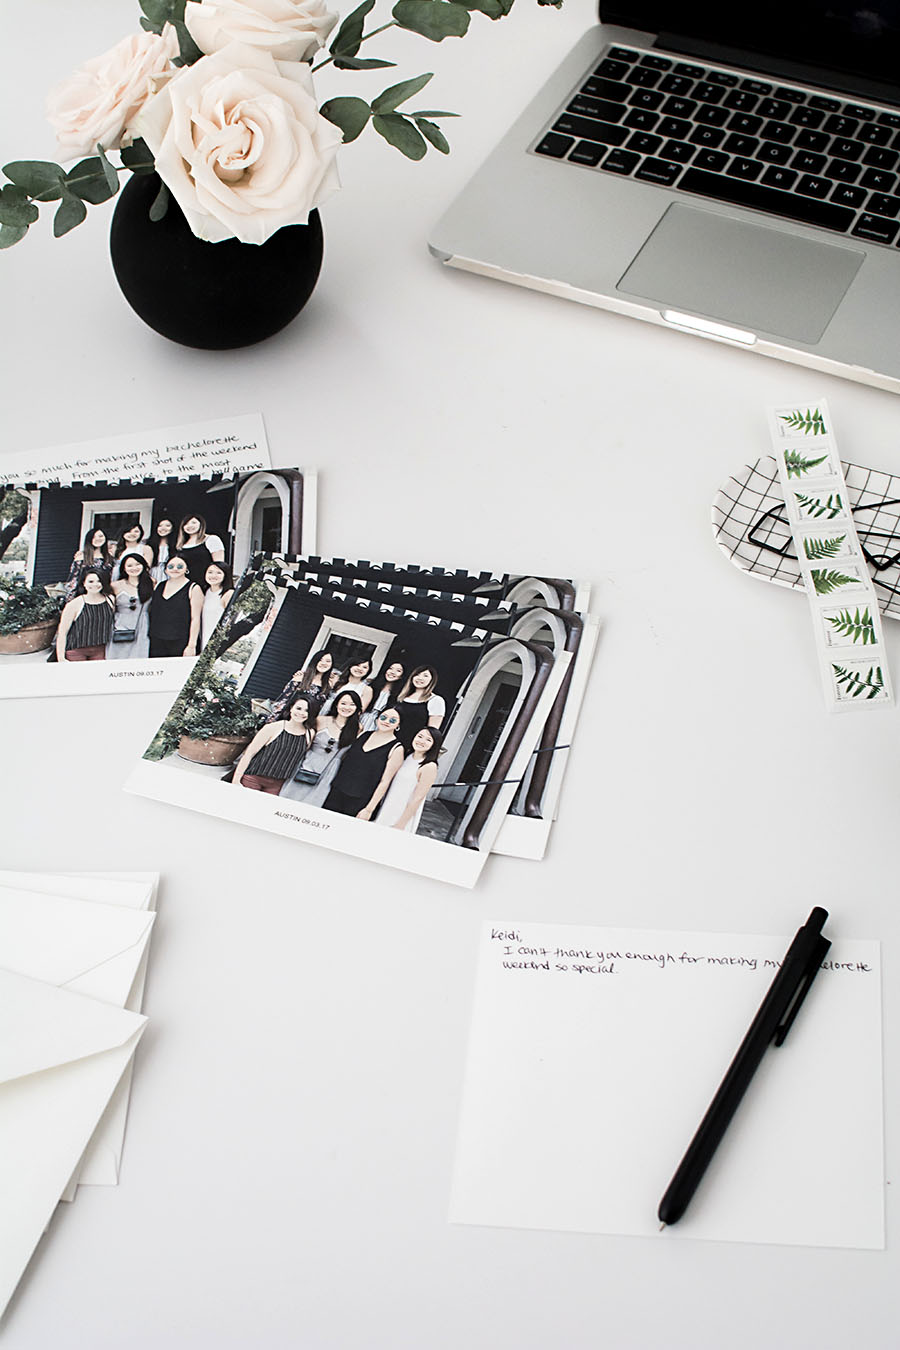
When it comes to saying thanks, few things go further than writing a card. This came to mind as I was trying to figure out what to gift my girlfriends for throwing me a most amazing bachelorette party a few months ago. Initially I had thought of bringing back souvenirs to send them later, then I remembered that the best memento from a trip is a photo, better if it’s printed, and even better with a note. Luckily we took this cute group photo during that bachelorette weekend, and with the help of my friends at Canon I’m sharing how to turn a photo into cards like these the next time you want to go for that extra special touch and make them yourself.
I used PicMonkey, a free online photo editing program, to make some really easy edits to the photo before printing. It’s only the following few steps to add in a caption and prepare it for printing and cutting.
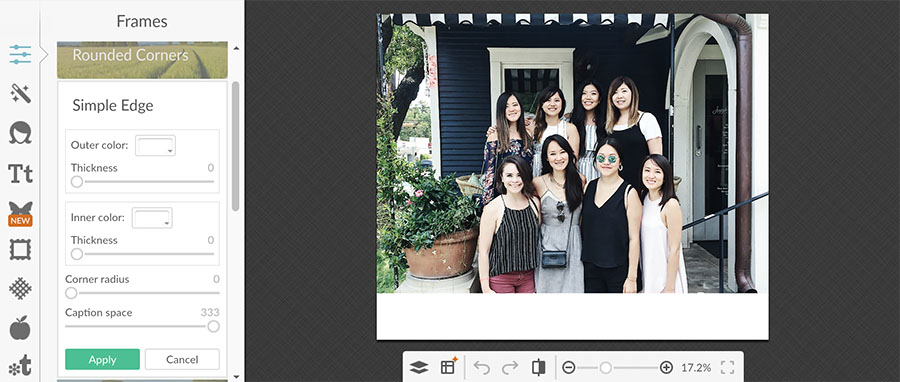
Once uploading the photo into PicMonkey, I picked the “Simple Edge” frame with all measurements at zero except for the “Caption Space” which I set at the largest size possible (333).
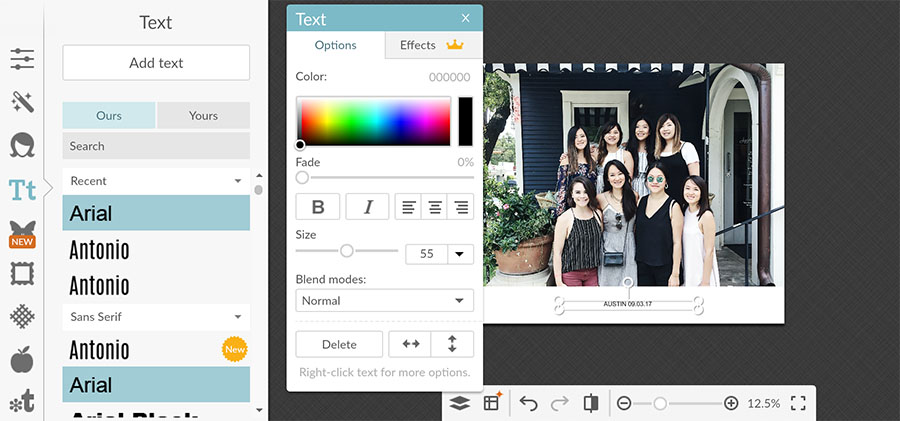
In the center of the caption space, I typed in the city and date in Arial size 55. A short thank you message could go here as well but I favored the simplicity of this instead.
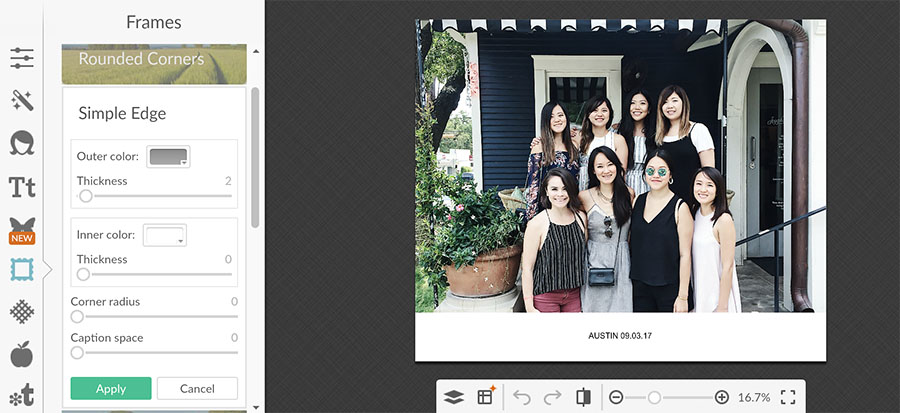
Next I added a “Simple Edge” with a thickness of 2 in a light gray color. This demarcates the edges so that it’s clear where to cut once printed.
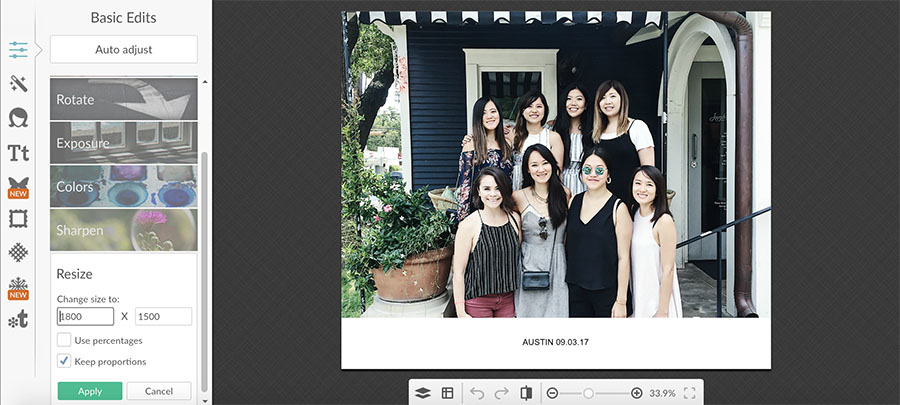
As a final step, I resized the photo to 1800px in width which made the total size of the card 5’x6″ (the size ratio of the photo I used was 4×6).
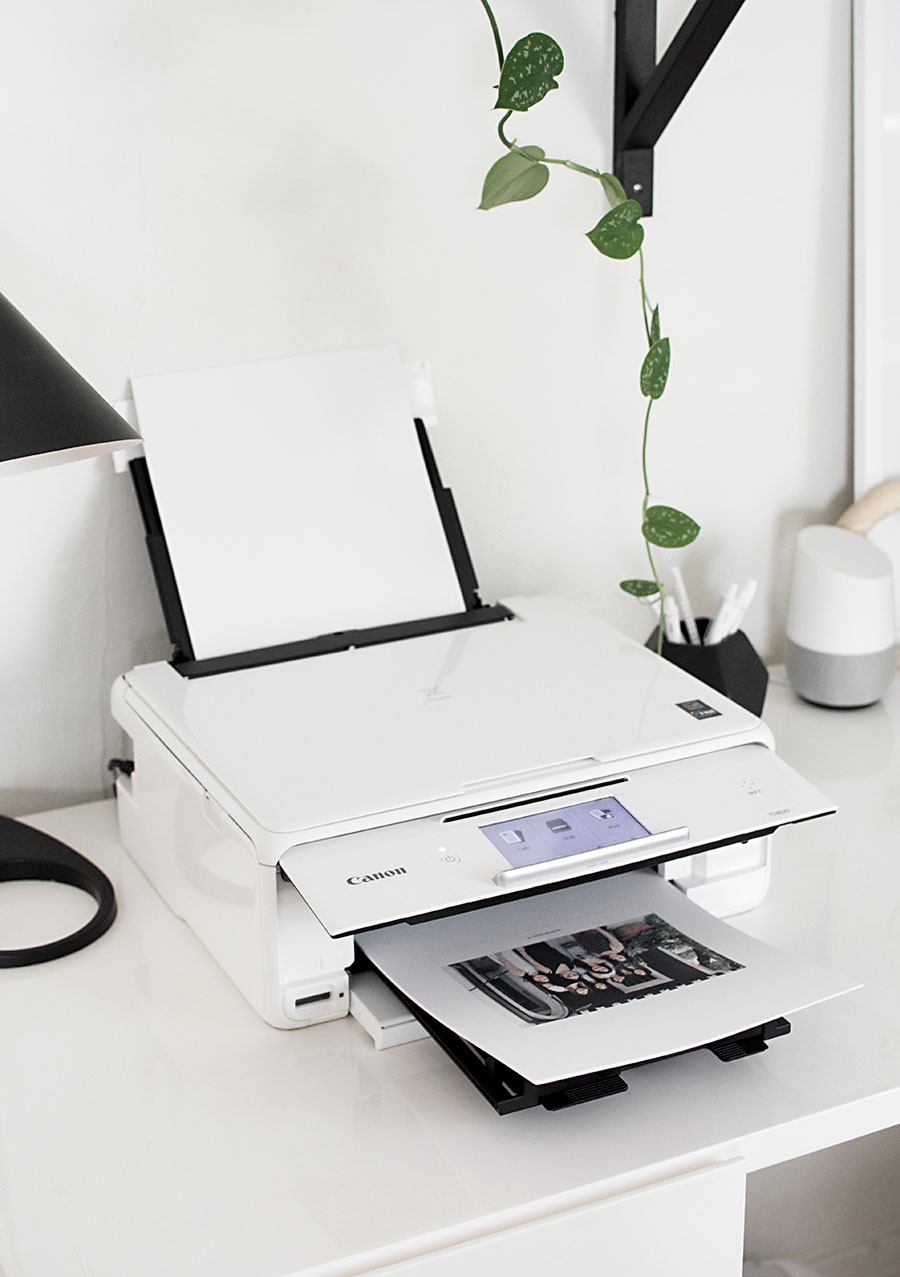
After downloading the photo card, I used my Canon TS8020 to print the cards on heavy card stock. That teeny tiny rear tray opening is what makes it possible for the thicker paper to feed through. It’s become my most used feature of this printer since it allows me to print on different materials of varying thickness. Very convenient for simple crafty projects like this.
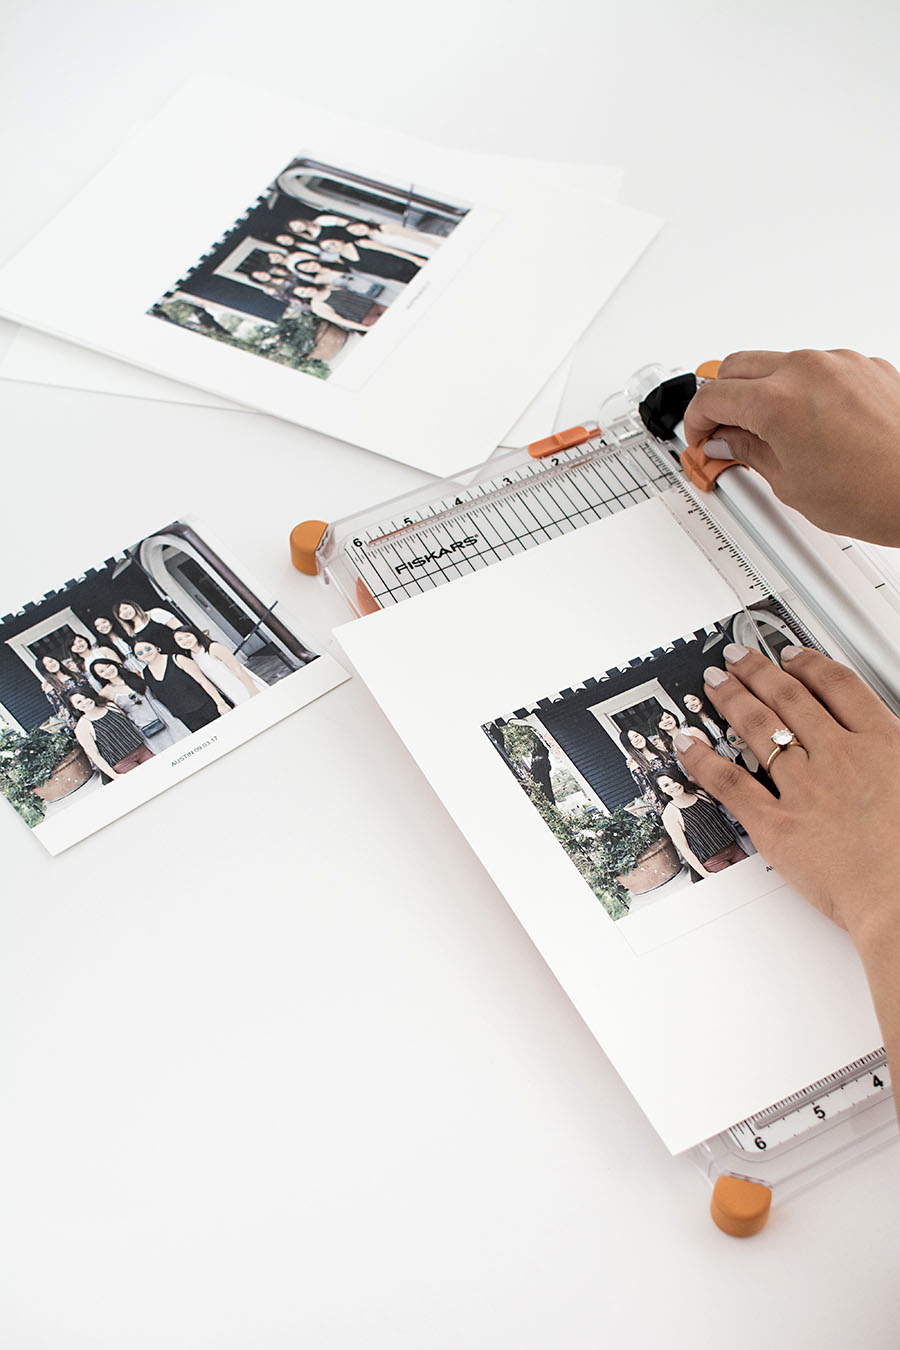
I cut each card out with a paper trimmer. You can see those gray lines around the caption area that help guide where to cut.
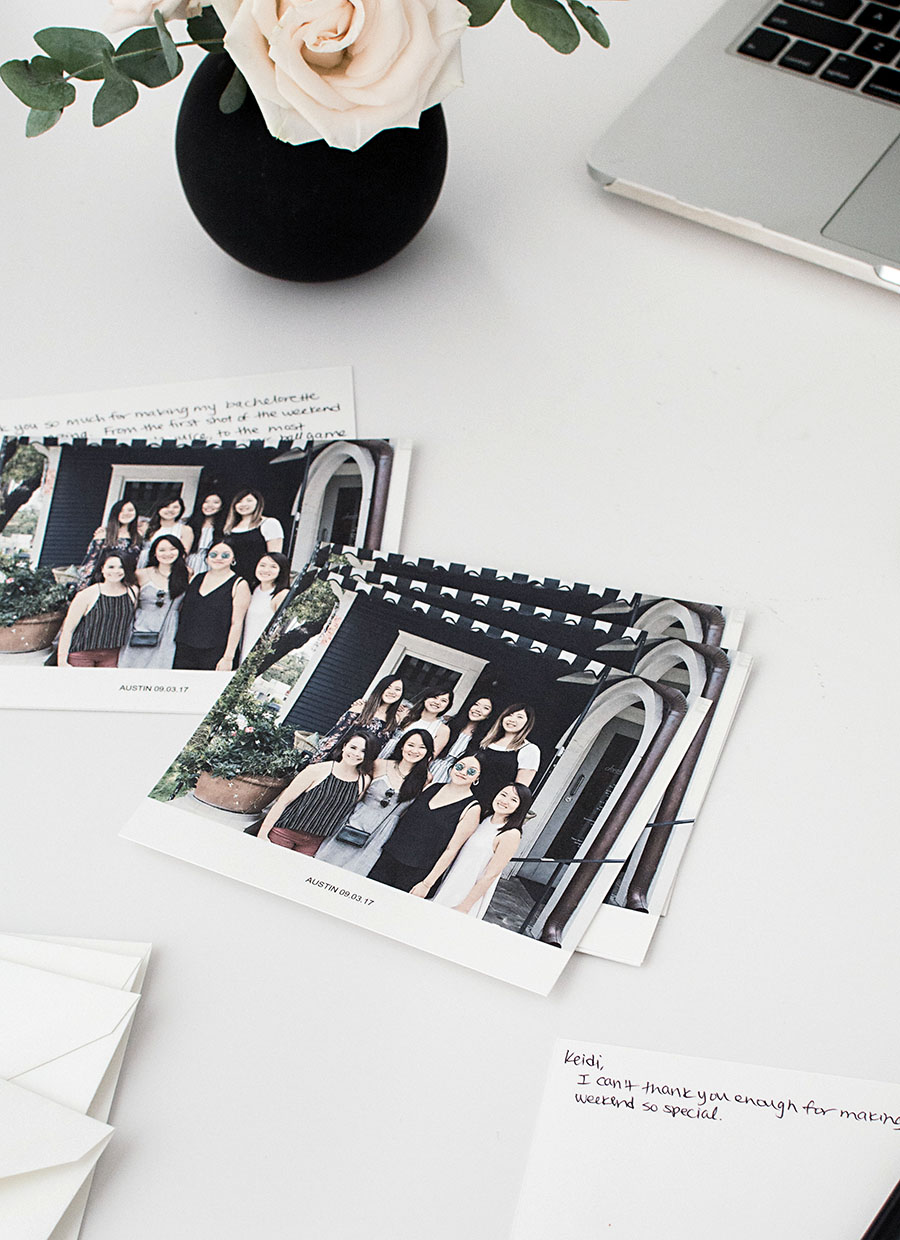
In simple postcard style, the back of the cards are completely blank to write your heart out. Makes it more compact to display or keep anywhere, and much more special than a generic card!
 This post is sponsored by Canon. All words and content are always my own. Thank you for supporting partners that help bring fun ideas for you to discover and try!

What a beautiful idea, especially with the hand written note on the back!
https://www.makeandmess.com/
Thank you!
Love this idea! Will definitely be using it in the future.
Really hope you give it a try! Thanks, Rebecca!
Awesome idea! The handwriting makes it even more personal, it’s perfect!
Completely agree – that there’s nothing nice than a photo as a memento! Love this idea
isoscella – diy + doodles | https://www.isoscella.co.uk
It looks like you made a flip book. How did you make that? Thank you in adv. I was thinking of making 1 for my F-I-L for Christmas for our kids. I love the simplicity of your ideas and projects. They are great.
Hi Summer, I didn’t make a flip book, it’s just multiples stacked on top of each other. These would be perfect for Christmas! Enjoy <3
Josephine House in Austin? Such a fun idea, I’ll have to try it. :)
Yes! Good eye.